
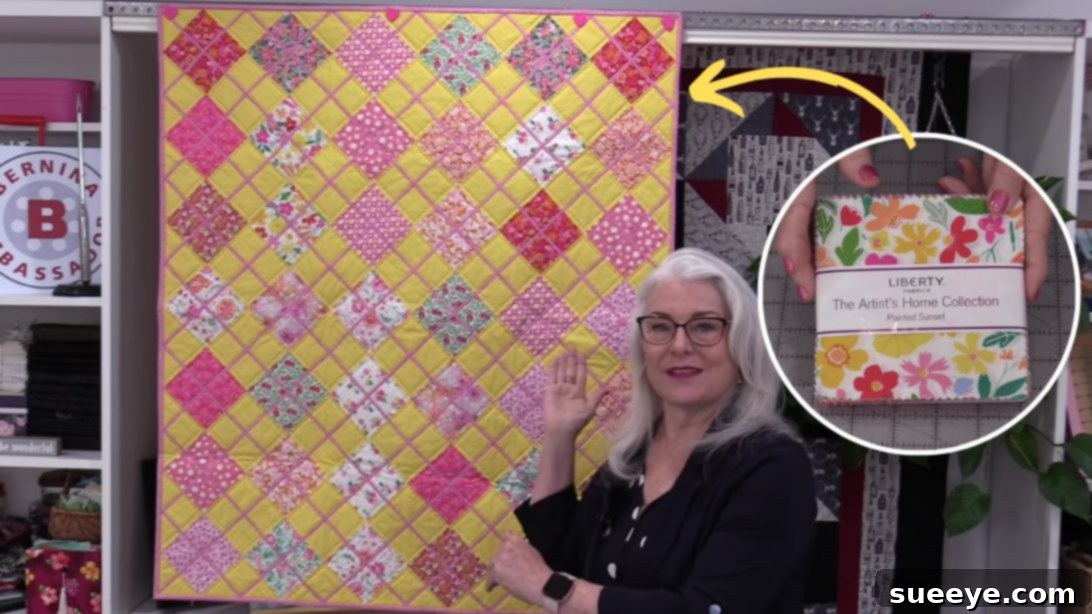
Master the Art of Argyle: An Easy Charm Pack Quilt Tutorial for Beginners
The timeless argyle pattern, often admired on cozy sweaters and stylish socks, holds a special charm. Imagine bringing that classic elegance to your home with a beautifully handcrafted argyle quilt! While traditional argyle might seem complex with its intricate diamond shapes, the brilliant method shared by SewVeryEasy on YouTube revolutionizes the process, making it surprisingly accessible even for beginner quilters. This innovative technique simplifies the iconic design by cleverly utilizing squares to form stunning diamond patterns, saving you time and intricate cutting.
If you’ve always dreamed of creating a unique argyle quilt but felt intimidated by complex piecing, this tutorial is for you. We’ll guide you through each step, transforming a simple pack of charm squares and solid fabric into a masterpiece. Get ready to dive into a rewarding quilting adventure that results in a gorgeous, cozy, and conversation-starting quilt.
Why the SewVeryEasy Method is a Game-Changer for Argyle Quilts
Traditional argyle quilt patterns typically require precise cutting and piecing of actual diamond shapes, which can be challenging and time-consuming. The genius behind SewVeryEasy’s approach lies in its simplicity: instead of cutting diamonds, you’ll work with squares. By strategically sewing solid squares to charm squares and then arranging them, these humble squares magically transform into the striking diamond motifs characteristic of argyle. This method not only speeds up the piecing process but also minimizes waste and increases accuracy, making it an ideal project for those new to quilting or anyone looking for a quicker, more enjoyable experience.
Essential Materials for Your Argyle Quilt
Before you embark on your quilting journey, gather all the necessary supplies. Having everything at hand ensures a smooth and uninterrupted creative flow. The beauty of this project is that it makes excellent use of charm packs, which are pre-cut fabric squares, typically 5×5 inches, perfect for quilters who want to jump straight into sewing.
- 1 Pack of Charm Squares: These pre-cut 5-inch squares offer a beautiful variety of coordinating fabrics. Choose a pack with colors and patterns that appeal to your aesthetic.
- 1 Yard of Solid Fabric: Opt for a high-quality cotton fabric that is a solid color and noticeably darker than most of your charm squares. This contrast is crucial for making the argyle diamonds “pop” against the background. A darker shade like deep grey, navy, forest green, or even black will provide excellent definition.
- Batting Fabric: The soft, fluffy middle layer of your quilt. The size will depend on your desired quilt dimensions, but generally, you’ll need batting slightly larger than your assembled quilt top to allow for trimming.
- Backing Fabric: The fabric for the underside of your quilt. Again, choose a piece slightly larger than your quilt top. You can opt for a solid color that complements your charm squares or a fun, coordinating print.
- Premade Bias Tape or Fabric for DIY Bias Tape: Approximately ¼-inch wide. Premade tape saves time, but making your own offers more control over fabric choice. This will be used for decorative elements on the quilt top.
- Fabric Marking Pen or Chalk: Essential for marking your fabric for cutting and sewing lines.
- Sharp Scissors or Rotary Cutter and a Cutting Mat: A rotary cutter and mat are highly recommended for precision and speed, especially when cutting multiple squares.
- Quilter’s Ruler: A clear, sturdy ruler (at least 6×12 inches or larger) for accurate measuring and cutting.
- Iron and Ironing Board: Crucial for pressing seams, which is a non-negotiable step for a professional-looking quilt.
- Needle and Thread: High-quality polyester or cotton thread in a neutral color (like grey or beige) that blends with your fabrics.
- Sewing Machine: A reliable machine with basic straight stitch and zigzag stitch capabilities.
Step-by-Step Directions: Crafting Your Argyle Quilt
Follow these detailed instructions carefully to bring your argyle quilt to life. Precision in cutting and pressing will contribute significantly to the overall success and beauty of your finished project.
Step 1: Preparing Your Fabric & Constructing the First Half
- Cut Solid Fabric Squares: Begin by cutting your solid-colored fabric into squares that are precisely the same size as your charm squares (e.g., 5×5 inches if using standard charm packs). You will need 52 of these solid squares to pair with your 42 charm squares. This gives you a few extra in case of errors or for practice.
- Pair and Sew: Take one solid fabric square and one charm square. Place them right sides together and sew along one edge, creating a simple two-piece unit. Use a consistent seam allowance, typically ¼ inch for quilting, throughout your project.
- Press Seams Consistently: After sewing each unit, take it to your ironing board. Press the seam allowance towards the darker fabric (the solid square in this case). This helps to “nest” seams later, reducing bulk and creating flatter joins. Ensure you press all seams in the same direction for uniformity. You should now have 42 of these joined units, leaving you with 10 unused solid fabric squares.
- Assemble Rows for the First Triangle: Now, you’ll start forming the distinctive argyle pattern by assembling your pieced units into rows. The key is to arrange them so the solid squares create a framing effect, making the charm squares appear as diamonds.
- First Row: Take 2 of your pieced units. Sew them together along their solid square sides, ensuring the charm squares are positioned to face the center, creating a small “V” shape with the charm squares.
- Second Row: Use 4 pieced units. Arrange and sew them so that the charm squares form a wider “V” or diamond line.
- Third Row: Requires 6 pieced units.
- Fourth Row: Requires 8 pieced units.
- Fifth Row: Requires 10 pieced units.
- Sixth Row: Requires 12 pieced units.
- Add Solid Squares to Row Ends: For each row, you will strategically add one of your remaining solid squares to each end of the rows where the charm squares are present. This helps define the outer edge of your argyle design and prepares the rows for joining. The charm squares should be prominently displayed at the center of each row, framed by the solid fabric.
- Complete the First Triangle: Carefully sew these six rows together in ascending order (shortest to longest). Ensure your seams are aligned and pressed open or to one side consistently after each join. Finally, take one of your last remaining solid squares and sew it to the top of the charm square located at the very center of your first, shortest row. This completes your first large triangular patchwork, with the argyle pattern emerging beautifully.
Step 2: Assembling the Quilt Top & Basting
- Press All Rows: After sewing each row together to form the large triangle, return to your iron. Press all seams carefully to ensure a flat and even surface. Consistent pressing at every stage is vital for a professional finish.
- Join the Rows into a Triangle: Sew your prepared rows together to form one large triangle. Pay close attention to nesting your seams at the intersections, which means alternating the direction of the pressed seams so they lock together, creating less bulk and flatter joins.
- Create the Second Triangle: You now have one large argyle-patterned triangle. To complete your quilt top, you will create a mirror image of this triangle. Repeat all the steps from Step 1 (cutting, pairing, sewing units, assembling rows, and joining them) to construct an identical second large triangle.
- Join the Two Triangles: Place the two large triangles right sides together, carefully aligning their central seams. Sew them together along their longest edge. Once sewn, open them up. You should now have a large square patchwork quilt top, with the beautiful argyle pattern flowing across it. Press this central seam open or to one side.
- Square and Prepare for Basting: Lay your completed quilt top flat on your cutting mat. Use your quilter’s ruler and rotary cutter to carefully square up the entire piece, trimming any uneven edges. This ensures your quilt will be perfectly rectangular or square.
- Baste the Quilt Sandwich: Now it’s time to create your “quilt sandwich.” Lay your backing fabric wrong side up on a clean, flat surface, securing it with painter’s tape to prevent shifting. Next, lay your batting smoothly on top of the backing. Finally, place your squared quilt top right side up on top of the batting. Ensure all layers are flat and wrinkle-free. Baste these three layers together using safety pins, basting spray, or long hand stitches. Basting prevents the layers from shifting during the quilting process.
Step 3: Quilting & Finishing Touches
- Add Decorative Bias Tape (Optional but Recommended): This step adds a crucial element to the argyle design. Sew your ¼-inch bias tape onto the center of each charm square, forming a continuous line that mimics the grid of a true argyle pattern. You can either use a decorative zigzag stitch along both edges of the bias tape or simply stitch close to each side with a straight stitch. This not only enhances the visual effect but also adds texture to your quilt.
- Quilt Your Layers: With your quilt sandwich basted and decorative bias tape applied, it’s time to add the quilting stitches that hold all three layers together. You can “stitch in the ditch” along the seam lines of your piecing, or follow the lines created by your bias tape. Alternatively, you can opt for free-motion quilting or a simple grid pattern across the entire quilt. The quilting lines add durability and dimension to your quilt.
- Final Trim and Bind: Once your quilting is complete, lay the quilt flat once more. Carefully trim around the edges, removing any excess batting and backing fabric, ensuring your quilt has crisp, clean edges. Finally, bind your quilt. This involves attaching a strip of fabric (the binding) around all four edges of the quilt, encasing the raw edges and providing a neat, durable finish. There are many binding tutorials available if you’re new to this step.
Expert Tips for a Flawless Argyle Quilt
- Precision is Key: In quilting, even small inconsistencies can compound. Take your time with cutting, measuring, and especially sewing your ¼-inch seam allowances.
- Press, Don’t Iron: When quilting, “pressing” involves lifting and lowering the iron, while “ironing” involves sliding it. Pressing helps set seams and prevents stretching your fabric out of shape.
- Thread Choice: Use a high-quality thread that is strong and fine. For piecing, a neutral color like light grey or beige works well as it blends with various fabric colors.
- Needle Freshness: Change your sewing machine needle regularly, especially at the start of a new project or after several hours of sewing. A sharp needle prevents skipped stitches and fabric snags.
- Machine Settings: Test your stitch length on a scrap piece of fabric. A slightly shorter stitch length (around 2.0-2.5mm) is ideal for quilting as it creates strong, secure seams.
- Stay Organized: Keep your charm squares and solid squares organized as you work, especially when assembling the rows. Labeling rows can prevent confusion.
- Watch the Video: While these instructions are comprehensive, watching the SewVeryEasy video tutorial will provide invaluable visual guidance, especially for understanding the fabric arrangement and pressing techniques.
Care and Maintenance for Your Handmade Quilt
To ensure your beautiful argyle quilt lasts for generations, proper care is essential. For the first wash, use a color catcher to absorb any potential dye bleeding. Wash your quilt on a gentle cycle with cold water and a mild detergent. Tumble dry on a low setting or, ideally, lay flat to dry to prevent shrinking and preserve the stitching. Avoid harsh chemicals or bleach, which can damage the fabric and colors.
Unleash Your Creativity: Variations & Personalization
This tutorial provides a fantastic foundation, but don’t stop there! Consider these ideas to personalize your argyle quilt:
- Fabric Scraps: Instead of charm packs, you can use fabric scraps cut into 5-inch squares. This is a wonderful way to use up remnants from previous projects and create a truly unique, scrappy argyle look.
- Color Schemes: Experiment with different color combinations. Instead of a single solid background, use multiple coordinating solids. Or, choose charm squares in a specific color palette (e.g., all blues, autumnal tones) for a cohesive design.
- Quilting Designs: Beyond stitching in the ditch or following the bias tape, explore different quilting motifs. Simple straight lines, cross-hatching, or even a stippling design can add another layer of texture and interest.
- Size Variations: Adjust the number of rows and pieced units to create different sized quilts – from a cozy baby quilt to a grand bedspread. Just remember to adjust your material quantities accordingly.
Congratulations on embarking on this wonderful quilting journey! With a pack of charm squares and the ingenious method by SewVeryEasy, you can create a stunning argyle quilt that looks complex but is surprisingly simple to make. Your finished quilt will not only be a testament to your creativity and skill but also a cherished item, perfect for snuggling or as a decorative accent in your home.
Happy quilting!
*These amazing images and the brilliant technique are all credited to SewVeryEasy via YouTube. We highly recommend checking her other content and subscribing for more fantastic quilting inspiration and tutorials!