
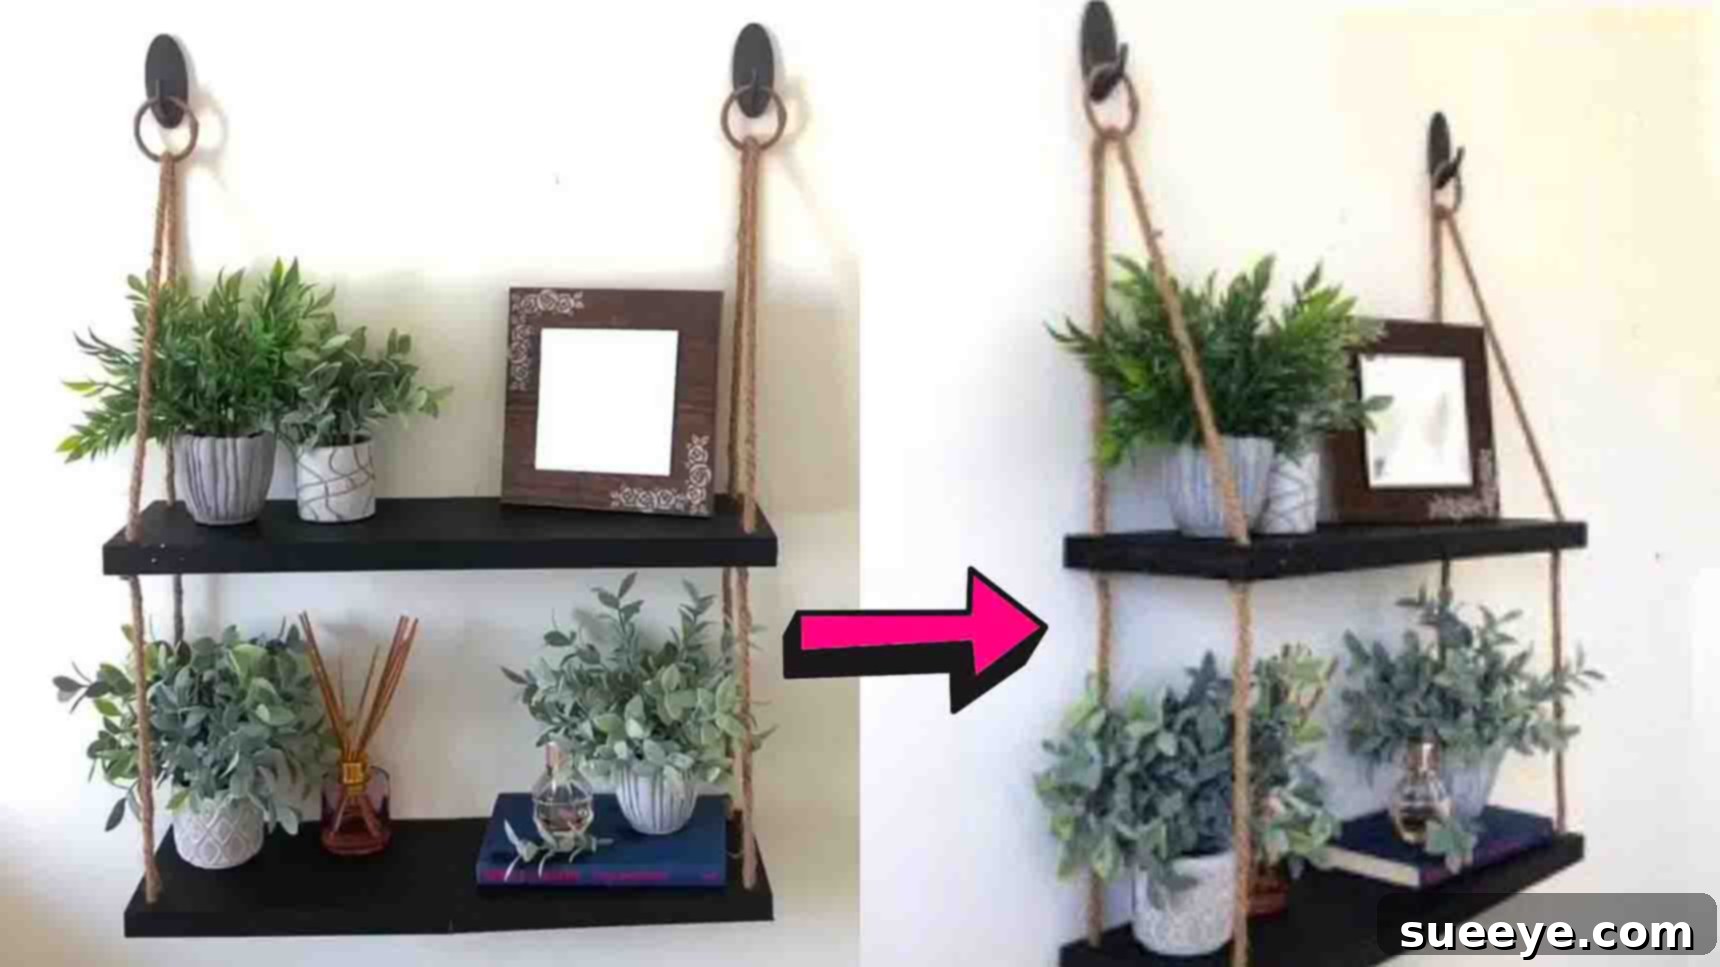
Are you looking to refresh your living space without breaking the bank? Imagine adding a touch of rustic charm and practical storage to any room for just a few dollars. Thanks to the creative genius of Jay Munee DIY on YouTube, you can now craft your very own stylish hanging shelf using materials almost exclusively from Dollar Tree! This project isn’t just incredibly cheap and easy; it’s a fantastic way to infuse personality and functionality into your home decor, proving that you don’t need a hefty budget to make your space feel fab. Whether you’re a seasoned DIY enthusiast or just starting your crafting journey, this beginner-friendly tutorial promises a rewarding weekend project for you and your family. Dive into the simple, step-by-step process below and discover how effortlessly you can elevate your home aesthetics with this DIY Dollar Tree hanging shelf.
DIY Dollar Tree Hanging Shelf: Transform Your Space on a Budget
Creating beautiful and functional home decor doesn’t have to be expensive. With a little creativity and a trip to your local Dollar Tree, you can craft stunning pieces that look far more luxurious than their actual cost. This DIY hanging shelf is a prime example, offering a versatile storage and display solution that’s perfect for adding character to any room—from the bathroom to the bedroom, kitchen, or living area. Follow our detailed guide to build a charming, custom hanging shelf that reflects your personal style.
Materials for Your Budget-Friendly Hanging Shelf:
One of the most appealing aspects of this DIY project is the accessibility and affordability of its materials. Most items can be sourced from Dollar Tree, making it a truly budget-conscious endeavor. Here’s what you’ll need to gather:
- Different Sizes of Wall Art Plaques: These will form the base of your shelf. Dollar Tree often carries various shapes and sizes of lightweight MDF or wooden plaques. Choose ones that will provide enough surface area for your intended use and can be securely bonded together. Rectangular plaques work well for a traditional shelf look, while square ones can create a unique stacked design.
- E6000 Adhesive: This industrial-strength adhesive is crucial for a durable bond between your plaques. Known for its strong, flexible, and waterproof qualities, E6000 ensures your shelf base is robust enough to hold items without separation.
- Dollar Tree Hardware Set (Nuts and Bolts): While the E6000 is strong, adding nuts and bolts provides an extra layer of structural integrity, especially if you plan to place heavier items on your shelf. Look for small, appropriate-sized hardware kits.
- Drill Bit Set: You’ll need various drill bit sizes for different purposes: one slightly smaller than your bolts for securing the plaques, and another slightly smaller than your chosen rope to create snug holes for hanging.
- Sanding Block/Sandpaper: Essential for smoothing out rough edges, especially around drilled holes, and preparing the entire surface for painting to ensure a professional finish.
- Chalkboard Paint: This provides a unique, matte finish that can be written on, adding an interactive and customizable element to your shelf. However, feel free to choose any paint color or finish that matches your decor.
- Book Rings: These small metal rings will be incorporated into your rope hangers, adding a decorative touch and potentially assisting with stability or future adjustments.
- Twine: Used to wrap around the book rings, adding a rustic or natural texture to the hanging mechanism.
- 2 Pcs. 12 ft Rope: This will be the primary hanging mechanism for your shelf. Choose a durable, decorative rope that complements your desired aesthetic. Natural fiber ropes (like jute or cotton) are popular choices for a bohemian or farmhouse look.
Step-by-Step Directions to Craft Your Hanging Shelf:
Let’s turn these simple materials into a beautiful and functional hanging shelf. Take your time with each step to ensure a sturdy and aesthetically pleasing result.
Step 1: Building the Base and Preparing for Hanging
The foundation of your hanging shelf is critical for its stability and longevity. This step focuses on securely bonding your plaques and preparing them for the rope hangers.
- Bonding the Wall Plaques: Begin by turning your selected wall plaques upside down on a flat, protected surface. Apply a generous, even layer of E6000 adhesive along the edges or surfaces where the plaques will meet. If you’re creating a multi-tiered shelf, ensure each level is perfectly aligned. Press them firmly together. To achieve the strongest possible bond, use binder clips, clamps, or heavy objects to apply consistent pressure across the joined areas. This prevents shifting as the adhesive cures. Allow the adhesive to dry and cure for a full 24 hours. Patience here is key; rushing this step can compromise the shelf’s integrity.
- Adding Extra Security with Hardware: After the E6000 has fully cured, it’s time to reinforce your shelf with nuts and bolts. This is especially important for shelves that might bear more weight. Using a drill bit that is slightly smaller than the diameter of your bolts, carefully drill two holes through the joined sections of your wall art plaques. Position these holes strategically, typically near the center of the bonded area, to evenly distribute stress. Insert the bolts through these holes and secure them tightly with nuts on the underside. This mechanical fastening adds significant strength and peace of mind.
- Marking and Drilling Rope Holes: Now, you need to prepare the shelf for its hanging ropes. Carefully measure and mark all four corners of your shelf. These marks will indicate where the ropes will pass through, ensuring your shelf hangs level and balanced. Precision here is vital for a visually appealing and stable shelf.
- Selecting the Right Drill Bit for Ropes: Choose a drill bit that is slightly smaller than the diameter of your rope. This snug fit is essential; it allows the rope to pass through with some effort but provides enough friction to help hold the shelf in place even before knotting. A bit too large will make the shelf wobbly, while one too small won’t allow the rope to pass through easily.
- Drilling and Sanding: With your chosen drill bit, carefully drill holes at each of your four marked corners. Take your time to prevent splintering the wood. Once the holes are drilled, use your sanding block or sandpaper to smooth down the edges of these holes. This prevents the rope from snagging or fraying over time. At this stage, it’s also an excellent opportunity to lightly sand the entire surface of your shelf. This preps the material for painting, creating a smooth canvas for even paint application and better adhesion. A fine-grit sandpaper will give the best results.
Step 2: Adding Color and Crafting the Hangers
With the structural work complete, this step focuses on the aesthetic appeal of your shelf and preparing the essential hanging ropes.
- Painting Your Shelf: After thorough sanding, your shelf is ready for its decorative finish. Apply an even coat of chalkboard paint across the entire surface. Chalkboard paint not only provides a stylish, matte black finish but also offers a unique functionality, allowing you to write labels or drawings directly on your shelf. If chalkboard paint isn’t your preference, consider other options: a vibrant acrylic paint for a pop of color, a distressed finish for a farmhouse look, or a wood stain for a more natural appeal. Apply multiple thin coats, allowing each to dry completely according to the manufacturer’s instructions, to achieve a smooth and durable finish.
- Crafting the Twine-Wrapped Book Rings: These rings add a charming detail to your hanging mechanism. Take a book ring and a length of twine. Apply a small dab of hot glue to the ring and firmly press one end of the twine onto it. Begin tightly wrapping the twine around the book ring, covering its entire surface. Ensure the wraps are close together for a neat, continuous look. Secure the end with another dab of hot glue. Repeat this for as many book rings as you intend to use (typically two per rope, if you want rings on both ropes).
- Preparing the Hanging Ropes: Get your two 12-foot pieces of rope. First, cut each 12-foot rope precisely in half, resulting in four 6-foot sections. Then, take two of these 6-foot sections and fold each one in half. This will create a loop at the top and two loose ends.
- Marking for Shelf Placement: With the ropes folded in half, use a marker to clearly indicate where you want your shelf to sit on the rope. This marking is crucial for ensuring the shelf hangs level. Measure from the loop down to your desired shelf height and mark all four rope strands at this point. These marks will guide where the bottom of your shelf aligns.
- Adding Book Rings to Ropes: Slide your prepared twine-wrapped book rings onto both ropes, pushing them all the way up towards the top loop. The rings can be used decoratively or to help space out the ropes if desired.
- Taping Rope Ends: A simple but effective trick: wrap the very bottom ends of your rope strands with a small piece of tape. This creates a firm, non-fraying tip that makes threading the rope through the shelf holes significantly easier.
Step 3: Assembling Your Masterpiece
This is where all your hard work comes together, and your Dollar Tree hanging shelf takes its final form.
- Threading the Ropes Through the Shelf: With the taped ends, begin threading each of the four rope strands through the holes you drilled in the shelf’s corners. Push the rope through until the bottom edge of the shelf aligns perfectly with the marks you made on the ropes in Step 2. Take your time to ensure the shelf is centered and evenly positioned on all four strands.
- Securing with Knots: Once the shelf is at the desired height and level, it’s time to secure it. Below the shelf, take each rope strand and tie a strong, secure knot directly underneath the shelf hole. A simple overhand knot, followed by another knot pulled tightly against it, works well. Ensure all four knots are consistent in size and tightness. This prevents the shelf from sliding down and distributes the weight effectively. Double-check that all knots are snug against the bottom of the shelf.
- Final Adjustments and Hanging: Take a step back and admire your creation! Check for levelness one last time. If needed, you can gently adjust the knots slightly before pulling them fully taut. Your beautiful, budget-friendly hanging shelf is now ready to be hung on your walls. Choose a sturdy hook or anchor point that can support the weight of the shelf and anything you plan to put on it.
Customizing Your DIY Dollar Tree Hanging Shelf
One of the joys of DIY is the ability to personalize your creations. While the chalkboard paint offers a great starting point, consider these ideas to make your hanging shelf truly unique:
- Paint Finishes: Instead of chalkboard paint, opt for a metallic spray paint for a modern look, a vibrant color to match existing decor, or a whitewash stain for a shabby-chic vibe. You could even stencil patterns or designs onto the plaques before assembly.
- Rope Variety: Explore different types of rope. Macrame cord can give a bohemian feel, thicker nautical rope adds a coastal touch, or colored synthetic ropes can provide a contemporary edge.
- Decorative Embellishments: Add wooden beads or painted accents along the ropes. Small S-hooks can be attached to the underside of the shelf for hanging lightweight items like keys or jewelry.
- Multi-Tiered Design: For more storage, consider creating a two or three-tier shelf by adding more plaques and extending the rope length. Just ensure structural integrity for each level.
Where to Hang Your New DIY Shelf
The versatility of this Dollar Tree hanging shelf means it can enhance almost any room in your home:
- Bathroom: Perfect for holding small toiletries, candles, or rolled hand towels.
- Kitchen: Display spices, small plants, or decorative mugs.
- Bedroom: A chic spot for jewelry, small trinkets, or a bedside lamp.
- Entryway: Keep keys, mail, or a small plant by the door.
- Living Room: Showcase small potted succulents, picture frames, or other decorative accents.
- Kids’ Room: Ideal for lightweight toys, small books, or art supplies.
DIY Dollar Tree Hanging Rope Shelf Tutorial: Your Affordable Home Upgrade
This DIY Dollar Tree hanging rope shelf project proves that style and functionality don’t have to come with a high price tag. With a few inexpensive materials and some simple steps, you can create a beautiful, custom piece of home decor that reflects your personal taste and provides practical storage. Not only is this a fulfilling project, but it also offers a fantastic opportunity to upgrade your space on a budget, adding charm and character wherever it’s hung.
So, gather your materials, set aside a fun weekend, and embark on this rewarding DIY journey. We’re confident you’ll love the outcome, and your refreshed space will thank you for it! Don’t forget to share your creations and inspire others to discover the magic of Dollar Tree DIYs.