
Craft Your Own Custom Hooded Towel: The Easiest DIY Sewing Tutorial
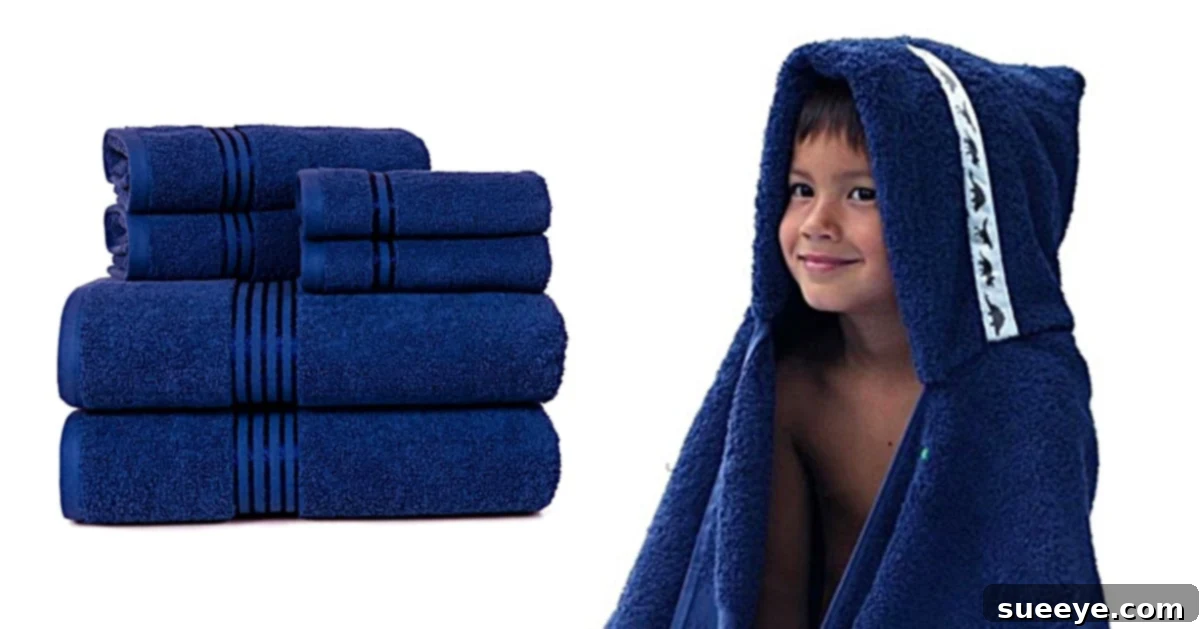
There’s something undeniably charming and practical about a hooded towel. Whether it’s for keeping a little one warm after a swim, drying off quickly at the beach, or simply adding a touch of fun to bath time at home, hooded towels are a fantastic addition to any family’s linen collection. For years, I had admired them, always wanting to create one myself. The final push came during a delightful afternoon at our neighborhood pool. I watched a lovely family, all sporting matching hooded towels, each beautifully embroidered with their names. The sight instantly sparked my determination to finally tackle this project and create custom hooded towels for my own family.
Inspired and eager, I dove into the vast ocean of YouTube tutorials, searching for the perfect guide. To my absolute delight, I struck gold! I discovered an incredibly straightforward and simple hooded towel tutorial that required no complex patterns whatsoever. It was presented in such an accessible way that even a relatively new sewer could tackle it with confidence. The excitement was immediate; I practically ran to Target, eager to gather my supplies and embark on this wonderful DIY hooded towel adventure. The promise of creating something practical, personalized, and utterly adorable was truly thrilling. This guide will walk you through making your own easy hooded towel, ensuring a smooth and rewarding sewing experience.
Why Make Your Own Hooded Towel? The Benefits of DIY
While store-bought hooded towels are readily available, crafting your own offers a multitude of advantages that make the effort truly worthwhile:
- Unleash Your Personal Style: This is perhaps the biggest draw. You get to choose the exact colors, patterns, and quality of towels. Imagine a vibrant character towel for a child, or a sophisticated, plush hooded towel for an adult. You can add names, monograms, appliques, or even turn the hood into a fun animal face, making each towel truly unique and a reflection of personality.
- Cost-Effective Comfort: Pre-made hooded towels, especially those of high quality or featuring licensed characters, can be surprisingly expensive. By purchasing a bath towel and a hand towel separately, you can often save a significant amount of money while still achieving a premium look and feel. This project is a budget-friendly way to get custom luxury.
- Superior Quality Control: When you DIY, you’re in charge of the materials. You can select the softest, most absorbent towels available, ensuring a comfortable and long-lasting product that will withstand countless washes and adventures. This means your hooded towel will be durable and effective for years to come.
- Perfect Fit for Every Age: Whether you need a small, snug hooded towel for a toddler, a generously sized one for a growing child, or even a cozy version for an adult, you can tailor the dimensions to perfectly suit the recipient. No more ill-fitting towels!
- A Heartfelt Handmade Gift: A handmade hooded towel makes an incredibly thoughtful and cherished gift for baby showers, birthdays, holidays, or just because. The effort, care, and personal touch involved speak volumes about your affection.
- Beginner-Friendly Project: As you’ll soon discover, this particular hooded towel project is exceptionally simple. It involves mostly straight lines and basic sewing techniques, making it an ideal project for those just starting their sewing journey or looking for a quick, satisfying craft that yields impressive results.
Essential Materials & Tools for Your Hooded Towel Project
Before you begin sewing, it’s crucial to gather all your materials and set up your workspace. Having everything ready will make the process smooth, efficient, and enjoyable. You’ll be surprised how few items you actually need for such a rewarding outcome!
- A Regular Size Bath Towel: This will form the main body of your hooded towel. For children, a standard bath towel (approximately 30×52 inches or 76×132 cm) works perfectly. If you’re making an adult-sized hooded towel, consider a bath sheet for extra coverage and luxurious comfort. Choose a color and texture you love – perhaps one that matches the recipient’s favorite color!
- A Hand Towel: This will be transformed into the hood itself. A standard hand towel (approximately 16×28 inches or 40×70 cm) is usually sufficient for a well-proportioned hood. Ensure it coordinates well with your bath towel, either by matching the color exactly or complementing it nicely for a stylish contrast.
- A Sewing Machine: Any basic sewing machine capable of straight stitches and a zigzag stitch will do. Familiarize yourself with how to thread it, wind a bobbin, and change stitches if you’re new to your particular machine model. A well-maintained machine makes all the difference.
- Sharp Fabric Scissors: Essential for precise, clean cuts, especially when shaping the hood. It’s a good practice to designate specific scissors for fabric only to keep their blades sharp and prevent snagging.
- A Rotary Cutter: While optional, a rotary cutter paired with a self-healing cutting mat makes cutting straight lines incredibly fast and accurate, saving time and effort. If you don’t have one, your sharp fabric scissors will work just fine.
- A Cutting Mat: (If using a rotary cutter) This protects your work surface from blade damage and provides a grid for accurate measuring and precise cutting.
- A Small Plate or Round Template: This will be used to create the beautifully rounded top of the hood. A standard dinner plate or a smaller dessert plate will work depending on the curve you desire. Alternatively, you can use a compass or even freehand draw a curve if you feel confident.
- Thread: Choose high-quality polyester thread that closely matches the color of your towels. Polyester thread is strong, durable, and resistant to shrinking and fading, making it perfect for items that will see frequent use and washing.
- Fabric Pins or Sewing Clips: Crucial for holding fabric layers together securely while you sew, preventing them from shifting. Pins are great for marking and securing, while clips are fantastic for thicker fabrics like towels, as they don’t leave pinholes.
- Measuring Tape or Ruler: Indispensable for accurate measurements of your towels and hood pieces, ensuring your final product is perfectly sized.
- Iron and Ironing Board: While not strictly necessary for every seam in this project, pressing your seams after sewing can give your finished hooded towel a much more professional and crisp appearance.
Important Pre-Wash Tip: Before you cut or sew, it’s highly recommended to wash and dry both your bath towel and hand towel. This crucial step pre-shrinks the fabric, ensuring your finished hooded towel maintains its shape and size after future washes and prevents any unexpected distortion.
Step-by-Step DIY Hooded Towel Tutorial
Now that you have all your materials ready and your towels are pre-washed and dry, let’s dive into the fun part: creating your very own custom hooded towel! Follow these simple steps for a successful outcome.
Step 1: Preparing Your Hand Towel for the Hood
First, take your chosen hand towel and lay it flat on your cutting mat or a clean, even surface. Using your measuring tape or ruler, precisely measure and cut the towel to dimensions of 12 ½ inches wide and 20 inches tall. These specific dimensions are ideal for creating a comfortable and well-proportioned hood that fits most children and even many adults comfortably. Once you have your rectangular piece, fold it in half width-wise, ensuring the raw edges are aligned perfectly. This fold will ultimately be the top of the hood, and the raw edges will form the back seam of the hood.
Next, to create a beautifully rounded top for the hood (which often looks neater and fits the head more naturally), place a small plate or a suitable round template on one corner of the folded hand towel. Specifically, align the edge of the plate with the top folded edge and the side raw edge of the towel. Carefully trace around the curve of the plate with a fabric marker or tailor’s chalk. Then, using your sharp fabric scissors or rotary cutter, carefully cut along this marked curved line through both layers of the folded towel. When you unfold it, you’ll have a perfectly rounded shape for the back of the hood. If, however, you envision a hooded towel with a slightly pointed hood (perhaps for adding fun animal ears later), you can simply skip this rounding step and leave the top corners squared for a different aesthetic.
Step 2: Constructing the Hood
With your hood piece now perfectly cut and shaped, it’s time to sew it together and form the hood structure. Fold the hood piece in half again, ensuring the “right sides together” (meaning the sides you want to see on the outside of the finished towel should be facing each other). Align the two raw edges of the curved side perfectly. This is the seam that will run down the back of the hood. Pin these edges together securely, placing pins perpendicularly to the seam line, to prevent any shifting of the thick towel fabric while sewing. Using your sewing machine, sew along this curved raw edge with a strong, straight stitch. A seam allowance of about ½ inch (1.25 cm) is generally sufficient for towel fabric and provides a sturdy connection.
Once you’ve sewn the seam, it’s absolutely crucial to finish the raw edges to prevent fraying, which is very common with terry cloth towel fabric. If you are fortunate enough to have a serger (also known as an overlocker), this is the ideal tool for creating a neat, durable, and professional finish; simply serge over the raw seam allowance. If you don’t have a serger, don’t worry! A dense zigzag stitch on your regular sewing machine will work wonders. Position the zigzag stitch so that one side of the stitch goes just over the raw edge of the fabric, effectively encasing and securing all the loose fibers. This step creates a clean, professional finish, significantly increases the longevity of your hooded towel, and prevents unsightly fraying after washes.
Step 3: Attaching the Hood to the Main Towel
Now for the exciting part – bringing your prepared hood and the main bath towel together! Lay your large bath towel flat on your workspace, with the “right side” (the side you want to be visible) facing up. Fold the bath towel in half lengthwise to find its exact center point along one of the shorter edges (this will be the top edge where the hood will attach). Mark this center point precisely with a pin or a fabric marker. Next, take your newly sewn hood (you can turn it right side out now, or leave it inside out, as long as you’re aligning correctly) and find the center of its open, unsewn edge. Mark this center point with another pin.
With the main bath towel still right-side up, place the hood on top of the main towel, aligning the center pin of the hood with the center pin of the bath towel. Ensure the raw, open edge of the hood is aligned perfectly with the top raw edge of the bath towel. Crucially, the “right sides” of both the hood and the main towel should be facing each other at the seam line. Pin the hood securely to the bath towel, working outwards from the center to each side. Use plenty of pins to keep the layers of thick towel fabric from shifting.
Using your sewing machine, stitch the hood to the bath towel with a strong, straight stitch, about ½ inch (1.25 cm) from the raw edges. Go slowly and steadily, removing pins as you approach them, to ensure a strong and even seam. Remember to backstitch at the beginning and end of your seam for added security and durability, especially since this seam will experience a lot of wear.
Step 4: Finishing Touches and Enjoyment
You’re almost there! Once the hood is firmly attached, you’ll have a raw seam where it meets the main towel. Just like with the hood’s back seam, you need to finish this edge to prevent fraying and ensure your hooded towel is as durable as possible. Using your sewing machine, go over this newly sewn seam with a dense zigzag stitch. Again, if you have a serger, this is the perfect time to use it for a super clean, professional, and robust finish. Make sure the zigzag stitch catches both layers of fabric and completely encases the raw edges, securing all loose fibers.
After finishing the seam, carefully trim any excess threads to give your hooded towel a neat and polished appearance. Give your new hooded towel a final inspection to ensure all seams are secure and tidy. And just like that, you’re done! Turn your towel right side out, and behold your adorable, custom-made hooded towel. This was, without a doubt, one of the easiest and most satisfying sewing projects I have ever completed. The sense of accomplishment combined with a truly practical and charming item is incredibly rewarding. Get ready to enjoy your creation, whether at the pool, the beach, or during a cozy bath time!
Personalization & Creative Ideas to Elevate Your Hooded Towel
One of the greatest joys of DIY projects is the ability to infuse them with your unique style and creativity. While a basic hooded towel is fantastic on its own, here are some inspiring ideas to make yours truly stand out and reflect the personality of its owner:
- Beautiful Embroidery: Just like the matching towels that inspired this entire project, adding a name, monogram, a special date, or a small embroidered design is a wonderful and thoughtful touch. You can do this by hand before assembly for delicate detail, or with an embroidery machine for professional results.
- Fun Appliques: Transform the hood into a playful character by adding felt or fabric appliques for eyes, a nose, a mouth, or even whiskers. Think adorable animal faces like a friendly bear, a floppy-eared bunny, a cheerful frog, or a ferocious dinosaur!
- Decorative Trims: Elevate the look with a decorative flourish. Sew a strip of colorful bias tape, a vibrant ribbon, or a contrasting patterned fabric along the front edge of the hood. This not only adds visual interest but can also help to neatly finish the raw edge of the hood opening.
- Animal Ears or Spikes: For the ultimate fun factor, cut out two ear shapes (pointed or rounded) or spike shapes from coordinating hand towel fabric (or even a different fabric for a pop of contrast). Sew them together, turn them right side out, and then baste them to the top edge of your hood piece before you sew the main hood seam in Step 2.
- Convenient Pockets: Sew a simple patch pocket onto one corner of the main bath towel. This is perfect for holding small essentials like goggles, sunscreen, a toy car, or even a snack when heading to the pool or beach. Ensure it’s positioned accessibly.
- Different Sizes for Different Ages: Don’t limit yourself to one size! Adjust the dimensions of your bath towel and hand towel to create hooded towels for every family member – tiny, snug versions for infants, standard sizes for toddlers and kids, and luxurious bath sheet versions for adults who love extra comfort.
Care and Maintenance for Your Handmade Hooded Towel
To ensure your beautiful new hooded towel stays soft, absorbent, and vibrant for many years to come, proper care is essential. Since you’re working with high-quality towel fabric, standard laundry practices generally apply, but a few specific considerations can help prolong its life and maintain its plushness:
- Wash Before First Use: Always wash your finished hooded towel before its first use. This helps to remove any residual fabric softeners or finishes from the manufacturing process of the original towels, which can sometimes hinder absorbency.
- Machine Wash Cold or Warm: Wash your hooded towel with like colors in cold or warm water. Hot water can sometimes cause colors to fade prematurely and may be too harsh on the delicate towel fibers over time, leading to stiffness.
- Use Mild Detergent: Opt for a mild, good-quality detergent. Avoid using harsh detergents or excessive amounts of laundry soap, as these can build up in the towel fibers and reduce their natural absorbency, leaving them feeling less soft.
- Go Easy on Fabric Softeners: While fabric softeners can make towels feel softer initially, they can also leave a waxy residue that significantly reduces absorbency over time. For best results, use fabric softener sparingly or consider using a cup of white vinegar in the rinse cycle as a natural, residue-free softener and deodorizer.
- Tumble Dry Low: Dry your hooded towel on a low heat setting in your dryer to prevent excessive shrinking and to maintain the integrity of the towel fibers. Over-drying can make towels feel stiff and scratchy. For an even gentler approach that saves energy, consider air drying whenever possible.
- Address Snags Promptly: Terry cloth loops can sometimes snag on sharp objects. If a loop pulls out, carefully snip it off with sharp scissors close to the base. Do not pull the snag, as this can unravel a larger section of the towel fabric.
Troubleshooting Common Sewing Issues
Even with a straightforward sewing project like this, a few hiccups can occasionally occur. Don’t get discouraged! Here are some common issues you might encounter and practical tips on how to resolve them, ensuring a smooth and enjoyable crafting experience:
- Uneven Stitches: If your stitches appear inconsistent, skipped, or simply not straight, first check your sewing machine’s tension settings; they might need adjustment. Also, ensure you’re guiding the fabric smoothly without pulling or pushing too hard, letting the machine’s feed dogs do most of the work. Practicing on scrap towel pieces can help you get a feel for the fabric.
- Fraying Edges After Sewing: If your seams are fraying even after applying a zigzag stitch, your stitch might not be dense enough or wide enough to adequately enclose the raw edges. Go over the seam again with a wider and closer zigzag stitch. Trimming the raw edge slightly before zigzaging can also help catch all fibers more effectively.
- Hood Seems Too Small or Too Large: The dimensions provided are an excellent starting point for a versatile fit. However, if you find the hood doesn’t fit quite right for your specific recipient, remember that you can always adjust. For a larger hood, start with a slightly larger hand towel (e.g., a bath towel instead of a hand towel for an adult-sized hood) and adjust the 12.5″ x 20″ measurement proportionally. For a smaller hood, reduce these measurements slightly.
- Towel Stretches While Sewing: Terry cloth can be a bit stretchy and bulky, making it challenging to sew evenly. To minimize stretching and shifting, use plenty of pins or sewing clips to secure your layers thoroughly before you begin sewing. If you have one, utilizing a walking foot on your sewing machine can be incredibly helpful, as it assists in feeding thick or stretchy fabrics through the machine evenly.
- Skipped Stitches: If your machine is skipping stitches, it might be due to a dull needle or an incorrect needle type for the fabric. Ensure you’re using a sharp needle suitable for medium to heavy fabrics, such as a denim needle or a universal needle in a larger size (e.g., 90/14 or 100/16). Change your needle often for best results.
Making your own hooded towel is an incredibly rewarding experience. It’s a project that combines practicality with the pure joy of creation, resulting in a unique item that’s perfect for thoughtful gifts or for making everyday bath and beach times more special. Embrace the process, personalize it to your heart’s content, and enjoy the profound satisfaction of crafting something beautiful, functional, and deeply cherished with your own hands. Happy sewing!