
Master the Art of Table Basting: An Easy Guide for Quilters
For many quilters, basting is often considered the most tedious and physically demanding part of the quilting process. Traditionally, it involves hours spent on the floor, leading to inevitable backaches and knee discomfort. This essential step, which secures the quilt top, batting, and backing layers together, can often deter even seasoned crafters. However, the quilting world has seen an innovative shift with the introduction of the table basting method, a game-changer that promises to transform this dreaded task into an enjoyable and efficient experience.
Inspired by the brilliant technique shared by Erica Arndt on YouTube, I wholeheartedly embraced table basting, and the results have been nothing short of revolutionary. What was once a chore I actively avoided has now become a surprisingly tolerable—even enjoyable—part of my quilting journey. This method is exceptionally fast, remarkably efficient, and so straightforward that even absolute beginners can achieve professional-looking results with ease. Say goodbye to floor-basting woes and prepare to discover a more comfortable, precise, and less strenuous way to prepare your quilts. Join us as we delve into the step-by-step instructions to master this incredible technique.
Why Choose Table Basting? The Benefits Unveiled
Table basting isn’t just an alternative; it’s an upgrade that addresses many common basting frustrations. Here’s why this method stands out:
- Ergonomic Comfort: The most immediate and significant benefit is the elimination of floor work. By working on a table, you save your back, knees, and neck from strain, allowing you to quilt comfortably for longer periods. This makes quilting more accessible for individuals with physical limitations.
- Increased Efficiency and Speed: The rolling and spraying technique, combined with working on an elevated surface, significantly speeds up the basting process. You can move quickly and smoothly, covering larger areas in less time compared to traditional pin basting or floor-based spray basting.
- Enhanced Accuracy and Precision: Working on a flat, stable table surface makes it easier to keep your layers smooth, aligned, and free of wrinkles and puckers. The controlled application of spray adhesive in sections ensures even distribution and minimizes shifting, resulting in a beautifully flat quilt sandwich.
- Beginner-Friendly: The clear, systematic approach of table basting is ideal for new quilters. It breaks down a potentially intimidating task into manageable steps, building confidence and fostering a positive quilting experience from the start.
- Optimized Workspace: While a sturdy table is required, the method allows for a more organized and contained workspace compared to spreading a huge quilt across an entire room floor.
Understanding the Crucial Role of Quilt Basting
Before diving into the “how,” let’s briefly touch upon the “why.” Basting is a critical, non-negotiable step in quilt making. It’s the process of temporarily securing the three layers of a quilt—the quilt top, the batting (or wadding), and the backing fabric—into a single, stable unit. This “quilt sandwich” must remain intact and smooth throughout the quilting process to ensure even stitching, prevent fabric shifting, and ultimately produce a beautiful, wrinkle-free finished quilt.
Without proper basting, your quilt layers can shift, bunch, or stretch unevenly as you quilt, leading to puckers, distortions, and an unprofessional appearance. While various basting methods exist—such as pin basting, thread basting, and spray basting—the table basting technique primarily utilizes spray adhesive, offering a balance of speed, hold, and ease of use that is particularly effective for this method.
Essential Materials for Successful Table Basting
Gathering the right materials is the first step towards a smooth basting experience. For this method, you’ll need a few key items, each playing a vital role in achieving a perfectly basted quilt:
- Quilt Backing and Top: These are the star components of your quilt sandwich. Ensure both are meticulously pressed and squared up before you begin. It’s crucial that your backing fabric and batting are adequately sized, ideally 4-6 inches larger than your quilt top on all sides. This extra margin provides wiggle room for potential shifting and ensures you have enough material to work with when trimming.
- 505 Spray Adhesive: This temporary, repositionable fabric adhesive is the cornerstone of the table basting method. Unlike permanent glues, 505 spray adhesive holds your layers securely during quilting but can be easily removed or repositioned without leaving residue or gumming up your sewing machine needle. Always work in a well-ventilated area when using spray adhesive and protect surrounding surfaces with a drop cloth or newspaper.
- 100% Cotton Batting: Batting provides the warmth, loft, and texture that makes a quilt cozy and substantial. 100% cotton batting is a popular choice due to its natural fibers, breathability, and excellent draping qualities. It’s easy to quilt through and creates a lovely, traditional crinkled look after washing. Ensure your batting is free of creases and large wrinkles before starting.
- A Sturdy Work Table: The foundation of this method! You’ll need a table that is sturdy, stable, and large enough to accommodate at least half of your quilt’s width comfortably. A dining room table, a large cutting table, or even a pair of folding tables pushed together can work. Ensure it’s clean and clear of obstructions.
- Iron and Ironing Board: A standard iron will be used to gently set the adhesive and smooth out any remaining wrinkles, especially on a low heat setting.
- Smoothers/Hands: Your hands are excellent tools for smoothing, but a brayer, a flat ruler, or even a clean credit card can be used to apply even pressure and work out air bubbles effectively.
Step-by-Step Directions for Flawless Table Basting
Follow these detailed steps to master the table basting technique and create a perfectly stable quilt sandwich:
Step 1: Preparing the Batting and Quilt Top for Adhesion
Begin by setting up your workspace. Center your table in the room, or at least pull it away from any walls, to allow for easy access from all sides as you work. This maneuverability is key to maintaining control and ensuring even application.
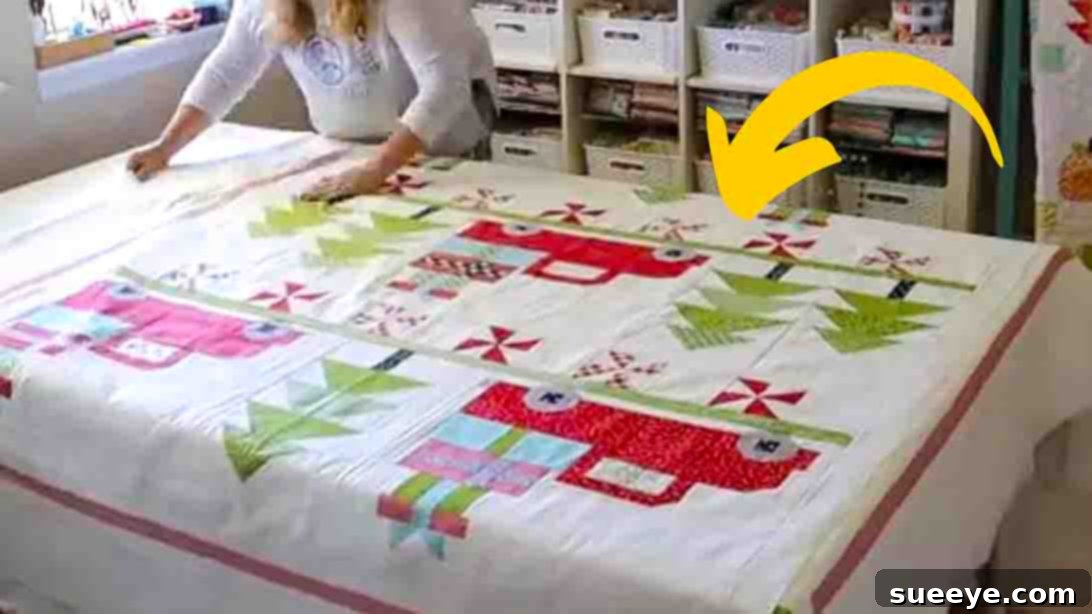
Next, carefully spread your batting over the entire surface of the table. Ensure it is perfectly flat, smooth, and free of any wrinkles or folds. If your batting is larger than your table, let the excess drape off the sides, making sure the portion on the table is taut and even. Now, meticulously place your quilt top directly on top of the batting, centering it as accurately as possible. Take your time to align all edges and corners, ensuring no part of the batting or quilt top is stretched or distorted. Once you are confident with the placement and everything looks straight and smooth, gently press down with your hands, working from the center outwards, to remove any initial air pockets or minor wrinkles.
With the quilt top neatly layered over the batting, it’s time to prepare for the spray adhesive application. Starting from one end, gently roll your quilt top and batting layers together, forming a neat, compact roll. Work in sections, approximately 1-foot wide, rolling steadily and evenly all the way down towards the opposite end of the table. For the very last section, instead of rolling it completely under, fold it up and away, creating a clean exposed strip of batting. This technique allows you to expose specific sections for spraying without disturbing the rest of the layers. Before spraying, double-check that the remaining unrolled portion of your quilt is perfectly straight and smooth.
Now, take your 505 spray adhesive. Holding the can at the recommended distance (usually 6-8 inches), begin to spray the exposed section of batting with an even, light coat. Avoid oversaturating the fabric, as a little goes a long way. Immediately after spraying, unroll the next 1-foot section of your quilt top over the freshly sprayed batting. As you unroll, use your hands or a brayer to firmly and smoothly press the quilt top onto the batting, working from the center outwards to eliminate any bubbles or wrinkles. Continue this process—spray, unroll, smooth—one section at a time, until you have reached the very end of your quilt. The methodical approach ensures a consistently flat and secure bond.
Step 2: Securing the Layers and Adding the Backing
Once you have completely basted the quilt top to the batting, take a moment to admire your progress. You’ll notice a smooth, wrinkle-free surface. To further secure the adhesive and eliminate any microscopic wrinkles that might remain, quickly run your iron over the entire basted quilt top. Use a low heat setting to avoid melting the adhesive or scorching your fabric. This quick press helps to “set” the spray adhesive, creating a more stable bond and preparing the layers for the final step.
Now comes the crucial step of attaching the backing fabric. Carefully, yet confidently, flip the entire quilt sandwich (quilt top and batting now adhered together) over. This should be done as one unit to prevent any shifting. Lay the basted layers down on your table with the batting side now facing up. Take your backing fabric, which should also be pressed and free of wrinkles, and carefully position it over the batting. Just like you did with the quilt top, ensure it is centered, perfectly aligned, and smooth across the entire surface. This symmetry is key to a balanced finished quilt.
Repeat the rolling and spraying process exactly as you did in Step 1. Starting from one end, roll the backing fabric and the already-basted quilt top/batting unit together in 1-foot sections. Fold up and away the last section to expose a clean strip of batting. Apply a light, even coat of 505 spray adhesive to the exposed batting, then carefully unroll the backing fabric over it, smoothing firmly from the center outwards to eliminate any wrinkles or air pockets. Continue this methodically until the entire backing fabric is adhered to the batting.
Once all three layers are basted together, give the backing side another quick pass with your iron on a low heat setting. This final press ensures all adhesive bonds are secure and the entire quilt sandwich is as flat and smooth as possible. You have now successfully table-basted your quilt, creating a stable, ready-to-quilt foundation without the need for pins or floor acrobatics!
Tips for Successful and Stress-Free Table Basting
To ensure your table basting experience is as smooth and successful as possible, consider these invaluable tips:
- Prepare Your Workspace: A clean, well-lit, and ventilated area is crucial. Dust and pet hair can easily get trapped between layers, and good ventilation is essential when using spray adhesives. Lay down a protective sheet if you’re concerned about overspray on your table.
- Pre-Press Everything: Take the time to meticulously press your quilt top and backing fabric before you start. Wrinkles in these layers will translate into wrinkles in your finished quilt.
- Size Matters: Always ensure your batting and backing are at least 4-6 inches larger than your quilt top on all four sides. This gives you plenty of wiggle room and prevents running short on fabric if slight shifting occurs.
- Less is More with Spray Adhesive: Resist the urge to drench your batting with adhesive. A light, even mist provides ample hold. Too much adhesive can make your quilt stiff, difficult to quilt, or even leave residue.
- Smooth from the Center Out: This technique is fundamental for preventing wrinkles and trapping air bubbles. Always apply pressure and smooth outwards from the middle of the quilt section you’re working on.
- Work Methodically: While table basting is fast, it’s not a race. Take your time with each section—spray, unroll, smooth. Rushing can lead to misalignments or trapped wrinkles.
- Consider a Helper for Large Quilts: For exceptionally large quilts, having an extra set of hands, especially during the flipping stage, can make the process much easier and prevent accidental shifting.
- Practice Makes Perfect: If you’re new to spray basting or this method, consider doing a small test run with scrap fabric and batting to get a feel for the spray application and smoothing technique.
- Clean Your Hands Regularly: Adhesive can transfer to your hands. Keep a damp cloth nearby to wipe your hands periodically to avoid transferring stickiness to your fabric.
- Store Batting Flat: If possible, store your batting unrolled or gently folded to minimize creases, which can be challenging to smooth out completely.
Troubleshooting Common Table Basting Issues
Even with the best techniques, minor issues can sometimes arise. Here’s how to address them:
- Wrinkles or Bubbles: If you spot a wrinkle or a bubble after smoothing, don’t panic. Gently peel back the affected section of the quilt top or backing from the batting. If needed, apply a tiny bit more spray adhesive (sparingly!) to the specific area, and then re-smooth it carefully, working outwards.
- Fabric Shifting: If you notice significant shifting, especially during the flip, it might indicate that the initial adhesive wasn’t applied evenly or that your layers weren’t perfectly aligned to begin with. Carefully try to reposition the shifted layer. For future projects, ensure your initial alignment is spot-on and that your spray application is consistent.
- Adhesive Not Sticking: This could be due to an old can of adhesive, an uneven spray, or extremely cold working conditions. Ensure your adhesive is fresh and applied at room temperature. If it still doesn’t stick, you might need to try a different can or brand.
- Adhesive Residue on Surfaces: If you get spray adhesive on your table or floor, use a citrus-based cleaner or rubbing alcohol to remove it effectively. Always test on an inconspicuous area first.
- Stiff Quilt Sandwich: If your quilt feels too stiff, it’s likely you’ve used too much adhesive. For your next project, remember that a light mist is all that’s required. The stiffness usually lessens after washing the finished quilt.
Embrace a New Era of Quilting Comfort and Efficiency
The table basting method truly revolutionizes one of quilting’s most laborious steps. By adopting this ergonomic, efficient, and precise technique, you can say goodbye to the discomfort of floor basting and embrace a more enjoyable and productive creative process. The clear, systematic approach makes it accessible to quilters of all skill levels, ensuring that even beginners can achieve a perfectly basted quilt sandwich, ready for stitching.
No more dreading the basting stage; with table basting, you’ll find yourself looking forward to this crucial part of your quilting journey. It’s fast, effective, and results in a beautifully flat foundation for your quilting stitches, ultimately contributing to a more professional and satisfying finished quilt. So, set up your table, gather your materials, and prepare to transform your quilting experience. Happy quilting!