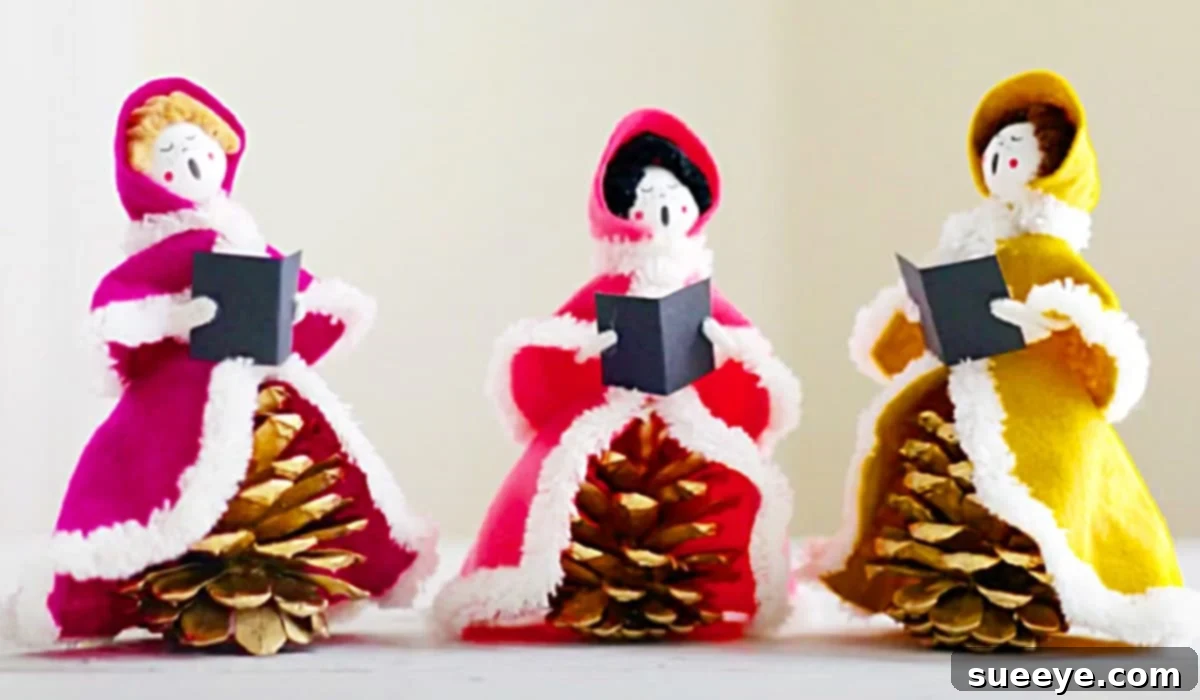
How to Craft Enchanting Pinecone Christmas Carolers: A Festive DIY Guide
There’s a special magic that comes with handmade decorations during the holiday season. They carry a unique warmth and personal touch that store-bought items simply can’t replicate. For me, that magic often begins with the simplest gifts from nature: pinecones. Growing up surrounded by majestic pine trees, our yard was an endless treasure trove of these versatile natural elements. Whenever we needed something festive, a quick stroll outside was all it took to gather the perfect crafting material. Pinecones truly are nature’s own DIY canvas, waiting to be transformed into something extraordinary.
Recently, I stumbled upon a delightful DIY pinecone caroler video tutorial by Smile Mercantile on YouTube, and I was immediately captivated. The idea of turning humble pinecones into a choir of charming Christmas carolers struck a chord, promising a project that was both fun and deeply satisfying. Though my current home isn’t surrounded by an abundance of pine trees, a trip to Michael’s craft store quickly remedied that, providing me with all the pinecones and additional supplies needed to bring these adorable figures to life. Join me as we embark on this delightful journey to create your very own set of pinecone carolers, adding a touch of rustic elegance and festive cheer to your holiday decor.
Why Choose Pinecones for Your Christmas Crafts?
Pinecones are an exceptional choice for holiday crafting, offering a blend of natural beauty, accessibility, and versatility. Their intricate scales provide unique textures, making each craft piece distinct. They are also incredibly sturdy, ensuring your handmade decorations will last for many seasons to come. Beyond their aesthetic appeal, using pinecones promotes a connection with nature, bringing the serene beauty of the outdoors into your home. They are eco-friendly, often free if you collect them yourself, and easily purchased from craft stores. This project, in particular, showcases how such a simple, natural element can be transformed into something so evocative of the Christmas spirit.
Essential Materials for Your Pinecone Carolers
Before you dive into crafting, gather all your supplies. Having everything organized will make the process smooth and enjoyable. Here’s what you’ll need to create your charming pinecone caroler choir:
- Pinecones: Choose various sizes for a diverse caroler group. Larger, more open pinecones work well for the bodies.
- Wooden Spools: These serve as stable bases and ‘feet’ for your carolers, providing them with height and balance.
- Pipe Cleaners (Chenille Stems): Ideal for crafting flexible arms and adding detail.
- Spray Paint (Optional): White, silver, or gold spray paint can give your pinecones a beautiful, snowy, or metallic finish.
- Wooden Beads: These will form the heads of your carolers. Choose sizes proportionate to your pinecones.
- Acrylic Craft Paint: A range of colors for painting faces, clothing details, and any embellishments.
- Small Paintbrushes: Fine-tipped brushes are essential for delicate facial features.
- Felt Sheets: Various colors of felt for creating hats, scarves, capes, and other clothing elements. Felt is easy to cut and doesn’t fray.
- Plushie Pipe Cleaners (Optional): Thicker, fuzzier pipe cleaners can be used for more voluminous arms or hair.
- Hot Glue Gun: Your primary tool for securely assembling all the components.
- Glue Sticks: Plenty of them!
- Optional Embellishments: Glitter, tiny buttons, miniature bows, small jingle bells, or even tiny paper songbooks can add extra charm.
Step-by-Step Directions to Create Your Delightful Pinecone Carolers
Crafting these pinecone carolers is a rewarding process, broken down into simple, manageable steps. Follow these instructions carefully, and don’t be afraid to add your own creative flair!
Step 1: Preparing Your Pinecones and Bases
The foundation of your caroler is the pinecone. If you’ve collected pinecones from outside, it’s wise to clean them first. You can gently brush off any dirt or debris. To ensure they are bug-free and fully open, you can bake them on a foil-lined baking sheet at 200°F (90°C) for about 30 minutes. Let them cool completely.
Once prepared, consider spray painting your pinecones. A coat of white spray paint can mimic a dusting of snow, while silver or gold can add a touch of festive sparkle. Allow the paint to dry thoroughly before proceeding.
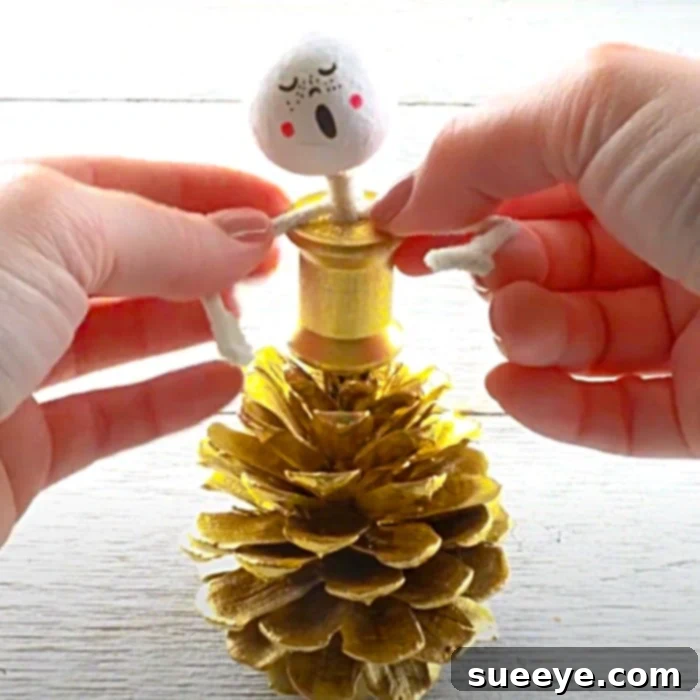
Next, attach the pinecone to its base. Apply a generous amount of hot glue to the top of a wooden spool. Carefully press the wider, flatter end of your pinecone onto the spool, holding it firmly until the glue sets. This creates a stable ‘body’ and ‘feet’ for your caroler.
Step 2: Crafting the Carolers’ Heads and Faces
The wooden bead will become the caroler’s head. This is where their personality truly shines! Using your acrylic craft paints and fine-tipped brushes, carefully paint charming faces onto each bead. Consider simple dots for eyes, a small line for a mouth, and rosy cheeks. You can make them smiling, singing, or with a serene expression. Let your creativity guide you. Once the faces are dry, you can add a small loop of yarn or felt scraps to the top of the bead for hair, securing it with hot glue.
Step 3: Designing and Attaching Festive Outfits
Now for the fun part – dressing your carolers! Felt is an excellent material for this because it’s easy to cut and doesn’t fray.
- Hats: Cut small circles of felt, then cut a slit to the center and form it into a cone shape, securing with hot glue. Alternatively, create simple beanie shapes or even miniature top hats.
- Scarves: Cut thin strips of felt and wrap them around the ‘neck’ area where the wooden bead meets the pinecone. You can snip the ends for a fringed look.
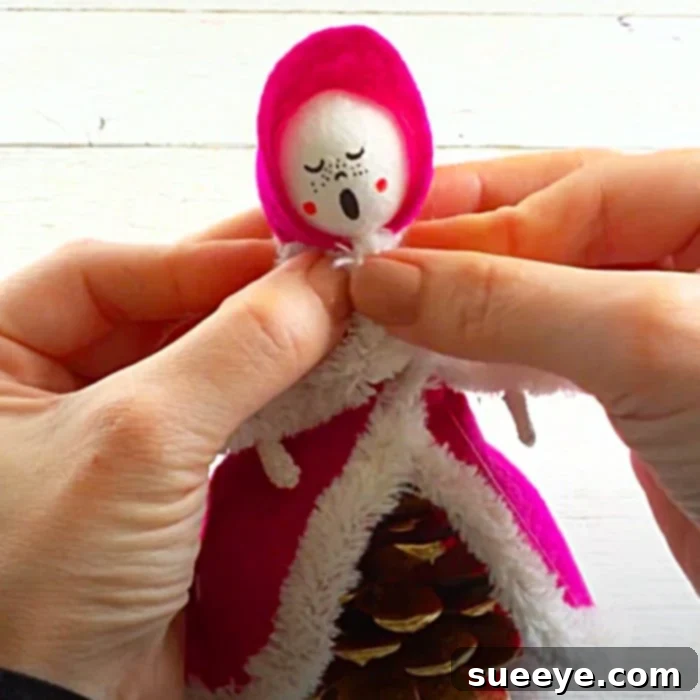
- Capes or Shawls: Cut larger semi-circles or rectangular pieces of felt and drape them over the ‘shoulders’ of the pinecone. Secure with a dab of hot glue.
Experiment with different colors and textures of felt to give each caroler a unique look. You can even add tiny buttons or sequins for extra embellishment.
Step 4: Adding Arms and Holding Accessories
Pipe cleaners are perfect for creating flexible and expressive arms. Cut a pipe cleaner to an appropriate length (about 3-4 inches depending on the size of your caroler). Bend it in half to create two arms. You can then bend the ends slightly to form tiny ‘hands.’ Use a dab of hot glue to attach the folded center of the pipe cleaner to the back of the pinecone, just below where the head will sit. Position the arms so they look like they are holding a songbook or simply gesturing.
For an extra touch, you can craft miniature songbooks from small pieces of paper, folded and perhaps drawn with a few musical notes. Glue these tiny books into the carolers’ pipe cleaner hands.
Step 5: Assembling Your Carolers and Final Touches
With all the individual components ready, it’s time to bring your caroler to life!
- Attach the Head: Apply a generous amount of hot glue to the top of the pinecone (the point where the body naturally narrows). Carefully press the wooden bead head onto this spot, ensuring it’s centered and straight. Hold until secure.
- Drape Clothing: If you haven’t already, gently drape and glue any felt capes, scarves, or other clothing pieces around the caroler’s neck and shoulders, making sure they sit nicely and don’t obscure the face or arms.
- Secure Arms and Accessories: Make sure the pipe cleaner arms are firmly glued. If your caroler is holding a songbook or other tiny accessory, glue that into place as well.
- Embellish: This is your chance to add any final decorative touches. A sprinkle of glitter on the ‘snowy’ pinecone, a tiny bow on a hat, or a small jingle bell on a scarf can make a big difference.
Allow all the glue to dry completely before handling your finished carolers.
Tips for Success and Customization
- Vary Sizes: Use pinecones of different sizes to create a diverse group of carolers, mimicking a real choir.
- Color Schemes: Don’t limit yourself to traditional red and green. Try a winter wonderland theme with whites, silvers, and blues, or a rustic theme with browns, creams, and greens.
- Facial Expressions: Experiment with different expressions to give each caroler a unique personality. Some could be singing loudly, others with gentle smiles.
- Add Instruments: Instead of songbooks, create tiny instruments like trumpets or drums from paper, beads, or small scraps to give your carolers a miniature band.
- Glitter and Sparkle: A touch of craft glitter, especially iridescent or silver, can add a magical shimmer to your carolers, making them truly sparkle under holiday lights.
- Child-Friendly: This is a wonderful project for children with adult supervision, especially for painting faces and choosing felt colors.
- Pinecone Type: Different pinecone species offer varied shapes and textures. Explore what’s available in your region or craft store.
Displaying Your Charming Pinecone Carolers
Once your pinecone carolers are complete, the fun continues with finding the perfect place to display them! Their rustic charm and festive appeal make them incredibly versatile for holiday decor.
- On the Mantelpiece: Arrange your choir along your fireplace mantel, perhaps nestled among some evergreen branches and fairy lights for a classic festive scene.
- Christmas Tree Ornaments: If you’ve made smaller carolers, attach a loop of twine to their heads to hang them as unique, handmade ornaments on your Christmas tree.
- Table Centerpiece: Create a charming centerpiece for your dining table or coffee table. Surround them with faux snow, small votive candles (safely!), or other miniature festive elements.
- Window Ledge Display: Let them greet passersby from a window ledge, bringing cheer to both inside and outside your home.
- Gift Toppers: Attach a single caroler to a beautifully wrapped gift for an extra special and personalized touch.
- Part of a Winter Village: Incorporate your carolers into a larger miniature Christmas village display, bringing life and music to your tiny town.
These adorable figures are sure to become a cherished part of your holiday decorations for years to come, evoking warm memories of the festive season and the joy of creating something beautiful with your own hands.
The Enduring Charm of Handmade Holiday Decor
There’s an undeniable satisfaction in crafting something beautiful with your own hands, especially during the holidays. These pinecone carolers are more than just decorations; they are symbols of creativity, mindfulness, and the simple joys of the season. They offer a fantastic opportunity to engage in a relaxing activity, either solo or with loved ones, creating memories along with masterpieces. Each caroler, with its unique expression and handmade charm, tells a story and adds a deeply personal touch to your festive surroundings.
So, gather your materials, put on some cheerful holiday music, and get ready to create a delightful choir of pinecone carolers that will fill your home with warmth, character, and the timeless spirit of Christmas. I simply can’t wait to start my own project and see these little figures bring joy to my home!