
Effortless Style: Craft Your Own DIY T-Shirt Dress in Under an Hour!
Are you searching for the ultimate summer wardrobe staple that’s both chic and incredibly comfortable? Look no further than the humble T-shirt dress! But why buy one when you can easily create your own custom version? This fantastic DIY project allows you to transform simple knit fabric into a stylish, personalized dress that feels amazing to wear. It’s perfect for casual outings, beach days, or simply lounging in style.
As a passionate crafter, T-shirt “upstyles” are among my absolute favorite projects. The best part? You don’t need to be an expert seamstress to achieve stunning results. In fact, this particular T-shirt dress can often be completed in as little as 15-30 minutes, making it an incredibly satisfying and quick craft. I’ve already whipped up a few of these myself, and they’ve proven to be absolute saviors during the warmer months – super cute, exceptionally comfortable, and truly versatile. This isn’t just a great summer dress; it’s a creative outlet that delivers immediate gratification!
The inspiration for this wonderful project comes from the highly acclaimed Mark Montano, a master of accessible DIY crafts. His tutorials are consistently engaging and easy to follow, and this T-shirt dress project stands out as one of his most brilliant and achievable designs.
Why DIY Your T-Shirt Dress? Embrace Upcycled Fashion
Beyond the joy of creating something with your own hands, there are numerous compelling reasons to try making your own T-shirt dress:
- Unbeatable Comfort: Knit fabric is inherently soft, stretchy, and breathable, making these dresses incredibly comfortable for all-day wear, especially in warm weather.
- Personalized Style: Store-bought dresses often lack that unique touch. By making your own, you choose the fabric, color, and fit, ensuring a garment that perfectly reflects your personal aesthetic.
- Budget-Friendly: Crafting your own clothes can be significantly more affordable than purchasing new items, especially when you can find great deals on fabric.
- Eco-Conscious Choice: Upcycling and DIY fashion contribute to a more sustainable lifestyle by reducing textile waste and promoting mindful consumption. You’re giving materials a new life!
- Beginner-Friendly Project: This specific design is incredibly forgiving and requires only basic sewing skills, making it an ideal entry point for those new to sewing garments.
- Quick Gratification: With a typical completion time of under an hour, you get to enjoy your new creation almost immediately!
Gathering Your Essential Materials
Before you dive into the creative process, ensure you have all the necessary tools and materials ready. Having everything at hand will make the project flow smoothly and efficiently.
Materials Needed:
- Sewing machine with ball point needle: Essential for working with knit fabrics. A ballpoint needle (also known as a stretch needle) is designed with a rounded tip that pushes fabric fibers aside instead of piercing them, preventing snags and skipped stitches.
- 60″ x 60″ knit fabric: This is the heart of your dress. Opt for a soft, comfortable knit like jersey, interlock, or a cotton-spandex blend. The 60-inch width is standard and provides ample material for various sizes and lengths. Pre-wash and dry your fabric before starting to account for any shrinkage.
- Knit tank top in matching color (or a color you like): This will serve as your perfect template. Choose a tank top that fits you well, as its dimensions will dictate the upper portion of your dress.
- Matching thread: A good quality polyester thread is recommended for knit fabrics, as it offers a bit of stretch and durability.
- Sharp fabric scissors: Dedicated fabric scissors ensure clean, precise cuts, which are crucial for a professional finish. Avoid using these scissors on paper or other materials to keep them sharp.
- Straight pins: Essential for holding layers of knit fabric together securely before sewing. Look for fine, sharp pins that won’t snag your material.
- Fabric pencil or chalk: For accurately marking your cutting lines and hemlines on the fabric. These marks will wash out or disappear, leaving no trace.
Your Step-by-Step Guide to Crafting the T-Shirt Dress
Now, let’s break down the process into easy, manageable steps. While Mark Montano’s tutorial provides excellent visual guidance, these written instructions will help you understand the core mechanics of creating this beautiful garment.
Step 1: Preparing and Folding Your Fabric
Start by laying your 60″ x 60″ knit fabric flat on a large, clean surface, ensuring it’s as smooth and wrinkle-free as possible. This step is critical for accurate cutting.
- First Fold: Fold your fabric in half lengthwise, aligning the two 60-inch edges perfectly. The fold will run along one of the 60-inch sides.
- Second Fold: Now, fold the fabric in half again, this time widthwise. You should end up with a neatly folded square (or close to it) with four layers of fabric. Ensure all raw edges and folds are perfectly aligned. This creates a quarter-fold that will allow you to cut both the front and back of your dress simultaneously and symmetrically.
- Press (Optional but Recommended): A quick press with an iron along the folds can help keep the fabric stable, especially with slippery knits.
Step 2: Preparing and Aligning Your Template Tank Top
Your chosen tank top is your secret weapon for a great fit. It acts as a guide for the bodice and armhole shape of your new dress.
- Fold the Tank: Fold your knit tank top neatly in half lengthwise, ensuring the side seams and shoulder seams are perfectly aligned. This will give you a precise half-template.
- Position for Marking: Carefully place the folded tank top onto your folded fabric. Align the folded edge of the tank top with the double-folded edge of your fabric. This is extremely important for ensuring symmetry when you cut the full dress. Position the tank top where you want the top of your dress to sit, leaving enough space above for your neckline if you choose to alter it slightly.
Step 3: Marking Your Cut Lines
This is where your fabric pencil comes in handy. You’ll be tracing the general shape of the tank top and then expanding it for the dress.
- Trace the Tank Top: Using your fabric pencil or chalk, carefully trace around the neckline, shoulder seam, and armhole of the folded tank top.
- Mark the Side Seam: Extend the tracing down the side of the tank top. This is where you get creative!
- Determine Length: Decide on your desired dress length. Mark this point on the fabric, adding about 1-2 inches for the hem allowance.
- Create the A-Line Shape: Instead of simply tracing straight down from the tank’s side seam, gently angle your line outwards from the underarm area down to your desired hemline. This will create a flattering A-line or slight swing shape, giving your dress a comfortable and stylish drape. The wider you make this angle, the fuller your dress will be.
- Add Seam Allowance: Crucially, draw a second line about 1/2 inch (1.25 cm) outside your traced lines along the shoulders, armholes, and side seams. This is your seam allowance. When you cut, you’ll cut along this outer line, giving you room to sew.
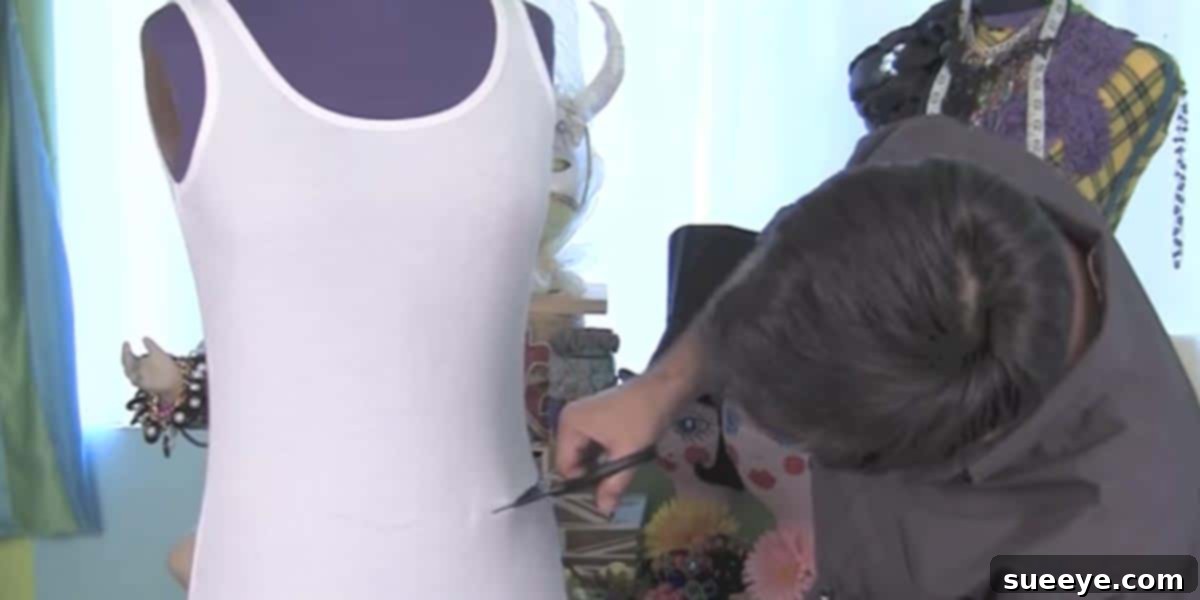
Step 4: The Cut
With your lines clearly marked, it’s time to make the cut. Remember to use sharp fabric scissors for the cleanest edge.
- Careful Cutting: Holding your fabric layers together firmly (you can use pins if needed), carefully cut along the outermost marked lines (the seam allowance lines). Do not cut along the fold line for the main body of the dress.
- Open Up: Once cut, unfold your fabric. You should now have one complete dress shape, perfectly symmetrical, with an open neckline, armholes, and hem.
Step 5: Pinning for Success
Now you’ll bring the two sides of your dress together for sewing.
- Right Sides Together: Lay your dress fabric flat and fold it in half again, this time with the “right sides” (the side you want to be visible when wearing) facing each other. Align all the raw edges perfectly – shoulders, side seams, and armholes.
- Pin Generously: Use your straight pins to secure the shoulder seams and the side seams. Pin perpendicular to the seam line, spacing them every 1-2 inches. This will prevent the knit fabric from stretching or shifting while sewing.
Step 6: Sewing Your Dress
Before you begin sewing, set up your machine correctly for knit fabrics.
- Machine Settings: Install your ballpoint needle. Choose a stretch stitch, a narrow zig-zag stitch (e.g., 0.5-1.0mm width, 2.5mm length), or use a serger if you have one. These stitches allow the fabric to stretch without breaking the thread.
- Sew Shoulder Seams: Starting from the neckline edge, sew each shoulder seam using your chosen stretch stitch, staying 1/2 inch from the raw edge (your seam allowance). Backstitch at the beginning and end to secure the stitches.
- Sew Side Seams: Next, sew each side seam, starting from the armhole down to the hem. Again, maintain your 1/2-inch seam allowance and backstitch securely.
- Finish Seams (Optional but Recommended): For a professional and durable finish, you can trim the seam allowance and then finish the raw edges with a zig-zag stitch or a serger. This prevents fraying and gives a cleaner look inside.
Step 7: Finishing Touches: Neckline, Armholes, and Hem
These final steps give your dress a polished look.
- Neckline Finish: For a simple finish, fold the raw edge of the neckline under by about 1/2 inch and press. Then, stitch it in place with a twin needle (for a store-bought look) or a zig-zag stitch, gently stretching the fabric as you sew to maintain elasticity. Alternatively, you can add a knit neckband for a more finished appearance.
- Armhole Finish: Repeat the same process for the armholes. Fold the raw edge under by 1/2 inch, press, and stitch using a twin needle or zig-zag stitch.
- Bottom Hem: Try on your dress to determine the perfect length. Trim any excess fabric. Fold the bottom hem up by 1 inch, press, and then fold it up another 1 inch (for a double-fold hem) or just once (for a single-fold hem, which is common with knits). Stitch in place with a twin needle or a stretch stitch.
Expert Tips for a Flawless Finish
Even with simple projects, a few tricks can elevate your results:
- Test Stitches: Always test your stitch settings on a scrap piece of your actual fabric before sewing your dress.
- Use a Walking Foot: If your sewing machine struggles with feeding knit fabric evenly, a walking foot attachment can be a game-changer. It helps feed both layers of fabric simultaneously, preventing stretching and puckering.
- Don’t Pull the Fabric: Allow your sewing machine to feed the fabric naturally. Pulling or pushing can distort the knit and lead to wavy seams.
- Press as You Go: Pressing seams after each step helps to set stitches, flatten edges, and gives your garment a more professional, crisp finish.
- Consider Customization: Once you’re comfortable with the basic pattern, experiment! Add patch pockets, contrast bands, or even incorporate fabric paints or embroidery for truly unique touches.
Styling Your New DIY T-Shirt Dress
The beauty of a T-shirt dress lies in its incredible versatility. Here are just a few ideas for styling your new creation:
- Casual Chic: Pair it with white sneakers and a denim jacket for an effortlessly cool, everyday look.
- Bohemian Vibes: Cinch it with a woven belt, add some layered necklaces, espadrille sandals, and a wide-brimmed hat for a free-spirited feel.
- Dress it Up: Elevate the look with a pair of wedges or block heels, a structured blazer, and some statement earrings for a smart-casual ensemble.
- Layering Fun: Wear it over leggings or skinny jeans for cooler weather, or under a long cardigan or vest for added texture and warmth.
- Beach Ready: Throw it over your swimsuit with flip-flops and a sun hat for the ultimate easy beach cover-up.
Unleash Your Creativity and Enjoy Your Handmade Style!
Creating your own DIY T-shirt dress is more than just a sewing project; it’s an empowering experience that results in a beautiful, comfortable, and highly versatile piece for your wardrobe. It’s a testament to how simple materials and a little creativity can yield truly rewarding fashion. The joy of wearing something you made yourself is incomparable, and the compliments you’ll receive are just an added bonus!
So, gather your materials, clear your workspace, and get ready to create your perfect summer dress. If you’re a visual learner, I highly recommend checking out Mark Montano’s original tutorial (with Make Your Mark) – it beautifully demonstrates each step and brings this fantastic project to life. Happy sewing, and don’t forget to share your amazing creations!