
Embarking on a sewing journey, whether you’re a complete novice or a seasoned enthusiast, can sometimes present its own set of challenges. From tricky zipper installations to unruly fabrics, common sewing mishaps can easily dampen the creative spirit. But what if there were ingenious shortcuts and smart techniques to make every stitch smoother, every seam straighter, and every project more enjoyable? This comprehensive guide compiles an incredible array of easy yet clever sewing hacks designed to revolutionize your crafting experience. Say goodbye to frustration and hello to flawless finishes, even if you’re just starting out.
Prepare to unlock new levels of precision and efficiency as we delve into a series of tips and tricks that promise to elevate your sewing prowess. You might even stumble upon creative methods and design ideas you never knew existed, opening doors to exciting new projects and possibilities. These invaluable insights and innovative approaches are inspired by the exceptional work of Trefa Craft on YouTube, a true beacon for crafting enthusiasts.
Mastering Your Craft: Essential Sewing Hacks for Every Project
Here, we present a collection of practical and effective sewing tips that address common pain points and introduce smart solutions. Each hack is explained with clarity, ensuring you can easily integrate these techniques into your next sewing adventure.
Tip 1: Achieving Perfectly Aligned Zippers with Ease
Sewing zippers can often be a daunting task, especially for beginners. The challenge lies in achieving a perfectly straight and even installation without any puckering or misalignment. This clever technique simplifies the process significantly, ensuring a professional finish every time. Instead of struggling to hold the zipper in place while stitching, we introduce a method that guarantees precision.
Begin by laying your zipper directly onto the fabric where it will be installed. Using a fabric marker or tailor’s chalk, lightly mark the exact points where the zipper ends will rest on your fabric. This initial marking acts as your guide. Next, remove the zipper and bring the two fabric pieces (that the zipper will join) together, right sides facing. Stitch them together temporarily along the seam line where the zipper will eventually go. This temporary stitch, often called a basting stitch, should be done in the middle section that the zipper will cover. The key is to use a longer stitch length so it can be easily removed later. This basted seam creates a stable foundation.
With the fabrics temporarily joined, carefully place the zipper on top of this basted seam, aligning its edges perfectly with the seam line and your initial markings. Pin the zipper securely in place. Now, using your sewing machine’s zipper foot, stitch the zipper onto both sides of the fabric. The pre-basted seam provides excellent stability, preventing the fabric from shifting and ensuring your zipper is sewn on straight. Once the zipper is securely attached on both sides, carefully use a seam ripper to remove the temporary basting stitches from the middle of the fabric, revealing your perfectly installed zipper. This method ensures an even, professional-looking zipper without the usual headaches, making zipper installation a breeze for any sewing project, from garments to bags.
Tip 2: Mastering Flawless Fabric Edges Without Shortening or Creasing
Finishing fabric edges is crucial for a polished look and to prevent fraying, but traditional hemming methods can sometimes shorten your fabric or create unwanted bulk and creases. This clever hack provides an elegant solution, allowing you to achieve a smooth, professional edge finish while preserving the original length and fluidity of your material. It’s particularly useful for delicate or flowy fabrics where a crisp, clean edge is desired without the stiffness of a double-fold hem.
To implement this technique, select a small strip of fabric that complements your main project. This strip will serve as the binding for your raw edge. Fold this small fabric strip in half lengthwise, ensuring the raw edges align neatly. Now, take the raw edge of your main project fabric and gently insert it underneath the fold of the smaller strip. The folded edge of the small strip should envelop the raw edge of your main fabric, encasing it completely.
Once the raw edge is tucked securely within the fold, pin everything in place to prevent any shifting. Using your sewing machine, stitch along the open side of the folded strip, ensuring your needle catches all layers: the top fold of the small strip, the main fabric’s edge, and the bottom fold of the small strip. This single stitch will secure the binding in place, effectively covering the raw edge. The result is a beautifully finished edge that looks incredibly neat and tidy, without any creasing on the main fabric or a reduction in its length. This method is excellent for cuffs, necklines, or any edge requiring a clean, seamless finish.
Tip 3: Simplifying Pocket Sewing for Professional Results
Pockets are a fantastic addition to any garment, offering both functionality and style. However, constructing them can often be perceived as intricate, involving multiple layers and precise alignment. This tip breaks down the process of sewing a neat, professional-looking pocket into manageable steps, making it accessible even for those new to garment construction.
The secret lies in preparing the pocket components systematically. First, for the pocket’s visible cover (the part you see on the outside), select two pieces of fabric. These should be cut to the exact size and shape of your desired pocket. Place these two fabric pieces right sides together. Using a pattern or freehand, draw the exact outline of your pocket onto the fabric. Sew along this drawn line, leaving a small opening to turn the fabric right side out. Carefully trim the seams, clip the corners (if applicable), and then flip the pocket cover right side out. Press it flat and set it aside; this is your perfectly shaped pocket flap or cover.
Next, focus on the inside of the pocket. Take another piece of fabric, preferably of the same design or a complementary one, which will form the main body of the pocket. Fold this fabric in half. Now, take a different fabric – this could be a lining fabric or any contrasting material – and insert it underneath the folded main pocket fabric. This contrasting piece will serve as the inner lining of your pocket, adding durability and a clean finish. Stitch these layers together, creating the interior structure of your pocket bag. Finally, with your pocket cover ready and your pocket interior formed, you will use a complete pocket pattern piece (which defines the overall shape and attachment points of the pocket) to sew all the individual pieces together. This structured approach ensures all elements align correctly, resulting in a beautifully tailored and functional pocket.
Tip 4: Effortless Cutting of Slippery and Silky Fabrics
Working with soft, silky, or delicate fabrics like chiffon, satin, or silk can be a tailor’s nightmare. Their tendency to shift, slip, and fray makes achieving a precise, straight cut incredibly challenging, often leading to distorted edges and wasted material. This ingenious hack offers a surprisingly simple yet highly effective solution to combat the slipperiness, allowing you to cut even the most elusive fabrics with remarkable accuracy and ease.
The key to this method is to create a perfectly straight guide directly on the fabric itself. Instead of relying solely on pins or weights, which can still allow for movement, you’ll utilize the fabric’s own weave. Begin by identifying the bottom side of the fabric from which you intend to make your cut. Often, there’s a selvedge edge or a pre-cut edge from which you can start. Once you’ve determined your starting point, make a small, shallow snip into the very edge of the fabric at the desired cutting line. Be careful not to cut too deep, just enough to catch a single thread.
From this small snip, gently grasp a single thread that runs parallel to the direction you wish to cut. Carefully and steadily pull this thread. As you pull, you’ll notice it creates a visible “ladder” or puckered line across the fabric. This line is perfectly straight, following the grain of the fabric. Continue pulling the thread until it either breaks or you reach the end of the fabric piece. This created “gap” or visual guide is now your flawless cutting line. You can then easily cut through the fabric along this perfectly straight line with your scissors, confident that your cut will be precise and your fabric undistorted. This method eliminates the frustration associated with cutting tricky materials, saving time and ensuring a clean, professional edge for your projects.
Tip 5: Achieving Clean and Secure Button Stitches for Lasting Durability
A well-attached button is not only functional but also contributes significantly to the overall finish and longevity of a garment. Flimsy button stitching can lead to buttons becoming loose or falling off prematurely, a common annoyance for many. This hack focuses on a technique that ensures your buttons are not only securely fastened but also look impeccably neat, adding a touch of craftsmanship to your sewing projects.
The first step to a durable button is preparing the fabric. Before attaching the button, stitch the thread a few times directly onto the fabric at the exact spot where you want the button to be placed. This initial “base” of stitches reinforces the fabric, giving the button a more stable foundation to rest upon and preventing the fabric from tearing around the buttonholes over time. Once the base is secure, position your button over these initial stitches. Pass your needle and thread up through one hole of the button, then down through an adjacent hole, securing the button to the fabric. Repeat this process multiple times, passing the thread through the buttonholes and the reinforced fabric, ensuring the button is firmly attached.
The final touch for a truly clean and secure button stitch involves creating a shank (a small raised column of thread under the button) and locking the stitches. Before making your final pass to tie off the thread, bring your needle up through the fabric but *not* through the buttonholes. Instead, wrap the thread several times tightly around the stitches directly underneath the button, between the button and the fabric. This forms a small, sturdy thread shank. A shank is crucial, especially for thicker fabrics, as it provides space for the fabric to gather under the button without puckering, making the button easier to fasten. After creating the shank, pass your needle back down through the fabric, securing the thread with a knot on the backside. This technique creates a durable, neat, and professional-looking button attachment that will withstand regular wear and washing, ensuring your buttons stay put for years to come.
Tip 6: Crafting an Easy and Stylish Flower Hair Tie
Adding a personal touch to your accessories is a delightful aspect of sewing, and this hack offers a simple yet charming project: an elegant flower hair tie. This DIY accessory is not only easy to make but also allows for creative expression through fabric choices, making it a perfect project for using up fabric scraps or experimenting with different textures and patterns. It’s an excellent way to create custom gifts or personalize your own style with a handmade touch.
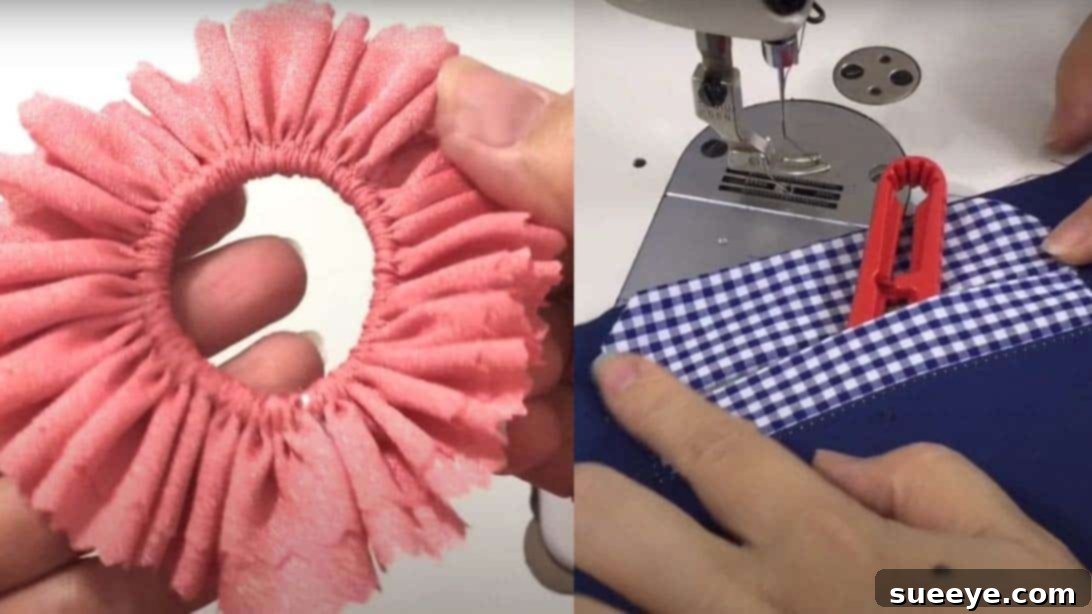
To begin, select a medium to thick fabric of your choice. Fabrics like cotton, linen, or even velvet work wonderfully for this project, offering enough body to hold the flower shape. Cut a rectangular piece of this fabric to your desired length and width (the length will determine how “full” your flower is, and the width will determine its height). Once cut, fold the fabric in half lengthwise, ensuring the right sides are together if your fabric has a distinct right and wrong side. The raw edges should align. Before stitching, take a garter band (an elastic hair tie) and carefully insert it into the middle of the fold, positioned along one of the raw edges. This garter will become the core of your hair tie.
Now, carefully stitch along the top edge of the folded fabric, making sure to catch the garter band within the seam. This initial stitch secures the garter, preventing it from slipping out during the subsequent steps. Once the garter is locked in place, continue stitching along the entire length of the raw edge of the fabric, effectively sewing the two halves of the fabric together, with the garter still tucked inside the fold. As you stitch, gently pull the garter band from the other end. This action will cause the fabric to gather and create beautiful little pleats, giving your “flower” its characteristic ruffled look. Continue until you’ve sewn the entire length of the fabric and gathered it onto the garter. Finally, bring the two ends of the garter together and tie them securely in a knot. Trim any excess garter length. The fabric will naturally form a lovely, ruffled flower shape around the garter, creating a unique and stylish hair accessory that’s both practical and beautiful.
Tip 7: Adding Creative Flair and Customization to Loose Sleeves
Plain or loose-fitting sleeves can sometimes feel uninspired, but with a touch of creativity, they can be transformed into a stylish focal point of any garment. This hack offers a simple yet impactful way to add decorative details, a cinched effect, or even adjustable styling to otherwise basic sleeves. It’s an excellent method for upcycling old garments, adding a unique design element to new creations, or simply experimenting with different looks.
To infuse some fun and functionality into your sleeves, start by identifying the section of the sleeve you wish to embellish, typically the bottom half or cuff area. Cut a small, rectangular piece of contrasting or complementary fabric. This piece will be inserted underneath the sleeve fabric, acting as a decorative element and a channel for a tie. Place this small fabric piece underneath the bottom portion of your sleeve, aligning its edges as desired. Pin it securely in place to ensure it doesn’t shift during stitching.
Using your sewing machine, stitch this small fabric piece to the underside of the sleeve. The key here is the stitching pattern: stitch along the middle of the inserted fabric first, creating a central anchor. Then, stitch along each side of the inserted fabric, but be sure to leave two small gaps beside the center stitch. These unstitched gaps will serve as openings for threading a string or tie. Once the fabric piece is securely attached with the two channels created by the gaps, you can then insert a decorative string, ribbon, or tie through these openings. Use a safety pin or a bodkin to easily thread the string through the channel. Once threaded, pull the string to gather the sleeve fabric, creating a lovely cinched effect or a charming ribbon detail. The beauty of this technique is its versatility; you can leave the string loose for a relaxed look, tie it in a bow for a feminine touch, or pull it taut for a more structured fit. This simple modification breathes new life into sleeves, allowing for endless customization and personalized style.
Elevate Your Sewing Journey Today!
These seven clever sewing tips and tricks are more than just shortcuts; they are gateways to a more confident and creative sewing experience. By incorporating these hacks into your routine, you’ll not only save time and avoid common pitfalls but also develop a deeper understanding of fabric manipulation and garment construction. Whether it’s achieving perfectly set zippers, pristine fabric edges, or unique decorative elements, each tip is designed to enhance your skills and empower you to tackle more complex projects with ease.
Don’t let sewing challenges hold you back. Embrace these smart techniques, experiment with new ideas, and discover the immense satisfaction of creating beautiful, professional-quality items with your own hands. We encourage you to try these methods on your next project and witness the transformative results firsthand. For more inspiring tutorials and creative insights, remember to visit Trefa Craft on YouTube, the brilliant minds behind these fantastic ideas. Happy sewing!