
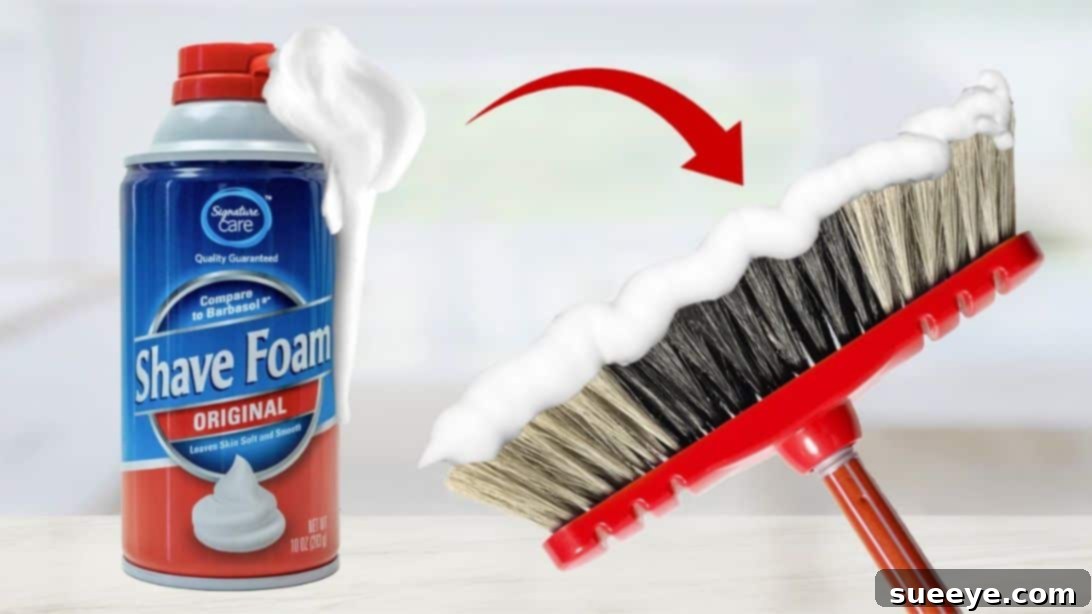
In the quest for a sparkling clean home, we often find ourselves reaching for an arsenal of specialized cleaning products, each promising to tackle a unique mess. However, what if a surprisingly effective and incredibly budget-friendly solution was already hiding in your bathroom cabinet? That’s right – humble shaving foam is far more than just a pre-shave essential. It’s a remarkable, multi-purpose cleaning agent that can revolutionize your cleaning routine, especially in high-traffic areas like your kitchen and bathroom.
Often overlooked, shaving foam offers an economical alternative to many expensive store-bought cleaners. Its availability at any dollar store means you can stock up on this versatile cleaner without breaking the bank. Imagine achieving impressive cleaning results while significantly cutting down on your household expenses!
RELATED: How to Clean Your Toilet with Shaving Cream
Prepare to be genuinely amazed by the sheer range of surfaces and items you can clean, and the substantial savings you can accrue, by incorporating these ingenious shaving foam cleaning tips and hacks into your routine. This article will guide you through the various applications, demonstrating how this everyday product can become your secret weapon against grime, soap scum, and unpleasant odors. For a visual demonstration of these fantastic cleaning techniques, be sure to watch the informative video tutorial by Joy Home Remedies on YouTube.
Unlock the Secret: Unexpected Ways Shaving Foam Can Revolutionize Your Cleaning Routine
Before we dive into the detailed how-to guides, let’s outline the key areas where shaving foam truly shines as a cleaning powerhouse. Its unique formulation, often containing mild detergents and foaming agents, makes it surprisingly effective for lifting dirt and leaving surfaces fresh. From tackling stubborn kitchen grease to banishing bathroom buildup, shaving foam is a versatile solution you’ll wonder how you ever lived without.
Where You Can Clean with Shaving Foam:
- Stoves and Ovens
- Kitchen Cabinets
- Bathtubs and Showers
- Bathroom and Kitchen Tiles
- Toilet Bowls and Brushes
- And many more surprising spots!
Now, let’s explore the practical methods for transforming your home with these simple yet incredibly effective shaving foam cleaning hacks. You’ll find that a little foam goes a long way in achieving a remarkably clean and fresh living space.
How to Clean with Shaving Foam: A Detailed Guide
#1: Stove and Oven: Your Ultimate Grease Buster
Kitchen stoves and ovens are notorious for accumulating stubborn grease, baked-on food, and general grime. Traditional cleaning sprays often come with harsh chemicals and strong, lingering odors that can be unpleasant and sometimes even irritating. Shaving foam presents itself as an excellent, less offensive alternative for tackling these greasy messes. Its thick, foamy consistency allows it to cling to vertical surfaces and penetrate tough stains, breaking down grease without the noxious fumes.
To use, simply dispense a generous amount of shaving foam onto a damp sponge or a microfiber cloth. Apply this directly to the areas of your stove or oven that require cleaning. For particularly stubborn spots, allow the foam to sit for 5-10 minutes to give it time to work its magic. Then, using the sponge or cloth, vigorously scrub the grimy surfaces. You’ll notice the foam lifting and dissolving the grease. Once satisfied, rinse the area thoroughly with hot water. The hot water helps to wash away any residue and ensures a streak-free finish. Finally, wipe the surface dry with a clean, soft cloth for a gleaming, fresh result. This method not only cleans effectively but also leaves a subtle, pleasant scent, far superior to many chemical cleaners.
#2: Kitchen Cabinet Refresh: Banishing Grime and Restoring Shine
Kitchen cabinets, despite their constant exposure to cooking splatters, steam, and everyday handling, are often the last areas on our cleaning checklist, if they make it there at all. Over time, a film of grease, dust, and general kitchen grime can build up, dulling their appearance and making them feel sticky to the touch. Regular cleaning is essential for maintaining their look and hygiene, and shaving foam offers a surprisingly quick and effective solution.
For a swift and easy cleaning method that brings back their shine, apply a small amount of shaving foam directly onto a clean microfiber cloth. Gently rub the cloth, laden with foam, all over the surfaces of your kitchen cabinets. Pay particular attention to areas around handles and knobs where grease and fingerprints tend to accumulate. Continue rubbing until the grime is visibly lifted and the cabinet surface appears clean and shiny. The mild abrasive action combined with the foam’s cleaning agents works wonderfully on various cabinet finishes. After cleaning, rinse the cabinets lightly with a damp cloth to remove any foam residue, then immediately dry them with a separate clean, soft towel to prevent water spots and restore their luster. This method revitalizes your cabinets, making them look and feel refreshed without much effort.
#3: Bathtub and Shower: Your Soap Scum Solution
Bathtubs and showers are breeding grounds for soap scum, hard water stains, and general grime, which can make them look dull and uninviting. Fighting this buildup can often feel like a never-ending battle, requiring vigorous scrubbing with harsh chemicals. Enter shaving foam, a gentle yet potent agent for dissolving and lifting away this stubborn residue, leaving your bathroom surfaces sparkling clean.
To effectively clean your bathtub and shower, apply a generous, even layer of shaving foam over the entire surface you wish to clean. Ensure good coverage, especially on areas with heavy soap scum. The foam will adhere to the surface, allowing its cleaning properties to penetrate and break down the grime. Let the shaving foam sit undisturbed for approximately 10 to 15 minutes. This dwell time is crucial as it allows the ingredients in the foam to work on dissolving the soap scum and mineral deposits. After the waiting period, simply rinse the surfaces thoroughly with water. You’ll find that the soap scum and dirt wash away with remarkable ease, often requiring minimal to no scrubbing. For particularly tough spots or crevices, you can apply shaving foam directly onto a scrub brush or sponge and gently agitate the area before rinsing. This method not only cleans but also leaves your bathroom with a fresh, clean scent, eliminating that typical stale bathroom smell.
#4: Tiles and Grout: A Simple Brightener
Bathroom and kitchen tiles, along with their grout lines, are constantly exposed to dirt, moisture, and general wear and tear, leading to discoloration and a dingy appearance. Cleaning grout can be especially challenging, often requiring specialized brushes and strong cleaners. Shaving foam, with its mild abrasive and foaming action, proves to be a surprisingly effective solution for cleaning both tiles and the notoriously difficult-to-clean grout.
To rejuvenate your tiled surfaces, begin by applying a layer of shaving foam onto a soft cloth or directly onto the tiles. Rub the foam gently over the entire surface of the tiles, paying close attention to the grout lines. The foam will seep into the porous grout, helping to lift dirt and mildew. For best results, allow the shaving foam to sit on the tiles and grout for a few minutes – typically 5 to 10 minutes – to give it ample time to break down the embedded grime. Following this dwell time, rinse the area thoroughly with clean water. You might be pleasantly surprised at how much dirt and discoloration simply wash away. Finish by wiping the tiles dry with a clean towel to prevent water spots and reveal their renewed shine. This method not only cleans but also brightens your tiles and grout, making your rooms look fresher and more inviting.
#5: Toilet Brush and Toilet: The Ultimate Sanitizer and Freshener
Maintaining a clean toilet and, importantly, a clean toilet brush, is fundamental for bathroom hygiene. The toilet brush, in particular, often gets overlooked and can harbor unpleasant bacteria and odors. Shaving foam offers a simple yet highly effective way to sanitize and freshen both your toilet bowl and the brush itself, making this often-dreaded task much more manageable.
For your toilet brush, a quick and effortless clean can be achieved by liberally applying some shaving foam directly onto the bristles of the brush. Once coated, place the brush back into its holder or hang it over the toilet rim (ensure it’s not touching the floor) and leave it overnight. The powerful cleaning agents in the shaving foam will work tirelessly to break down any gunk, grime, and odor-causing bacteria that have accumulated on the bristles. The next morning, a simple rinse with hot water will leave your toilet brush looking and smelling significantly cleaner and more sanitary.
When it comes to the toilet bowl itself, shaving foam can work wonders. Dispense a generous amount of foam around the inside rim of the toilet bowl, allowing it to coat the sides and sink into the water. Let it sit for at least 15-20 minutes, or even longer for a deeper clean. The foam will dissolve hard water stains, grime, and mineral deposits. After the dwell time, give the bowl a quick scrub with your now-clean toilet brush and flush. Not only will the inside of your toilet bowl be visibly cleaner, but the pleasant scent of the shaving foam will also leave your bathroom smelling fresh and inviting. For the exterior of the toilet, apply foam to a cloth and wipe down the surfaces, then rinse and dry, ensuring a complete and hygienic clean.
Why Shaving Foam Is Your Next Cleaning Superstar
Beyond its impressive cleaning capabilities, shaving foam offers several advantages that make it an ideal choice for the eco-conscious and budget-minded cleaner. Its mild formulation typically contains fewer harsh chemicals compared to many industrial-strength cleaners, making it safer for your home and family. Furthermore, its ability to tackle a wide range of messes means you can reduce the number of specialized products you keep under your sink, simplifying your cleaning arsenal.
Its cost-effectiveness is undeniable. A can of shaving foam, often available for just a dollar, provides multiple cleaning sessions, offering significant savings over time. The pleasant, fresh scent it leaves behind is a welcome bonus, far preferable to the strong, sometimes overwhelming chemical odors of traditional cleaners. This versatile product is readily available everywhere, making it an easy and convenient option for those impromptu cleaning sessions.
Always remember to test shaving foam on an inconspicuous area first, especially on delicate or unfamiliar surfaces, to ensure compatibility and prevent any potential discoloration or damage. While generally safe, this simple step is a good practice for any new cleaning product.
*All images and cleaning inspiration for these fantastic tips are credited to Joy Home Remedies via YouTube. We highly recommend visiting their channel and subscribing for more brilliant home care and DIY solutions!
Embrace the Power of Shaving Foam for a Cleaner Home
Who knew that a product designed for a smooth shave could also deliver a spectacularly clean home? From cutting through stubborn kitchen grease to banishing bathroom soap scum and freshening up your toilet, shaving foam proves to be an indispensable cleaning hack. Its affordability, effectiveness, and pleasant scent make it a standout choice for anyone looking to simplify their cleaning routine and save money.
So, next time you’re at the store, grab an extra can of shaving foam. You’ll be well-equipped to tackle some of your toughest household messes with ease, achieving a sparkling clean and fresh home without resorting to harsh chemicals or expensive specialized products. Give these easy cleaning tricks a try and discover the surprising power of shaving foam for yourself!