
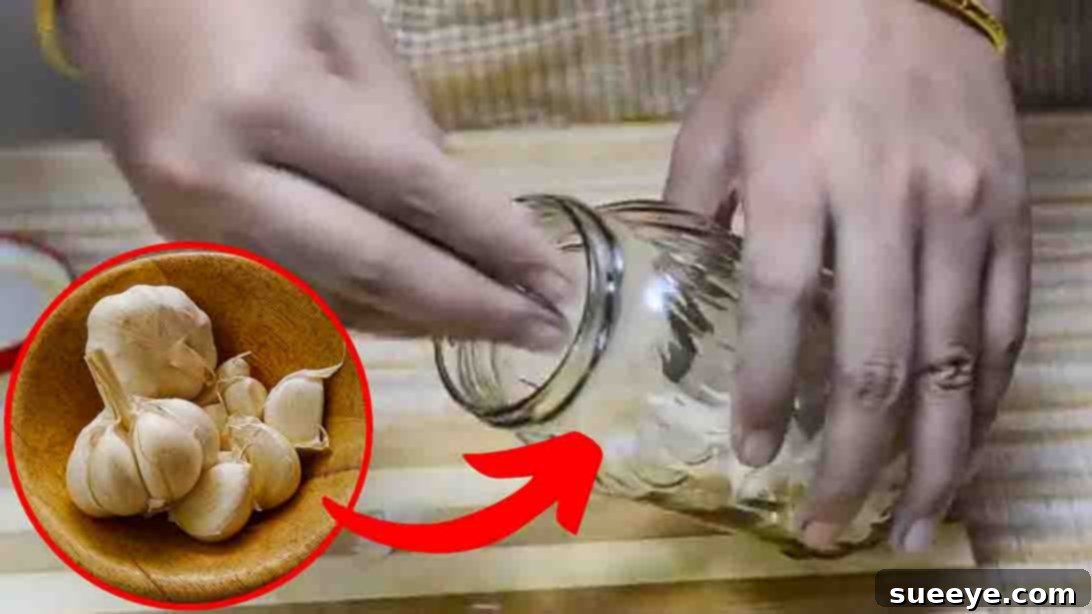
Garlic is an indispensable ingredient in countless cuisines worldwide, lending its pungent, aromatic magic to everything from hearty stews to delicate sautés. However, the one universal challenge every home cook and professional chef faces is the tedious task of peeling garlic cloves. Those papery skins cling stubbornly, often turning what should be a simple step into a time-consuming chore. If you’ve ever found yourself struggling to peel enough garlic for a recipe, you’re not alone. But what if there was a way to make this process incredibly simple, fast, and even enjoyable?
Unlock Speedy Meal Prep: 5 Revolutionary Ways to Peel Garlic Fast
Gone are the days of laboriously picking at individual cloves. We’ve uncovered ingenious methods that will transform your kitchen experience, making garlic preparation effortless. Thanks to the brilliant tips shared by Taste Unfold on YouTube, you can now master the art of rapid garlic peeling, saving precious minutes and significantly speeding up your meal prep. These techniques are game-changers, promising to streamline your cooking and ensure you always have fresh garlic ready at hand. Prepare to discover five incredible hacks that will have you wondering why you haven’t been peeling garlic this way all along!
Why Master the Art of Fast Garlic Peeling?
Beyond just saving time, efficient garlic peeling contributes to a more enjoyable cooking process. It reduces frustration, encourages the use of fresh ingredients over pre-minced alternatives, and ultimately enhances the flavor profile of your dishes. When peeling becomes quick and easy, you’re more likely to incorporate this powerhouse ingredient into your daily meals, benefiting from its incredible taste and numerous health properties. These methods aren’t just about speed; they’re about making cooking more accessible, more efficient, and more satisfying.
Explore 5 Game-Changing Garlic Peeling Techniques
Method 1: The Jar Shake Technique
This method is a classic for a reason: it’s incredibly effective, surprisingly fun, and ideal for peeling an entire head of garlic in one go. The principle is simple yet ingenious: friction. By vigorously shaking garlic cloves within an enclosed space, the skins rub against each other and the container’s surface, causing them to loosen and detach without any direct manual effort.
How to Do It: First, break your garlic head into individual cloves. There’s no need to trim the ends or pre-loosen anything. Place all the separated cloves into a sturdy jar or a clean, empty container with a tight-fitting lid. A glass jar, like a mason jar, works wonderfully because of its rigidity and transparency, allowing you to see the magic happen. Ensure the lid is securely fastened to prevent any cloves from escaping during the vigorous shaking. Now, with a firm grip, shake the jar vigorously for about 15 to 30 seconds. You’ll hear the garlic clattering around inside, and soon, you’ll see the skins beginning to separate from the cloves.
Tips for Success: For best results, use a jar that’s not too large for the amount of garlic you’re peeling; you want enough cloves to tumble and create friction. A slight crack or bruise on a few cloves can actually help kickstart the process, as their natural oils can make the skins a bit more pliable. Some chefs even suggest using two metal bowls of the same size, placing one over the other to form a sphere, then shaking. This can be particularly effective for larger batches. Once shaken, simply open the jar and separate the perfectly peeled cloves from their papery skins. This method is a fantastic time-saver for recipes requiring a significant amount of garlic.
Method 2: The Chef’s Vertical Press
For those times when you only need a single clove or two, the jar shake might be overkill. This method, often favored by professional chefs for its speed and precision, involves a swift, firm press that quickly loosens the skin. It’s an efficient technique that minimizes waste and keeps your hands relatively clean.
How to Do It: Select a single garlic clove and place it on a clean, sturdy cutting board or work surface. Orient the clove so that its widest, flat side is resting on the surface. Now, grab a chef’s knife or a utility knife – any knife with a broad, flat blade will work. Place the flat side of the knife blade directly over the garlic clove. With your dominant hand, apply firm, even pressure directly down onto the blade with your palm. You don’t need to “smash” it; a strong, controlled press is sufficient. You should feel a slight give or a soft crunch as the clove’s structure is compromised, and the skin begins to crack and separate.
Tips for Success: The key here is firm, consistent pressure, not brute force. Too much force can excessively bruise the garlic, while too little won’t loosen the skin effectively. Once pressed, the skin will be visibly cracked and easily pulled away from the clove. This method works best for fresh, plump cloves. Older, drier garlic might require a slightly more aggressive press or could benefit from a quick soak first. Always be mindful of knife safety; keep your fingers clear of the blade’s edge while pressing. This technique is incredibly quick for individual cloves and perfect for recipes where you’re adding garlic on the fly.
Method 3: The Microwave Warm-Up
This lesser-known but incredibly effective method leverages the power of heat to make garlic peeling a breeze. The microwave gently warms the garlic, causing the moisture within the clove to expand slightly. This expansion creates a subtle separation between the clove and its papery skin, making the peeling process almost effortless.
How to Do It: Take your garlic cloves, whether whole or separated from the head, and place them on a microwave-safe plate or in a small bowl. Ensure they are not overlapping excessively for even heating. Pop them into the microwave and heat for approximately 10 to 30 seconds. The exact time may vary depending on your microwave’s wattage and the size of your garlic cloves. Start with 10 seconds and add more time in small increments if needed. You’re looking for the garlic to be just warm to the touch, not cooked or soft.
Tips for Success: Do not overcook the garlic, as this can alter its flavor and texture, turning it slightly rubbery or giving it a cooked aroma, which might not be desirable if you plan to use it raw. After heating, carefully remove the cloves. You’ll notice that the skins are now remarkably loose and can often be slipped off with just a gentle squeeze or peel. The root end, in particular, will become much easier to trim away. This method is particularly useful when dealing with larger, tougher cloves or older garlic that tends to have very stubborn skins. It’s quick, clean, and requires minimal physical effort, making it a favorite for many busy cooks.
Method 4: The Classic Knife Smash
Often seen in professional kitchens and home cooking videos, the knife smash method is a vigorous yet highly efficient technique for quickly peeling garlic, especially when you need crushed or minced garlic right away. It’s a satisfying method that relies on brute force to separate skin from flesh.
How to Do It: Place a garlic clove on a sturdy cutting surface. Using the flat side of a chef’s knife, firmly lay it over the garlic clove. Now, with the palm of your hand, press down sharply and decisively onto the knife blade. You want to apply enough pressure to “smash” the garlic clove, causing it to flatten slightly and the skin to burst open or significantly crack. You should hear a satisfying crunch.
Tips for Success: The key to this method is confidence and control. Ensure your knife is clean and the surface beneath is stable. While applying pressure, keep your fingers curled away from the blade’s edge for safety. The skins will often practically fall off once the clove has been properly smashed. This technique not only peels the garlic but also begins the process of mincing or crushing it, saving you an additional step if that’s your intended use. It’s incredibly fast for a single clove or a small handful. Be aware that the garlic will be slightly bruised or flattened, which might not be ideal if you need perfectly whole, unblemished cloves for aesthetic purposes. However, for most culinary applications, this slight alteration is negligible and perfectly acceptable.
Method 5: The Water Soak Method
If you prefer a gentler, hands-off approach, or if you plan to prepare a large batch of garlic for future use, the water soak method is an excellent choice. This technique relies on hydration to soften the garlic’s papery skin, making it incredibly easy to remove without any aggressive force.
How to Do It: Start by separating your garlic head into individual cloves. There’s no need to peel them at this stage. Place all the cloves you intend to peel into a bowl. Fill the bowl with warm (not hot) water, ensuring that all the garlic cloves are fully submerged. Let the garlic soak for approximately 10 to 30 minutes. The warmth of the water helps to soften the outer layers of the garlic skin, making them less brittle and more pliable.
Tips for Success: While cold water can also work, warm water significantly speeds up the softening process. You’ll notice that after soaking, the skins become translucent and much easier to manipulate. Many cooks find that the root end and the stem end of the clove become particularly easy to snip or pull off after a good soak, often bringing a significant portion of the skin with them. Once soaked, you can simply drain the water and peel the cloves by hand. The skins will practically slide off with minimal effort. This method is fantastic for bulk peeling, as it allows you to prepare many cloves simultaneously with very little active work. It’s also ideal if you want perfectly intact, unbruised garlic cloves for specific recipes or pickling.
Choosing Your Perfect Peeling Method
With these five fantastic methods at your disposal, you might wonder which one is best. The answer largely depends on your specific needs:
- For large quantities: The Jar Shake or Water Soak methods are highly efficient.
- For quick, single cloves: The Chef’s Vertical Press or Knife Smash are incredibly fast.
- For stubborn skins or older garlic: The Microwave Warm-Up or Water Soak will work wonders.
- For perfectly intact cloves: The Water Soak method is your best bet, followed by the Jar Shake if done carefully.
Don’t be afraid to experiment with each technique to find your personal favorites. You might even find yourself using a combination of methods depending on the recipe and the amount of garlic required.
Transform Your Kitchen Workflow Today!
Say goodbye to the frustration of garlic peeling and embrace a more efficient, enjoyable cooking experience. These five methods, ranging from clever kitchen hacks to chef-approved techniques, offer a solution for every situation. By integrating these tips into your routine, you’ll not only save time and effort but also ensure that your dishes are always infused with the fresh, vibrant flavor of perfectly prepped garlic.
We extend our gratitude to Taste Unfold for sharing these invaluable insights. Make sure to visit their channel for more incredible kitchen tips and culinary inspiration. Try these methods today, share them with your fellow food enthusiasts, and elevate your cooking to a whole new level!