
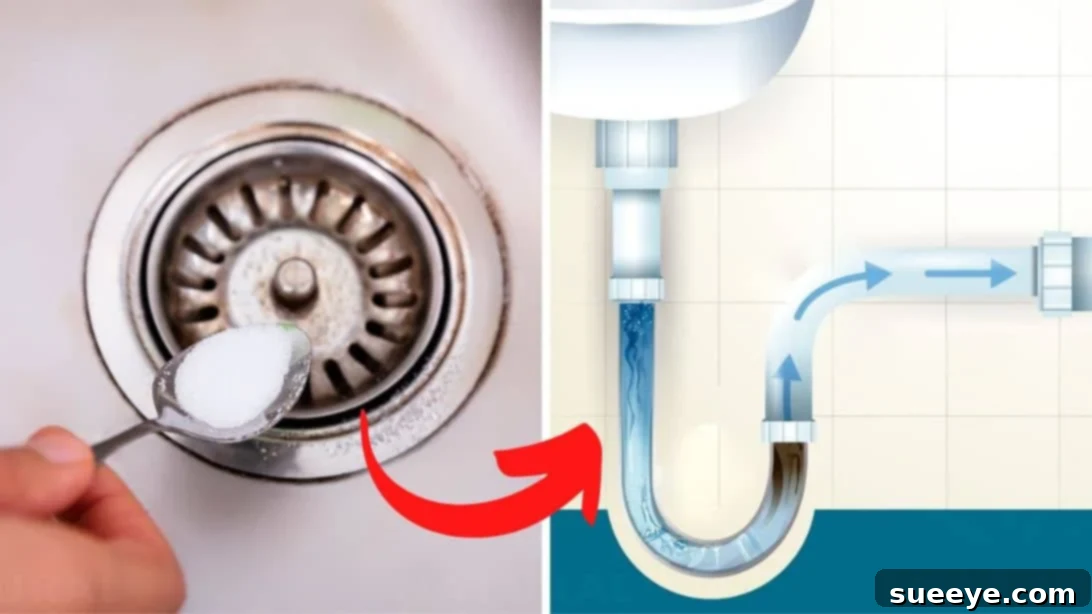
Say Goodbye to Clogged Drains: 5 Easy & Natural Home Remedies
Few household frustrations rival the annoyance of a slow-draining or completely clogged sink. Whether it’s your kitchen drain struggling with grease buildup or your bathroom sink battling hair and soap scum, a blocked drain can disrupt your daily routine and lead to costly plumber calls. But what if you could tackle many common drain clogs using simple, everyday ingredients found right in your home?
You’re in luck! This comprehensive guide will walk you through five incredibly easy, budget-friendly, and effective DIY methods to clear your drains, inspired by the practical tips from Natural Cures on YouTube. Forget expensive chemical drain cleaners that can harm your pipes and the environment, or the unexpected expense of a professional. With these techniques, you can restore your drains to their free-flowing glory and regain peace of mind.
Before diving into the methods, remember that prevention is always better than cure. Regularly maintaining your drains can significantly reduce the frequency of clogs. However, when a blockage does occur, these home remedies offer a fantastic first line of defense. Let’s get your water flowing freely again!
Before You Start: Essential Tips for Safe & Effective DIY Drain Cleaning
While these methods are generally safe and natural, a few precautions and best practices will ensure the best results and protect your plumbing:
- Safety First: When working with hot water, always use heat-resistant gloves to protect your hands.
- Assess the Clog: These methods are most effective for minor to moderate clogs caused by grease, food particles, hair, and soap scum. For severe blockages, multiple clogged drains, or backed-up sewage, it’s best to call a professional plumber.
- Avoid Mixing Chemicals: Never mix different drain cleaning products, especially commercial chemical cleaners with these natural remedies. Dangerous chemical reactions can occur.
- Remove Standing Water: For some methods, it’s helpful to remove as much standing water from the sink as possible using a cup or a small bucket before applying the solution.
- Protect Surfaces: Keep a towel or cloth handy to wipe up any spills, especially around delicate countertop materials.
- Be Patient: Natural remedies often require a bit of waiting time to work their magic. Don’t rush the process.
1. The Power Duo: Baking Soda and Vinegar
This classic combination is a household staple for a reason. Baking soda (sodium bicarbonate) is an alkali, and white vinegar (acetic acid) is, well, an acid. When they mix, they create a fizzing chemical reaction that helps break down grease, grime, and other organic matter clinging to your pipes. The abrasive action and gas bubbles produced can dislodge smaller clogs effectively.
How to Unclog Your Drain with Baking Soda and Vinegar:
- Prepare Your Drain: If there’s standing water in the sink, remove as much as you can. You want the baking soda to go directly into the drain opening.
- Add Baking Soda: Carefully pour 1/2 to 1 full cup of baking soda directly into the clogged drain. The amount depends on the severity of the clog; start with less for minor issues, more for tougher ones.
- Let It Settle: Allow the baking soda to sit in the drain for about 1 minute. This gives it a moment to coat the inside of the pipe near the blockage.
- Introduce Vinegar: Slowly pour 1 cup of white vinegar down the drain. You’ll immediately hear and see a fizzing reaction. This effervescence is crucial for dislodging debris.
- Wait and React: Cover the drain opening with a stopper or a heavy cloth to help contain the reaction and force the fizzing action deeper into the pipes. Let it sit for at least 30 minutes, or even up to an hour for stubborn clogs. You might notice a bad-smelling foam emerging from the drain – this indicates the solution is breaking down the blockage.
- Flush with Hot Water: After the waiting period, flush the drain generously with very hot tap water (or boiled water, if available and safe for your pipes). This will rinse away the loosened clog and clear the pipe. Repeat if necessary.
Best for: Minor to moderate clogs caused by grease, food particles, and some soap scum in both kitchen and bathroom sinks.
2. Dish Detergent and Boiling Water: The Grease Buster
When it comes to kitchen sink clogs, fat and grease are often the primary culprits. They solidify in pipes, creating sticky blockages that trap other debris. Dish detergent is specifically formulated to cut through grease, and when combined with very hot water, it can work wonders to melt and emulsify these fatty deposits, allowing them to be flushed away.
How to Unclog Your Drain with Dish Detergent and Hot Water:
- Remove Standing Water: If your sink is full of water, use a plunger to try and clear some of it, or manually scoop out as much water as possible. The goal is to get the detergent and hot water directly to the clog.
- Add Dish Detergent: Squeeze approximately 1/4 cup (or a generous amount, about 4-5 tablespoons) of liquid dish soap directly down the drain. Choose a good quality, grease-cutting dish detergent.
- Boil Water: Boil a large pot of water – about 1.5 to 2 liters (roughly 50-67 fluid ounces). For more stubborn clogs, you can use more.
- Pour Gradually: Carefully and slowly pour the boiling water down the drain, directly over the dish soap. Pouring slowly allows the hot water to gradually melt the grease and the soap to work its magic.
- Wait and Flush: Let the mixture sit in the drain for 15-20 minutes. The hot water will continue to soften the grease, and the detergent will break it down. After waiting, flush the drain with hot tap water for a few minutes to see if the clog has cleared.
- Repeat if Necessary: For very stubborn grease clogs, you might need to repeat this process once or twice.
Best for: Kitchen sink clogs caused by grease and fat buildup. Also effective for some soap scum clogs in bathrooms.
3. The Unexpected Helper: Coca-Cola (or other Cola-Based Sodas)
This might sound surprising, but the phosphoric acid found in cola-based sodas can actually be quite effective at dissolving certain types of clogs, particularly those caused by grease and some organic matter. While not as strong as commercial drain cleaners, it’s a safer and readily available alternative in a pinch.
How to Unclog Your Drain with Coca-Cola:
- Clear the Drain: Ensure there’s no standing water in the sink. The cola needs to make direct contact with the clog.
- Pour the Cola: Take a 2-liter (approximately 67 fluid ounces) bottle of Coca-Cola (or another full-sugar cola-based soda) and gradually pour the entire bottle down the clogged drain.
- Let It Sit: Allow the cola to work for at least 1-2 hours, or even overnight for very stubborn clogs. The longer it sits, the more time the phosphoric acid has to break down the blockage.
- Flush with Hot Water: After the waiting period, flush the drain thoroughly with hot water. Check if the clog has cleared.
Best for: Grease clogs and mild organic matter buildup. It’s a gentler option that won’t damage pipes but might take longer to show results compared to stronger methods.
4. Salt and Boiling Water: The Abrasive Scrubber
Salt, when combined with boiling water, can act as a natural abrasive and help dislodge stubborn blockages. The coarse texture of the salt can scrub the pipe walls, while the boiling water helps melt grease and carry the salt through the clog, breaking it apart.
How to Unclog Your Drain with Salt and Boiling Water:
- Prepare and Protect: Put on heat-resistant and waterproof gloves. Remove any standing water from the sink.
- Add Salt: Pour 1/2 to 1 cup of table salt (coarse salt works even better) directly down the drain.
- Boil Water: Boil a large pot of water (about 1.5 to 2 liters).
- Pour Carefully: Slowly and cautiously pour the boiling water down the drain, directly over the salt. The hot water will dissolve the salt, creating a potent solution that can penetrate and break down the clog.
- Apply Pressure (Optional but Recommended): Immediately after pouring the boiling water, quickly close the drain opening using a drain stopper or a thick cloth. Apply some pressure to create a mild vacuum effect, which can help force the mixture deeper into the clog.
- Wait and Flush: Let the salt and hot water mixture sit for about 10-20 minutes. Then, remove the stopper and flush the drain thoroughly with hot tap water to rinse away the loosened debris.
Best for: Minor clogs caused by grease, soap scum, and some food particles. The abrasive nature of salt makes it useful for scrubbing pipe walls.
5. The Hands-On Approach: Cleaning the Siphon (P-Trap)
Sometimes, the clog isn’t deep within your plumbing system but is simply accumulated dirt, hair, and grime trapped in the P-trap (siphon) directly beneath your sink. This curved section of pipe is designed to hold water to prevent sewer gases from entering your home but is also a common collection point for debris. This method requires a bit more effort but is often the most effective for persistent local clogs.
How to Clean the Siphon (P-Trap):
- Safety and Preparation: Put on rubber gloves. Clear out the cabinet under your sink to give yourself plenty of working space.
- Place a Bucket: Position a bucket or a small container directly underneath the P-trap. This is crucial for catching any water, sludge, and debris that will fall out when you open the trap.
- Locate and Loosen Nuts: The P-trap is the U-shaped or S-shaped pipe section. You’ll see two large slip nuts holding it in place – one connecting it to the tailpiece of the sink and another connecting it to the drainpipe in the wall. Use a pipe wrench or adjustable pliers to carefully loosen these nuts. If they’re hand-tightened, you might be able to twist them by hand.
- Remove the P-Trap: Once the nuts are loose, gently remove the P-trap. Be prepared for some water and accumulated gunk to spill into your bucket.
- Clean the P-Trap: Inspect the inside of the P-trap. You’ll likely find a collection of hair, grease, food scraps, soap scum, and other debris. Use an old sponge, a stiff brush, or even a wire coat hanger (straightened out with a small hook at the end) to thoroughly clean out all the accumulated dirt. Rinse the trap thoroughly under a running faucet with hot water and a neutral detergent.
- Check Pipes: While the P-trap is off, also inspect the tailpiece (the vertical pipe leading from the sink drain to the P-trap) and the drainpipe leading into the wall for any obvious blockages. You might be able to reach in and pull out some debris.
- Reassemble: Carefully reattach the clean P-trap, ensuring the nuts are tightened securely but not overtightened (which can crack plastic pipes). Hand-tighten first, then use pliers for a quarter turn more.
- Test the Drain: Turn on the faucet slowly and check for any leaks around the P-trap connections. Once you confirm no leaks, run the water at full force to ensure proper drainage.
Best for: Stubborn bathroom sink clogs (often hair-related) and kitchen sink clogs (often grease and food particle-related) that are located very close to the drain opening in the P-trap itself.
Preventative Measures: Keeping Your Drains Clear for Good
Once you’ve successfully unclogged your drain, the best way to avoid future headaches is through proactive maintenance. Here are some simple habits to adopt:
- Use Drain Screens: Install inexpensive drain screens or catchers in both your kitchen and bathroom sinks. These will trap hair, food particles, and other debris before they enter your pipes.
- Never Pour Grease Down the Drain: Always dispose of cooking grease, oil, and fat in the trash once it has cooled and solidified. Pouring it down the drain is a primary cause of kitchen clogs.
- Flush with Hot Water: After doing dishes or rinsing anything greasy, run hot water down the kitchen drain for about 30 seconds. This helps flush away residual grease before it has a chance to solidify.
- Regular Baking Soda & Vinegar Flush: Perform a mini-maintenance flush once a month. Pour 1/2 cup of baking soda down the drain, followed by 1/2 cup of white vinegar. Let it sit for 15-30 minutes, then flush with hot water.
- Avoid Harsh Chemicals: While tempting, many commercial chemical drain cleaners can be corrosive to your pipes and harmful to the environment. Stick to natural remedies or mechanical solutions like a snake or plunger.
- Scrape Plates: Scrape all food scraps into the trash or compost bin before rinsing dishes.
When to Call a Professional Plumber
While DIY methods are excellent for many common clogs, there are times when professional help is essential. Don’t hesitate to call a plumber if:
- Clog Persists: You’ve tried multiple DIY methods, and the drain is still blocked or draining very slowly.
- Multiple Clogs: Several drains in your home are clogged simultaneously. This often indicates a deeper issue in your main sewer line.
- Foul Odors: Persistent bad smells from multiple drains could point to sewer line problems.
- Water Backup: If water is backing up into other fixtures (e.g., flushing the toilet causes water to rise in the shower), this is a serious sign of a main line blockage.
- Chemical Cleaner Failure: If you’ve used a commercial chemical drain cleaner and it hasn’t worked, do NOT attempt other methods without consulting a plumber, as mixing chemicals can be dangerous.
Conclusion: Empower Yourself Against Clogged Drains!
Dealing with a clogged drain doesn’t have to be a nightmare scenario involving expensive emergency calls. With these five simple, natural, and effective home remedies, you’re now equipped to tackle most common blockages in your kitchen and bathroom sinks. From the fizzing power of baking soda and vinegar to the hands-on approach of cleaning the P-trap, these methods offer practical, cost-effective solutions.
Remember to always prioritize safety, understand the nature of your clog, and when in doubt, don’t hesitate to call a professional. By integrating these DIY solutions and proactive maintenance into your routine, you can keep your drains flowing smoothly, save money, and enjoy a happier, clog-free home. Give these methods a try and experience the satisfaction of a job well done!