
Indulge in No-Bake Cheesecake Perfection: Easy Recipes for Every Craving
The mere mention of “cheesecake” often conjures images of complex recipes, lengthy baking times, and the daunting task of perfecting a water bath. For many home cooks, especially those with busy schedules or, perhaps, a temporarily out-of-order oven, the traditional cheesecake can seem like an insurmountable culinary challenge. But what if there was a simpler path to cheesecake bliss? What if you could create a luxurious, creamy, and utterly delicious cheesecake without ever turning on your oven?
Enter the world of no-bake cheesecakes! These delightful desserts are a game-changer, offering all the rich flavor and smooth texture you crave with significantly less fuss. My own journey into this revelation began out of sheer desperation when my oven decided to take an unscheduled break. A quick search for “easy no-bake cheesecake recipes” led me to the fantastic resources provided by El Mundo Eats on YouTube, whose clear and concise tutorials proved to be nothing short of destiny. These recipes are not only incredibly easy to follow but also produce results that taste absolutely divine, fitting perfectly into any schedule. Join us as we explore the magic of no-bake cheesecakes, focusing on two irresistible classics: vanilla and chocolate.
The Irresistible Allure of No-Bake Cheesecakes
No-bake cheesecakes have soared in popularity, and for good reason. They offer a host of advantages that make them a preferred choice for both novice bakers and seasoned dessert enthusiasts alike. Understanding these benefits will undoubtedly convince you to try your hand at these simple yet spectacular treats.
- Unmatched Convenience: The most obvious advantage is the complete absence of baking. This means no preheating the oven, no worrying about cracks forming in your cheesecake, and no fretting over perfect timing. Simply assemble, chill, and serve! This convenience makes them ideal for last-minute gatherings or when you’re short on time.
- Effortless Preparation: Many steps in traditional cheesecake recipes, such as tempering ingredients or carefully monitoring oven temperatures, are eliminated. The process is largely about mixing ingredients, creating a sturdy base, and allowing sufficient chilling time. This simplicity significantly reduces the chances of culinary mishaps, making it perfect for beginners.
- Perfect for Warm Weather: When temperatures rise, the last thing anyone wants is to heat up their kitchen with a hot oven. No-bake cheesecakes are a refreshing alternative, offering a cool and creamy dessert that’s perfect for summer picnics, barbecues, or any occasion where you want to keep things cool.
- Versatility at Its Best: The no-bake format lends itself beautifully to endless customization. From different cookie crusts to various flavorings, fillings, and toppings, you can easily adapt these recipes to suit your preferences or seasonal ingredients.
- Ideal for Beginners: If you’re new to baking or feel intimidated by more complex desserts, no-bake cheesecakes are an excellent starting point. They build confidence and deliver impressive results with minimal effort, making you look like a pro without breaking a sweat.
Embracing no-bake cheesecakes opens up a world of delightful possibilities, transforming the often-daunting task of making cheesecake into a truly enjoyable and rewarding experience. Let’s dive into the specifics of crafting two beloved versions that promise to become your go-to dessert staples.
Classic Vanilla No-Bake Cheesecake: A Timeless Delight
There’s nothing quite like the simple elegance of a classic vanilla cheesecake. Its smooth, rich, and subtly sweet flavor makes it a universally loved dessert. This no-bake version captures all that charm with an incredibly straightforward process, proving that classic flavors don’t require complex techniques.
Ingredients for Vanilla No-Bake Cheesecake
- 1 ½ cups Digestive Biscuits: These classic British biscuits provide a wonderfully buttery and slightly sweet base that perfectly complements the creamy filling. Crush them finely to ensure a cohesive, uniform crust.
- 1 ½ cups Unsalted Butter, melted: High-quality unsalted butter is crucial for binding the biscuit crumbs together and adding a rich, decadent flavor to the crust. Using unsalted butter allows you to control the overall saltiness of your dessert.
- 16 oz (450 g) Full-Fat Cream Cheese, room temperature: This is the star of your cheesecake. Using full-fat cream cheese ensures a rich, dense, and incredibly creamy texture. It’s essential that it’s at room temperature to prevent lumps and ensure smooth mixing.
- ½ cup (60 g) Powdered Sugar (Icing Sugar): Powdered sugar dissolves easily into the cream cheese mixture, ensuring a silky-smooth filling without any grainy texture. It also provides the perfect level of sweetness, complementing the vanilla.
- 2 teaspoons Vanilla Extract: A generous amount of good quality vanilla extract enhances the overall flavor profile, adding warmth and depth to the cheesecake. Pure vanilla extract is always recommended for the best taste.
- ½ cup Chilled Whipping Cream (minimum 35% fat): Cold whipping cream is vital for achieving stiff peaks when whisked, which gives the cheesecake its light, airy, yet firm structure. Ensure it’s very cold before whipping for optimal results.
- Sweetened Whipped Cream (for garnish): An extra dollop of sweetened whipped cream adds a beautiful finish and another layer of creamy indulgence, elevating both the presentation and the taste.
Step-by-Step Directions: Crafting Your Vanilla Masterpiece
Creating this vanilla no-bake cheesecake is a surprisingly simple and gratifying experience. Follow these steps carefully to achieve a perfect result every time, making you a no-bake dessert pro.
Step 1: Prepare the Biscuit Base. Begin by crushing your digestive biscuits. The easiest method is to place them in a sturdy Ziploc bag and use a rolling pin to crush them into fine crumbs. Alternatively, a food processor can achieve this quickly and efficiently. The goal is a fine, uniform consistency, similar to sand, to ensure your crust holds together well and doesn’t crumble when sliced.
Step 2: Combine and Form the Crust. In a medium mixing bowl, combine the finely crushed biscuit crumbs with the 1 ½ cups of melted unsalted butter. Mix thoroughly until all the crumbs are moistened and resemble wet sand. This ensures a firm and flavorful crust. Press this mixture evenly into the bottom of a 7-inch (18cm) springform pan. Use the back of a spoon or the bottom of a flat glass to compact it firmly. A well-compacted crust is key to preventing crumbling when sliced. Place the pan in the freezer for at least 30 minutes to allow the butter to solidify and the crust to set firmly. This step is crucial for a stable base.
Step 3: Prepare the Cream Cheese Filling. While your crust is chilling, prepare the luscious filling. In a large mixing bowl, take your room temperature full-fat cream cheese and whisk it until it becomes light and fluffy. You can use a regular whisk for a good arm workout, or for convenience, a handheld electric mixer will achieve a wonderfully smooth consistency more quickly. Ensure there are no lumps for a truly silky texture. Set this aside.
Step 4: Whip the Cream and Combine. In a separate, chilled bowl, whisk the ½ cup of chilled whipping cream until stiff peaks form. The cream should hold its shape firmly when you lift the whisk. Gently fold this whipped cream into the fluffy cream cheese mixture using a spatula. This gentle folding technique is crucial to maintain the airiness of the whipped cream, contributing to the cheesecake’s light texture. Pour this exquisite filling over your chilled biscuit base in the springform pan, spreading it evenly and smoothly.
Step 5: Chill to Perfection. Now comes the most challenging part: patience! Place the filled springform pan into the coldest part of your refrigerator for a minimum of 8 hours, or ideally overnight. This extended chilling time is absolutely critical for the cheesecake to fully set and achieve its firm, sliceable texture. Do not rush this step, as it’s key to the success of any no-bake cheesecake. The longer it chills, the better it sets.
Step 6: Unmold and Serve. Once thoroughly chilled and set, carefully unmold your cheesecake. To do this, run a thin knife gently around the inner edge of the springform pan to loosen the cheesecake from the sides. Then, release the spring and carefully lift the ring away. To transfer it gracefully, run a thin knife or offset spatula underneath the cheesecake base to loosen it from the pan bottom. Insert two large, flat spatulas underneath the base in opposite directions, supporting the entire cheesecake. Swiftly and confidently lift the cheesecake onto your serving platter. Garnish with additional sweetened whipped cream, fresh berries, or chocolate shavings if desired for an elegant finish.
Slice into generous portions, serve with pride, and savor every single creamy, dreamy bite of your homemade no-bake vanilla cheesecake! It’s a guaranteed crowd-pleaser.
Decadent Chocolate No-Bake Cheesecake: A Chocoholic’s Dream
For those who adore the rich, indulgent flavor of chocolate, this no-bake chocolate cheesecake is an absolute dream come true. Combining the satisfying crunch of an Oreo crust with a lusciously smooth chocolate cream cheese filling, it’s a dessert that truly satisfies. This recipe takes convenience to the next level without compromising on profound chocolate flavor.
Ingredients for Chocolate No-Bake Cheesecake
- 6.7 oz (190 g) Oreo Cookies: The iconic chocolate sandwich cookies with their creamy filling create an irresistible, deep chocolate crust that perfectly complements the rich filling. Use them whole, filling and all, for maximum flavor and ease.
- 3 tablespoons Unsalted Melted Butter: Just enough melted butter to bind the crushed Oreos into a firm, flavorful crust. This quantity ensures the crust is not overly greasy but holds together beautifully.
- 8 oz (230 g) Semisweet Chocolate, chopped: High-quality semisweet chocolate is essential for a deep, rich chocolate flavor in the filling. Chopping it into small pieces ensures it melts smoothly and evenly, incorporating seamlessly into the cream cheese.
- 14 oz (400 g) Cream Cheese, Room Temperature: The foundation of the creamy filling. As with the vanilla version, ensure it’s at room temperature for optimal smoothness and to prevent a lumpy mixture. Full-fat is recommended for the best texture and richness.
- 1 cup (120 g) Icing Sugar (Powdered Sugar), sifted: Sifting the icing sugar prevents lumps, ensuring a flawlessly smooth and sweet chocolate filling. This also helps it to integrate more easily into the cream cheese.
- 1 teaspoon Vanilla Extract: A touch of vanilla extract helps to round out and deepen the chocolate flavor, adding a subtle complexity that enhances the overall taste profile.
- Pinch of Salt: A small pinch of salt is a secret weapon in chocolate desserts, as it enhances the chocolate’s natural flavor and balances the sweetness, preventing the dessert from being cloyingly sweet.
- ½ cup Whipping Cream (minimum 35% fat): This adds lightness and a wonderfully airy texture to the dense chocolate filling. It must be very cold before whipping to achieve stiff peaks.
- 3 oz (85 g) Semisweet Chocolate, chopped (for ganache): A smaller amount of semisweet chocolate for creating a glossy, decadent ganache topping that elevates the cheesecake’s presentation and taste. Choose a good quality chocolate for the best shine and flavor.
- ⅓ cup Whipping Cream (minimum 35% fat, for ganache): Combined with the chopped chocolate, this forms the silky-smooth ganache, providing a luxurious finish that is both beautiful and delicious.
Step-by-Step Directions: Unveiling Your Chocolate Creation
Get ready to impress with this stunning chocolate no-bake cheesecake. The steps are simple, but the result is pure decadence that will have everyone asking for more.
Step 1: Prepare the Oreo Crust. Place the entire Oreo cookies (filling included) into a food processor and pulse until they form fine, even crumbs. If you don’t have a food processor, a Ziploc bag and a rolling pin will work, though it might take a bit more effort to achieve the desired fine consistency. Once crushed, transfer the crumbs to a mixing bowl and thoroughly combine them with the 3 tablespoons of melted unsalted butter. Press this mixture firmly and evenly into the bottom of a 7-inch (18cm) springform pan. Use the back of a spoon or a flat-bottomed glass for an even and compact layer. Chill the crust in the freezer for at least 30 minutes while you prepare the filling, ensuring it sets perfectly.
Step 2: Melt the Chocolate. In a heatproof bowl, melt the 8 oz (230 g) of chopped semisweet chocolate. You can do this gently over a double boiler or in the microwave in 20-second intervals, stirring well after each interval, until completely smooth and melted. Be careful not to overheat the chocolate, as it can seize and become grainy. Let it cool slightly to a warm, pourable liquid, but ensure it doesn’t harden.
Step 3: Create the Chocolate Cream Cheese Filling. In a large mixing bowl, whisk the room temperature cream cheese until smooth and creamy. Gradually add the sifted icing sugar, vanilla extract, and a pinch of salt, mixing until fully incorporated and lump-free. Pour in the slightly cooled melted chocolate and mix until the filling is uniformly chocolatey and smooth. In a separate, chilled bowl, whip the ½ cup of cold whipping cream until stiff peaks form. Gently fold this whipped cream into the chocolate cream cheese mixture using a spatula, ensuring the mixture remains light and airy, which contributes to the cheesecake’s delightful texture.
Step 4: Assemble and Chill. Pour the luscious chocolate filling over your chilled Oreo crust in the springform pan. Smooth the top with a spatula for an even surface and a professional finish. Return the cheesecake to the refrigerator and chill for a minimum of 8 hours, or preferably overnight. As with the vanilla version, adequate chilling time is absolutely essential for the cheesecake to firm up, slice cleanly, and allow the complex chocolate flavors to meld beautifully.
Step 5: Prepare the Chocolate Ganache Topping (Optional but Recommended). Once the cheesecake is fully set, you can prepare the ganache. Place the 3 oz (85 g) of chopped semisweet chocolate in a heatproof bowl. In a small saucepan, gently heat the ⅓ cup of whipping cream until it just begins to simmer around the edges (do not boil). Pour the hot cream over the chopped chocolate and let it sit undisturbed for 2-3 minutes to allow the chocolate to melt. Then, whisk gently from the center outwards until you have a smooth, glossy ganache. Let the ganache cool slightly to a pourable consistency, but not so thick that it won’t spread easily.
Step 6: Decorate and Serve. Pour the cooled ganache evenly over the top of the chilled cheesecake. You can gently tilt the pan to spread it to the edges for full coverage. If desired, sprinkle with chocolate shavings, a dusting of cocoa powder, or fresh berries for an elegant finish that adds visual appeal. Chill for another 30 minutes to allow the ganache to set slightly before serving. Carefully unmold the cheesecake as described for the vanilla version: run a thin knife around the edge, release the spring, and transfer to a serving platter. Slice with a warm, clean knife for perfect portions.
Prepare to be enchanted by the rich, deep flavors of this no-bake chocolate cheesecake – a perfect indulgence for any chocolate lover and an impressive dessert for any occasion!
Expert Tips for No-Bake Cheesecake Success
Achieving a flawless no-bake cheesecake is incredibly easy once you understand a few key principles. Keep these expert tips in mind to ensure your dessert turns out perfectly every time, cementing your reputation as a master of no-bake treats.
- Room Temperature Cream Cheese is Non-Negotiable: This is perhaps the most critical tip. Cold cream cheese will result in a lumpy filling, no matter how much you whisk. Plan ahead and take your cream cheese out of the refrigerator at least 30-60 minutes before you start mixing to ensure a silky-smooth texture.
- Thoroughly Chill Your Cheesecake: Patience is a virtue, especially with no-bake desserts. The chilling time is not just a suggestion; it’s essential for the cheesecake to set properly. An under-chilled cheesecake will be soft, messy, and difficult to slice cleanly. For best results, aim for at least 8 hours, or ideally, overnight.
- Whip Cream to Stiff Peaks: When preparing the whipped cream, ensure it reaches stiff peaks. This incorporates enough air to give your cheesecake a light yet firm texture. Be careful not to over-whip, which can turn it grainy; stop once it holds its shape firmly.
- Gentle Folding is Key: When combining the whipped cream with the cream cheese mixture, use a gentle folding motion with a spatula. This preserves the air in the whipped cream, ensuring a fluffy and airy final product that isn’t dense or heavy.
- High-Quality Ingredients Make a Difference: While no-bake cheesecakes are simple, the quality of your ingredients shines through. Use full-fat cream cheese for richness, good quality chocolate, and fresh, cold whipping cream for the best taste and texture.
- Compact Your Crust Firmly: A well-packed crust is crucial for structural integrity. Use the back of a spoon or a flat-bottomed glass to press the crumbs firmly and evenly into the pan. This prevents it from crumbling when sliced and ensures a sturdy foundation.
- Warm Knife for Clean Slices: For pristine slices, dip a sharp knife in hot water and wipe it clean between each cut. This will glide through the cheesecake smoothly, giving you beautiful, picture-perfect portions every time.
Unleash Your Creativity: Endless No-Bake Cheesecake Variations
One of the most exciting aspects of no-bake cheesecakes is their incredible adaptability. Once you’ve mastered the basic vanilla and chocolate recipes, you can easily experiment with various flavors, crusts, and toppings to create your own signature desserts that reflect your personal taste.
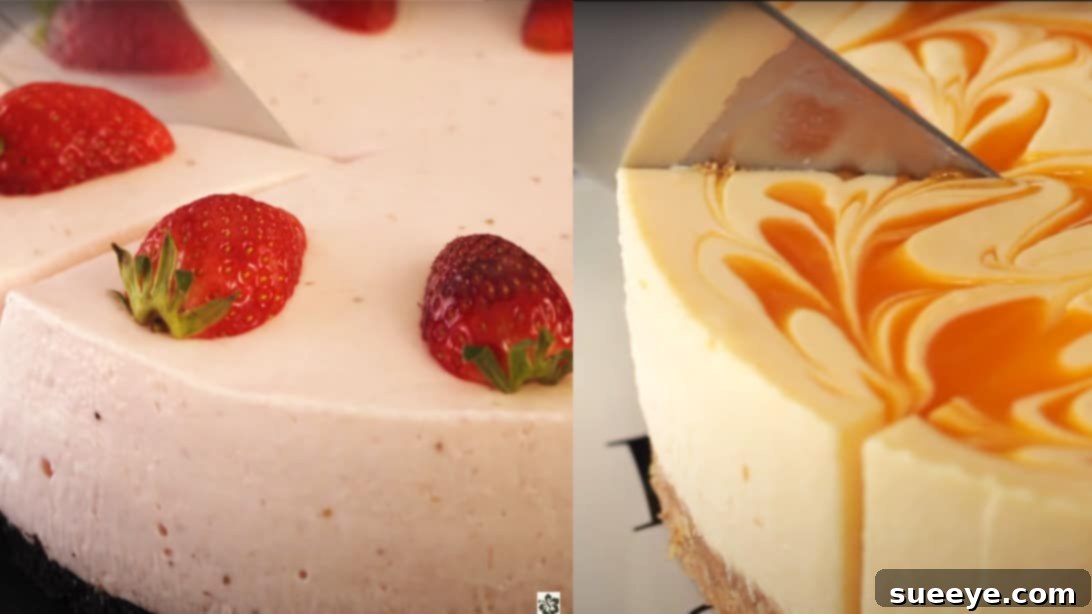
- Fruity Delights: Incorporate fresh fruit purees (like raspberry or strawberry) into the cream cheese filling for a vibrant, seasonal twist. Layer fresh berries on top, or add a fruit compote or a simple fruit coulis for a delightful tangy contrast. Mango, passion fruit, or key lime variations are also popular.
- Nutty Indulgences: Add finely chopped nuts (pecans, walnuts, almonds) to your biscuit crust for added texture and flavor. You can also sprinkle toasted nuts on top as a garnish, or incorporate nut butters into the filling for a richer taste.
- Caramel Swirls: Drizzle homemade or store-bought caramel sauce over the filling before chilling, or create beautiful swirls for a rich, sweet addition. A pinch of sea salt with caramel creates a popular and irresistible salted caramel cheesecake.
- Coffee or Espresso Kick: Dissolve instant coffee or espresso powder in a small amount of hot water and add it to the cream cheese mixture for a delightful coffee-flavored cheesecake, perfect for coffee lovers.
- Citrus Zest: Brighten up your vanilla cheesecake by adding lemon, lime, or orange zest to the filling. The fragrant oils from the zest will add a refreshing burst of flavor and a lovely aroma.
- Different Cookie Bases: Don’t limit yourself to digestive biscuits or Oreos. Try graham crackers, shortbread cookies, ginger snaps, or even speculoos biscuits for a unique and intriguing crust that offers different flavor profiles.
The possibilities are truly endless, allowing you to tailor your no-bake cheesecake to any palate or occasion. Let your imagination guide you and have fun experimenting with new flavor combinations!
Your No-Bake Cheesecake Journey Begins Now!
From the first crumbly crust to the last velvety bite, no-bake cheesecakes offer an unparalleled combination of ease and indulgence. They dispel the myth that truly exquisite desserts must be complicated, proving that sometimes, the simplest methods yield the most satisfying results. Whether you’re a beginner seeking a foolproof recipe or a seasoned baker looking for a quick and impressive treat, these no-bake vanilla and chocolate cheesecakes are guaranteed to delight.
So, the next time a cheesecake craving strikes, don’t let the oven stand in your way. Embrace the simplicity, savor the flavor, and discover the sheer joy of creating a stunning dessert with minimal effort. With these detailed recipes from El Mundo Eats as your guide, you’re all set to whip up cheesecake perfection right in your own kitchen. Happy no-baking!