
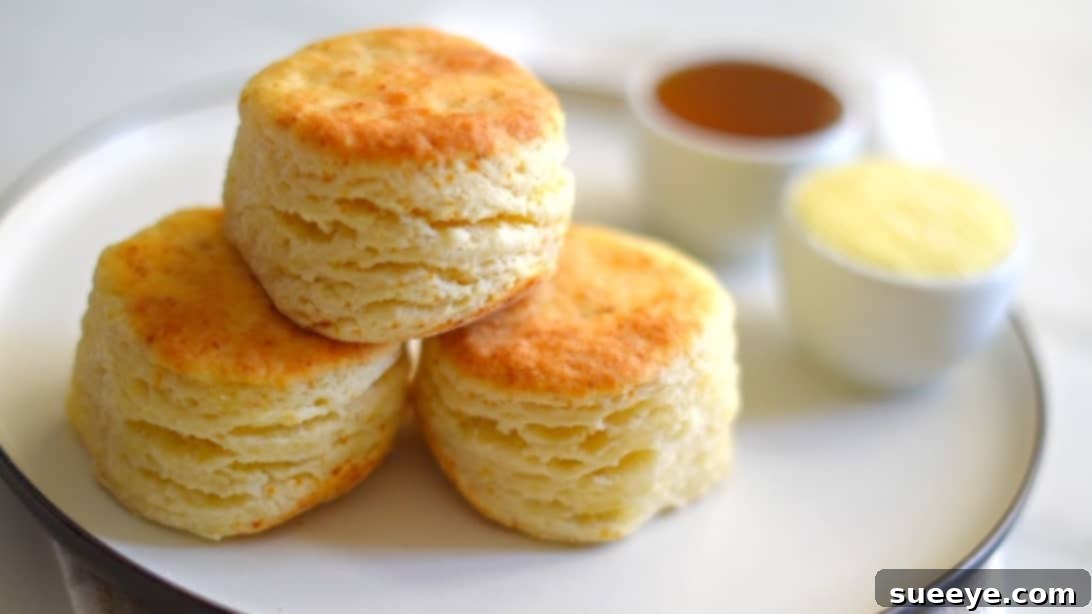
Master the Art of Fluffy Biscuits: A 30-Minute Homemade Recipe
There’s nothing quite like a warm, tender, and incredibly fluffy biscuit, fresh from the oven. Many believe achieving this baking marvel is complex, but with the right guidance, it’s surprisingly simple. We’re thrilled to share an extraordinary recipe by the talented Bincy Chris that guarantees perfect, cloud-like biscuits in a mere 30 minutes! Forget about lengthy preparation times or complicated techniques; this recipe is a game-changer for both novice and experienced bakers alike. Having personally tried countless online recipes, I can confidently say this one stands out as the absolute best for its simplicity, speed, and consistently delicious results. Prepare to impress your family and friends with these delightful homemade treats.
This foolproof guide will walk you through each step, ensuring you achieve golden-brown perfection every time. Not only does it require just six basic ingredients, most of which you likely already have in your pantry, but the process is also incredibly straightforward. Get ready to transform simple pantry staples into a batch of irresistibly soft and flaky biscuits that will become a staple in your home.
Ingredients for Your Fluffy Biscuits
Creating truly spectacular biscuits starts with quality ingredients and precise measurements. Here’s what you’ll need for Bincy Chris’s amazing 30-minute recipe:
- 2 cups of All-Purpose Flour: Loosely packed for accurate measurement. Flour provides the structure for your biscuits.
- 1/2 teaspoon of Salt: Essential for balancing the flavors and enhancing the taste of your biscuits.
- 6 tablespoons of Unsalted Butter: Crucially, this needs to be very cold and cut into small pieces. Cold butter is key to creating those desirable flaky layers.
- 1 tablespoon of Granulated Sugar: Adds a touch of sweetness and helps with browning, contributing to a golden crust.
- 2 teaspoons of Baking Powder: This leavening agent is vital for giving your biscuits their incredible rise and characteristic fluffiness. Ensure it’s fresh for the best results.
- 3/4 cup of Cold Milk: Whole milk is recommended for richness, but any milk will work. Keeping it cold is important to prevent the butter from melting prematurely.
Tips for Perfect Ingredients:
- Cold Butter is Non-Negotiable: Place your butter in the freezer for 10-15 minutes before starting, then cut it into small cubes. This ensures it stays solid longer during mixing, creating pockets of steam in the oven for flakiness.
- Measure Flour Accurately: Avoid scooping directly from the bag, which can compact the flour. Instead, spoon flour into your measuring cup and level it off with a straight edge.
- Check Your Baking Powder: To test if your baking powder is still active, add a teaspoon to half a cup of hot water. If it fizzes vigorously, it’s good to go!
- Consider Buttermilk for Tang: While the recipe calls for regular milk, using cold buttermilk can add a lovely tang and tenderness to your biscuits. If you don’t have buttermilk, you can make a substitute by adding 1 tablespoon of lemon juice or white vinegar to regular milk and letting it sit for 5 minutes.
Step-by-Step Guide to Fluffy Biscuit Perfection
Follow these precise instructions to bake the best homemade fluffy biscuits in just 30 minutes. The key is to work quickly and avoid overworking the dough.
Step 1: Combine Dry Ingredients
In a spacious mixing bowl, begin by combining your dry ingredients. Add the two cups of all-purpose flour, one tablespoon of granulated sugar, half a teaspoon of salt, and two teaspoons of baking powder. Using a whisk, gently combine all these ingredients. Ensure they are thoroughly mixed together, distributing the leavening agent and seasonings evenly throughout the flour. This initial step prevents pockets of unmixed ingredients in your final biscuit.
Step 2: Incorporate the Cold Butter
Now it’s time to add the six tablespoons of very cold, cubed unsalted butter to your dry flour mixture. The goal here is to break down the butter into pea-sized or even smaller pieces and distribute them evenly throughout the flour. You can use a pastry blender, your fingertips, or even a food processor (pulsing carefully). Work quickly to prevent the butter from melting. The flour-coated butter pieces are what will create those wonderful flaky layers as they melt and release steam during baking.
Step 3: Gradually Add Cold Milk
Carefully pour the 3/4 cup of cold milk into the flour and butter mixture. The best approach is to add the milk in three or four separate batches, gently stirring with a fork after each addition. Continue mixing until large lumps of dough begin to form and all the flour has been fully moistened. Avoid over-mixing; the dough should look shaggy and slightly sticky, not perfectly smooth. It should have a soft, cohesive doughy texture, not a dry, crumbly consistency. Over-mixing develops gluten, which can lead to tough biscuits.
Step 4: Prepare and Shape the Dough
Lightly dust your clean work surface with a small amount of all-purpose flour. Carefully transfer the shaggy biscuit dough onto this floured surface. Gently bring the dough together and form it into a rough ball. Avoid kneading vigorously. Once you have a loose ball, gently press or pat the dough down to form a small, thick, and somewhat rough square shape. The goal is to handle the dough as little as possible to maintain its tenderness.
Step 5: Laminate for Layers (The Secret to Fluffiness!)
This step is crucial for achieving those incredible layers. Cut the rough square of dough into four equal parts. Stack these four pieces directly on top of each other. Once stacked, gently press and pat the combined dough down again to form another rough square. Repeat this process: cut into four equal parts, stack them, and then gently pat down into a square. This folding and stacking technique, known as lamination, creates multiple layers within the dough, which will separate into beautiful flakes when baked. After repeating the process once or twice, pat the dough into a flat sheet, approximately 1 inch thick.
Step 6: Cut Your Biscuits
Using a round cookie cutter (a 2.5 to 3-inch cutter is ideal), firmly press straight down into the dough to cut out your biscuits. Avoid twisting the cutter, as this can seal the edges and inhibit the biscuits from rising properly. Place the cut biscuits onto your baking surface. Gather any remaining pastry dough, stack it gently, and pat it down again to form another flat sheet. Cut out additional biscuits until all the dough is used. This method minimizes waste and yields more delicious biscuits.
Step 7: Bake to Golden Perfection
Preheat your oven to the specified temperature. If you are using a cast iron skillet (which helps achieve a wonderfully crisp bottom), preheat it along with the oven to 450 degrees Fahrenheit. If using a standard baking tray, preheat your oven to 425 degrees Fahrenheit. Carefully arrange the cut biscuits onto your chosen baking vessel. For a cast iron skillet, bake at 450°F for approximately 14 minutes, or until the tops are beautifully golden brown and the biscuits have risen significantly. If using a baking tray, bake at 425°F for about 16 minutes, keeping an eye on them for that perfect golden hue. Baking times may vary slightly based on your oven, so watch for visual cues.
Step 8: The Finishing Touch
Once baked to a magnificent golden brown, carefully remove the biscuits from the oven. For an extra layer of flavor and a beautiful sheen, immediately brush the tops of the hot biscuits with a little melted unsalted butter. This simple step adds richness and moisture, making them even more irresistible. Serve your fluffy biscuits warm and enjoy!
Pro Tips for Achieving the Fluffiest Biscuits Every Time
- Don’t Overwork the Dough: This is arguably the most critical rule for tender biscuits. Excessive handling develops gluten, leading to tough, chewy results. Mix just until combined.
- Use Cold Ingredients: Especially butter and milk. Cold butter creates steam pockets for flakiness, while cold liquids prevent the butter from melting before baking.
- Bake at a High Temperature: High heat helps the biscuits rise quickly and creates a crisp, golden crust while keeping the interior soft.
- Don’t Twist the Cutter: Press straight down and pull straight up. Twisting seals the edges of the dough, which can prevent proper rise and flakiness.
- Keep Biscuits Close Together: When baking, place biscuits almost touching on the baking sheet. This helps them rise taller and creates softer sides.
- Know Your Oven: Ovens can vary. Get to know your oven’s hot spots and adjust baking times as needed. A reliable oven thermometer can be a great investment.
Common Biscuit Problems and How to Fix Them:
- Biscuits are Tough: You likely overworked the dough. Remember to mix gently and minimally.
- Biscuits are Flat: Your baking powder might be old, or your dough was too warm. Ensure ingredients are cold and baking powder is fresh. Also, ensure you’re using a sufficiently hot oven.
- Biscuits are Dry/Crumbly: Too much flour or not enough liquid. Make sure to measure accurately and add milk until the dough just comes together.
Beyond the Basics: Variations and Serving Suggestions
Once you’ve mastered the classic fluffy biscuit, the possibilities are endless! Here are a few ideas to get you started:
- Cheesy Biscuits: Fold in 1/2 to 3/4 cup of shredded cheddar cheese (or your favorite cheese) with the dry ingredients.
- Herb Biscuits: Add 1-2 tablespoons of finely chopped fresh herbs like chives, rosemary, or thyme to the dry ingredients for an aromatic twist.
- Sweet Biscuits: Increase the sugar to 2-3 tablespoons and add a teaspoon of vanilla extract with the milk. These are perfect with jam or fruit compotes.
- Buttermilk Biscuits: As mentioned, substitute regular milk with cold buttermilk for a classic tangy flavor and extra tender crumb.
Serving Your Delicious Biscuits:
These fluffy biscuits are incredibly versatile. Enjoy them:
- Warm with butter and your favorite jam or honey.
- As a side to hearty stews, chili, or fried chicken.
- Split and filled with sausage gravy for a classic breakfast.
- With a dollop of whipped cream and fresh berries for a simple dessert.
- As a base for mini sandwiches with ham and cheese.
Storage Tips for Freshness
- Cooked Biscuits: Store leftover biscuits in an airtight container at room temperature for up to 2-3 days. Reheat briefly in the oven or microwave for best results.
- Unbaked Dough: You can prepare the dough, cut the biscuits, and then freeze them on a baking sheet until solid. Transfer to a freezer-safe bag and store for up to 1 month. Bake directly from frozen, adding a few extra minutes to the baking time.
There you have it – a comprehensive guide to crafting the most exquisite fluffy biscuits right in your own kitchen, all within 30 minutes. This recipe by Bincy Chris truly demystifies biscuit making, proving that homemade perfection doesn’t require hours of effort. With minimal ingredients and straightforward steps, you’re well on your way to enjoying these warm, tender, and utterly delicious treats. So, roll up your sleeves, gather your ingredients, and get ready to experience the joy of baking the best fluffy biscuits you’ve ever tasted. Happy baking!