
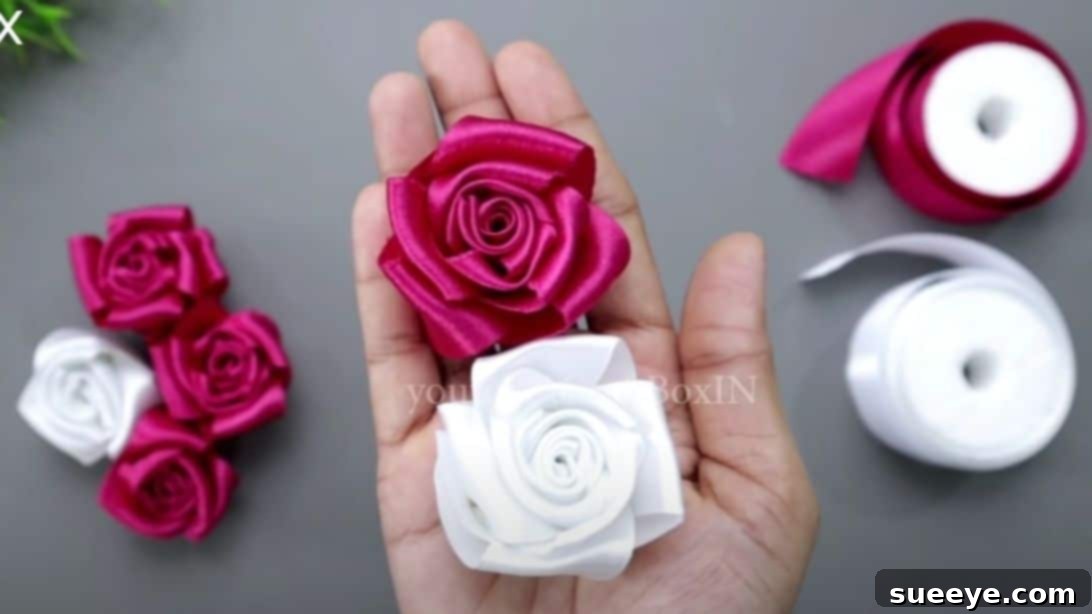
Master the Art of DIY Satin Ribbon Roses: A Comprehensive Guide to Crafting Elegant Flowers
As Valentine’s Day approaches, or perhaps any occasion calling for a touch of handmade elegance, the quest for unique gifts and charming decor begins. If you’re looking for a craft project that’s both simple and stunning, this tutorial on creating DIY satin ribbon roses is precisely what you need. Imagine transforming a simple satin ribbon into delicate, realistic-looking roses that can serve as beautiful decor, thoughtful gifts, or even enchanting accents on a box of chocolates. The best part? Each rose comes together quickly, allowing you ample time to craft an entire bouquet or an array of embellishments.
This versatile project also encourages creativity; feel free to experiment with a spectrum of ribbon colors to match any theme or personal preference. This clever and accessible idea comes from the talented YouTuber, Craft Box IN, known for inspiring crafters with innovative projects. Let’s delve into the process and discover how easily you can craft these beautiful satin roses.
Why Choose DIY Satin Ribbon Roses?
Handmade crafts offer a unique charm that store-bought items often lack. DIY satin ribbon roses stand out for several compelling reasons:
- Elegance and Versatility: Satin roses exude a classic elegance, making them suitable for a wide range of applications, from rustic to luxurious settings.
- Cost-Effective: Creating your own roses from ribbon is significantly more economical than purchasing fresh flowers or elaborate decorations, especially when you need a large quantity.
- Durability: Unlike real flowers, ribbon roses last indefinitely, serving as a lasting keepsake or a permanent fixture in your home decor.
- Personal Touch: Gifting or decorating with handmade items adds a personal touch that shows thought and effort, making the gesture even more special.
- Quick and Easy: Despite their intricate appearance, these roses are surprisingly simple to make, perfect for crafters of all skill levels, even beginners.
Materials You’ll Need
Gathering your supplies is the first step to a smooth crafting experience. You likely have many of these items already!
- Satin Ribbon: A 1-inch (2-3cm) wide satin ribbon is ideal for creating roses with a good balance of size and detail. However, don’t hesitate to experiment with different widths! Wider ribbons create larger, fuller roses, while narrower ribbons yield delicate, petite blooms. The key is to choose a ribbon with a smooth, luxurious feel that will hold its shape beautifully.
- Double-Sided Tape: This is crucial for securing the ribbon layers without visible stitches or glue, giving your roses a clean, professional finish. Choose a strong adhesive tape that will hold up over time.
- Tweezer (Optional but Recommended): A tweezer can be incredibly helpful for handling the delicate ribbon ends and ensuring precise placement, especially if you have larger fingers. It offers better control for intricate steps.
- Scissors: A sharp pair of scissors is essential for clean, straight cuts, preventing frayed edges and ensuring your ribbon pieces are uniform.
- Ruler: A ruler is vital for accurate measurements, ensuring your ribbon pieces are cut to the correct length, which is key to consistent rose sizes.
- Lighter: A lighter is used to carefully seal the ribbon ends, preventing fraying. This step adds to the durability and neatness of your finished rose. Always exercise extreme caution when using a lighter and work in a well-ventilated area away from flammable materials.
Step-by-Step Guide to Crafting Your Satin Rose
Step 1: Preparing Your Ribbon and Initial Wrap
Precision in this initial step sets the foundation for a beautifully formed rose.
- Measure and Cut: Begin by cutting your satin ribbon to a generous length of 80 centimeters (approximately 31-32 inches). This length provides enough material to create a full, elegant rose without being excessively long or short.
- Seal the Edges: To prevent fraying, carefully seal both ends of the ribbon. Using a tweezer, gently hold one end of the ribbon close to the very edge. With a lighter, quickly and carefully pass the flame along the cut edge. The heat will slightly melt the satin, sealing the fibers. Repeat this process for the other end of the ribbon. Be swift and light with the flame to avoid burning or discoloring the ribbon.
- The Slanted Wrap: Take a 12-inch (30cm) ruler. Starting from one end, begin to slowly wrap the ribbon around the ruler in a continuous, slightly slanted manner. The slant is important as it creates the gradual spiral that will form the petals of your rose. Ensure each wrap is snug but not overly tight, and maintain a consistent angle. Continue wrapping until you reach the other end of the ribbon.
- Secure the Wrap: Once the ribbon is fully wrapped around the ruler, carefully lay the ruler flat on your work surface. Place a small weight (like a book or another craft item) on top of the wrapped ribbon to hold it securely in place. This prevents the ribbon from unwinding and losing its shape while you prepare for the next step.
Step 2: Forming the Rose Petals
This is where the magic happens, as your neatly wrapped ribbon transforms into a beautiful rose.
- Apply Double-Sided Tape: While the ribbon is still wrapped around the ruler and secured, take your double-sided tape. Apply a strip along the lower edge of the wrapped ribbon, ensuring it slightly overlaps the lower part. This tape will act as the core adhesive for holding the rose’s shape.
- Gentle Removal: Carefully and gently slide the ribbon off the ruler. Take your time to avoid disturbing the wrapped coils. The tape will help keep the structure intact.
- Begin the Roll: Now, either using a tweezer for precision or your fingers, hold one end of the ribbon firmly. This end will become the center of your rose. As you slowly peel off the paper backing from the double-sided tape, begin to gently turn and roll the ribbon over from left to right. This rolling motion will naturally create the spiral of petals, with the tape securing each layer as you go.
- Continue Rolling and Shaping: Continue this delicate rolling process, ensuring each turn overlaps the previous one slightly, mimicking the natural layering of a rose’s petals. Maintain a consistent tension to create an even, beautiful bloom. Do this until you’ve reached the other end of the ribbon.
- Secure the Base: Once you’ve rolled the entire length of the ribbon into a rose, you’ll have a small excess strip of double-sided tape at the bottom. Fold this excess tape underneath the base of the rose to secure the final layer. For extra durability and peace of mind, especially if the rose will be handled frequently or exposed to varying conditions, you can apply a dab of hot glue to the bottom base. This will firmly hold all the layers together, ensuring your beautiful rose maintains its shape.
Creative Ways to Use Your Handmade Ribbon Roses
Now that you’ve mastered the art of making these beautiful satin ribbon roses, the possibilities for their use are endless. Here are some inspiring ideas:
Valentine’s Day Decor and Gifts
- Romantic Bouquets: Combine several roses of varying sizes and shades of red, pink, and white to create a stunning, everlasting Valentine’s bouquet.
- Gift Embellishments: Elevate any gift by attaching a handmade rose to the wrapping. It adds a sophisticated and personal touch.
- Card Accents: Glue a small ribbon rose onto a handmade Valentine’s card for an extra dimension and heartfelt sentiment.
- Table Centerpieces: Arrange a cluster of roses in a decorative bowl or vase to create an enchanting centerpiece for a romantic dinner.
- Chocolate Box Decoration: As mentioned, a ribbon rose instantly transforms a simple box of chocolates into a luxurious, personalized present.
Everyday Home Accents
- Curtain Tie-Backs: Attach a few roses to a ribbon or cord to create elegant tie-backs for your curtains.
- Pillow Adornments: Sew or glue a rose onto decorative throw pillows for a touch of feminine charm.
- Wreaths and Garlands: Incorporate ribbon roses into seasonal wreaths or garlands for year-round beauty.
- Picture Frame Embellishments: Add small roses to the corners of picture frames to enhance cherished memories.
Fashion and Accessory Embellishments
- Hair Accessories: Glue a rose onto a hair clip, headband, or bobby pin for a charming hair accessory.
- Brooches and Pins: Attach a pin back to the rose to create a lovely brooch for jackets, scarves, or bags.
- Clothing Embellishments: Carefully sew roses onto blouses, dresses, or even hats for a unique, customized look.
Special Occasions
- Wedding Favors: These roses make beautiful and affordable additions to wedding favors.
- Bridal Showers/Baby Showers: Use them as decorations, game prizes, or small gifts for guests.
- Birthday Parties: Incorporate them into party decor or as delightful cake toppers (if food-safe adhesive is used).
Tips for Perfect Ribbon Roses Every Time
To ensure your ribbon roses are consistently beautiful and durable, keep these expert tips in mind:
Choosing the Right Ribbon
- Quality Matters: A high-quality satin ribbon will be easier to work with and produce a more polished final product. Look for ribbons with a good sheen and a sturdy weave.
- Experiment with Textures: While satin is classic, don’t shy away from experimenting with other ribbon types like organza, grosgrain, or even velvet for different textures and looks.
Color Combinations
- Monochromatic Schemes: Use different shades of the same color for a sophisticated, subtle effect.
- Complementary Colors: Combine colors opposite each other on the color wheel for a vibrant, eye-catching contrast.
- Pastels for Softness: Light pinks, blues, and creams create a delicate, romantic feel, perfect for baby showers or spring decor.
Secure Your Creation
- Hot Glue for Durability: As mentioned in the steps, a dab of hot glue at the base can significantly increase the longevity and stability of your roses, especially if they will be handled or attached to other items.
- Fabric Glue for Clothing: If you’re attaching roses to fabric items that will be washed, opt for a strong, fabric-safe adhesive.
Safety First
- Lighter Caution: Always use a lighter in a well-ventilated area, away from flammable materials. Keep a glass of water nearby in case of accidental burns or if the ribbon catches fire. Always have adult supervision if children are involved.
- Scissors Safety: Handle sharp scissors with care to avoid cuts.
Conclusion
Crafting DIY satin ribbon roses is a wonderfully rewarding project that combines simplicity with stunning results. Whether you’re preparing for Valentine’s Day, looking for unique gift embellishments, or simply want to add a touch of handmade beauty to your home, these elegant flowers are sure to impress. With just a few basic materials and these clear, step-by-step instructions, you can transform ordinary ribbon into extraordinary blooms. Embrace your creativity, experiment with colors and sizes, and enjoy the satisfaction of making something beautiful with your own hands. Happy crafting!
*All images for this tutorial are credited to Craft Box IN via YouTube. We highly recommend visiting their channel and subscribing for more inspiring DIY projects and tutorials!