
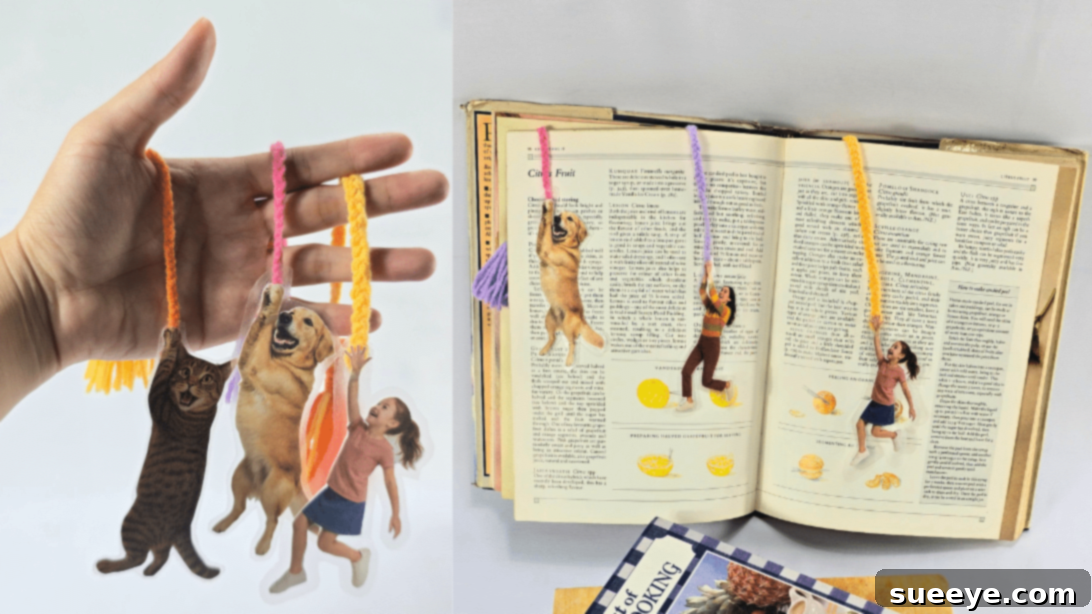
For every avid reader, the joy of diving into a captivating book is a cherished experience. Yet, navigating back to your last read page can sometimes interrupt that flow, leading to dog-eared pages or lost placeholders. While countless store-bought bookmarks offer a quick fix, imagine holding a bookmark that tells a story, evokes a smile, or carries a cherished memory. This is where the magic of DIY photo bookmarks comes into play – a delightful opportunity to blend your love for reading with your personal creativity and treasured photographs. Forget generic markers; it’s time to craft your own unique, fun, and deeply personal photo bookmarks!
One of the most appealing aspects of creating your own photo bookmarks is the boundless customization. The canvas is truly yours: featuring your children’s adorable faces, your beloved pets, or even capturing iconic scenes from your favorite movies or characters from beloved TV shows and anime. The possibilities are genuinely endless! This level of personalization elevates a simple bookmark into a cherished keepsake, making it an unparalleled gift for virtually every occasion. Picture the delight on a loved one’s face receiving a bookmark adorned with a precious family photo on their birthday or Christmas. Imagine the heartfelt appreciation from a mother on Mother’s Day, or a grandparent on Grandparent’s Day, receiving a bookmark that holds a special memory close to their heart. These handmade treasures are not just page-keepers; they are miniature works of art that preserve moments and emotions, serving as a constant, warm reminder of what truly matters.
Why DIY Photo Bookmarks Are a Must-Try Craft
Beyond their charming aesthetic, DIY photo bookmarks offer a multitude of benefits that make them an ideal project for crafters of all skill levels. They are incredibly easy to make, transforming an ordinary afternoon into a productive and creative session. This makes them a fantastic activity to share with children, fostering their creativity, improving fine motor skills, and teaching them the joy of making something with their own hands. The simplicity of the process, combined with the profound personalization, ensures a rewarding experience for everyone involved. It’s not just a craft; it’s an opportunity to bond over shared memories and create something lasting.
Another significant advantage is their budget-friendly nature. You don’t need expensive tools or exotic materials. Most supplies, like cardstock, glue, and scissors, are likely already in your craft drawer or can be easily found at any local craft store for a minimal cost. This affordability means you can create a batch of these lovely bookmarks without breaking the bank, making them perfect for crafting multiple gifts, party favors, or simply expanding your own collection of reading accessories. Plus, the durability added by laminating with contact paper ensures your handmade creations will withstand countless reading adventures, preserving those precious photos and memories for years to come.
Elevate Your Bookmarks: Creative Embellishment Ideas
While a simple photo cutout is charming on its own, there’s always room to elevate your photo bookmarks with extra flair. Consider adding decorative elements to truly make them pop and stand out. Tassels, for instance, are not just beautiful; they also make it significantly easier to spot your bookmark peeking out from the top of your book. You can choose tassels in colors that complement your photo, or go for contrasting hues for a bolder statement. Beyond tassels, think about incorporating small gems, glitter, sequins, beads, or even a tiny charm to hang from the top. A strategically placed dab of glitter glue can add a touch of sparkle, while a thin ribbon woven through a punched hole can enhance elegance. For a truly unique touch, you could even write a small, meaningful quote on the back of the bookmark. These small, thoughtful additions transform your already unique photo bookmark into a truly exquisite, personalized masterpiece that reflects your personal style.
Essential Materials for Your Photo Bookmark Project
Gathering your materials is the first exciting step in bringing your personalized photo bookmarks to life. Fortunately, the supplies are readily available and won’t strain your wallet. Here’s what you’ll need, along with a brief explanation of why each item is crucial for success:
- Contact Paper: This self-adhesive clear film is your secret weapon for durability. It acts as a laminate, protecting your photo bookmark from tears, spills, and general wear and tear, ensuring it lasts for countless reading sessions and remains vibrant.
- Cardstock: To give your photo bookmark body and sturdiness, a good quality cardstock (80lb or heavier) is essential. It prevents the bookmark from bending easily and provides a stable, resilient base for your chosen photo. Choose a color that complements your photo or a neutral tone for versatility.
- Scissors: A sharp pair of scissors will be your primary tool for cutting out your photo and cardstock precisely. For intricate details, delicate curves, or exceptionally precise edges, a craft knife or X-Acto knife can provide superior accuracy and a cleaner finish.
- Tassel (Optional, but Recommended): Tassels add a touch of elegance and visual appeal, and make your bookmark easier to find between the pages. You can purchase pre-made tassels in various colors and styles, or even create your own from embroidery floss, yarn, or ribbon for an extra personal touch.
- Glue: A strong craft glue or glue stick is needed to securely adhere your photo cutout to the cardstock, creating a robust and lasting bond that will stand the test of time. Ensure it dries clear if using liquid glue.
- Your Chosen Photos: The absolute star of the show! Select high-resolution photos that you wish to immortalize as bookmarks. Consider photos with good contrast and clear subjects, as these will translate best into a small bookmark format.

Why You’ll Adore Crafting These Personalized Bookmarks
Apart from being a uniquely creative idea, this project offers unparalleled customization, allowing you to beautifully preserve cherished memories and create meaningful, thoughtful gifts!
Step-by-Step Guide: How to Make Your Own Photo Bookmarks
Ready to transform your favorite pictures into functional and fabulous bookmarks? Follow these easy steps to craft a personalized keepsake that will brighten every reading session. This simple tutorial is designed for crafters of all ages and skill levels, ensuring a fun and successful project.
-
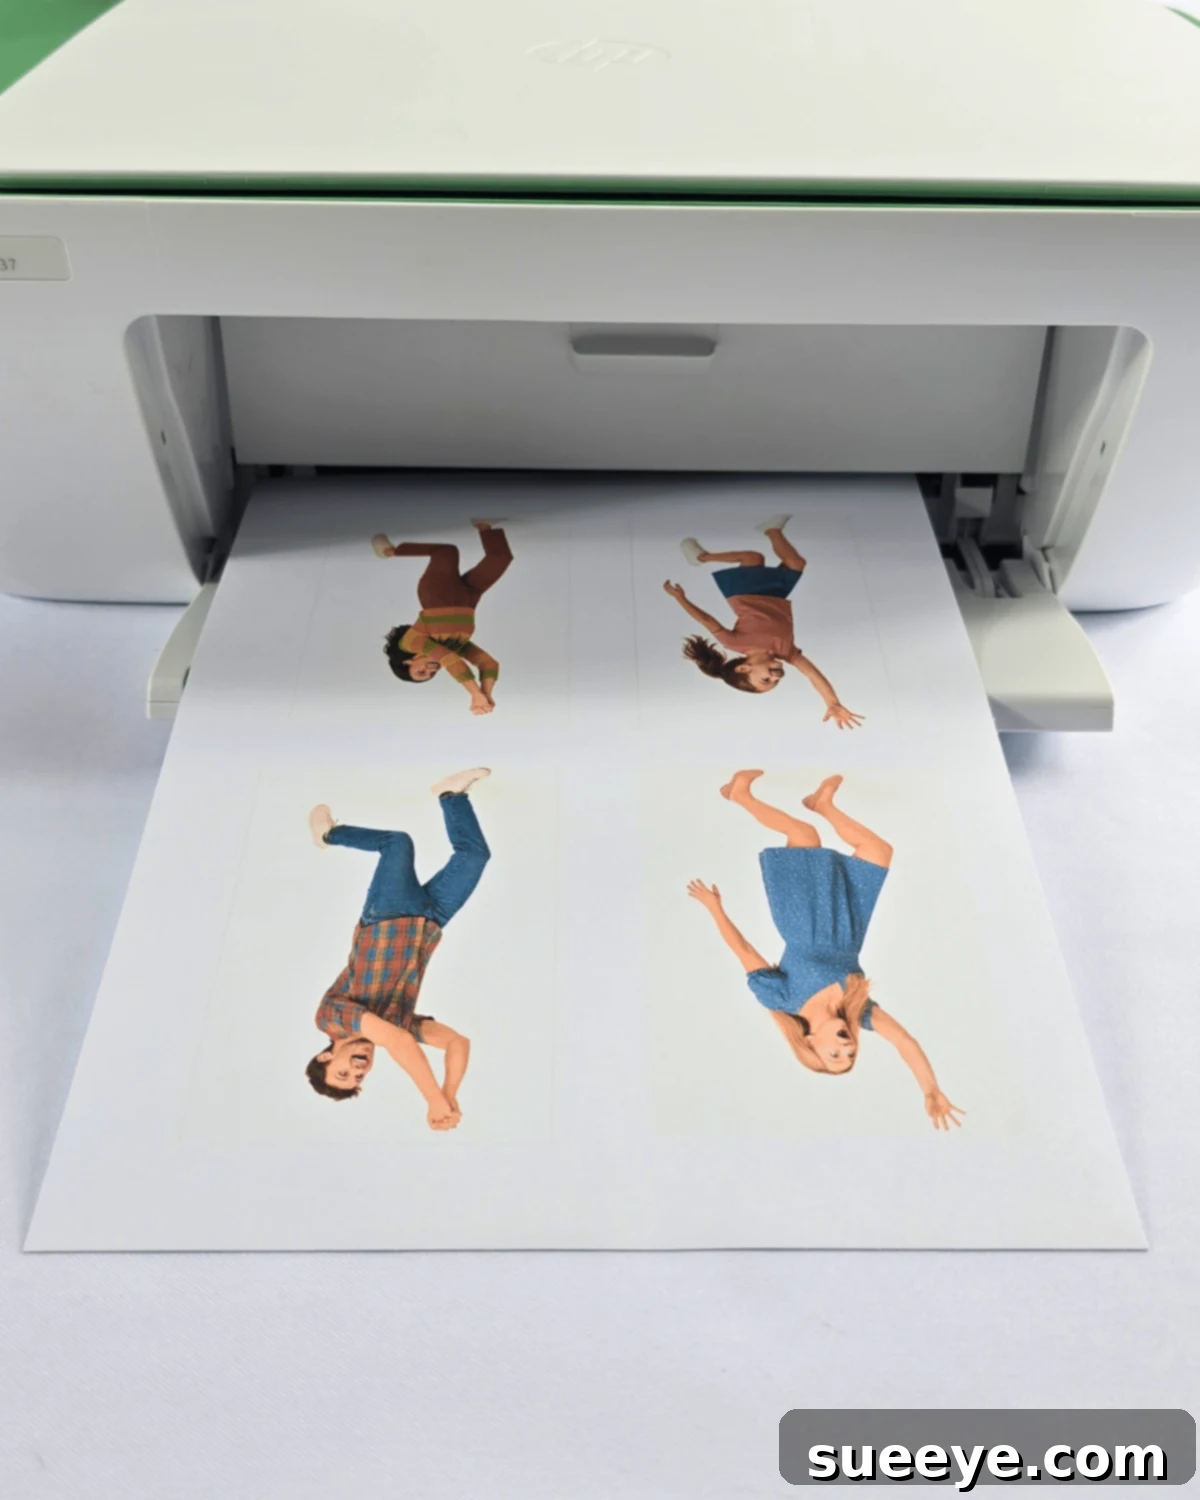
1. Choose and Print Your Perfect Photo
The first and most enjoyable step is selecting the photo that will become the heart of your bookmark. This could be a beloved family member, a furry friend, a scenic landscape from a memorable trip, or even an illustration of your favorite fictional character. Consider photos where the subject has clear, defined outlines, as this will make cutting easier. You can also print out specific decorative shapes, a meaningful quote, or your name in a stylish font if you prefer. Ensure your photo is printed on quality paper and sized appropriately for a bookmark – typically a height of 4-6 inches and a width proportional to your subject, depending on the image.

-
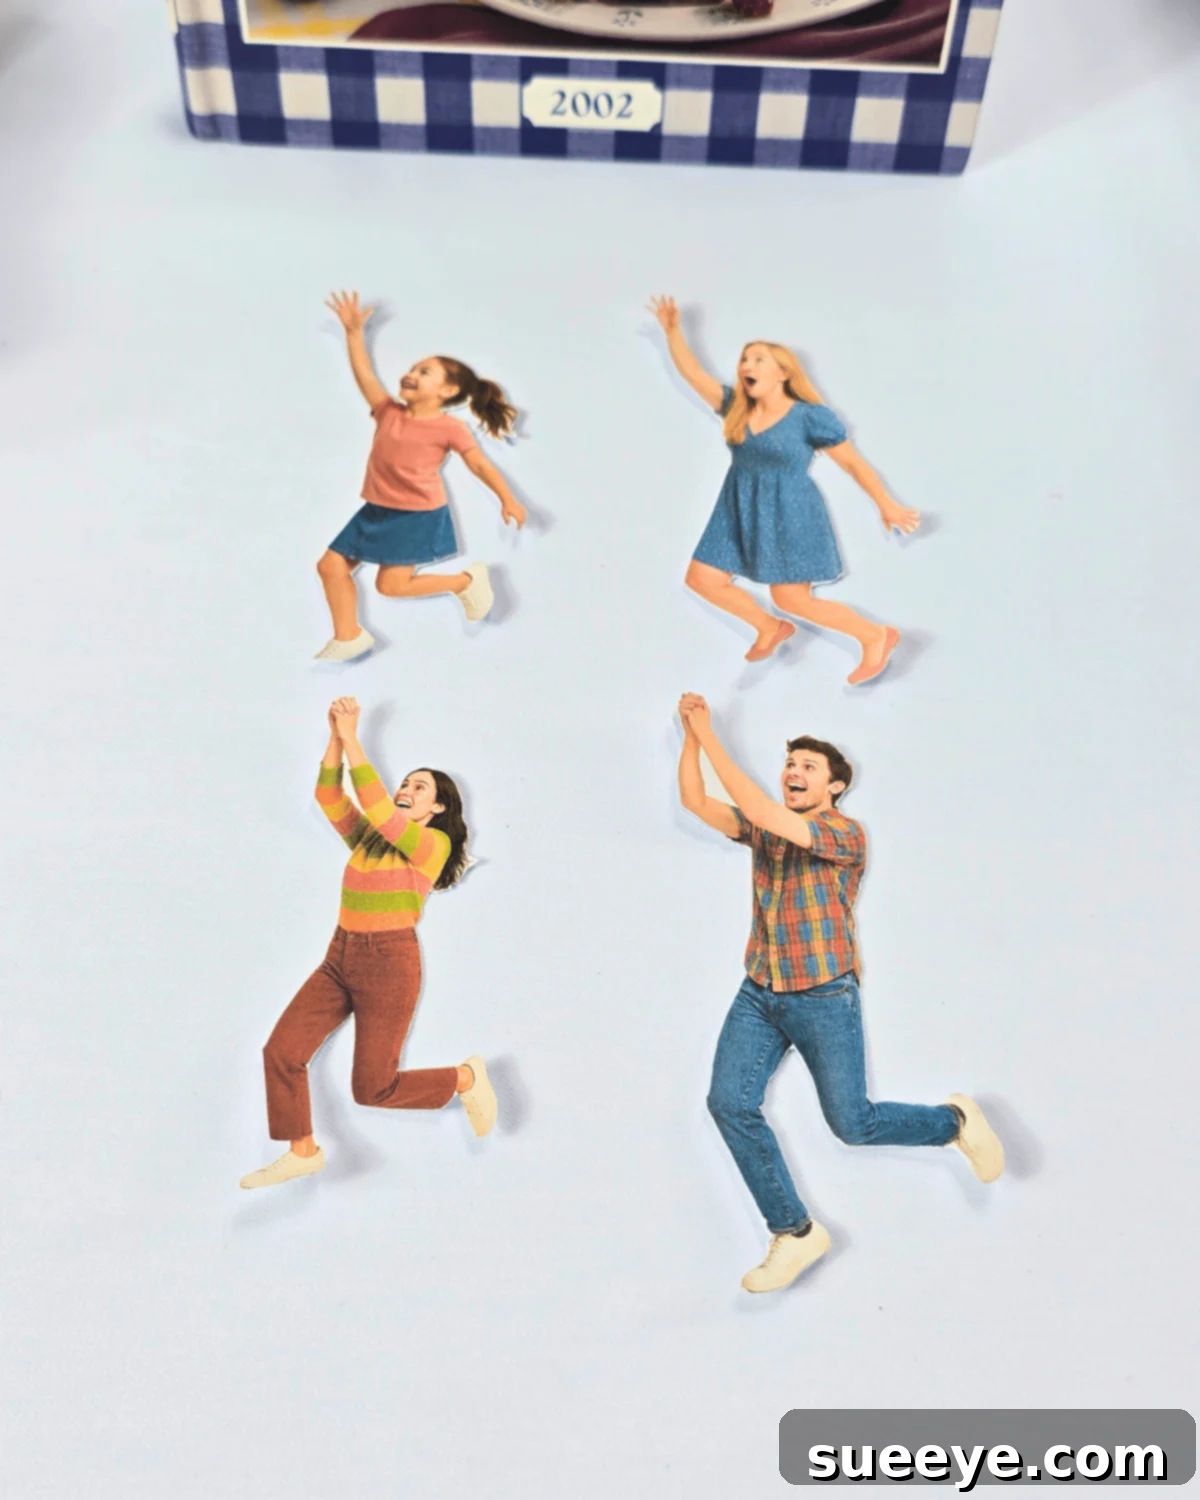
2. Precisely Cut Out Your Photo
Carefully cut around the edges of your chosen photo. Aim to be as precise as possible, removing any white borders or background you don’t want to include. For photos with intricate details, sharp corners, or small, delicate curves, an X-Acto knife or craft cutter can offer much greater accuracy and a cleaner finish than standard scissors. Always use a cutting mat underneath if using a craft knife for safety and to protect your work surfaces. Don’t fret too much over tiny imperfections; once laminated, these small spots often become unnoticeable. Taking your time during this step will yield the best results.
-
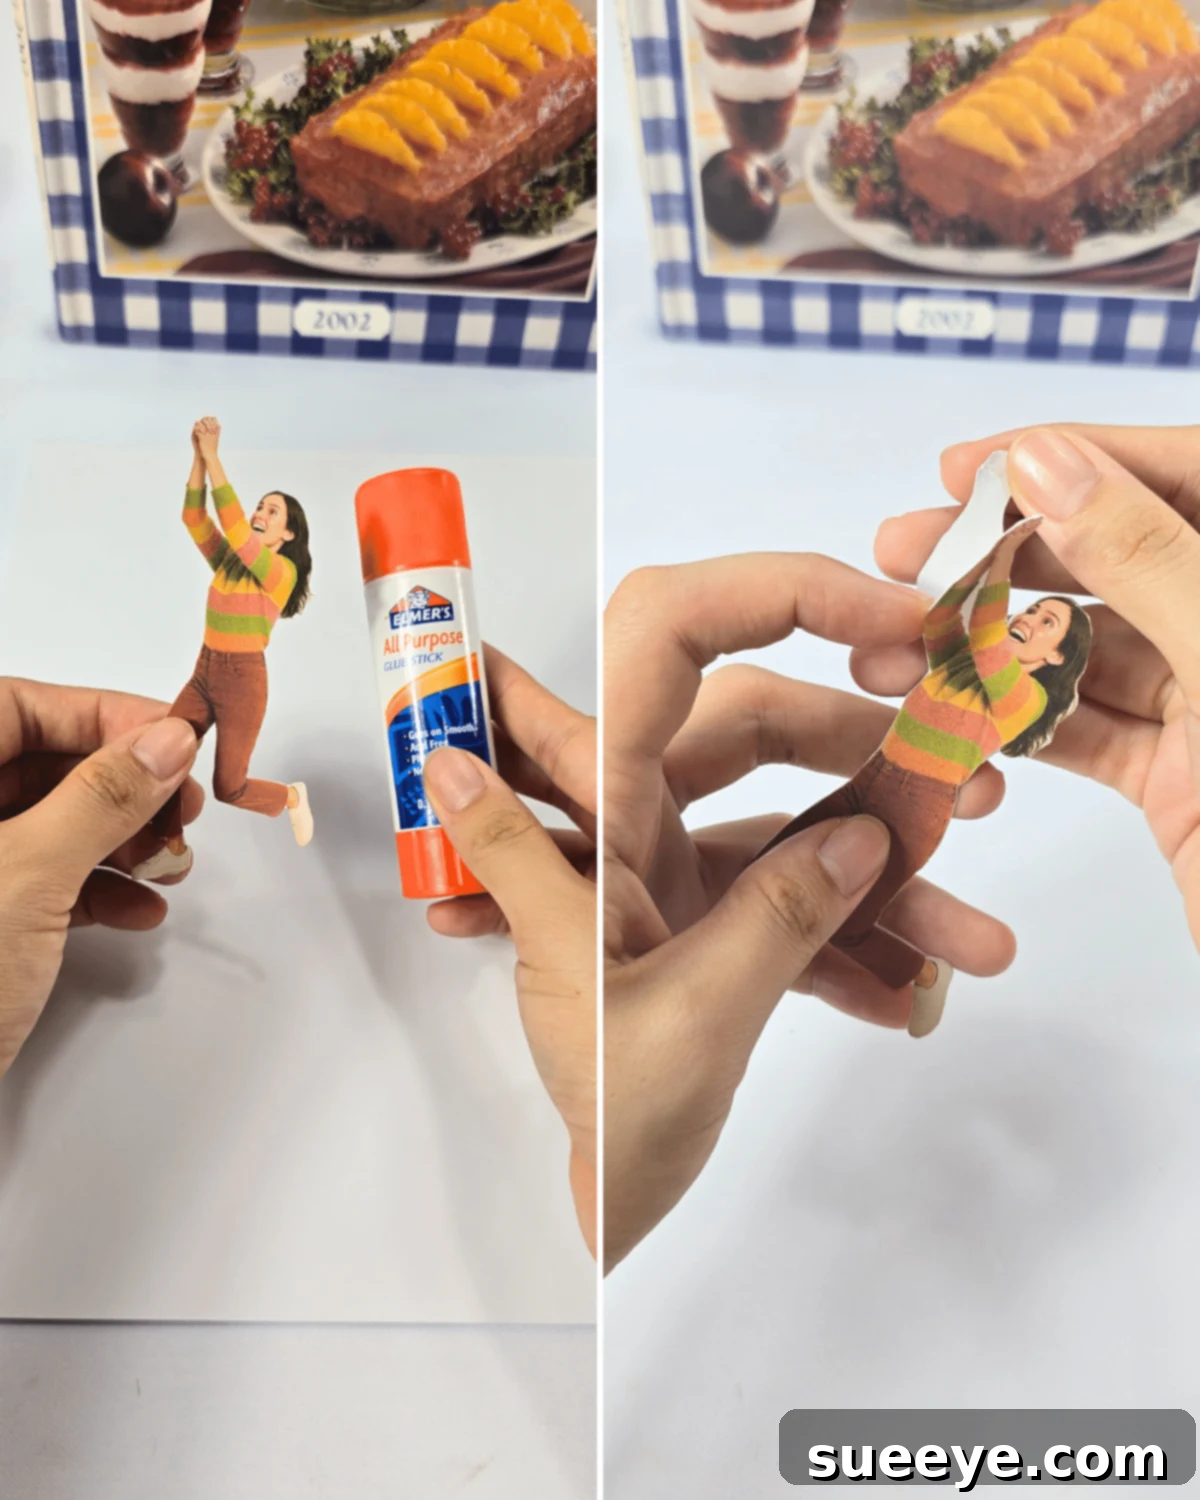
3. Enhance Sturdiness with Cardstock
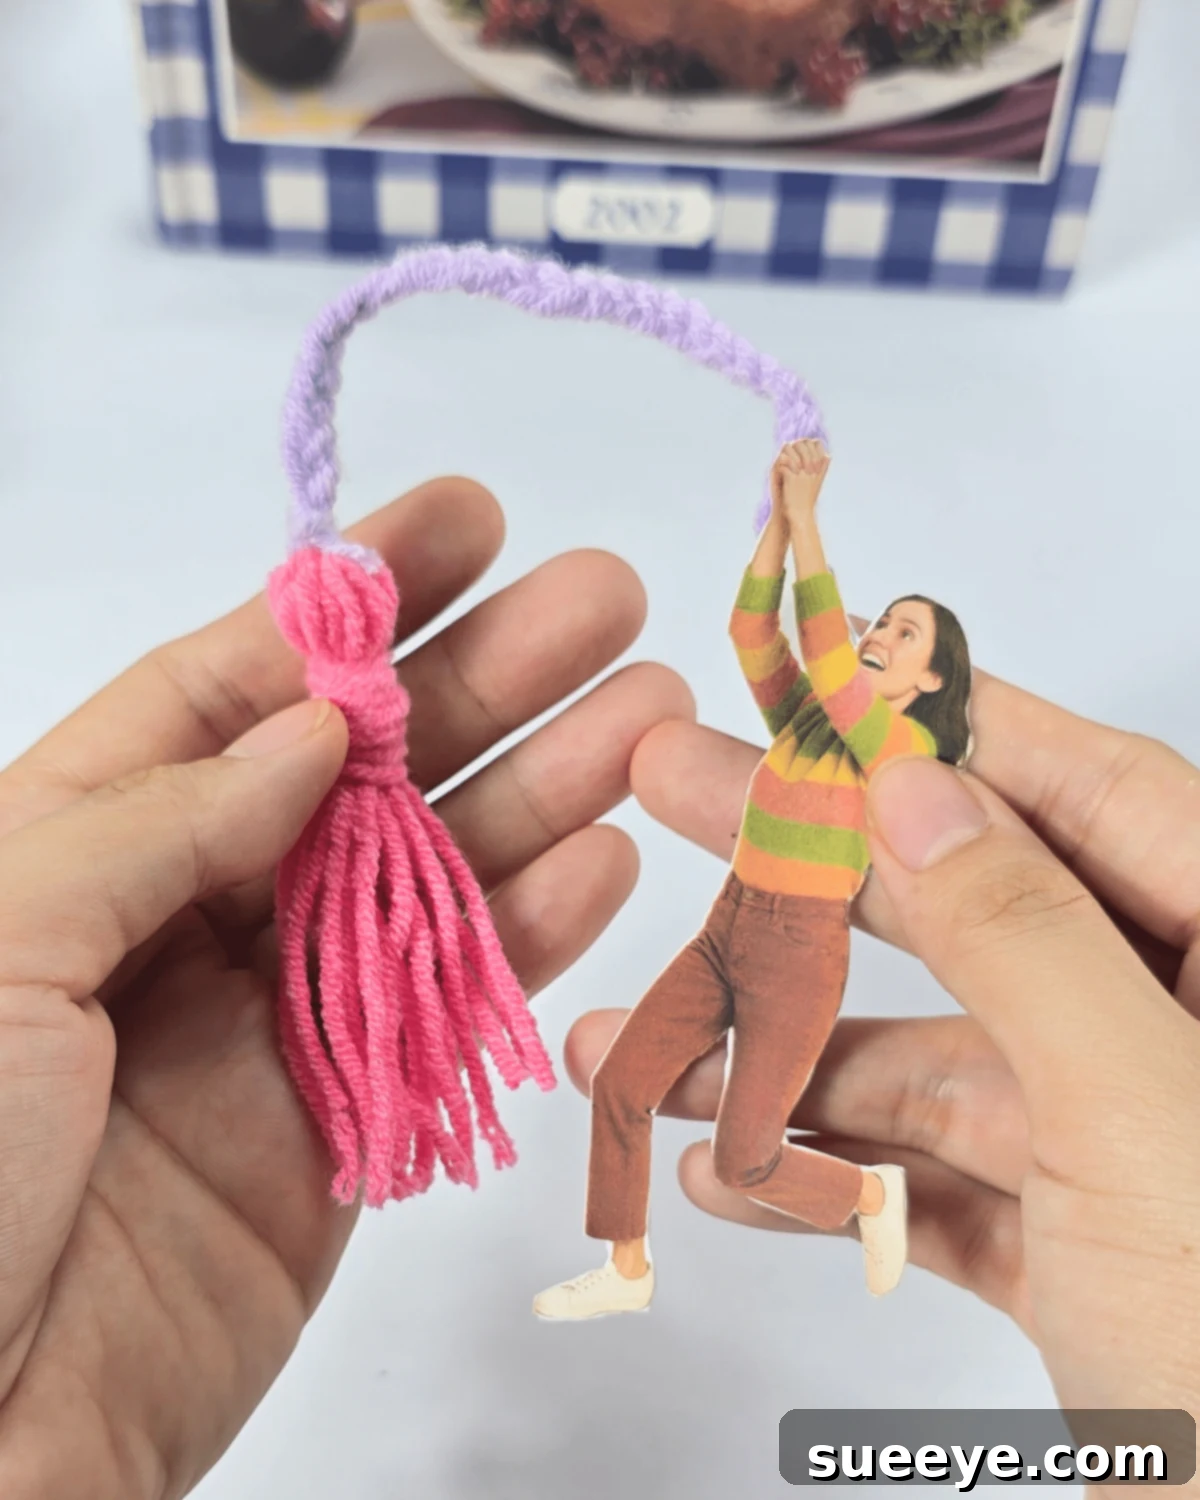
To ensure your bookmark is durable and doesn’t bend or crease easily with repeated use, you’ll need to adhere your photo cutout to a piece of sturdy cardstock. Apply a thin, even layer of craft glue or use a glue stick on the back of your photo. Carefully position it onto the cardstock, pressing down firmly from the center outwards to remove any air bubbles and ensure a strong bond. If you plan to add a tassel that attaches to a specific part of the photo (e.g., if a hand or an arm is designed to “hold” the tassel), remember to leave that particular section unglued for now. Once the glue is completely dry, trim the cardstock neatly around your photo, ensuring the edges are perfectly aligned for a clean look.
-
4. Attach Your Tassel (Optional)
If you’ve opted to add a decorative tassel, now’s the time to integrate it! If you left a section unglued on the cardstock (as mentioned in step 3 for a “holding” effect), insert the tassel’s top loop between the photo and the cardstock layers. Secure it firmly with a small dab of strong glue, ensuring it’s well-hidden. Alternatively, a common method is to use a small hole punch at the very top of your bookmark, thread the tassel loop through the hole, and secure it with a simple knot. Make sure the tassel is firmly attached so it doesn’t detach with repeated use. This small addition significantly elevates the bookmark’s aesthetic and makes it easier to retrieve from your book.
-
5. Prepare Your Contact Paper
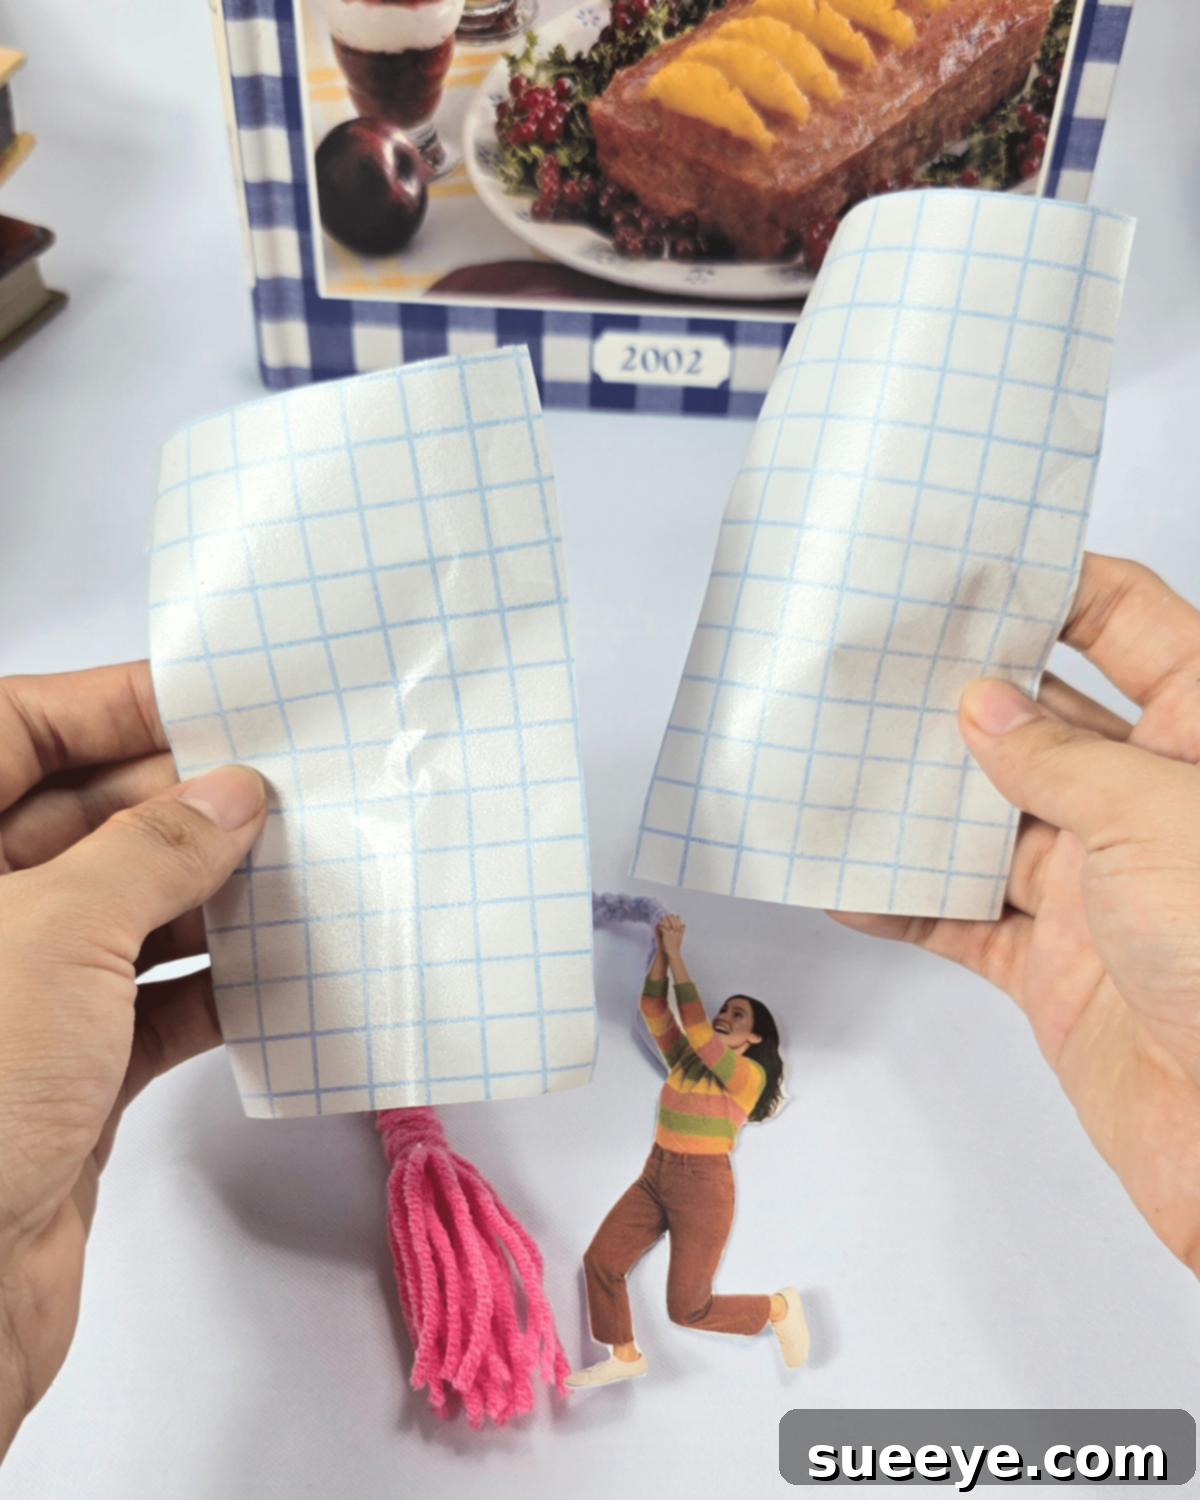
For the crucial lamination step, cut two pieces of clear contact paper. Each piece should be slightly larger than your completed photo bookmark – aim for about ⅛ to ¼ inch extra around all edges. This extra margin will ensure a complete, airtight seal around your bookmark, providing optimal protection and a professional finish. Measure carefully before cutting to avoid waste and ensure you have enough overlap.
-
6. Laminate and Finish Your Bookmark
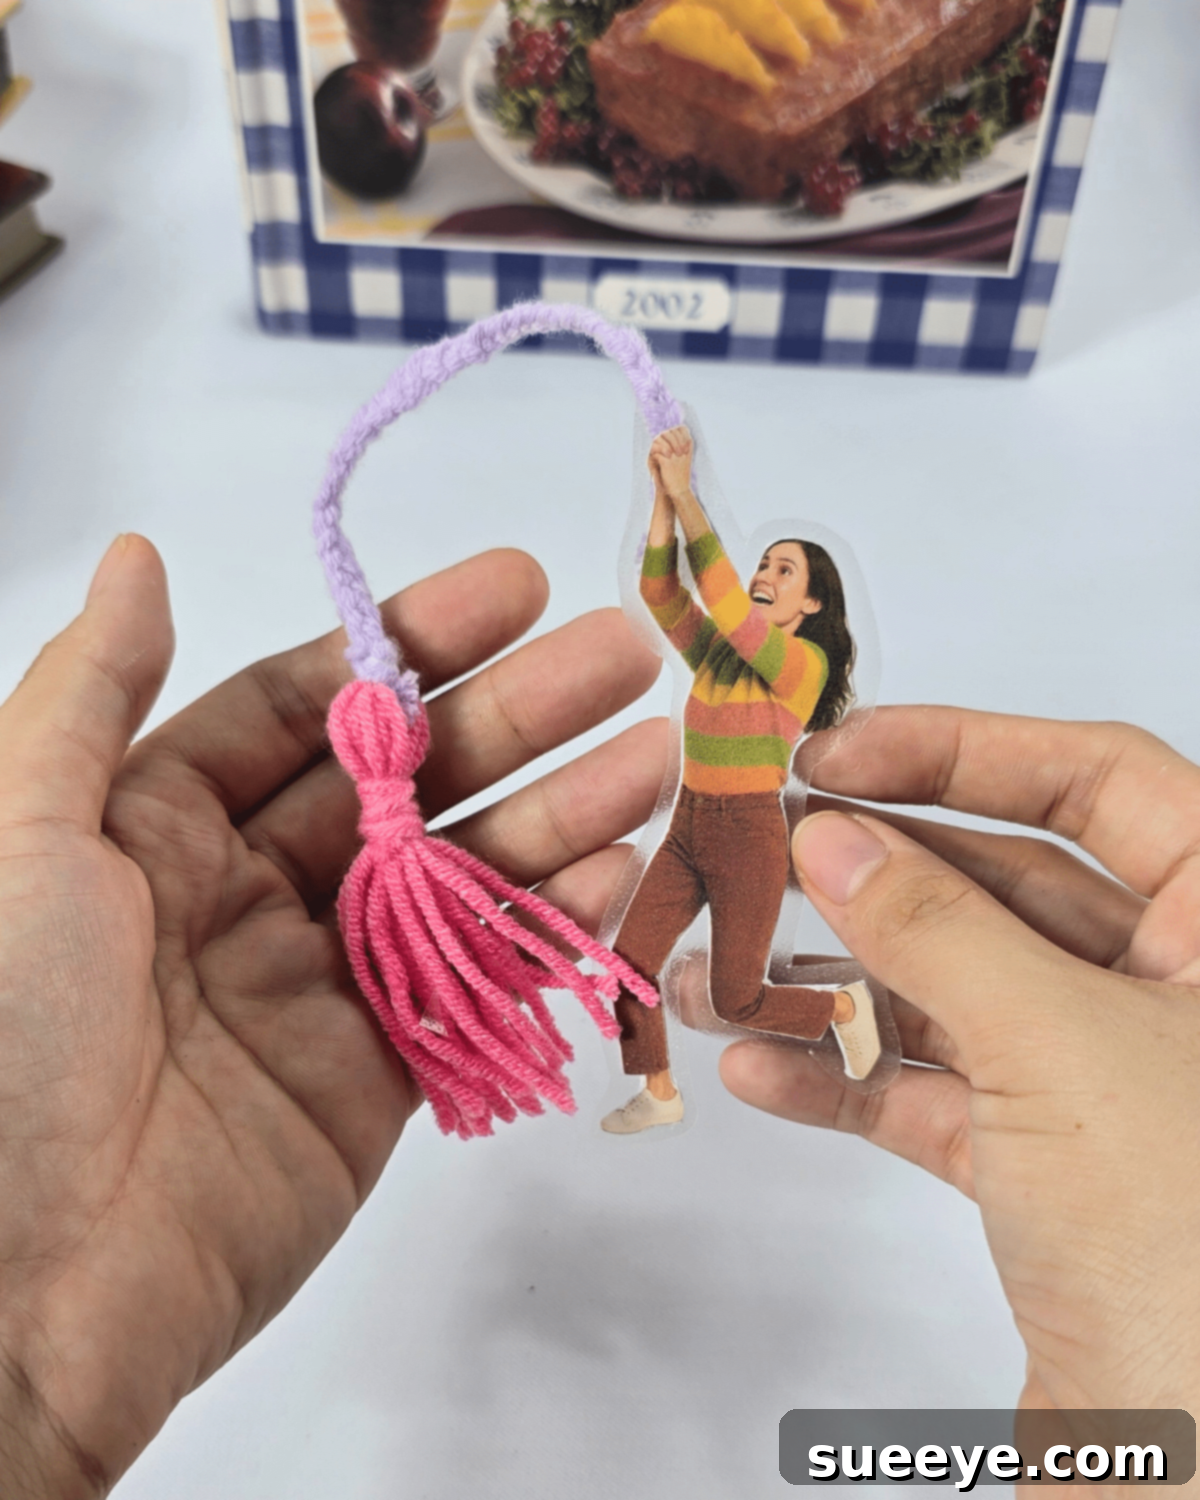
Carefully peel the backing off one piece of contact paper. Gently align your bookmark over the sticky side of the contact paper, pressing it down smoothly from the center outwards to prevent any unsightly air bubbles. Use a credit card, a ruler, or your fingers to firmly smooth out any trapped air, ensuring a flat, secure bond. Repeat this precise process for the back of the bookmark with the second piece of contact paper, making sure both sides are fully covered and sealed. Once laminated, use your scissors to meticulously cut off the excess contact paper, leaving a small, consistent border (approximately ⅛ inch) around the entire bookmark. You can also gently round the corners for a more polished and professional look, which also helps prevent the edges from lifting. Your unique, personalized photo bookmark is now complete and ready to elegantly mark your next literary adventure!
Materials Recap
- Contact paper
- Cardstock
- Scissors (or X-Acto knife)
- Tassel (optional)
- Glue
- Your favorite photos
Aren’t these personalized photo bookmarks absolutely charming? This easy and rewarding craft is perfect for adding a touch of personality to your reading or creating memorable, heartfelt gifts for friends and family. Don’t wait – gather your supplies, choose your favorite photos, and give them a try now to unleash your inner crafter!
Beyond Bookmarks: Other Creative Gift Ideas You’ll Adore
If you’ve enjoyed the rewarding process of crafting these personalized photo bookmarks, you’ll be thrilled to explore more handmade gift ideas that bring joy and a personal touch. Handcrafted gifts carry a special sentiment that store-bought items simply can’t match, truly showing the recipient just how much you care and the effort you put in. Dive into these other fantastic DIY projects perfect for gifting or simply for expanding your crafting repertoire and enjoying some creative fun:
More Thoughtful DIY Gifts
Paper Crafts
How to Make a Gift Bag from Wrapping Paper
Learn to craft charming and eco-friendly gift bags from your favorite wrapping paper. A perfect solution for irregularly shaped gifts, or a creative and personal alternative to store-bought bags that adds an extra touch of thoughtfulness to your present.
Crafts
How to Make An Origami Heart Bookmark
Discover the ancient art of origami with this delightful heart bookmark tutorial. A simple yet elegant craft that adds a romantic touch to any book and makes a sweet, thoughtful little gift for any bookworm or loved one.
Crafts
Easy Crochet Yarn Bow Tutorial
Unleash your inner crafter with this simple finger crochet yarn bow tutorial. Perfect for beginners, these charming bows can adorn gifts, hair accessories, or even add a cozy touch to your newly made photo bookmarks!
Home Decor
DIY Towel Teddy Bear Tutorial
Transform a simple towel into an adorable teddy bear with this fun and easy tutorial. An excellent, unique gift for baby showers, birthdays, or as a cute, charming decoration for any room in your home.
Start Your Creative Journey Today!
Crafting personalized photo bookmarks is more than just a hobby; it’s a wonderfully creative way to infuse everyday items with meaning and cherished memories. Whether you’re making them for yourself to enhance your reading experience, as thoughtful and unique gifts for friends and family, or as a fun and engaging activity with loved ones, these bookmarks are sure to bring immense joy and a distinctive flair to every book opened. So, gather your supplies, pick out your most beloved photos, and embark on this delightful DIY adventure today!
*If you loved this craft and want to explore more creative projects, be sure to visit our official website for endless inspiration and new ideas. For daily doses of DIY fun, follow our Facebook page, and don’t forget to subscribe to our YouTube channel for engaging video tutorials and exciting new craft ideas! Happy crafting!