
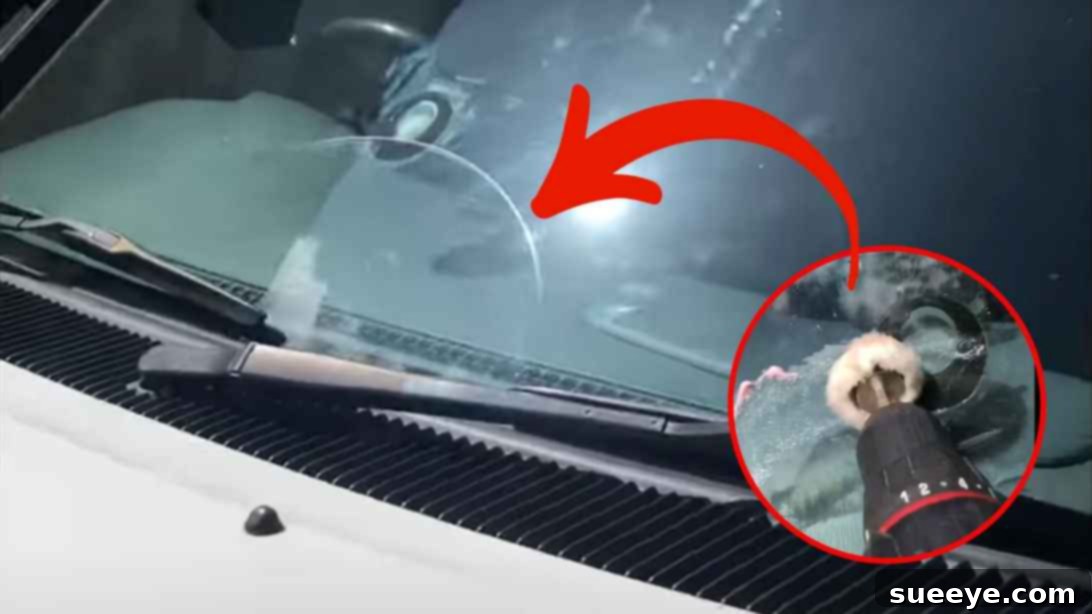
How To Fix A Scratched Windshield: Your Comprehensive DIY Guide
A pristine windshield is essential for safe driving, offering clear visibility of the road ahead. Unfortunately, even with the most careful maintenance, your vehicle’s windshield can accumulate unsightly scratches over time. These blemishes, whether minor or more noticeable, can impair your vision, become distracting, and even reduce your car’s aesthetic appeal. While deep cracks and significant damage always warrant professional intervention, many common surface scratches can be effectively addressed with a do-it-yourself (DIY) approach, saving you considerable time and money.
Instead of rushing to the nearest auto repair shop and potentially spending hundreds or even thousands of dollars, a simple, effective method can bring back the clarity of your windshield right from your garage. This comprehensive guide, inspired by the practical solutions shared by Stein Industrial Corporation on YouTube, will walk you through an easy-to-follow process. With just a few readily available materials and an hour of your time, you can achieve remarkable results. Prepare to restore your windshield’s smooth surface and clear view, enhancing both your driving safety and your car’s appearance.
Understanding Windshield Scratches: Causes and Severity
Before diving into the repair process, it’s crucial to understand the nature of windshield scratches. Not all scratches are created equal, and identifying their type and severity will determine if a DIY fix is appropriate or if professional help is required. Misjudging a scratch can lead to further damage or, more importantly, compromise your safety.
Common Causes of Windshield Scratches:
- Wiper Blades: Worn-out or faulty wiper blades can pick up tiny particles of grit and debris, which then act like sandpaper, scratching the glass with every swipe.
- Road Debris: Small stones, sand, and other particulate matter kicked up by other vehicles are a primary cause of impact-related scratches and chips.
- Improper Cleaning Techniques: Washing your windshield with abrasive cloths, dirty sponges, or dry wiping can drag dirt across the glass, causing swirl marks and light scratches.
- Ice Scrapers: Using metal or hard plastic ice scrapers without proper care, or when ice is partially thawed, can easily gouge the glass surface.
- Automatic Car Washes: Brushes in automatic car washes can sometimes harbor dirt and grime that, when applied with force, can scratch your windshield.
Types of Scratches and When to DIY vs. Professional Repair:
- Surface Scratches (Fine Scratches): These are usually very light, appearing as hazy lines or swirl marks. You can often feel them with your fingernail, but they don’t catch deeply. These are the ideal candidates for a DIY repair method, as they are confined to the outermost layer of the glass.
- Moderate Scratches: Slightly deeper than surface scratches, these are more noticeable and might catch your fingernail slightly. While some DIY methods can improve them, multiple applications or more aggressive polishing might be needed. Exercise caution and assess results carefully.
- Deep Scratches, Chips, and Cracks: If a scratch is deep enough to catch your fingernail firmly, or if you see any spiderwebbing, stars, bullseyes, or long cracks, it likely extends beyond the surface layer. These types of damage compromise the structural integrity of the windshield and require professional repair or replacement. Attempting a DIY fix on deep damage can worsen the problem and is a significant safety risk.
This DIY method is specifically designed for surface to moderate scratches. Always prioritize safety, and if in doubt, consult a qualified auto glass technician.
Essential Materials for DIY Windshield Scratch Repair
Gathering the right tools and materials is the first critical step in successfully repairing your scratched windshield. The beauty of this method lies in its simplicity, utilizing items you might already have or can easily acquire. Quality materials ensure optimal results and safety during the process.
Materials You Will Need:
- Industrial Strength Hand Cleaner: This acts as a primary abrasive in our polishing paste. Look for products designed to remove heavy grease and grime, often containing pumice or similar fine abrasive particles. Its cutting power helps to gently wear down the glass around the scratch.
- Super Cut Compound (Automotive Polishing Compound): A high-quality automotive cutting or polishing compound is vital. These compounds contain micro-abrasives specifically designed to refine surfaces, removing imperfections and restoring clarity without causing further damage. It works synergistically with the hand cleaner to create a smooth finish.
- Mixing Container: A small, clean, and sturdy container (e.g., a plastic bowl, an old yogurt cup) is needed to safely mix your polishing paste. Ensure it’s clean to prevent introducing new contaminants.
- Glass Polishing Buffer: A rotary or orbital buffer fitted with a glass polishing pad is essential. The type of pad matters; felt or foam pads designed for glass polishing are ideal. A variable speed buffer is highly recommended, allowing you to control the RPMs and prevent overheating the glass.
- Clean Microfiber Cloths: Have several clean, lint-free microfiber cloths on hand. These are crucial for wiping away residue, inspecting your progress, and performing the final clean-up without re-scratching the glass.
- Spray Bottle with Water (Optional but Recommended): A fine mist of water can help keep the working area lubricated and cool, especially during extended buffing sessions, reducing the risk of heat-induced glass distortion.
- Masking Tape (Optional but Recommended): Use automotive masking tape to cordon off the scratched area and protect surrounding paintwork or trim from accidental contact with the buffing paste or buffer.
- Safety Glasses and Gloves: Always wear safety glasses to protect your eyes from splashes and debris, and gloves to protect your hands from the cleaning and polishing compounds.
Detailed Directions: Your Step-by-Step Windshield Repair Process
With your materials ready, let’s proceed with the repair. This process requires patience and attention to detail to ensure a flawless finish. Follow these steps carefully for the best results.
Step 1: Prepare Your Work Area and Windshield
Begin by parking your vehicle in a shaded, well-ventilated area to prevent premature drying of the polishing paste and to allow for better visibility of scratches. Thoroughly clean the entire windshield using a quality glass cleaner and a clean microfiber cloth. Remove any dirt, grime, or existing waxes. This ensures that no new scratches are introduced during the buffing process. Once clean, use masking tape to delineate the scratched area and protect any adjacent paint or trim. Don’t forget to put on your safety glasses and gloves.
Step 2: Create Your Custom Buffing Paste
In your clean mixing container, combine the industrial strength hand cleaner and the super cut compound. The ideal ratio is 70% industrial strength hand cleaner to 30% super cut compound. For example, if you use 7 spoonfuls of hand cleaner, add 3 spoonfuls of super cut compound. Mix these two ingredients thoroughly until you achieve a consistent, smooth paste. This mixture is your secret weapon, combining the aggressive cutting power of the hand cleaner with the refining properties of the automotive compound.
Step 3: Apply Paste and Begin Buffing
Apply a small amount of the freshly mixed buffing paste directly onto the glass polishing buffer pad. Then, dab a thin, even layer of the paste onto the scratched area of your windshield. Start buffing the scratched section using your glass polishing buffer at a low to medium speed. Maintain even pressure and move the buffer in small, overlapping circular motions. The goal is to gently abrade the glass surface, leveling out the scratch. Avoid applying excessive pressure or dwelling in one spot for too long, as this can generate excessive heat and potentially distort the glass. Keep the buffer moving constantly.
Step 4: Wipe, Inspect, and Repeat
After a minute or two of buffing, stop the machine and use a clean microfiber cloth to wipe away the paste residue from the treated area. Thoroughly inspect the scratch from various angles, both inside and outside the car, under different lighting conditions. You should notice a reduction in the scratch’s visibility. If the scratch is still present, reapply the paste to the buffer and the scratched area, then repeat the buffing process. Continue buffing, wiping, and inspecting in iterative cycles until the scratch is either completely gone or significantly less noticeable. Patience is key here; multiple passes are often required for optimal results.
Step 5: Final Clean-up and Assessment
Once you are satisfied with the scratch removal, give the entire windshield a final, thorough cleaning with glass cleaner and fresh microfiber cloths. Ensure all paste residue is removed. Conduct a final inspection of the repaired area. Under ideal conditions, the scratch should be virtually undetectable, leaving your windshield clear and smooth. If a faint trace remains, but significant improvement has been made, you may opt to stop to prevent over-polishing, which can lead to slight distortions in the glass. For deeper scratches, you may reach a point of diminishing returns where no further improvement is possible with this method.
Important Tips for Success and Safety
To ensure the best possible outcome and to maintain safety throughout the DIY windshield scratch repair process, keep the following tips in mind:
- Always Test in an Inconspicuous Area: If you’re unsure about the compounds or your buffing technique, test on a small, less visible part of your windshield first, like a corner, to observe how the glass reacts.
- Patience is Paramount: Do not rush the process. Windshield repair is a gradual process of fine abrasion. Aggressive buffing can lead to new damage or overheating the glass.
- Control Heat: Excessive heat can cause glass distortion or even cracking. Keep the buffer moving, use moderate speed, and if necessary, mist the area lightly with water from a spray bottle to keep it cool. Feel the glass periodically; if it feels hot, take a break.
- Suitable Scratches Only: Reiterate that this method is for surface to moderate scratches. Attempting to fix deep scratches, chips, or cracks can worsen the damage and compromise safety.
- Maintain Cleanliness: Always use clean cloths and ensure your buffer pad is free of debris. Any particles can create new scratches during the polishing process.
- Proper Lighting is Crucial: Work in good lighting conditions to accurately identify scratches and monitor your progress. Sunlight or a strong flashlight held at an angle can reveal hidden imperfections.
- Don’t Over-Polish: While repeating the process is necessary for stubborn scratches, there’s a point of diminishing returns. Over-polishing can lead to a slight concave effect or haziness in the glass, which is irreversible without professional intervention. Stop when you achieve satisfactory results or no further improvement is observed.
- Consider Professional Help: If you’re uncomfortable performing the repair, or if the scratches are deep, extensive, or in your direct line of sight, it’s always best to consult a professional auto glass technician.
When to Call a Professional for Windshield Repair
While DIY solutions are effective for minor issues, there are specific situations where professional windshield repair or replacement is not just recommended, but essential for your safety and compliance with road regulations. Understanding these limits is crucial.
- Deep Scratches, Chips, or Cracks: Any damage that penetrates the outer layer of the glass, feels deep to the touch, or shows signs of cracking (e.g., star breaks, bullseyes, spiderwebs) cannot be safely repaired with a DIY method. These types of damage compromise the structural integrity of the windshield, which is a vital safety component of your vehicle, supporting the roof in a rollover and aiding airbag deployment.
- Damage in the Driver’s Direct Line of Sight: Even minor damage in the critical viewing area can be a major distraction and may fail vehicle safety inspections. Professional repair ensures that visibility remains unimpaired and meets legal standards.
- Large Areas of Damage: If your windshield has multiple scratches spread across a large area, or a single scratch that is very long, a DIY approach might be too time-consuming, ineffective, or could lead to uneven results (like optical distortion).
- Uncertainty or Lack of Confidence: If you’re not confident in your ability to perform the repair correctly, or if you’re unsure about the severity of the damage, it’s always safer to seek expert advice. Professional technicians have specialized tools and training to assess and fix complex windshield issues.
- Previous Unsuccessful DIY Attempts: If you’ve tried a DIY method and haven’t achieved satisfactory results, or worse, if you’ve caused further damage (like hazing or distortion), it’s time to let professionals evaluate the situation.
Remember, your windshield is more than just a piece of glass; it’s a critical safety feature. Compromising its integrity can have severe consequences. Don’t hesitate to invest in professional service when the damage exceeds the scope of a simple DIY fix.
Maintaining a Scratch-Free Windshield
Once you’ve successfully removed those annoying scratches, taking proactive steps to prevent future damage is paramount. Regular maintenance and careful driving habits can significantly extend the life of your windshield and keep it looking pristine.
- Replace Wiper Blades Regularly: Worn-out wiper blades are a leading cause of windshield scratches. Replace them every 6-12 months, or as soon as you notice streaking, chattering, or a reduction in wiping efficiency. Ensure they are the correct size and type for your vehicle.
- Use Quality Windshield Washer Fluid: Keep your washer fluid reservoir filled with a good quality fluid that helps clean and lubricate the glass. Avoid using plain water, especially in freezing temperatures, as it offers no cleaning power and can freeze.
- Practice Proper Car Washing Techniques: When washing your car, always rinse the windshield thoroughly to remove loose dirt and grit before scrubbing. Use a soft, clean sponge or microfiber wash mitt and a two-bucket washing method (one for soapy water, one for rinsing) to prevent transferring abrasive particles back onto the glass. Avoid dry wiping the windshield.
- Avoid Harsh Scrapers for Ice and Snow: When dealing with ice, use a plastic ice scraper and apply gentle pressure. For thick ice, allow your defroster to work for a while or use an ice-melt spray before attempting to scrape. Never use metal tools or anything abrasive.
- Maintain a Safe Following Distance: Keeping a safe distance from other vehicles, particularly on highways or unpaved roads, reduces the likelihood of rocks and debris being kicked up and striking your windshield.
- Apply Glass Sealants or Rain Repellents: Products like Rain-X create a hydrophobic barrier on your windshield, making it smoother. This not only improves visibility in rain but also makes it harder for dirt and minor debris to adhere, potentially reducing scratch incidence and making cleaning easier.
- Inspect Your Windshield Regularly: Periodically check your windshield for any new chips or scratches. Addressing small issues promptly can prevent them from worsening and becoming more costly to repair.
By incorporating these preventative measures into your car care routine, you can significantly reduce the risk of future windshield scratches, ensuring clear vision and a safer driving experience for years to come.
Conclusion
Dealing with a scratched windshield no longer needs to be a source of frustration or a drain on your finances. As demonstrated by the innovative approach from Stein Industrial Corporation, many common surface scratches can be effectively and affordably repaired right at home. This detailed DIY guide provides you with the knowledge, tools, and step-by-step instructions to tackle those imperfections, restoring clarity and improving the safety of your vehicle.
Remember, the key to success lies in understanding the type of scratch you’re dealing with, meticulous preparation, careful application of the buffing paste, and the patience to repeat the process until you achieve the desired results. While this method is a powerful solution for minor to moderate damage, always prioritize safety and know when to seek professional assistance for deeper, more complex issues. By taking proactive steps in windshield maintenance, you can enjoy a consistently clear view of the road, ensuring a safer and more pleasant driving experience.