
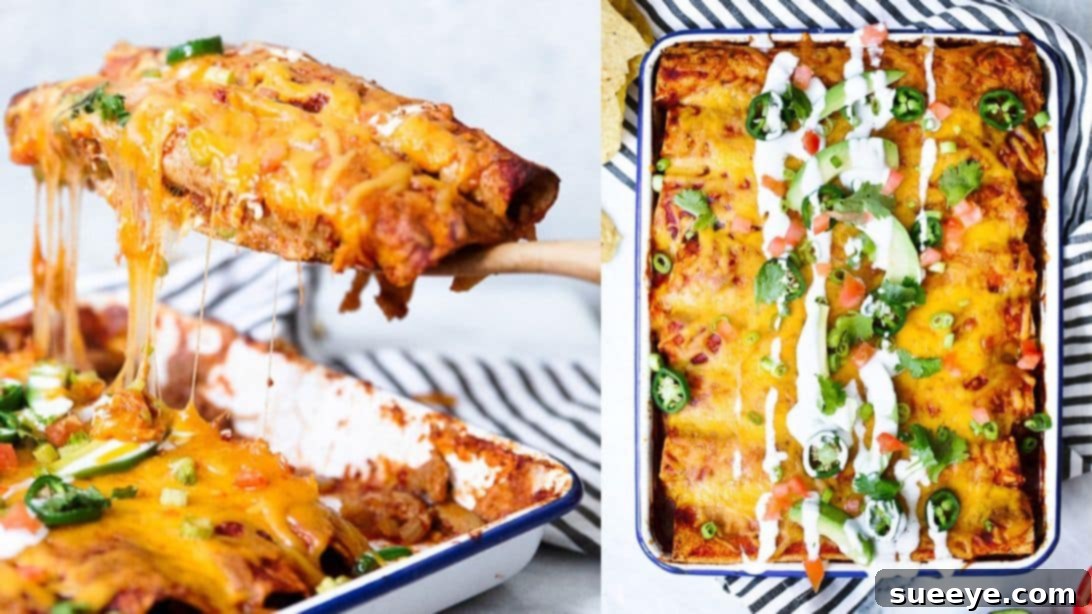
The Ultimate 5-Star Chicken Enchiladas Recipe: Authentic Flavors at Home
Prepare to elevate your dinner game with a truly exceptional recipe for chicken enchiladas. This particular rendition, inspired by the talented Rachel cooks with love, has earned its “5-star” reputation for good reason. Forget everything you thought you knew about homemade enchiladas; this recipe brings a depth of flavor and creamy richness that sets it apart from any other version you might have tried. It’s a harmonious blend of traditional Mexican spices and a velvety sauce that will undoubtedly become a staple in your culinary repertoire. Whether you’re a seasoned chef or a home cook looking for a new family favorite, these chicken enchiladas promise a delightful culinary experience that’s both comforting and incredibly satisfying.
Enchiladas, a beloved staple of Mexican cuisine, consist of corn tortillas rolled around a filling and covered with a savory chili sauce. While their history dates back centuries, evolving from simple corn tortillas dipped in chili sauce to the more complex, cheese-laden dishes we know today, the essence remains the same: a celebration of flavor and tradition. This recipe honors that heritage while introducing an unparalleled richness that makes every bite memorable. If you’re ready to create a truly unforgettable meal at home, follow along with our detailed instructions.
Gather Your Ingredients for Exceptional Enchiladas
Crafting these remarkable chicken enchiladas begins with selecting the right ingredients. Each component plays a crucial role in building the layered flavors that make this dish so special. From the succulent chicken to the carefully chosen spices for the rich sauce, quality ingredients are key to achieving that authentic 5-star taste. Here’s what you’ll need:
- 1 lb of Boneless, Skinless Chicken: A combination of 3 thighs and 1 breast is ideal for tender, flavorful meat that shreds beautifully.
- 2 tablespoons of Melted Butter: Forms the base of our luxurious enchilada sauce.
- 1 tablespoon of Vegetable Oil: For enhancing the roux and frying tortillas.
- 3 tablespoons of All-Purpose Flour: The essential thickening agent for a silky-smooth sauce.
- 1 1/2 tablespoons of Chili Powder: Provides the foundational chili flavor and vibrant color.
- 2 teaspoons of Paprika: Adds warmth and a touch of sweetness to the spice blend.
- 1 teaspoon of Garlic Powder: Aromatic depth that complements the savory chicken.
- 1 teaspoon of Onion Powder: Offers a mild, sweet onion essence without the texture.
- 1 teaspoon of Ground Cumin: Earthy and distinctive, a hallmark spice in Mexican cooking.
- 1/2 teaspoon of Mexican Oregano: More floral and citrusy than common oregano, enhancing authenticity.
- 3 cups of Chicken Broth: The liquid base for our rich enchilada sauce.
- 2 teaspoons of Tomato Paste: Deepens the color and adds umami richness to the sauce.
- 1 1/2 teaspoons of Chicken Bouillon: Intensifies the savory chicken flavor throughout the sauce.
- 1/2 teaspoon of Sugar: Balances the acidity of the tomatoes and enhances other flavors.
- Additional Vegetable Oil: For shallow-frying the corn tortillas.
- 10 to 12 Corn Tortillas: The classic choice for authentic enchiladas; their flavor and texture are unmatched.
- 3/4 lb of American Cheese: Melts beautifully, adding a creamy, rich texture to the filling and topping.
Essential Kitchen Tools for Success
Having the right tools at hand will make the preparation process smooth and enjoyable. You won’t need anything overly specialized, but these essentials will ensure your enchilada-making journey is seamless:
- Deep saucepan or Dutch oven for boiling chicken
- Large skillet or saucepan for making the sauce
- Whisk
- Cutting board and knife for chopping chicken
- Another skillet for frying tortillas
- Tongs for handling hot tortillas
- Paper towels for draining oil
- 9×13 inch (or similar) casserole dish
- Aluminum foil
Step-by-Step Guide to Crafting 5-Star Chicken Enchiladas
Follow these detailed instructions to create the most incredibly flavorful chicken enchiladas. Each step is designed to build layers of taste, culminating in a dish that will impress everyone at your table.
Step 1: Prepare the Flavorful Chicken
Begin by preparing the star of our enchiladas: the chicken. In a deep saucepan or Dutch oven, add enough cold water to fully cover your chicken pieces. Place the saucepan over medium heat. Carefully add the boneless, skinless chicken (the combination of thighs and breast ensures both moisture and flavor), a small piece of onion, and a pinch of salt to the water. Bring the water to a rolling boil. Once boiling, reduce the heat to medium-low, allowing the chicken to simmer gently until it’s cooked through and easily shreddable – this typically takes about 15-20 minutes depending on the thickness of your chicken. Cooked chicken should reach an internal temperature of 165°F (74°C). Once done, remove the chicken from the pot, let it cool slightly, then chop it into very small, uniform pieces. This size ensures it distributes evenly and doesn’t tear the tortillas during assembly.
Step 2: Master the Rich Enchilada Sauce Base
The enchilada sauce is the heart of this recipe, and a perfect roux is its foundation. In a separate large saucepan, melt 2 tablespoons of butter over medium heat. Add 1 tablespoon of vegetable oil to the butter, then gradually whisk in 3 tablespoons of all-purpose flour. Continuously whisk this mixture, creating a roux, until the flour is thoroughly cooked and achieves a beautiful golden-brown color, akin to a light peanut butter. This process usually takes about 3-5 minutes and is crucial for removing the raw flour taste. Next, reduce the heat to low. Add the chili powder and paprika, mixing them thoroughly into the roux. Allow these spices to “bloom” for about a minute, stirring constantly – this short toasting period truly intensifies their flavor and aroma. Then, whisk in the garlic powder, onion powder, and ground cumin until well combined with the spice-infused roux.
Step 3: Develop the Sauce’s Silky Smoothness
With your aromatic spice base ready, it’s time to introduce the liquid. Gradually pour in 3 cups of chicken broth, whisking continuously and vigorously as you add it. This constant whisking is vital to prevent lumps and ensure your sauce remains perfectly smooth and velvety. Continue to whisk until all the broth is incorporated and the sauce begins to thicken slightly. The heat will help activate the flour’s thickening properties, transforming it into a cohesive and appealing sauce base.
Step 4: Infuse the Sauce with Deep Flavors
Now, we’ll layer in the final flavor enhancers for an exceptionally rich sauce. Whisk in the Mexican oregano, tomato paste, chicken bouillon, and sugar. The tomato paste adds a wonderful depth of color and umami, while the bouillon intensifies the chicken notes, and the sugar balances the overall profile. Continue to stir until all ingredients are fully dissolved and integrated. As the sauce warms, you’ll notice small bubbles forming around the edges of the pan. Once this occurs, reduce the temperature to its lowest setting. Allow the sauce to simmer gently for an additional 2 to 3 minutes, stirring occasionally. This simmering time allows the flavors to meld and deepen, creating a truly complex and irresistible enchilada sauce.
Step 5: Prepare the Corn Tortillas for Optimal Texture
Properly prepared tortillas are crucial for delicious, non-soggy enchiladas. Add about 1/4 inch of vegetable oil to a separate pan and place it over medium heat. Once the oil is hot (a small drop of water should sizzle), carefully fry each corn tortilla, one at a time. Fry until it softens and begins to bubble slightly, typically just a few seconds per side. This process makes the tortillas pliable, preventing them from cracking when rolled, and also adds a layer of flavor and texture that differentiates truly great enchiladas. Flip the tortilla with tongs and cook the other side for just a couple more seconds. Immediately transfer the fried tortilla to a plate lined with paper towels to absorb any excess oil. Make sure to pat down both sides gently. Repeat this process with all the remaining tortillas, adding more oil as needed to maintain the shallow depth.
Step 6: Expertly Assemble Your Chicken Enchiladas
Now for the exciting part – assembly! Begin by spooning a thin layer of your magnificent enchilada sauce onto the bottom of your casserole dish. This prevents the enchiladas from sticking and adds flavor to every layer. Take one of your softened corn tortillas and dip it completely into the warm enchilada sauce, ensuring it’s fully coated. Don’t let it soak too long, just enough to be covered. Transfer the sauce-dipped tortilla to your casserole dish. Down the center of the tortilla, add a generous portion of your chopped chicken, followed by a sprinkle of shredded American cheese, and optionally, some finely diced onions for an extra zing. Carefully roll the tortilla up, creating a neat cylinder. Place the rolled enchilada seam-side down in the prepared casserole dish. Repeat this process with the remaining tortillas, chicken, cheese, and onions, arranging them snugly in the dish until it’s full.
Step 7: Bake to Golden, Cheesy Perfection
Once all your enchiladas are neatly arranged in the casserole dish, it’s time for the grand finale. Ladle a generous amount of the remaining enchilada sauce evenly over the top of the rolled tortillas, ensuring they are all thoroughly covered. This not only adds flavor but also helps keep them moist during baking. Finish by sprinkling a final layer of American cheese and any remaining diced onions over the sauce. Cover the casserole dish tightly with aluminum foil. This helps to steam the enchiladas and melt the cheese beautifully without drying them out. Place the covered dish into a preheated 375-degree Fahrenheit (190°C) oven, ideally on the center rack. Bake for 20 to 30 minutes, or until the cheese is completely melted, bubbly, and the enchiladas are heated through. For an even more golden top, you can remove the foil for the last 5-10 minutes of baking.
Step 8: Serve and Savor Your Masterpiece
Once your chicken enchiladas emerge from the oven, bubbling and fragrant, let them rest for a few minutes before serving. This allows the sauce to settle and prevents the enchiladas from falling apart. These glorious 5-star chicken enchiladas are a complete meal in themselves, but they pair wonderfully with various side dishes. Consider serving them with a dollop of sour cream or crema, a sprinkle of fresh cilantro, a side of fluffy Mexican rice, refried beans, or a simple green salad with a zesty vinaigrette. The creamy, savory flavors of the enchiladas are perfectly complemented by these lighter additions. Get ready to enjoy a truly magnificent homemade meal that tastes like it came straight from your favorite Mexican restaurant!
Tips for the Perfect 5-Star Chicken Enchiladas Every Time
To ensure your chicken enchiladas are consistently perfect and live up to their 5-star rating, consider these additional tips:
- Don’t Skip Frying the Tortillas: This step is critical. It makes the tortillas pliable, preventing them from tearing when rolled, and seals them to prevent sogginess from the sauce.
- Taste and Adjust the Sauce: Before adding it to the enchiladas, always taste your sauce. Adjust salt, pepper, or even a tiny bit more sugar or chili powder to suit your preference.
- Shredding vs. Chopping Chicken: While the recipe calls for chopping, shredding the chicken (especially thighs) can offer a different, stringier texture that some prefer. Experiment to find your favorite!
- Cheese Choice: American cheese melts incredibly well and contributes to the creamy texture. However, a blend of Monterey Jack and mild cheddar can also be used for a slightly sharper flavor.
- Make Ahead: Enchiladas are a fantastic make-ahead meal! Assemble them in the casserole dish, cover tightly with foil (or plastic wrap then foil), and refrigerate for up to 24 hours. Add an extra 10-15 minutes to the baking time if baking from cold.
- Freezing Instructions: You can freeze unbaked enchiladas. Wrap the assembled dish tightly in several layers of plastic wrap and then foil. Freeze for up to 2-3 months. Thaw overnight in the refrigerator before baking, or bake from frozen, increasing baking time significantly (around 60-90 minutes, covered, then uncovered).
- Garnish Generously: Fresh cilantro, sliced green onions, a drizzle of Mexican crema or sour cream, and even some sliced avocado can elevate the presentation and add fresh flavors.
Frequently Asked Questions About Chicken Enchiladas
Can I use flour tortillas instead of corn?
While traditional enchiladas use corn tortillas, you can certainly use flour tortillas if you prefer. However, they don’t hold up quite as well to soaking in sauce and tend to be less pliable after frying. For the authentic 5-star experience, corn tortillas are recommended.
What if I don’t have Mexican oregano?
Regular Mediterranean oregano can be substituted, but Mexican oregano has a distinct, more earthy and citrusy flavor that truly enhances the authenticity of the dish. If you can find it, it’s worth seeking out.
How can I make this spicier?
To increase the heat, you can add a pinch of cayenne pepper to the sauce, or include a finely diced jalapeño or serrano pepper when sautéing the initial roux spices. You can also add a dash of your favorite hot sauce to the finished dish.
Can I use different types of meat?
Absolutely! While chicken is specified here, this sauce base works wonderfully with shredded beef (like barbacoa or birria-style beef) or even ground beef. Ensure the meat is fully cooked and seasoned before adding it to the tortillas.
Why does my sauce taste like raw flour?
This is usually due to not cooking the roux long enough in Step 2. The flour needs to be continuously whisked over heat until it reaches a golden-brown color and a nutty aroma develops, indicating it’s fully cooked.
Ready to Delight Your Taste Buds?
This 5-star chicken enchiladas recipe, inspired by Rachel cooks with love, is more than just a meal; it’s an experience. The rich, flavorful sauce combined with tender chicken and melted cheese creates a symphony of tastes that will transport you straight to culinary bliss. Don’t hesitate to embark on this delicious journey. Gather your ingredients, follow these steps, and prepare to enjoy truly extraordinary homemade chicken enchiladas. Your family and friends will thank you!