
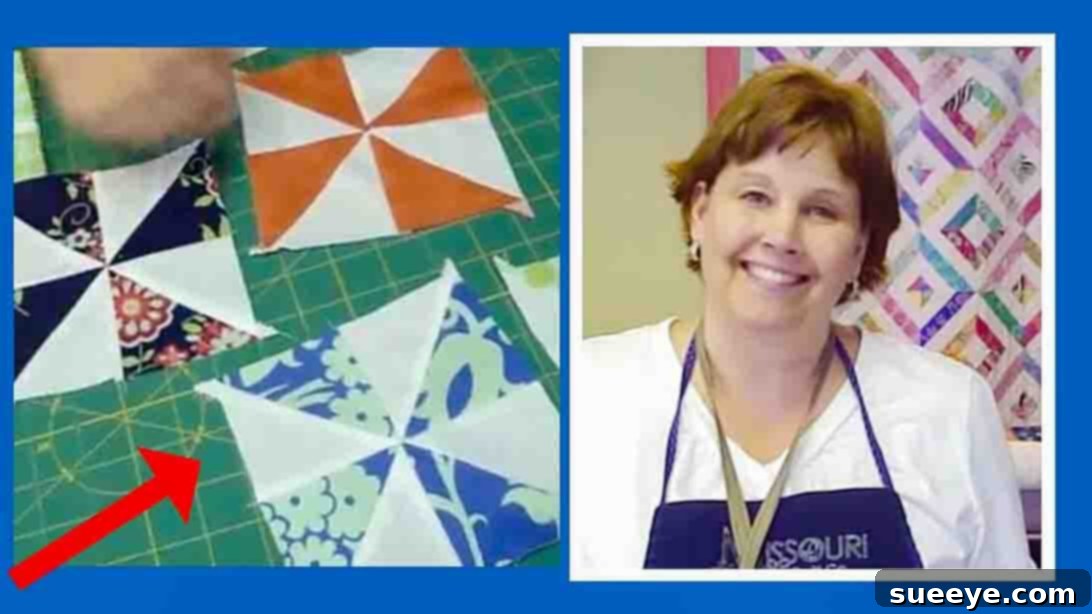
Embarking on your quilting journey or simply looking for a quick and satisfying project? The Pinwheel quilt block is a timeless classic, beloved by quilters of all skill levels for its charming simplicity and versatile design. Among its many variations, the fast and easy method popularized by quilting maestro Jenny Doan of Missouri Star Quilt Company stands out as a true game-changer. This tutorial simplifies the process, making it incredibly accessible for beginners while still being a delightful project for experienced quilters.
If you’ve ever admired the intricate dance of fabrics in a beautifully pieced quilt but felt intimidated by complex patterns, the Pinwheel block is your perfect entry point. It’s an excellent opportunity to hone fundamental quilting skills like precise cutting and accurate seam allowances, which are crucial for success in more elaborate projects down the line. What makes this particular method even more appealing is its reliance on pre-cut fabric squares, specifically charm packs, which eliminate much of the initial cutting, getting you straight to the fun part of sewing.
This guide will walk you through creating stunning Pinwheel quilt blocks with ease, following Jenny Doan’s celebrated technique. We’ll explore the joy of transforming simple squares into dynamic, spinning designs that can form the basis of a beautiful quilt, a decorative throw pillow, or even unique placemats. Get ready to gather your materials and let’s dive into the world of fast, fun, and fabulous Pinwheel quilting!
Mastering the Pinwheel Quilt Block: An Easy Guide for Quilters
The Pinwheel quilt block is an iconic design that brings a sense of motion and whimsy to any quilting project. Its beauty lies in its simplicity, typically formed by combining four half-square triangles (HSTs) to create a spinning effect. This particular method from Missouri Star Quilt Company, championed by Jenny Doan, takes the traditional approach and streamlines it, allowing you to create multiple HSTs simultaneously, thus speeding up the entire process significantly. This makes it an ideal choice for a weekend project or for making multiple blocks for a larger quilt in record time.
One of the greatest advantages of this pattern is its versatility. Once you’ve mastered the basic Pinwheel block, you can experiment with different fabric combinations, colors, and arrangements to create truly unique quilts. Imagine a quilt composed entirely of bright, cheerful Pinwheels, or a more subdued design featuring earthy tones. The possibilities are endless, and it all starts with learning this fundamental, yet powerful, technique.
Materials for Your Fast and Easy Pinwheel Quilt Block
Before we begin sewing, let’s ensure you have all the necessary supplies. The beauty of this project lies in its minimal material requirements, primarily focusing on pre-cut fabrics, which are a quilter’s best friend for quick projects.
- 1 Charm Pack: A charm pack typically consists of 42 pre-cut 5-inch by 5-inch fabric squares, all from a coordinating fabric line. This takes the guesswork out of fabric selection and ensures a harmonious look for your quilt. Charm packs are fantastic for beginners as they eliminate the need for extensive fabric cutting, allowing you to jump straight into piecing.
- 5″ x 5″ White Squares: You’ll need an equal number of these background squares as you have charm pack squares. These plain squares provide a striking contrast, allowing the vibrant patterns of your charm pack fabrics to truly pop and define the Pinwheel’s spinning motion. Using a solid, light-colored fabric like white, cream, or a very light gray is common, but you could also experiment with a dark solid for a more dramatic effect.
- Basic Quilting Tools:
- Sewing machine with a 1/4″ quilting foot (highly recommended for consistent seams)
- Rotary cutter with a fresh blade
- Quilting ruler (at least 6″ x 12″ is versatile)
- Cutting mat
- Iron and ironing board
- Thread (matching or contrasting, good quality polyester or cotton)
- Fabric scissors or snips
- Pins or wonder clips
Having these tools readily available will make your quilting experience much smoother and more enjoyable. Precision is key in quilting, and good tools are your best allies.
Directions: Crafting Your Pinwheel Quilt Block Step-by-Step
Now, let’s get into the exciting part – bringing your Pinwheel blocks to life! This method simplifies the creation of half-square triangles (HSTs), which are the fundamental building blocks of our Pinwheel.
Step 1: Preparing and Cutting Your Half-Square Triangles (HSTs)
This initial step is where the magic happens, transforming two squares into four perfect half-square triangles, ready to form your Pinwheel.
- Pair Your Squares: Take one 5″ x 5″ square from your charm pack and one 5″ x 5″ white background square. Place them together with their right sides facing each other. “Right sides together” means the printed or finished sides of the fabric are touching, and the wrong (often duller) sides are facing outwards. Ensure all edges are perfectly aligned. You may wish to pin the corners to keep them from shifting, especially if you are new to quilting.
- Sew All Around the Edges: Using your sewing machine, stitch a 1/4″ seam allowance all the way around the perimeter of the paired squares. It’s crucial to maintain a consistent 1/4″ seam for accurate piecing. If your machine has a 1/4″ quilting foot, this is the ideal time to use it. Sew slowly and carefully, starting and stopping with a backstitch or by leaving thread tails to secure your stitches.
- Diagonal Cuts: Once you’ve sewn all four sides, place your sewn square unit on your cutting mat. Take your quilting ruler and align it diagonally across the square, from one corner to the opposite corner. Using your rotary cutter, make a clean cut along this line.
- Second Diagonal Cut: Rotate your square unit by 90 degrees or simply reposition your ruler. Now, align your ruler diagonally across the square again, from the remaining un-cut corner to its opposite. Make another precise cut.
- Revealing Your HSTs: You should now have four individual triangle units. When you open each unit, you’ll discover that you’ve created four perfect half-square triangles, each comprising one charm pack fabric and one white fabric. This method is incredibly efficient, producing multiple HSTs from just two squares.
- Pressing Your HSTs: Pressing is a non-negotiable step in quilting for achieving flat, accurate blocks. Take each newly formed half-square triangle to your ironing board. The common practice for HSTs is to press the seam allowance towards the darker fabric. This helps to prevent the darker fabric’s color from showing through the lighter fabric on the right side. Alternatively, some quilters prefer to press their seams open for a flatter, less bulky result, especially when many seams meet. For this project, pressing towards the darker fabric (the charm pack print) will create nesting seams later, which aids in precise alignment. Use a dry iron or a spritz of starch for crisp results.
Repeat this process for all your charm pack and white square pairs until you have enough HSTs to create your desired number of Pinwheel blocks. Remember, each pair yields four HSTs, and each Pinwheel block requires four HSTs.
Step 2: Assembling Your Pinwheel Quilt Block
With your beautiful half-square triangles pressed and ready, it’s time to arrange them and stitch them into the classic Pinwheel design.
- Layout the Pieces: Take four of your newly created half-square triangles. Lay them out on your design wall or a flat surface. The key to forming the Pinwheel is in the orientation of these HSTs. Arrange them so that the lighter fabric (your white square) is consistently in one direction, creating a central point where all the darker fabrics meet. Imagine the darker fabric points “spinning” around a central axis. All the centers of your HSTs, where the seams meet, should converge neatly in the middle to form the iconic Pinwheel shape. Double-check your layout to ensure all triangles are going in the correct “spinning” direction. A common mistake is to have one HST pointing the wrong way, which breaks the flow of the Pinwheel.
- Sew Into Rows: Once you are satisfied with your arrangement, pick up the two top HSTs and sew them together along their shared edge with a 1/4″ seam. Do the same for the two bottom HSTs. You will now have two small rows. When sewing, pay attention to the point where the seams intersect in the middle of your Pinwheel. If you pressed your seams towards the darker fabric in Step 1, these seams will naturally “nest” together when you place the HSTs right sides together. This nesting effect helps to align your points perfectly, minimizing bulk and ensuring a flat center. Use pins to secure these intersections before sewing.
- Press Your Seams: After sewing your two rows, take them to the ironing board. Press the seams for the top row in one direction (e.g., to the left), and the seams for the bottom row in the opposite direction (e.g., to the right). This opposing press will allow these new seams to also nest beautifully when you join the two rows.
- Join the Rows: Now, place your two sewn rows right sides together. Align the central seam where the four HSTs will meet. Again, the nested seams will guide you to a perfect match. Pin generously at the center and ends. Sew the two rows together with a 1/4″ seam allowance along their shared long edge.
- Final Pressing: Take your completed Pinwheel block back to the ironing board. Carefully press the final seam. Many quilters prefer to press this final seam open to reduce bulk in the center where all the seams converge. Alternatively, you can press it to one side, perhaps spinning the central seams in a small pinwheel fashion themselves, to distribute the bulk. Pressing is vital for a crisp, flat block that will lie beautifully in your quilt.
- Squaring Up (Optional but Recommended): For the most precise results, use your quilting ruler and rotary cutter to “square up” your finished Pinwheel block. This means trimming off any tiny excess fabric around the edges to make your block a perfect square (e.g., 4.5 inches or 5.5 inches, depending on your desired finished size and seam allowances). Squaring up ensures all your blocks are the same size, which is critical for assembling a flat quilt top.
Congratulations! Your first fast and easy Pinwheel block is complete. Admire your handiwork and the satisfying spin of your design.
Bringing Your Pinwheel Quilt to Life: Tips and Inspiration
Now that you’ve mastered the creation of a single Pinwheel block, the real fun begins: making many more and assembling them into a beautiful quilt!
Batch Production for Efficiency
To create a larger quilt, you’ll need multiple Pinwheel blocks. Consider “chain piecing” to speed up your production. This involves feeding multiple units through your sewing machine one after another without cutting the threads in between, creating a chain. Once all units are sewn, you can snip them apart. This method is incredibly efficient for repetitive tasks like sewing the 1/4″ seams around all your paired squares or joining your HSTs into rows.
Quilt Design Ideas with Pinwheels
The Pinwheel block is incredibly versatile. Here are a few ideas for integrating your blocks:
- All-Pinwheel Quilt: Simply sew your Pinwheel blocks together in rows and columns. Experiment with rotating some blocks 90 degrees to create secondary patterns where the Pinwheels meet.
- Pinwheels with Sashing: Add strips of coordinating fabric (sashing) between your blocks and at the intersections (cornerstones) to create visual breaks and help your Pinwheels stand out.
- Mixed Blocks: Combine your Pinwheel blocks with other simple blocks like Four-Patch, Nine-Patch, or solid squares for a more complex and dynamic design.
- Borders: Frame your quilt top with carefully selected borders to complete the look.
Perfecting Your Quilting Skills
This Pinwheel project is an excellent practice for foundational quilting skills. As you make more blocks, you’ll naturally improve your:
- 1/4″ Seam Accuracy: Consistent seam allowances are the backbone of a successful quilt.
- Precise Cutting: Sharp rotary cutters and accurate rulers are your best friends.
- Careful Pressing: Thoughtful pressing makes all the difference in achieving flat, professional-looking blocks.
- Seam Matching: Learning to nest seams and pin effectively will result in perfectly matched points and intersections.
Beyond the Quilt Top
Don’t limit yourself to just a quilt! Individual Pinwheel blocks or small groupings can be transformed into:
- Decorative throw pillows
- Tote bag panels
- Pot holders or trivets
- Placemats or table runners
The possibilities are truly endless, limited only by your imagination.
Fast and Easy Pinwheels Quilt Block with Jenny Doan: Your Quilting Journey Begins
Jenny Doan and the Missouri Star Quilt Company have inspired millions to discover the joy of quilting with their approachable and innovative techniques. This fast and easy Pinwheel block tutorial is a testament to their philosophy of making quilting accessible and fun for everyone. By following these steps, you’ve not only created a beautiful quilt block but also built confidence in your quilting abilities.
Whether you’re crafting your very first quilt or simply enjoying a quick project, the satisfaction of seeing fabric squares transform into a dynamic Pinwheel is truly rewarding. We encourage you to watch the original video tutorial by Missouri Star if you prefer a visual guide; sometimes seeing the steps in action can clarify any uncertainties.
So, what are you waiting for? Grab another charm pack, pick out some coordinating background fabric, and continue making these delightful Pinwheel blocks. Soon, you’ll have a collection ready to assemble into a stunning quilt that will be cherished for years to come. Happy quilting!