
Paula Deen’s Depression-Era Water Pie: A Journey into Simple Deliciousness
In times of scarcity, human ingenuity often shines brightest, giving rise to creations born out of necessity that surprise us with their enduring charm. The Water Pie is a perfect example of such a culinary marvel, emerging from the depths of the Great Depression. This humble yet intriguing dessert, once a staple for families making ends meet, has found a new spotlight thanks to the beloved Southern chef, Paula Deen.
My first encounter with this fascinating recipe was through a captivating Water Pie video tutorial by Paula Deen on YouTube. The premise itself was enough to pique my interest: a pie made primarily from water, sugar, and butter. It sounded almost mythical, a testament to resourceful baking. Paula’s journey into discovering this pie began with an email from a curious fan, inquiring if she had ever heard of this Depression-era treat. Always one for a culinary adventure, Paula delved into research and unearthed a recipe that promised simplicity and, surprisingly, deliciousness.
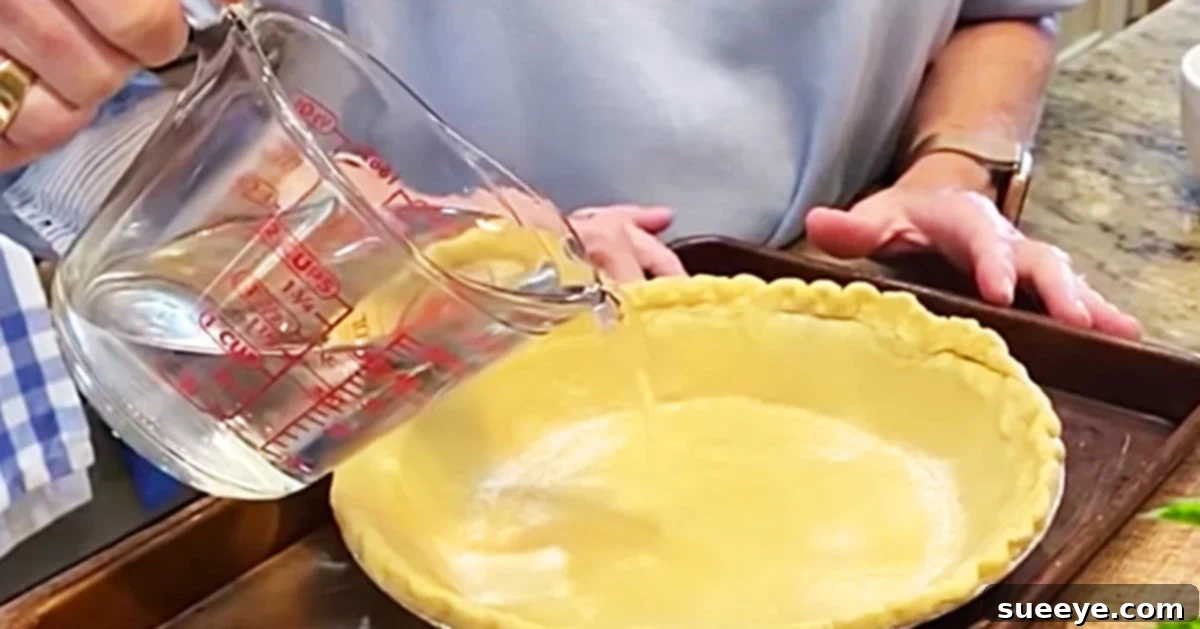
The video itself is a delight, capturing Paula and her best friend embarking on this baking quest. Their initial skepticism, mixed with playful banter, as they pour the first cup of water into the pie crust is genuinely entertaining. The anticipation builds, and by the end, both Paula and her friend unanimously agree: it tastes absolutely delicious. This isn’t just a recipe; it’s a charming journey into the unknown, a testament to the resilience and creativity of those who lived through the Great Depression.
Let’s dive into the world of Water Pie, exploring its history, understanding its unique appeal, and most importantly, learning how to recreate Paula Deen’s beloved rendition in your own kitchen.
The Intriguing History of Water Pie: A Taste of Resilience
To truly appreciate Water Pie, one must understand the era from which it sprang. The Great Depression, a period of severe economic hardship in the 1930s, forced families across America to be incredibly resourceful with their food. Luxuries were scarce, and even basic ingredients like milk, eggs, and fruit became precious commodities. In such an environment, the concept of a dessert seemed almost unattainable for many.
However, the human desire for something sweet and comforting persists even in the toughest times. Water Pie emerged as a brilliant solution. It required only the most fundamental ingredients that most households might still possess: water, sugar, butter, and a bit of flour. These humble components, when combined with ingenuity, transformed into a surprisingly satisfying dessert. It was a testament to the perseverance and adaptability of American families, who found ways to create moments of joy and comfort even when resources were severely limited.
This pie wasn’t just food; it was a symbol of hope and a small act of defiance against the harsh realities of the era. It allowed families to enjoy a “sweet treat” without breaking the bank, providing a simple pleasure that brought people together. Paula Deen’s revival of this recipe brings this rich history to life, inviting us to connect with a past where resourcefulness was a virtue and every ingredient counted.
Ingredients for Paula Deen’s Depression-Era Water Pie
One of the most appealing aspects of Water Pie is its minimal ingredient list. While Paula Deen’s original exploration stemmed from a fan’s inquiry, the recipe itself embodies simplicity. Below are the ingredients needed to recreate this unique dessert, offering options for either a homemade or store-bought crust.
For the Water Pie Filling:
- 2 cups of Water: The star ingredient, surprisingly transformed into a delightful custard-like filling.
- 12 tablespoons (1 ½ sticks) Cold Butter: Cubed to ensure even melting and distribution, providing richness and flavor.
- 3 tablespoons Granulated White Sugar: The primary sweetener, creating a balanced, comforting sweetness.
- 1/4 cup All-Purpose Flour: Essential for thickening the water and sugar mixture, giving the pie its custard-like consistency.
- Optional Flavor Enhancers:
- 1 teaspoon Vanilla Extract: Adds a warm, aromatic note.
- 1/4 teaspoon Ground Nutmeg or Cinnamon: Provides a subtle spice that complements the simple sweetness.
For the Pie Crust (Choose One Option):
- Option A: One 9-inch Store-Bought Pie Crust: For ultimate convenience, pre-made crusts are a perfect choice.
- Option B: Homemade Pie Crust (Using the following ingredients from the original recipe):
- 2 1/2 cups All-Purpose Flour: The base for a flaky, homemade crust.
- 1/4 teaspoon Fine Salt: Enhances the flavor of the crust.
- 1/4 cup Cold Vegetable Shortening: Cut into small pieces, this creates the desired flakiness.
- 1/4 cup Ice Water: Helps bind the dough without making it tough.
(Note: If making a homemade crust from scratch, these ingredients will be used to prepare a single 9-inch pie crust before adding the filling.)
Directions: Crafting Your Own Water Pie
Making this Depression-era Water Pie is remarkably straightforward, a testament to its origins as a budget-friendly and easy-to-prepare treat. Follow these steps to bring Paula Deen’s delightful discovery to life in your kitchen. This process is adapted to ensure a coherent and successful bake, building upon the simple instructions from the Water Pie video recipe tutorial by Paula Deen on YouTube.
Step 1: Prepare Your Pie Crust
- If Using a Store-Bought Crust: Simply unroll and place it into a 9-inch pie plate. Flute the edges as desired.
- If Making a Homemade Crust:
- In a large bowl, whisk together the 2 1/2 cups all-purpose flour and 1/4 teaspoon fine salt.
- Cut in the 1/4 cup cold vegetable shortening using a pastry blender, two knives, or your fingertips, until the mixture resembles coarse crumbs with some pea-sized pieces remaining.
- Gradually add the 1/4 cup ice water, one tablespoon at a time, mixing until the dough just comes together. Be careful not to overmix.
- Form the dough into a disk, wrap it in plastic, and refrigerate for at least 30 minutes.
- On a lightly floured surface, roll out the chilled dough into a 12-inch circle. Carefully transfer it to a 9-inch pie plate and trim and flute the edges.
Step 2: Preheat Oven and Assemble the Filling Base
- Preheat your oven to 400°F (200°C).
- Place your prepared pie crust (either store-bought or homemade) into the pie plate.
- Carefully pour the 2 cups of water directly into the raw pie crust. This might seem unconventional, but it’s the signature step of this unique pie.
Step 3: Layer the Remaining Ingredients
- Evenly sprinkle the 3 tablespoons of granulated white sugar over the water in the pie crust.
- Next, sprinkle the 1/4 cup all-purpose flour over the sugar. This flour will act as a thickener, transforming the water into a creamy, custard-like consistency during baking.
- Distribute the 12 tablespoons of cold, cubed butter evenly over the water, sugar, and flour mixture. The cold butter will slowly melt during baking, creating pockets of richness and contributing to the pie’s unique texture.
- If using, drizzle the vanilla extract and sprinkle the ground nutmeg or cinnamon over the top for an added layer of flavor.
Step 4: Bake to Perfection
- Carefully place the pie on a baking sheet (to catch any potential spills) and transfer it to the preheated 400°F (200°C) oven.
- Bake for approximately 50 to 60 minutes. The exact baking time may vary depending on your oven.
- Key Indicators for Doneness: The crust should be golden brown, and the filling should appear set around the edges with a slight jiggle in the center. The top layer might develop a caramelized, slightly crispy crust from the melted butter and sugar.
- If the crust edges start to brown too quickly, you can cover them loosely with aluminum foil.
Step 5: Cool and Serve
- Once baked, carefully remove the pie from the oven.
- Let the Water Pie cool completely on a wire rack before slicing and serving. This is a crucial step, as the filling needs time to fully set and firm up. Cooling can take several hours.
- Serve plain or with a dollop of whipped cream or a dusting of powdered sugar for an extra touch of elegance.
Why You Should Try Paula Deen’s Water Pie
Beyond its historical significance, Paula Deen’s Water Pie offers a unique culinary experience that is surprisingly delightful. Many, like Paula herself, approach it with skepticism, only to be won over by its understated charm.
- A Taste of History: Eating Water Pie is like taking a step back in time. It connects you directly to the resourcefulness and resilience of those who lived through the Great Depression. It’s a tangible link to culinary history.
- Surprisingly Delicious: Despite its humble ingredients, Water Pie delivers a delightful taste and texture. The melted butter creates a rich, almost caramel-like top crust, while the flour thickens the sweetened water into a delicate, custard-like filling. It’s sweet, comforting, and utterly unique.
- Simple and Budget-Friendly: In an era where complex recipes and exotic ingredients often dominate, Water Pie stands out for its elegant simplicity. It requires minimal ingredients, most of which are pantry staples, making it incredibly affordable and accessible for anyone.
- A Conversation Starter: Bring a Water Pie to any gathering, and you’re guaranteed to spark curiosity and conversation. Its unusual name and intriguing history make it a memorable dish that people will talk about long after the last slice is gone.
- Comfort in Every Bite: There’s a certain warmth and nostalgia associated with simple, homemade desserts. Water Pie delivers pure comfort, a soothing sweetness that is both familiar and novel.
Tips for the Perfect Water Pie
- Use Cold Butter: Ensure your butter is very cold and cut into small cubes. This allows it to melt slowly and evenly, creating pockets of flavor and a lovely texture.
- Don’t Overmix the Homemade Crust: If you opt for a homemade crust, handle the dough as little as possible to prevent it from becoming tough.
- Patience with Cooling: Resist the urge to cut into the pie too soon. Water Pie needs ample time to cool completely and for the filling to set properly. This ensures clean slices and the best texture.
- Even Distribution: Make sure to sprinkle the sugar and flour as evenly as possible over the water. This helps ensure a consistent texture throughout the filling.
- Watch Your Oven: Oven temperatures can vary. Keep an eye on your pie, especially towards the end of the baking time, to prevent the crust from burning. A pie shield or aluminum foil can be your friend.
- Experiment with Flavors: While the classic Water Pie is wonderfully simple, don’t hesitate to experiment with the optional vanilla, nutmeg, or cinnamon to tailor it to your taste. A hint of lemon zest could also add a bright note.
This intriguing pie is more than just a recipe; it’s a story, a slice of history, and a testament to the magic that can be created with the humblest of ingredients. It’s certainly interesting, and I wholeheartedly encourage you to make a point to try it someday!
Embrace the simplicity, savor the history, and enjoy the surprisingly delicious outcome of Paula Deen’s Depression-Era Water Pie. Happy baking!