
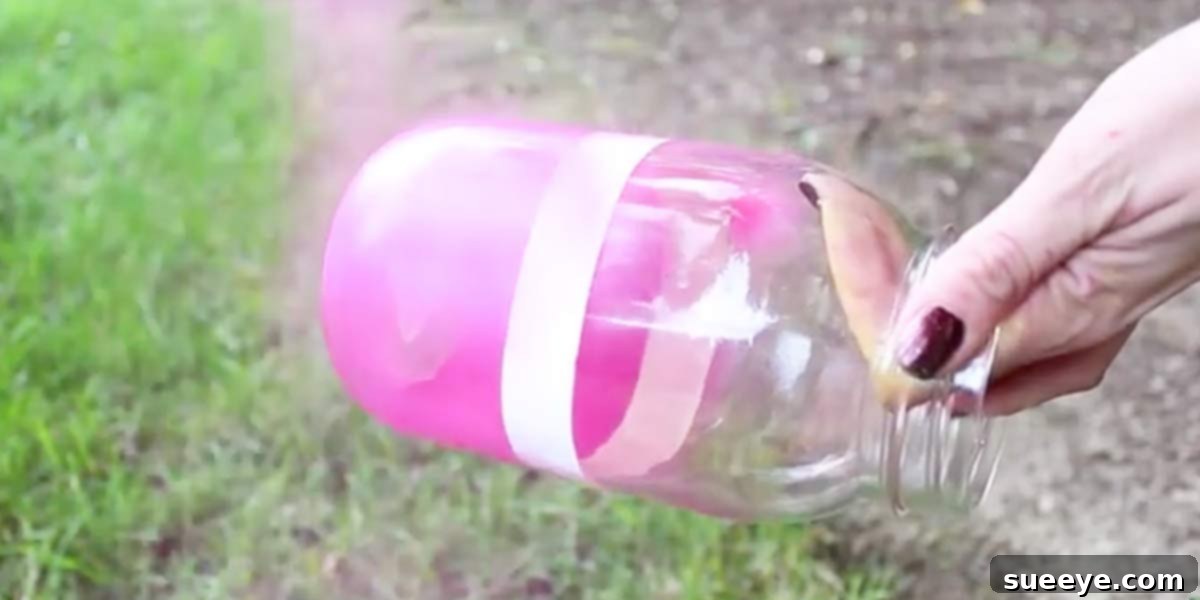
Transform Your Home with Easy DIY Ombre Mason Jars: A Vibrant Decor Guide
Are you searching for a delightfully simple yet incredibly impactful way to inject color and personality into your home decor? Look no further than the humble Mason jar. These versatile glass containers, already a staple in countless households, are about to become your next favorite canvas for creativity. This project takes the classic Mason jar and elevates it with a stunning ombre effect, offering a beautiful blend of colors that transitions smoothly from one hue to another. Imagine vibrant bursts of color or soft, ethereal pastels gracing your shelves – the choice is entirely yours, making this DIY a perfect match for any aesthetic.
The beauty of this project lies in its remarkable ease and boundless customization. Whether you’re a seasoned crafter or just dipping your toes into the world of DIY, you’ll find the process straightforward and incredibly rewarding. The results are truly fabulous, yielding brightly colored, eye-catching pieces that look far more complicated than they actually are. With just a few basic supplies and a touch of imagination, you can create bespoke decor items that perfectly complement your existing style or introduce a fresh new vibe.
Why Mason Jars Endure: More Than Just a Container
Mason jars aren’t just practical storage solutions; they’ve transcended their utility to become a cultural icon in home decor and crafting. A quick search for “weddings” or “home decor” online will inundate you with images featuring these charming glass jars, highlighting their widespread appeal. From rustic farmhouse aesthetics to modern minimalist designs, Mason jars effortlessly blend into almost any setting, offering a touch of timeless elegance and simple charm.
Their enduring popularity isn’t just a fleeting trend; it’s a testament to their versatility and inherent appeal. You’ll spot Mason jar drinkware and decor in some of the most fashionable restaurants and event spaces, cementing their status as a stylish choice. By choosing to incorporate Mason jars into your home or as a focal point for your next gathering, you’re not just following a trend – you’re embracing a classic that continually reinvents itself. Their clean lines, robust structure, and nostalgic charm make them ideal for countless applications, from practical organization to purely decorative displays.
Beyond Storage: The Multifaceted Uses of Mason Jars
We all know Mason jars are brilliant for everyday storage, keeping our lives tidy and organized. But their utility extends far beyond just holding pickles or jams. When transformed with an ombre effect, they become even more dynamic:
- Makeup Brush Holders: Keep your vanity tidy and add a splash of color.
- Flower Vases: Showcase your favorite blooms in a unique, handcrafted vessel.
- Pen & Pencil Organizers: Bring order and style to your home office or study space.
- Toothbrush & Toothpaste Caddies: Elevate your bathroom countertop with a decorative touch.
- Kitchen Utensil Holders: Keep spatulas and whisks handy and add a pop of color to your kitchen.
- Candle Holders: Create a cozy ambiance with votives or tea lights nestled inside your ombre jars.
- Party Decor: Use them as centerpieces, cutlery holders, or creative drink dispensers for gatherings.
- Gift Packaging: Fill them with homemade treats, craft supplies, or small gifts for a personalized touch.
- Coin Banks: A stylish way to save up your loose change.
- Desk Accessories: Organize paperclips, rubber bands, or small stationery items with flair.
Unleash Your Inner Artist: Crafting the Perfect Ombre Effect
The core of this DIY project lies in creating that beautiful, seamless gradient of color known as the ombre effect. This technique involves blending different shades of paint, typically starting with a lighter hue at the top and gradually transitioning to a darker one at the bottom, or vice-versa. The magic is in the transition, which can be subtle and delicate or bold and dramatic, depending on your chosen colors and application method. You can opt for two colors, allowing one to gently fade into the other, or introduce a third color for an even richer, more complex gradient.
This is where your personal style truly shines. Do you envision a serene blend of blues and greens reminiscent of the ocean, or perhaps a fiery progression from crimson to orange? Maybe a playful pastel combination of pink, lavender, and mint? The possibilities are as endless as the colors of the rainbow. This project empowers you to create custom pieces that perfectly resonate with your personality and decor, turning a simple glass jar into a unique piece of art.
Choosing Your Palette: Colors and Themes
Selecting your color scheme is one of the most exciting parts of this project. Consider the mood you want to evoke and the existing colors in your space:
- Vibrant & Bold: Think fuchsia blending into tangerine, or electric blue merging with lime green for a lively, energetic feel.
- Soft & Pastel: Delicate shades of blush pink, baby blue, and mint green create a calming, elegant, and almost ethereal look, perfect for nurseries or serene spaces.
- Metallics: Incorporate gold, silver, or rose gold into your ombre. Paint the bottom with a metallic hue and blend it upwards into a matte color for a touch of glamour.
- Seasonal Tones: Warm reds and oranges for autumn, cool blues and whites for winter, or bright yellows and greens for spring and summer.
- Monochromatic Ombre: Use varying shades of the same color (e.g., light blue, medium blue, dark blue) for a sophisticated, harmonious effect.
DIY Ombre Mason Jars: Your Simplified Step-by-Step Guide
While an external tutorial provides the visual specifics, the general process for creating these stunning ombre Mason jars is quite straightforward. Here’s a conceptual guide to get you started:
Materials You’ll Need:
- Clean Mason jars (any size works!)
- Acrylic craft paints (2-3 colors for your ombre effect)
- Small paintbrushes or foam brushes
- Painter’s tape (optional, for crisp lines if desired)
- A clear sealant spray (e.g., Mod Podge sealant or clear acrylic spray)
- Disposable gloves (to keep your hands clean)
- Newspaper or a drop cloth to protect your workspace
The Creative Process:
- Prepare Your Jars: Start with clean, dry Mason jars. Remove any labels. For best adhesion, you might lightly sand the exterior of the jars with fine-grit sandpaper, then wipe clean.
- Choose Your Gradient Direction: Decide if you want the lightest color at the top blending down to the darkest, or vice-versa. This is purely a stylistic choice.
- Apply the First Color: Using your brush, apply your first chosen color to the desired section of the jar. For example, if you’re starting light to dark, paint the top third or half of the jar with your lightest color. Apply in thin, even coats to avoid drips and ensure smooth coverage. Let it dry completely.
- Introduce the Second Color: Once the first coat is dry, apply your second color, overlapping slightly with the first color. This is where the “ombre” blending comes in. While the second color is still wet, gently blend the edges where the two colors meet using a clean, damp brush or a dabbing motion with a dry brush. The goal is a soft, seamless transition. Let it dry completely.
- Add a Third Color (Optional): If you’re using three colors, repeat the blending process with your third color, overlapping with the second color and carefully blending the seam. Ensure each layer is dry before adding the next to prevent muddying the colors.
- Layering for Opacity: Depending on the paint and desired intensity, you may need to apply a second or even third thin coat of each color, carefully blending each time. Patience is key here.
- Curing Time: Allow your painted jars to dry and cure fully, which can take up to 24-72 hours, depending on the paint type and humidity.
- Seal Your Masterpiece: Once completely dry, apply a thin, even coat of clear sealant spray. This protects the paint from chipping, moisture, and ensures longevity. Follow the manufacturer’s instructions for application and drying time. A matte or glossy finish sealant can be chosen based on your preference.
Elevating Your Home Decor with Ombre Jars
Once your ombre Mason jars are complete, it’s time to integrate them into your home decor. Their unique aesthetic makes them fantastic focal points. Group several jars of varying sizes together on a mantelpiece or bookshelf for an artistic display. Use them to organize your craft supplies, holding ribbons, buttons, or paintbrushes in style. They can brighten up a dull corner, add charm to a bathroom, or serve as playful centerpieces for a casual brunch.
Consider the lighting in your chosen space. Natural light can really make the colors pop, while artificial lighting can create dramatic shadows and highlights, showcasing the gradient effect. The versatility of these jars means they can seamlessly transition from everyday decor to festive holiday accents simply by changing their contents or adding small embellishments.
Tips for a Flawless Finish and Long-Lasting Beauty
Achieving that professional, smooth ombre look requires a few simple considerations. Always work in a well-ventilated area, especially when using spray sealants. Ensure your paint coats are thin and even to prevent streaking or a gloppy appearance. If you make a mistake, it’s often easier to wipe off wet paint with a damp cloth and restart that section rather than trying to fix it once dry. Patience during drying times is crucial – rushing can lead to smudges or an uneven finish. For projects that might see a lot of handling or moisture (like a toothbrush holder), consider using a waterproof sealant for extra durability. Finally, remember to clean your brushes immediately after use to keep them in good condition for future DIY adventures!
Conclusion: Your Next Creative Adventure Awaits
This Mason jar DIY project is more than just a craft; it’s an invitation to infuse your living space with personalized charm and vibrant color. The ease of execution combined with the stunning visual results makes it an incredibly satisfying endeavor. Whether you’re looking to organize your everyday essentials, create unique gifts, or simply add a touch of handcrafted beauty to your home, these ombre Mason jars are the perfect solution.
Embrace your creativity, choose your favorite hues, and embark on this delightful journey to transform ordinary glass jars into extraordinary works of art. You’ll be amazed at how such a simple project can yield such spectacularly beautiful and functional decor pieces. So, gather your supplies and get ready to create something truly special!