
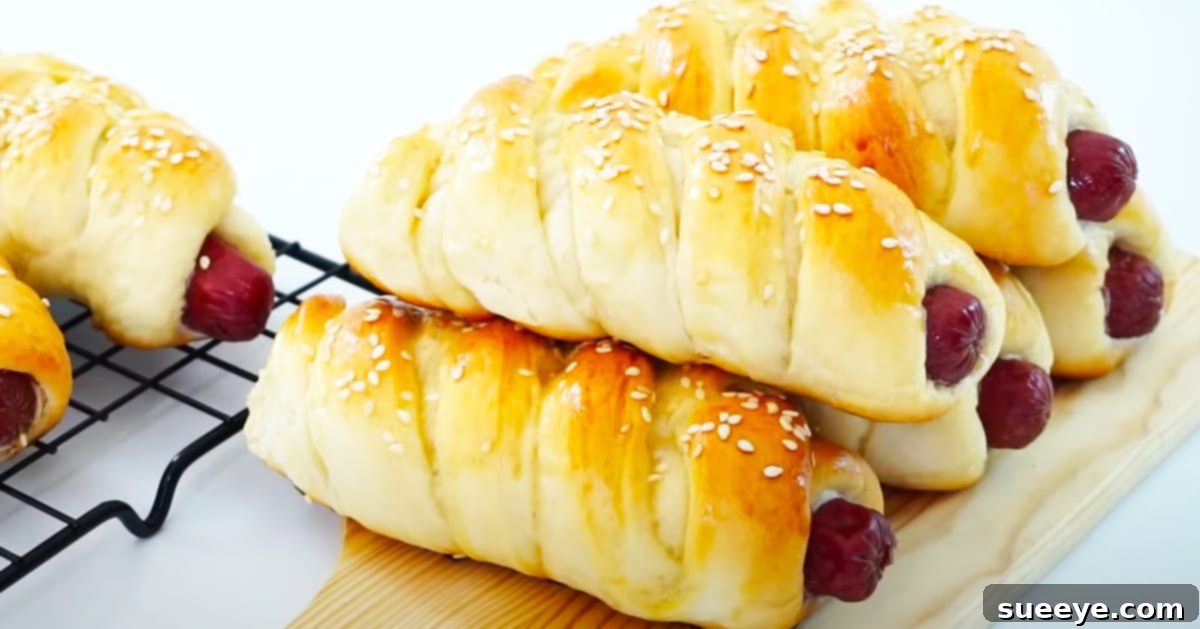
There’s something universally comforting and undeniably delicious about warm, savory sausages enveloped in soft, pillowy bread. While many are familiar with the classic “pigs in a blanket” made with flaky crescent roll dough, our delightful sausage bread rolls offer a distinct and arguably superior experience. This recipe introduces a thicker, more wholesome breading that beautifully complements the savory sausage, creating a truly satisfying bite. Imagine golden-brown bread, crisscrossing artfully over succulent sausages – not only are they a feast for the taste buds, but their elegant presentation also makes them a standout addition to any meal or gathering.
This particular rendition, inspired by the fantastic Savor Easy tutorial, is incredibly accessible, making it an excellent project for home bakers of all skill levels, including families looking for a fun culinary activity with kids. I have fond memories of making these growing up; they were always a hit and such a kid-friendly meal or snack. Their portability makes them perfect for packing into lunchboxes, grabbing on the go for a quick breakfast, or even slicing into smaller pieces to serve as an elegant appetizer at your next party. These homemade sausage bread rolls have quickly earned a permanent spot in my recipe collection, and I’m thrilled to share this experience with you.
Why Choose Sausage Bread Rolls Over Traditional Pigs in a Blanket?
While pigs in a blanket hold a special place in many hearts, often featuring a simple crescent roll dough, our sausage bread rolls elevate the experience with a richer, more substantial bread. The dough here is designed to be soft, fluffy, and slightly sweet, providing a delightful contrast to the savory sausage. Unlike the thinner, sometimes flaky texture of crescent rolls, this homemade bread offers a comforting chewiness that truly makes it a mini meal in itself. It’s a more satisfying and wholesome alternative, perfect for those seeking a heartier snack or a more impressive appetizer. The visual appeal of the woven bread strips also adds an extra layer of gourmet charm that’s hard to resist.
The Joy of Baking with Kids: A Fun Family Activity
One of the greatest aspects of this sausage bread roll recipe is its family-friendly nature. The steps are straightforward enough for children to participate in various stages, from mixing ingredients to shaping the dough. Kneading the dough can be a wonderfully tactile experience, and rolling out the pieces, placing the sausages, and especially making those crisscross cuts and folds, can be incredibly engaging for little hands. It’s a fantastic way to introduce kids to the joys of baking, fostering creativity and practical skills in the kitchen. Plus, the reward of eating something delicious they helped create is unparalleled!
Versatility Unleashed: From Snack to Appetizer
These sausage bread rolls are incredibly versatile. Need a quick, satisfying breakfast? Grab one (or two!). Looking for an easy lunchbox filler that your kids will actually eat? These are perfect. Hosting a gathering and want an impressive yet simple appetizer? Slice them into elegant bite-sized pieces and watch them disappear. They pair wonderfully with various dipping sauces too – think tangy mustard, sweet chili, or even a simple ketchup. Their robust flavor and comforting texture make them suitable for almost any occasion, proving that homemade goodness doesn’t have to be complicated.
Ingredients: Crafting the Perfect Dough and Filling
The magic of these sausage bread rolls begins with a simple yet effective list of ingredients, each playing a crucial role in achieving that perfect fluffy texture and rich flavor. Using quality ingredients will always elevate your baking, so opt for fresh milk and eggs, and good quality sausages or hotdogs.
- 1 cup milk (250ml): Provides moisture and contributes to the softness and richness of the dough. Using whole milk can add a bit more tenderness.
- 1 egg (65g): Adds richness, helps bind the dough, and contributes to a beautiful golden crust.
- 3 and 1/2 cup all-purpose flour (437g): The structural backbone of our bread. All-purpose flour is versatile and creates a tender crumb.
- 1/4 cup sugar (50g): Feeds the yeast, aids in browning, and adds a subtle sweetness that balances the savory sausage.
- 2 and ¼ teaspoon instant yeast (6-7g): The leavening agent that makes our bread light and fluffy. Instant yeast is convenient as it can be mixed directly with dry ingredients.
- 1 tsp salt (5g): Essential for flavor balance and controlling yeast activity. Don’t skip it!
- 4 tbsp unsalted butter (softened): Adds incredible flavor, tenderness, and richness to the dough, making it melt-in-your-mouth soft. Make sure it’s at room temperature for easy incorporation.
- 16 pcs cooked sausages or hotdogs: The star of our filling! Choose your favorite type – breakfast sausages, frankfurters, or even gourmet chicken sausages work wonderfully. Ensure they are pre-cooked to minimize baking time and ensure safety.
- Eggwash: 1 egg + 2 tbsp milk beaten: Applied before baking, this mixture gives the rolls a beautiful golden sheen and helps sesame seeds adhere.
- 1 tbsp sesame seeds for toppings: Adds a delightful crunch and nutty flavor, enhancing the visual appeal and taste.
Directions: Step-by-Step to Deliciousness
Creating these delightful sausage bread rolls involves a few key stages: preparing the dough, shaping the rolls, and finally baking them to golden perfection. Each step is designed to be straightforward, ensuring a successful outcome even for novice bakers.
Step 1: Preparing the Dough – The Foundation of Fluffiness
The bread component is what truly sets these rolls apart. Begin by gently warming the milk (ensure it’s lukewarm, not hot, to avoid killing the yeast) and whisking it together with the egg in a large mixing bowl. In a separate, larger bowl, combine your all-purpose flour, sugar, instant yeast, and salt. Gradually add the wet ingredients to the dry ingredients, mixing until a shaggy dough forms. Once the dough comes together, incorporate the softened unsalted butter. Knead the dough for about 8-10 minutes, either by hand on a lightly floured surface or using a stand mixer with a dough hook, until it is smooth, elastic, and no longer sticky. A well-kneaded dough is crucial for developing gluten, which gives the bread its structure and chewiness.
After kneading, place the dough in a lightly oiled bowl, turning it once to coat. Cover the bowl with plastic wrap or a clean kitchen towel and let it rise in a warm, draft-free place for 1 to 1.5 hours, or until it has doubled in size. This first proofing stage allows the yeast to work its magic, creating air pockets and developing flavor. For a visual guide on this dough creation process, I highly recommend watching Savor Easy’s comprehensive tutorial linked above – it’s incredibly helpful for ensuring your dough reaches its full potential.
Step 2: Shaping the Rolls – The Artful Weave
Once your dough has beautifully risen and is ready, gently punch it down to release the air. Transfer it to a lightly floured surface. Now, divide the dough into 16 equal pieces. The easiest way to do this is to form the dough into a log and then cut it into 16 even sections. For best results, use a kitchen scale to ensure each piece is roughly the same weight, which will lead to uniform baking.
Take each dough piece and roll it into a smooth ball. Then, using a rolling pin, flatten each ball into an elongated rectangle, approximately 6-7 inches long and 3-4 inches wide. The exact dimensions might vary slightly depending on the size of your sausages. Place one cooked sausage or hot dog in the middle of each flattened dough rectangle. Next comes the fun, artistic part: using a sharp knife or a pizza cutter, make four even slits on each side of the sausage, extending from the edge of the dough towards the sausage but not cutting into the sausage itself. These slits should create strips of dough on either side of the sausage.
To create the signature crisscross pattern, begin by folding the top strip from one side over the sausage towards the opposite side. Then, take the corresponding strip from the other side and fold it over the first strip, tucking it slightly underneath if possible. Continue this weaving pattern, alternating sides, until the entire sausage is encased in beautifully braided dough. Pinch the ends firmly to seal. Arrange the shaped rolls on a baking sheet lined with parchment paper, ensuring there’s enough space between each roll for them to expand.
Once all the rolls are shaped, cover them loosely with plastic wrap or a clean kitchen towel and let them rise for a second time, for approximately 30 more minutes. This crucial second proofing allows the dough to become light and airy, contributing to the ultimate fluffy texture of the finished rolls. Meanwhile, preheat your oven to 375°F (190°C).
Step 3: Baking and Finishing – Golden Perfection
Just before baking, prepare your egg wash by whisking one egg with two tablespoons of milk until well combined. Gently brush the top of each risen sausage bread roll with this egg wash. This step is key to achieving that beautiful golden-brown, shiny crust. Sprinkle a tablespoon of sesame seeds evenly over the tops of the rolls for added texture and a nutty flavor that complements the savory filling perfectly.
Bake the sausage bread rolls in your preheated oven at 375°F (190°C) for 15-20 minutes, or until they are golden brown and cooked through. Keep an eye on them towards the end of the baking time, as oven temperatures can vary. The rolls should sound hollow when tapped on the bottom if they are fully cooked. Once baked, remove them from the oven and transfer them to a wire rack to cool slightly. While they are tempting to eat immediately, letting them cool for a few minutes allows the internal structure to set and makes them easier to handle.
Serving Suggestions and Variations
These sausage bread rolls are fantastic on their own, but here are some ideas to enhance your enjoyment:
- Dipping Sauces: Serve with a side of spicy mustard, classic ketchup, sweet and sour sauce, or a homemade sriracha mayo for an extra kick.
- Make It a Meal: Pair them with a fresh green salad for a light lunch or a bowl of hot soup for a cozy dinner.
- Appetizer Platter: Cut them into smaller, half-inch slices and arrange them elegantly on a platter for a sophisticated party appetizer.
- Cheese Please: Before folding the dough, sprinkle a little shredded cheddar, mozzarella, or provolone cheese over the sausage for a cheesy twist.
- Herb Infusion: Add a pinch of dried Italian herbs, garlic powder, or onion powder to your dough mix for an extra layer of savory flavor.
- Different Sausages: Experiment with various types of sausages – chicken, turkey, spicy Italian, or even vegetarian sausages – to cater to different tastes and dietary preferences.
Storage and Reheating Tips
One of the best things about these sausage bread rolls is how well they store, making them excellent for meal prepping or enjoying leftovers:
- Room Temperature: Freshly baked rolls can be stored in an airtight container at room temperature for up to 2 days.
- Refrigeration: For longer storage, refrigerate them in an airtight container for up to 4-5 days.
- Freezing: These rolls freeze beautifully! Once completely cooled, wrap individual rolls tightly in plastic wrap and then place them in a freezer-safe bag or container. They can be frozen for up to 2-3 months.
- Reheating:
- From Refrigerator: Reheat in a preheated oven at 300°F (150°C) for about 5-10 minutes, or until warmed through. A microwave can also be used for quick reheating, but the bread might lose some of its crispness.
- From Freezer: Thaw overnight in the refrigerator, then reheat as above. Alternatively, you can reheat them directly from frozen in a 325°F (160°C) oven for 15-20 minutes, or until heated through.
Conclusion: Your New Favorite Homemade Treat
Overall, I absolutely adore this take on the classic pigs in a blanket concept. The breading on these sausage bread rolls is truly a game-changer – soft, fluffy, and incredibly satisfying, it elevates the humble sausage roll into something quite special. The joy of making them, the beautiful presentation, and the delightful taste make this recipe a winner in every regard. Whether you’re looking for a simple, hearty snack, a convenient grab-and-go lunch option, or an impressive appetizer that’s sure to wow your guests, these homemade sausage bread rolls are guaranteed to become a new family favorite. Don’t hesitate to give this recipe a try; you’ll be delighted by the comforting, wholesome goodness you can create right in your own kitchen!