
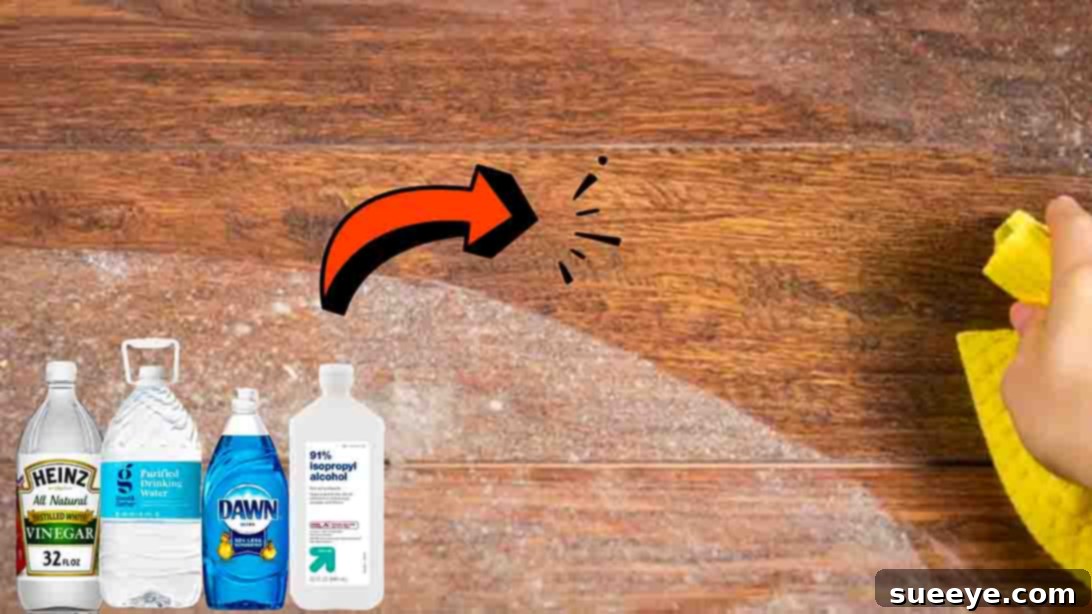
Tired of spending a fortune on specialized floor cleaners that often contain harsh chemicals and leave behind a strong, artificial scent? Many commercial floor cleaning products promise sparkling results but come at a high cost, both financially and environmentally. But what if we told you there’s a simpler, more affordable, and equally effective way to achieve immaculately clean floors right from your own home? Look no further! The experts at Flooring You Can Trust on YouTube have unveiled a fantastic homemade floor cleaner solution that is not only budget-friendly but also incredibly effective.
This revolutionary DIY cleaner is specifically formulated for floors with sensitive finishes such as urethane, acrylic, and melamine. These types of finishes, commonly found in modern homes, require gentle yet potent cleaning agents to maintain their shine and integrity without causing damage or dullness. With just a handful of everyday household chemicals, you can whip up this miracle cleaner that promises to leave your floors gleaming and streak-free. We’ve personally saved a significant amount of money thanks to this brilliant tutorial, and we’re excited to share it with you! Let’s dive in and discover how to craft these fantastic DIY floor cleaning solutions.
Why Choose DIY Floor Cleaners? Save Money, Stay Healthy, & Go Green
The shift towards homemade cleaning solutions isn’t just a trend; it’s a smart choice for your wallet, your health, and the planet. Commercial floor cleaners often come with a hefty price tag, especially those tailored for specific floor types. Beyond the cost, many contain complex chemical compounds that can contribute to indoor air pollution, trigger allergies, or even be harmful to pets and small children. Strong fragrances, while pleasant to some, can be overwhelming and indicate the presence of synthetic chemicals.
Opting for a DIY approach puts you in control. You know exactly what ingredients are going into your cleaning solution, ensuring a safer environment for everyone in your home. Furthermore, creating your own cleaners drastically reduces plastic waste from single-use bottles, making it an eco-conscious decision. The recipes we’re sharing today leverage the natural cleaning power of common pantry staples, proving that effective cleaning doesn’t require harsh chemicals or expensive brands. Embrace the simplicity and efficacy of homemade solutions and enjoy a cleaner home without compromise.
Understanding Your Floor Finishes: Urethane, Acrylic, & Melamine
Before diving into the recipes, it’s helpful to understand why certain floor finishes, like urethane, acrylic, and melamine, benefit specifically from these gentle DIY cleaners.
- Urethane Finishes: Common on hardwood and engineered wood floors, urethane provides a durable, protective layer that resists scratches and moisture. However, harsh chemicals can dull this finish over time, leading to a cloudy appearance. Our DIY solutions are designed to clean effectively without stripping the urethane’s protective properties.
- Acrylic Finishes: Often found on vinyl, laminate, and some luxury vinyl plank (LVP) flooring, acrylic finishes offer a good balance of durability and affordability. They are prone to showing streaks if not cleaned with the right products, and abrasive cleaners can leave permanent marks. The streak-free nature of these homemade cleaners is ideal for maintaining the pristine look of acrylic surfaces.
- Melamine Finishes: Most commonly seen on laminate flooring, melamine is a tough, plastic-like coating that resists stains and wear. While durable, it can be sensitive to excessive moisture and harsh solvents, which can cause delamination or damage to the underlying layers. Our DIY formulas are water-based and contain mild ingredients, making them safe and effective for melamine without posing a risk of damage.
Understanding these finishes helps you appreciate why a carefully balanced, gentle cleaner is essential for preserving the beauty and longevity of your floors.
Essential Ingredients: The Power of Household Staples
The beauty of these DIY floor cleaners lies in their simplicity and the accessibility of their ingredients. You likely have most, if not all, of these items in your pantry or medicine cabinet already! Let’s explore why each component is a powerhouse in its own right.
Water: The Universal Solvent
- Role: Dilution and primary cleaning agent.
- Why it’s effective: Water is fundamental to almost all cleaning. It helps dissolve dirt and grime, allowing other active ingredients to spread evenly and do their job. For best results, especially if you have hard water, consider using distilled or filtered water to prevent mineral deposits and potential streaks.
White Vinegar: Nature’s Disinfectant & Deodorizer
- Role: Mild acid, degreaser, disinfectant, streak-free agent.
- Why it’s effective: The acetic acid in white vinegar is a gentle yet powerful cleaner. It breaks down grease, cuts through grime, and helps dissolve mineral deposits. Its mild acidity also makes it an excellent natural disinfectant against many bacteria and fungi, and it acts as a natural deodorizer, neutralizing odors rather than just masking them. Crucially, vinegar helps to achieve a streak-free shine, particularly on surfaces like acrylic and melamine.
70% Isopropyl Alcohol: Quick Drying & Disinfecting Booster
- Role: Evaporation aid, additional disinfectant, streak prevention.
- Why it’s effective: Isopropyl alcohol is a fantastic addition, especially for quicker drying times and enhanced disinfecting power. It evaporates rapidly, which is key for streak-free results on hard floors and helps prevent moisture damage, especially on laminate. Its antiseptic properties provide an extra layer of cleanliness, making your floors not just look clean but truly sanitized.
Dawn Dish Soap: The Ultimate Degreaser
- Role: Surfactant, grease cutter, dirt emulsifier.
- Why it’s effective: Just a tiny amount of Dawn dish soap (or a similar gentle, concentrated dish soap) can make a significant difference. It’s renowned for its ability to cut through grease and oil, effectively lifting dirt and grime from the floor surface. As a surfactant, it reduces the surface tension of water, allowing the cleaning solution to penetrate and clean more effectively. The key is to use very little to avoid excessive suds and residue.
DIY Floor Cleaner Recipes: Two Powerful Options
Now that we understand the benefits and ingredients, let’s get to the practical part. Here are two fantastic formulas for your homemade floor cleaner, offering options for everyday cleaning and more stubborn messes.
Option 1: The Gentle Everyday Shine (Vinegar and Water Mix)
This simple yet effective formula is perfect for routine cleaning, maintaining the luster of your floors, and quickly tackling everyday dust and light grime. It’s incredibly gentle and leaves no residue.
What You Need:
- 2 cups of clean water (distilled or filtered water is recommended to minimize streaks)
- 1/4 teaspoon of white vinegar (household cleaning vinegar, 5% acidity)
- A clean spray bottle (at least 20 oz capacity)
- A microfiber mop or several clean microfiber cloths
Directions for Option 1:
- Prepare Your Bottle: Ensure your spray bottle is thoroughly cleaned and dry. This prevents any residues from previous cleaners from mixing with your DIY solution.
- Combine Ingredients: Carefully pour 2 cups of water into the spray bottle. Then, add 1/4 teaspoon of white vinegar. The precise measurement is crucial for preventing streaking and ensuring the right balance.
- Mix Thoroughly: Secure the spray bottle cap tightly and gently shake the bottle a few times to ensure the water and vinegar are well combined.
- Prepare Your Floors: Before applying any liquid cleaner, always sweep or vacuum your floors to remove loose dirt, dust, and debris. This prevents scratching and ensures the cleaner can work directly on the grime.
- Application: Lightly mist a small section of your floor (about a 3×3 foot area) with the solution. Avoid oversaturating the floor, especially if you have laminate or wood finishes, as excessive moisture can cause damage. A little goes a long way!
- Mop and Wipe: Immediately clean the misted area with a clean, damp microfiber mop or cloth. Work in small sections, rinsing or changing your cloth as it gets dirty to avoid spreading grime. Microfiber is ideal for its ability to pick up dirt and leave a streak-free finish.
- Dry if Needed: Although this solution dries quickly and is designed to be streak-free, if you notice any lingering moisture, give the area a quick wipe with a separate dry microfiber cloth for an extra polished look.
Option 2: The Power Boost for Tougher Grime (Vinegar, Alcohol, Dawn, & Water Mix)
When your floors need a little extra oomph to cut through grease, eliminate stubborn spots, or achieve an even faster drying, streak-free finish, this enhanced formula is your go-to. The addition of alcohol and dish soap amplifies the cleaning power without compromising the safety of your delicate floor finishes.
What You Need:
- 2 cups of clean water (distilled or filtered water is highly recommended for best results)
- 1 teaspoon of 70% isopropyl alcohol
- 1/2 teaspoon of white vinegar (household cleaning vinegar, 5% acidity)
- 1/4 teaspoon of Dawn dish soap (or a similar concentrated, gentle dish soap)
- A clean spray bottle (at least 20 oz capacity)
- A microfiber mop or several clean microfiber cloths
Directions for Option 2:
- Clean Bottle First: As with Option 1, start with a thoroughly cleaned and dry spray bottle.
- Measure Precisely: Carefully pour 2 cups of water into the bottle. Then add 1 teaspoon of 70% alcohol, followed by 1/2 teaspoon of white vinegar, and finally, 1/4 teaspoon of Dawn dish soap. Exact measurements are vital to ensure the solution is balanced and won’t leave residue or streaks.
- Gentle Mix: Secure the cap and gently swirl or lightly shake the bottle to mix the ingredients. Avoid vigorous shaking, as this can create excessive suds from the dish soap.
- Pre-Clean Floors: Always begin by sweeping or vacuuming your floors to remove all loose dirt and debris. This step is crucial for an effective deep clean.
- Targeted Application: Mist a small section of your floor, focusing on areas with more visible grime or traffic. Remember, a light spray is all you need.
- Deep Clean with Microfiber: Immediately clean the misted section with a clean, damp microfiber mop or cloth. The alcohol and dish soap work together to lift and dissolve tougher dirt and grease more effectively. If cleaning particularly dirty areas, you may need to apply a bit more pressure or pass over the spot a couple of times.
- Rinse if Necessary (Rarely): Due to the small amount of dish soap, a separate rinse pass is usually not required. However, if you accidentally oversaturated an area or notice any slight stickiness (which should be rare with these proportions), a quick wipe with a separate mop dampened with plain water can resolve it.
- Enjoy a Streak-Free Finish: The alcohol helps this solution dry incredibly fast, leaving your floors sparkling clean and streak-free without the need for extensive buffing.
Pro Tips for Impeccable Floor Cleaning Results
Achieving perfectly clean floors isn’t just about the right cleaner; it’s also about technique. Follow these pro tips to maximize the effectiveness of your homemade solutions and protect your beautiful floors:
- Always Pre-Clean: Never skip sweeping or vacuuming before mopping. Dust, crumbs, and grit can act like sandpaper under your mop, potentially scratching your floor’s finish.
- Spot Test First: While these formulas are designed to be gentle, it’s always wise to test any new cleaner in an inconspicuous area of your floor first. This ensures there are no adverse reactions or discoloration, although unlikely with these ingredients.
- Use a Microfiber Mop: Microfiber mops are superior for cleaning hard floors. Their tiny fibers effectively pick up dirt, grime, and even microscopic particles, leaving surfaces cleaner and streak-free. They also absorb less water than traditional string mops, reducing the risk of oversaturation.
- Avoid Oversaturation: This is particularly critical for laminate and wood floors. Excessive moisture can seep into seams and cause swelling, warping, or delamination. A light mist is all you need for these DIY spray solutions.
- Work in Sections: Clean your floors in small, manageable sections. This allows you to address dirt effectively and ensures the cleaner doesn’t dry before you can wipe it up, preventing potential streaks.
- Change or Rinse Cloths Frequently: As your microfiber mop head or cloths become dirty, rinse them thoroughly or switch to a clean one. Using a dirty cloth will only spread grime around, not clean it.
- Wipe Dry (If Necessary): While these solutions are formulated for fast drying, if you notice any residual dampness, a quick pass with a separate dry microfiber cloth will guarantee a flawless, streak-free shine.
- Clean Regularly: Frequent, light cleaning is always better than infrequent, heavy-duty cleaning. Regular maintenance prevents dirt and grime from building up, making each cleaning session quicker and easier.
- Store Cleaners Properly: Label your spray bottles clearly. Store them in a cool, dark place away from direct sunlight and out of reach of children and pets. These natural cleaners are best used within a few weeks for optimal freshness, though they can last longer.
Safety & Environmental Considerations
While these homemade cleaners are significantly safer than many commercial alternatives, a few best practices ensure you maintain a healthy and safe cleaning routine:
- Ventilation: Always ensure good ventilation when cleaning. Open windows or turn on a fan to circulate fresh air, especially when using vinegar and alcohol.
- Never Mix with Bleach: A crucial safety warning: NEVER mix vinegar with bleach. This combination creates toxic chlorine gas, which can be extremely dangerous. Ensure your cleaning tools and bottles are thoroughly rinsed if they’ve ever contained bleach.
- Keep Out of Reach: Even natural ingredients should be kept out of reach of children and pets. Label your bottles clearly to avoid confusion.
- Eco-Friendly Disposal: The beauty of these solutions is that they are biodegradable and safe to rinse down drains, unlike many chemical-laden commercial products.
Final Thoughts: Embrace the Power of DIY Cleaning
Transforming your floor cleaning routine with these simple, homemade solutions from Flooring You Can Trust is a game-changer. You’re not only saving money and reducing your environmental footprint but also ensuring a safer, healthier home free from harsh chemicals. Whether you opt for the gentle vinegar and water mix for daily maintenance or the powerful alcohol and dish soap blend for a deeper clean, you’ll be amazed at the sparkling, streak-free results on your urethane, acrylic, and melamine floors.
So, ditch those expensive store-bought cleaners and embrace the effectiveness of ingredients you already have. Your floors will thank you, your wallet will thank you, and the environment will thank you! We highly recommend watching the full tutorial by Flooring You Can Trust on YouTube for visual guidance and more expert tips. Don’t forget to share these incredible, cost-saving cleaning hacks with your friends and family – everyone deserves to know the secret to beautifully clean floors!