
Grandma Hope’s Legendary 4-Ingredient Homemade Pie Crust: Your Secret to Holiday Perfection
As the holiday season draws near, the irresistible aroma of freshly baked pies becomes a cherished tradition in many homes. For me, creating the perfect pie starts with an exceptional, homemade pie crust – the foundation of any truly memorable dessert. While many recipes promise simplicity, few deliver with the consistent flakiness and delicious flavor of Grandma Hope’s pie crust recipe. This culinary gem stands out not just for its incredible results, but for its remarkable ease, requiring only four common ingredients you likely already have in your pantry.
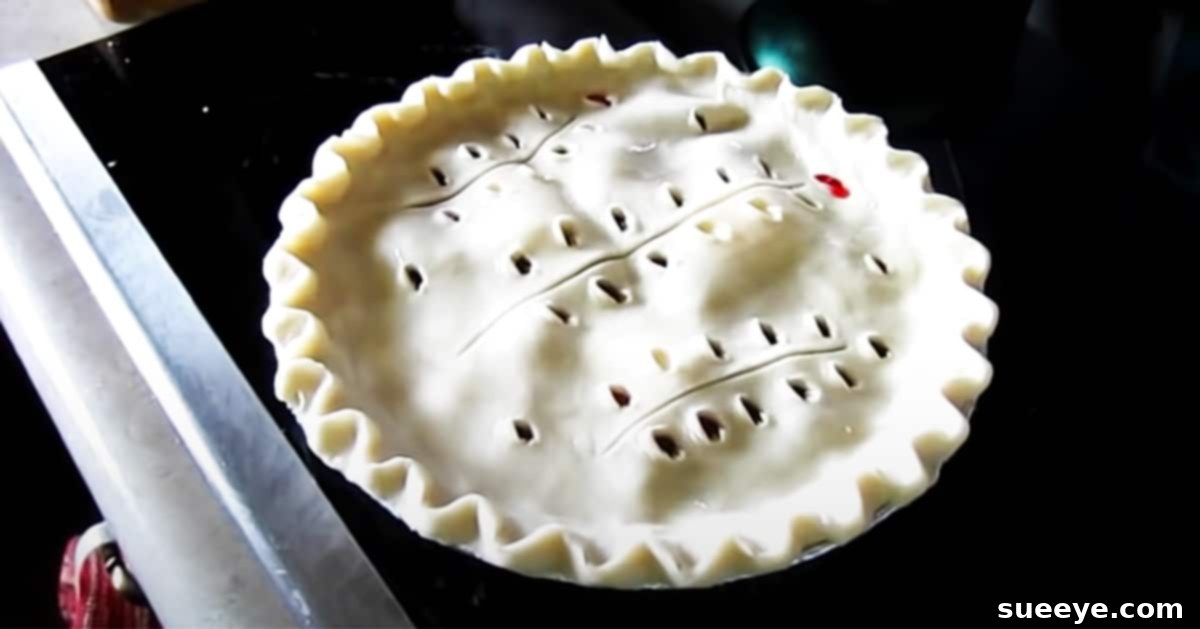
In a world of complex baking endeavors, finding a recipe that yields stellar results with minimal effort is like discovering a treasure. Grandma Hope’s approach is a testament to the idea that simplicity often leads to perfection. Her recipe, famed for producing pies that once commanded a staggering $1000 at auction, is a proven winner. This isn’t just another pie crust; it’s a legacy of flavor and texture, ensuring that your holiday pies will be the talk of the table. Beyond its simplicity, Grandma Hope generously shares a wonderful tip: using your index finger to create a beautiful, decorative pattern along the edge of the crust, adding that authentic, artisanal touch.
Essential Ingredients for Your Flaky Homemade Pie Crust
The beauty of Grandma Hope’s perfect pie crust lies in its straightforward ingredient list. Quality ingredients are key, but you don’t need anything fancy to achieve a sublime result. Just four simple items stand between you and the most delightful pie crust you’ve ever made.
- 1 Heaping Cup Shortening: The secret to an incredibly flaky and tender crust. Shortening, unlike butter, has a higher melting point and 100% fat content, which creates distinct layers and prevents a tough crust.
- 3/4 tsp Salt: Crucial for enhancing the overall flavor of your pie crust and balancing the sweetness of your pie filling. Don’t skip it!
- 3 Cups All-Purpose Flour: The structural backbone of your crust. All-purpose flour provides the right balance of protein for a tender, yet workable dough.
- 1/2 Cup Ice-Cold Water: Absolutely essential. Cold water helps keep the shortening solid, preventing premature gluten development and ensuring maximum flakiness.
Choosing good quality shortening can make a difference in texture, but even a standard brand will yield excellent results with this recipe. Always ensure your water is as cold as possible – you can even add a few ice cubes to a cup of water and let it sit for a few minutes before measuring out your half cup.
Step-by-Step Directions to the Perfect Homemade Pie Crust
Making a homemade pie crust might seem daunting, but with Grandma Hope’s clear and concise steps, you’ll find it incredibly satisfying and surprisingly easy. Follow these directions closely for a consistently flaky and delicious foundation for all your pies.
Step 1: Preparing Your Dry Ingredients
Begin by taking a large mixing bowl. Measure out your 3 cups of all-purpose flour and add it to the bowl. Next, sprinkle in the 3/4 teaspoon of salt. Use a whisk or a fork to thoroughly combine these dry ingredients. This ensures that the salt is evenly distributed throughout the flour, contributing to a balanced flavor in every bite of your pie crust.
Step 2: Incorporating the Shortening for Flakiness
Now it’s time to add the star of the show for flakiness: the shortening. Measure out one heaping cup of vegetable shortening. Using a tablespoon, add spoonfuls of shortening directly into the flour mixture. The key here is to “cut” the shortening into the flour. You can use a fork, a pastry blender, or even your fingertips for this step. The goal is to break down the shortening into pea-sized crumbs, coating each flour particle. Avoid overworking the mixture at this stage, as too much handling can lead to a tough crust. For a visual guide on achieving the perfect consistency, you can refer to the Eat at Joe’s tutorial on YouTube, which demonstrates how to effectively mix and get your pie crust dough ready.
Step 3: Adding the Ice-Cold Water
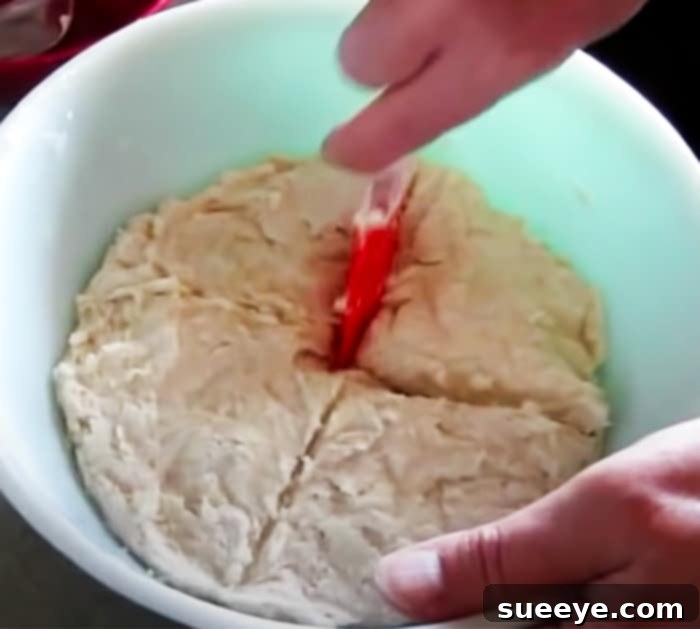
Once your flour and shortening mixture resembles coarse crumbs, it’s time to introduce the ice-cold water. Gradually add the 1/2 cup of cold water, a tablespoon at a time, mixing gently with a fork after each addition. The exact amount of water can vary slightly depending on your flour and humidity, so add just enough until the dough comes together. The mixture should be moist enough to hold together when pressed, but not sticky. Be careful not to overmix; over-developing the gluten will result in a tough pie crust. Stop mixing as soon as the dough forms a shaggy ball.
Step 4: Chilling the Dough (A Crucial Step for Flakiness)
Although not explicitly mentioned in the original snippet, chilling your pie dough is a critical step for achieving that coveted flaky texture. Once your dough has formed, divide it into two equal portions if you’re making a double-crust pie, or keep it as one ball for a single-crust pie. Flatten each portion into a disk, wrap it tightly in plastic wrap, and refrigerate for at least 30 minutes, or up to 2 days. Chilling allows the gluten to relax, making the dough easier to roll out, and more importantly, it solidifies the shortening, which contributes to those beautiful flaky layers when baked.
Step 5: Rolling Out the Pie Crust Dough
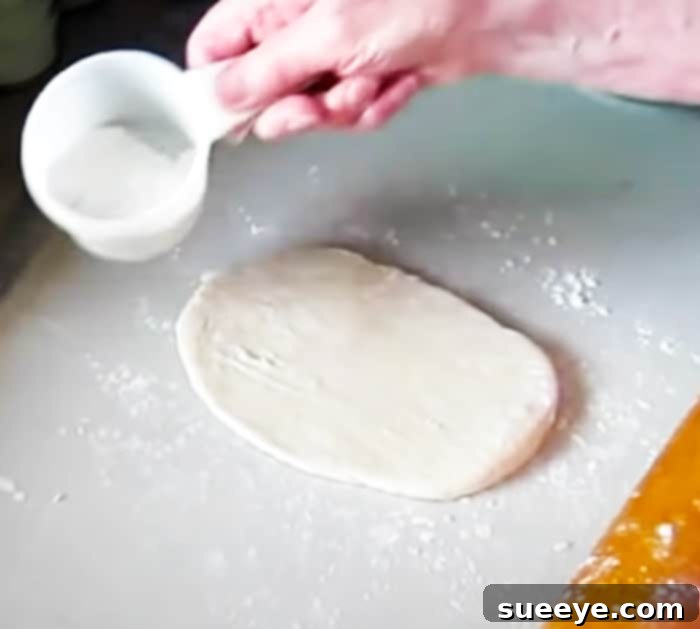
Once chilled, remove one disk of dough from the refrigerator. Lightly dust a clean, flat surface (like a baking mat or countertop) with flour. Place your dough disk in the center and dust the top of the dough with a little more flour. Using a rolling pin, begin rolling the dough from the center outwards, rotating the dough frequently to ensure an even thickness and prevent sticking. Keep adding small amounts of flour to the baking mat and the top of the dough as needed to prevent it from adhering. Roll the dough into a circle approximately 1/8 inch thick and large enough to fit your pie plate with about a 1-inch overhang.
Step 6: Transferring and Shaping Your Crust
Carefully transfer the rolled-out dough to your pie plate. The easiest way to do this is to gently roll the dough around your rolling pin, then unroll it over the pie plate. Alternatively, you can fold the dough in half, then in half again, and carefully unfold it into the plate. Gently ease the dough into the contours of the pie plate, making sure not to stretch it, which can cause the crust to shrink during baking. Trim any excess dough, leaving about a 1/2 to 1-inch overhang.
Step 7: The Signature Grandma Hope Edge
This is where Grandma Hope’s personal touch comes in. Take the overhanging dough and fold it under, creating a thicker edge. Now, use your index finger to press into the folded edge, while simultaneously using the thumb and index finger of your other hand to pinch the dough around it. This creates a beautiful, rustic, and distinct pattern that makes your pie look professionally made and uniquely homemade. You can also use a fork to crimp the edges for a simpler finish.
Expert Tips for a Flawless Homemade Pie Crust Every Time
Achieving the perfect homemade pie crust consistently comes down to a few key techniques. Mastering these will elevate your baking and ensure every pie is a masterpiece.
- Keep Everything Cold: This is arguably the most crucial tip. Cold ingredients (especially shortening and water) prevent the fat from melting too soon and inhibit gluten development, which results in a tender, flaky crust.
- Don’t Overmix: Overworking the dough develops too much gluten, leading to a tough, rather than tender, crust. Mix just until the ingredients are combined and the dough barely holds together.
- Use Quality Ingredients: While simple, the quality of your flour and shortening can impact the final texture and flavor.
- Chill Your Dough: Always chill the dough for at least 30 minutes before rolling. This allows the gluten to relax, making the dough easier to handle, and firms up the fat, which contributes to flakiness.
- Flour Your Surface (But Don’t Overdo It): Use just enough flour on your work surface and rolling pin to prevent sticking. Too much flour can make your dough dry and tough.
- Don’t Stretch the Dough: When transferring the dough to the pie plate, gently ease it in. Stretching the dough will cause it to shrink back significantly during baking, leading to an uneven crust.
- Practice Makes Perfect: Don’t get discouraged if your first pie crust isn’t exactly as you envisioned. Each attempt builds skill and confidence.
Homemade vs. Store-Bought: The Undeniable Advantage
While the convenience of store-bought, premade pie crusts is undeniable, especially when time is short, the difference in taste, texture, and overall experience between a homemade crust and its store-bought counterpart is vast. Homemade pie crusts, particularly one as simple and effective as Grandma Hope’s, offer a superior flavor profile – rich, buttery (even with shortening), and perfectly seasoned. The texture is unmatched; that delicate, flaky goodness simply cannot be replicated by mass-produced alternatives.
Beyond taste, there’s the satisfaction of creating something from scratch. Knowing exactly what ingredients go into your food provides peace of mind, and the cost savings over time are significant. Furthermore, the authentic, rustic look of a handmade crust, complete with Grandma Hope’s signature decorative edge, elevates any pie from merely good to truly spectacular. It adds a personal touch that transforms a simple dessert into a heartfelt creation, reflecting the care and love poured into holiday baking. Embracing this easy recipe means you no longer have to sacrifice quality for convenience; you can have both.
Embrace the Joy of Baking with Grandma Hope’s Perfect Pie Crust Recipe
Overall, Grandma Hope’s pie crust recipe is more than just a list of ingredients and steps; it’s an invitation to rediscover the simple joys of homemade baking. With the holidays right around the corner, this easy, foolproof recipe is an absolute must-add to your pie-making repertoire. It proves that making an incredible pie crust doesn’t have to be hard or time-consuming. While there are certainly days when the convenience of premade crusts calls, the small effort required for this authentic, delicious, and budget-friendly homemade version is profoundly rewarding.
The beauty of the design Grandma Hope adds to her pie crust, a simple yet elegant touch, transforms a basic pastry into a work of art. This recipe truly results in what looks and tastes like the perfect pie crust – one that will undoubtedly earn you rave reviews from family and friends. So, roll up your sleeves, gather your four ingredients, and prepare to create unforgettable holiday memories, one flaky slice at a time, thanks to Grandma Hope’s timeless wisdom.