Crafts
14 Free Embroidery Patterns and Easy Projects
Free embroidery patterns and easy projects: 14 hoops and stitch ideas, from a pom pom tote and cactus hoop art to snowflake ornaments and punch needle.
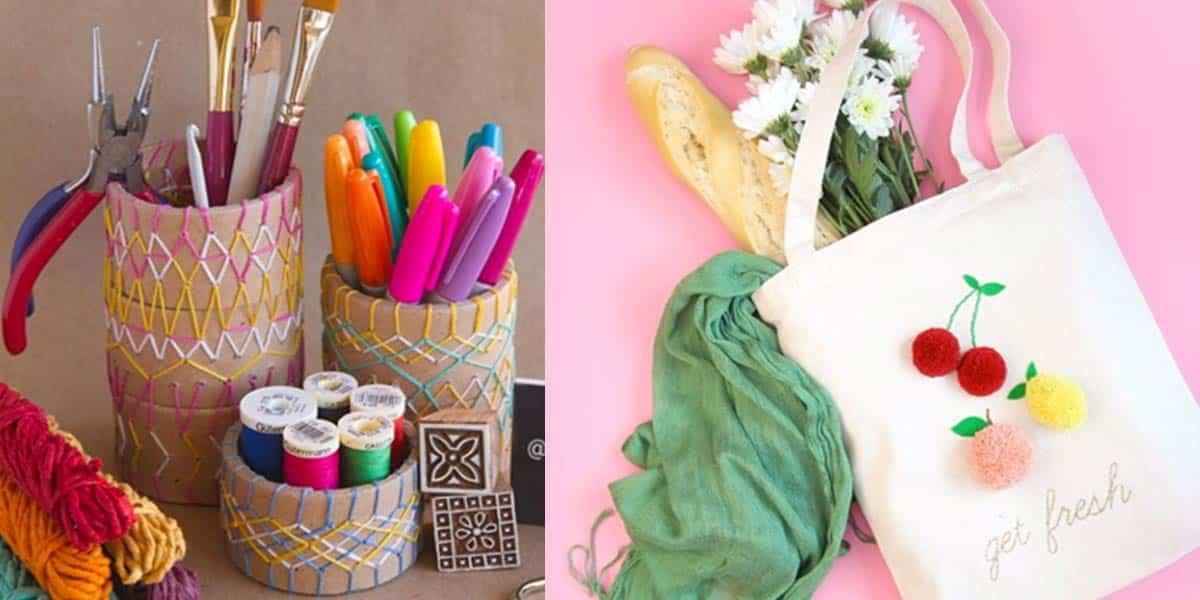
Thread, a needle and a wooden hoop. That is the entire buy in for embroidery, which is why free embroidery patterns are the easiest craft to fall into and the hardest one to put down again. All 14 of these are a real tutorial with a real maker behind it, from a beginner backstitch on a canvas tote to satin stitched flowers that honestly look painted on. Some take an evening. A few take a weekend and a good podcast. The early ones are gentle: straight lines, big shapes, forgiving fabric. Further down you will meet French knots, fishbone leaves and lazy daisies, which sound terrifying and are really four small moves rearranged. Where a pattern is a free download the tutorial says so, every outside project links back to the person who drew it, and the last two are Sueeye’s own video tutorials.
1. Embroidered Pom Pom Market Tote
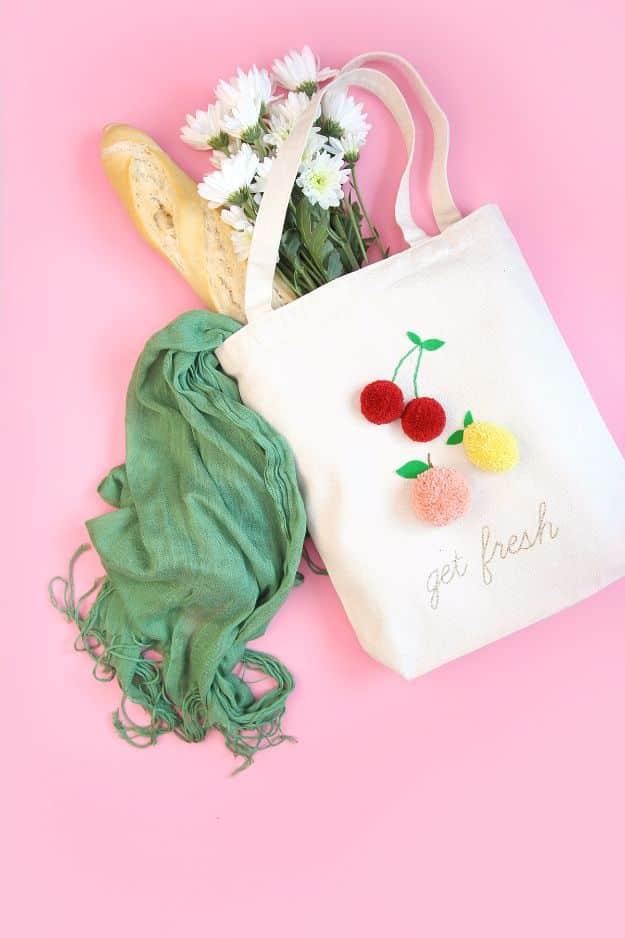
Half pom poms glued onto a plain canvas tote so they read as cherries, a peach and a lemon, with stems and leaves backstitched in green and brown floss. The half pom is the trick worth stealing: wrap yarn around one side of the pom pom maker only, cut, tie off, then trim and trim again until it sits flat against the fabric instead of rolling off it. Sketch the stems with a washable pen, backstitch along the lines, then launder the bag to remove the pen before any glue goes near it. Felt leaves and the poms go on last.
Get the full tutorial at Damask Love.
2. Wooden Stitched Planter DIY
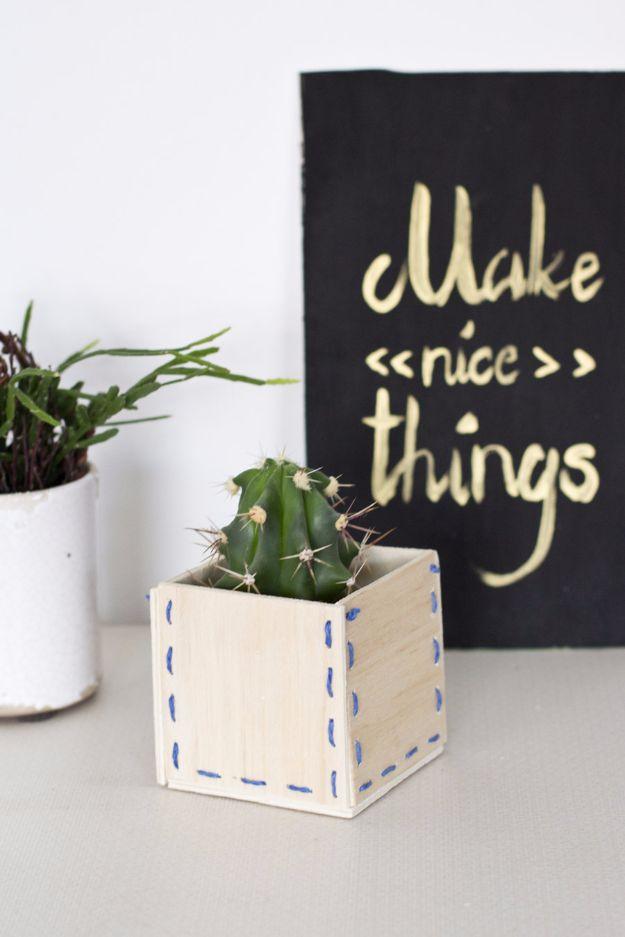
Five equal squares of thin crafting board, each side eight centimeters, drilled around the edges and laced together with yarn so the stitches themselves are the joinery. No glue, no nails, no clamps. Mark the hole positions with a ruler and pencil first, because uneven spacing is the only thing that can spoil this, then drill small holes and sand off every splinter before threading. Lace the four walls to the base and to each other, knot the ends inside, and drop a small potted plant in. A tiny cactus is the classic choice and it suits the blue thread perfectly.
Get the full tutorial at Look What I Made.
3. Embroidered Photo Art
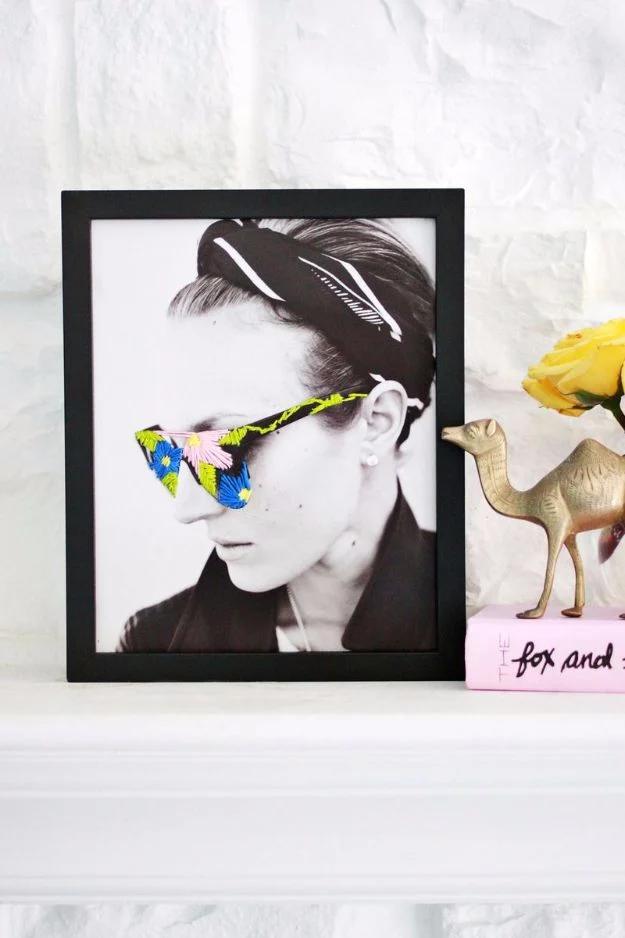
A framed black and white portrait with flowers stitched straight through the print in neon pink, blue, green and yellow floss, worked right across the sunglasses. Photo paper needs a backing before a needle touches it, so spray adhesive the print onto cardstock and the whole thing stops flexing while a big yarn needle goes through. Each petal is a few scattered long and short stitches with the gaps filled in afterwards, the center is a handful of parallel stitches, and leaves are longer and shorter stitches meeting down a middle line. Go back through the same holes where you can and stagger them around a flower center so no chunk of the picture tears out.
Get the full tutorial at A Beautiful Mess.
4. Vintage Camper Embroidery
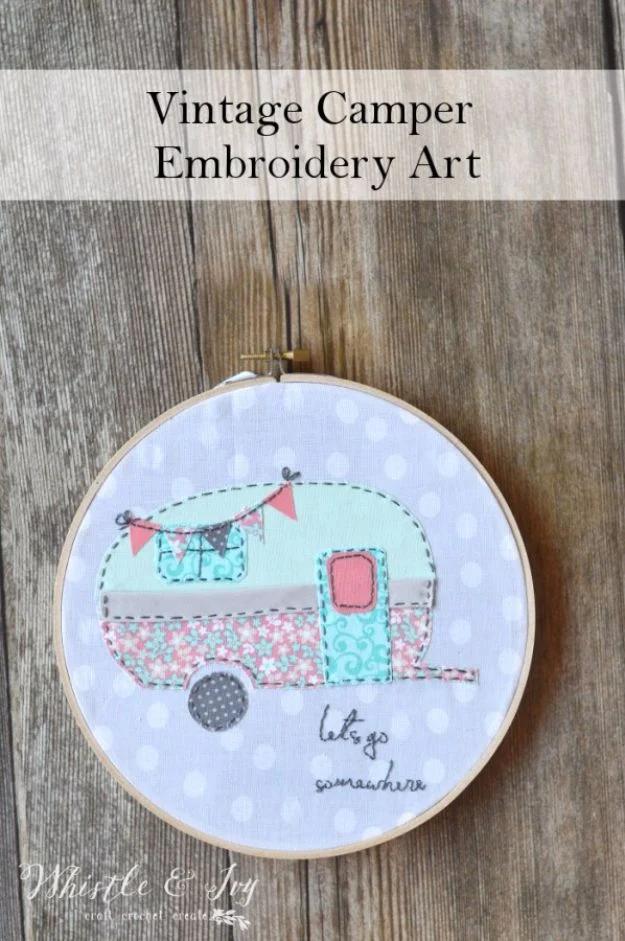
A little retro caravan built from fabric scraps appliqued onto polka dot cotton, outlined entirely in running stitch and backstitch, with a bunting strung over the roof and three words hand lettered beside the wheel. Every scrap you have ever refused to throw away has a job here, because the body, the window, the door and the awning stripe are all separate small pieces. The maker hand sewed the whole thing on purpose, as stitch practice, and swapped the ribbon trim for double fold bias tape. Two hours start to finish, which is a fair trade for a wall piece.
Get the full tutorial at Whistle and Lively.
5. DIY Magnets With Hand Embroidery
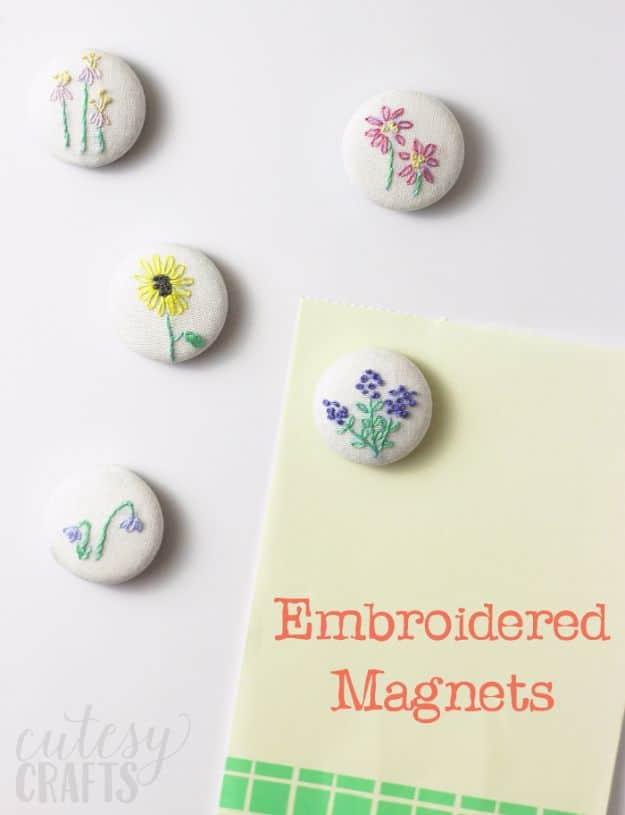
Tiny wildflowers stitched on scraps of cotton or linen, then trapped inside one and an eighth inch cover buttons and glued onto magnets. The size is what makes it charming and also what makes it tricky, so use a single strand of floss rather than the usual two or three, or the design will crowd itself before you finish a stem. Transfer the flowers with carbon paper, stitch them in a hoop, then cut using the template from the button kit. Pliers take the shanks off. E-6000 holds the magnets, and it needs to cure fully before anything goes on a fridge.
Get the full tutorial at DIY Candy.
6. DIY Ribbon Embroidery
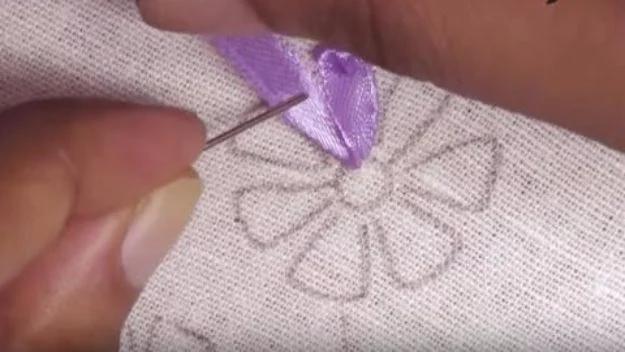
Silk ribbon worked with a needle exactly the way floss is, except every stitch comes out three dimensional because the ribbon twists and folds as it lands. Five stitches carry the whole technique: the ribbon stitch, lazy daisy, straight stitch, French knot and stem stitch, and those five in different combinations will give you every flower you see on a vintage blouse. It is genuinely easier than floss embroidery for a beginner, because one ribbon stitch fills a petal that would take twenty satin stitches. Draw your flower shape on the fabric first and work outward from the center.
Get the full tutorial at Sueeye.
7. Embroidered Pillow Case
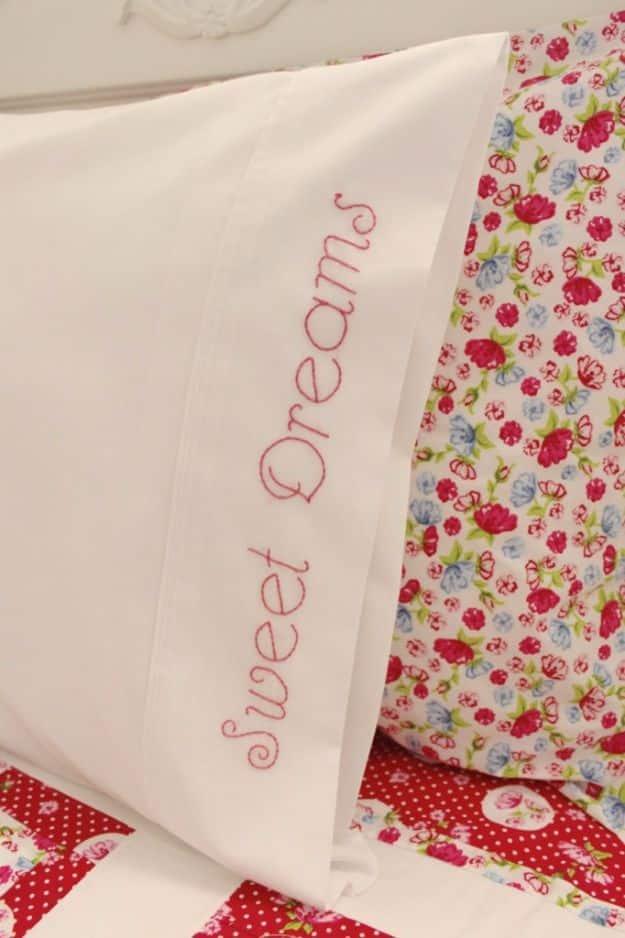
Two words backstitched along the cuff of a plain white pillowcase in a single pink, which is about as low risk as embroidery on something you actually use gets. The transfer is the clever part: print the words mirrored, trace over them with an iron on transfer pen, then press the paper onto the cuff at a warm setting with no steam. Three strands of floss, stitches only a few millimeters long, kept even the whole way. Work between the two layers of the cuff so every knot and thread tail is hidden and the inside stays as tidy as the outside.
Get the full tutorial at Molly and Mama.
8. Embroidered Bouquet
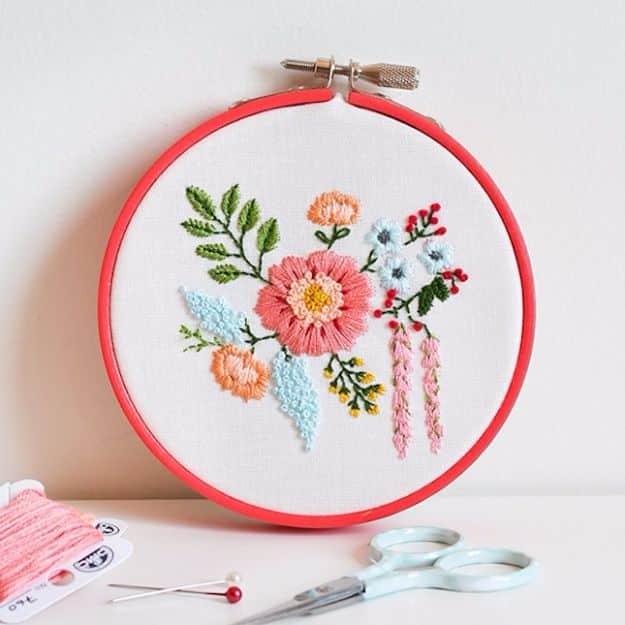
A loose posy worked on an eight inch square of fabric in a four inch hoop, two strands of floss throughout, and it is worth reading the stitch list before starting because almost every flower is a different technique. The big coral bloom is satin stitch petals around a French knot center with deeper red laid in for depth. Blue buds and red berries are French knots, the drooping pink spires are long and short stitch, stems are backstitch and the leaves are fishbone. Print the free pattern at full size, trace it, then work the stems first so the flowers sit over them.
Get the full tutorial at Down Grapevine Lane.
9. Can't Touch This – Cactus Embroidery
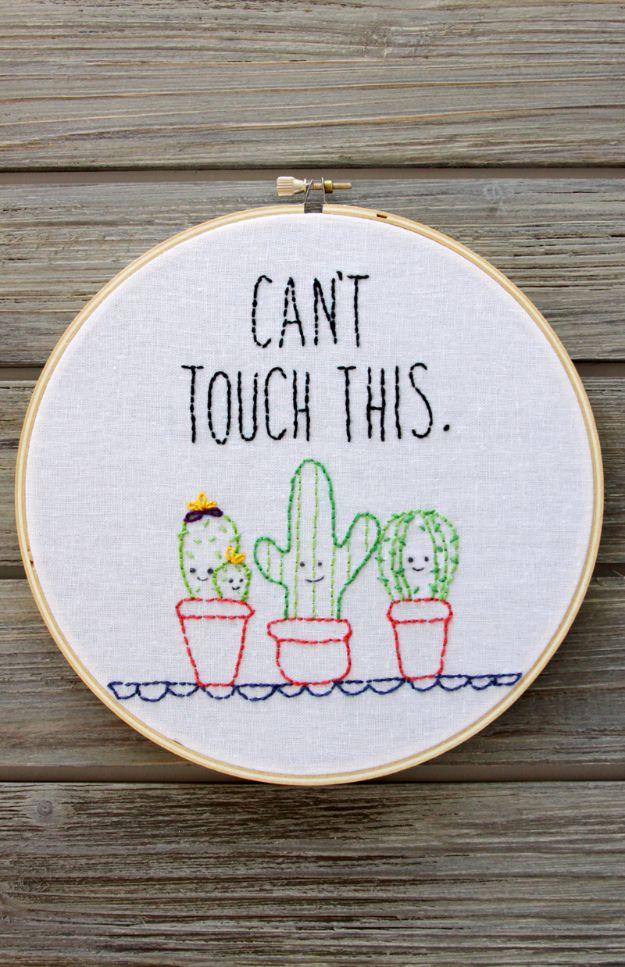
Four smiling cacti in three stitched pots under a hand stitched joke, worked on a ten inch square of white linen in an eight inch hoop. The whole piece is backstitch with three strands, which means if you can sew a dotted line you can make this. Faces are two strands of gray, French knots for eyes and a tiny backstitched smile, and the flowers on the left cactus are lazy daisies. Trace the free pattern by taping it to a window with the fabric over it. A damp paper towel lifts the marking pen off at the end.
Get the full tutorial at Flamingo Toes.
10. DIY Stitched Text Tote Bag
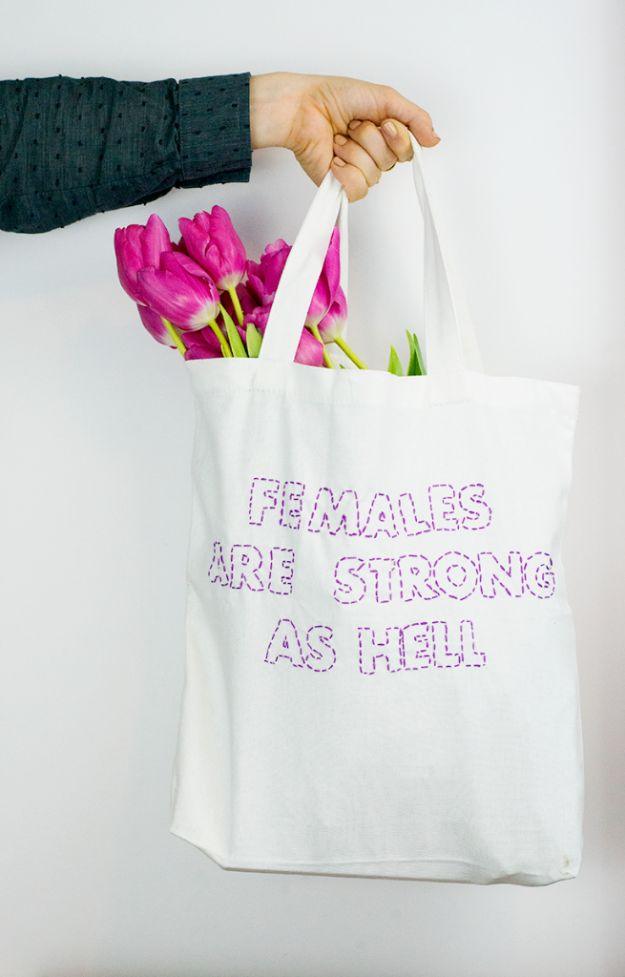
Block letters outlined in purple floss across a plain canvas tote, and the transfer method is the reason to read this one: stick large letter stickers on the bag, stitch around the edge of each sticker, then peel it off. No tracing, no transfer pen, no printing anything backwards. Use a needle with a big eye and leave the sticker in place until that letter is finished, because it holds the shape for you. Straight sided letters are far easier than script for a first attempt, and a short phrase beats a long one.
Get the full tutorial at The Homesteady.
11. Embroidered Snowflake
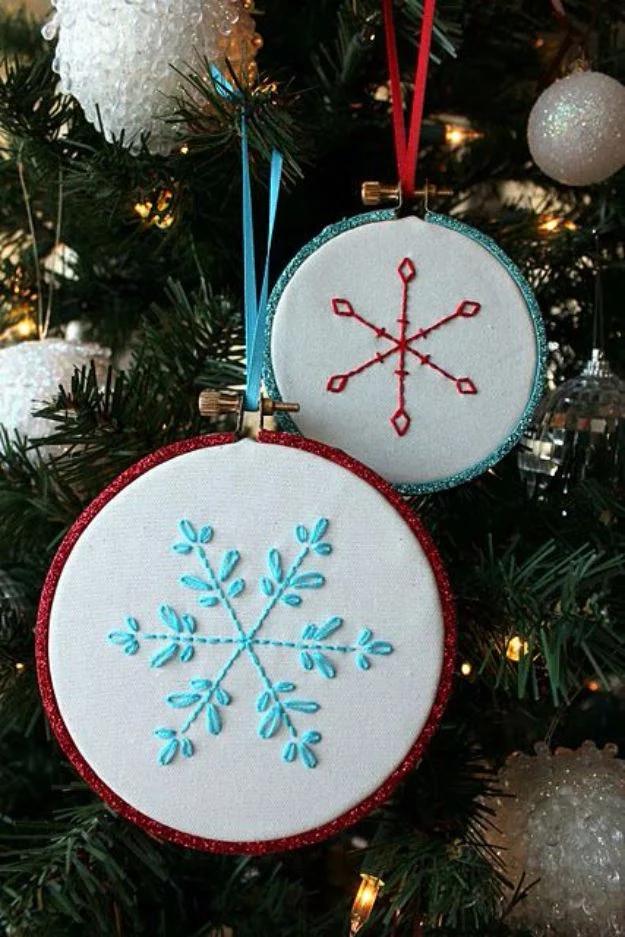
Two hoops turned into tree ornaments, each holding a single snowflake, with the hoop rims painted red and turquoise and then rolled in glitter while the paint was still wet. The stitching is mostly backstitch, with chain stitch used for the looped arms on the turquoise flake, so one evening covers both. Trace the free pattern with a water soluble pen, stitch, then tie ribbon through the hoop screw to hang. The glitter rim is what stops these reading as craft fair filler, and it is the last thing you would think to do.
Get the full tutorial at Thirty Handmade Days.
12. You Will Forever Be My Always – Floral Embroidery Hoop Art
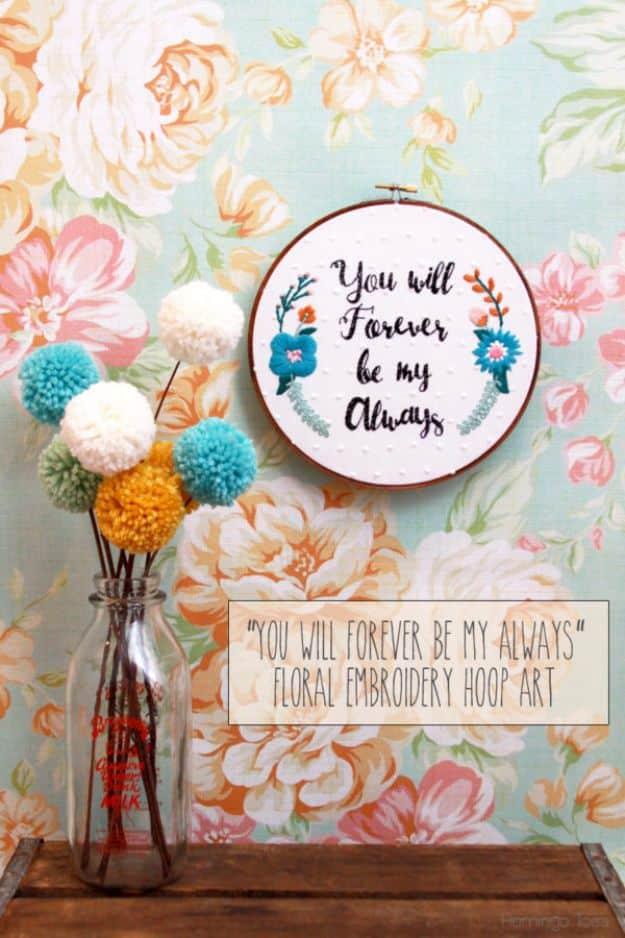
A quote in stitched script with flowers growing up both sides, on a ten inch square of swiss dot fabric in an eight inch hoop. The lettering technique is the part worth copying: backstitch the outline of each letter, then fill the wider strokes with diagonal satin stitch left deliberately gappy, so the words read as sketched rather than solid. Flowers are satin stitch, stems are stem stitch, the ferny leaves are lazy daisies and the centers are French knots. Stain the outer ring, trim the fabric to an inch, glue it inside and finish with a felt circle.
Get the full tutorial at Flamingo Toes.
13. 15 Basic Embroidery Stitches for Beginners
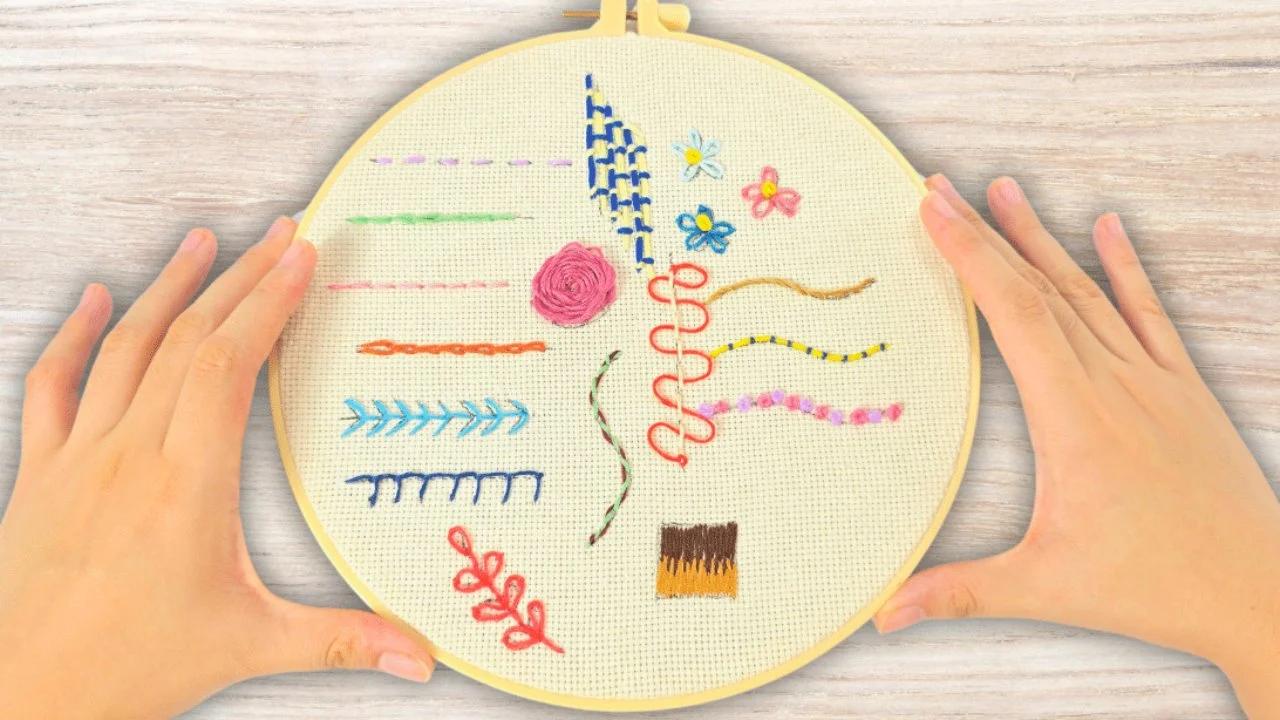
Fifteen stitches laid out side by side on one piece of aida in a single hoop, which is the fastest way anybody has ever learned to embroider. Running stitch, split stitch and backstitch first, all worked about a quarter inch at a time, then the fancier ones build on those three. You can buy cloth with the guide already printed, or just draw your own lines straight onto plain fabric, which is what happened here. Fifteen stitches, under an hour, and afterwards every pattern in this list stops looking like a foreign language.
Get the full tutorial at Sueeye.
14. Punch Needle Embroidery for Beginners
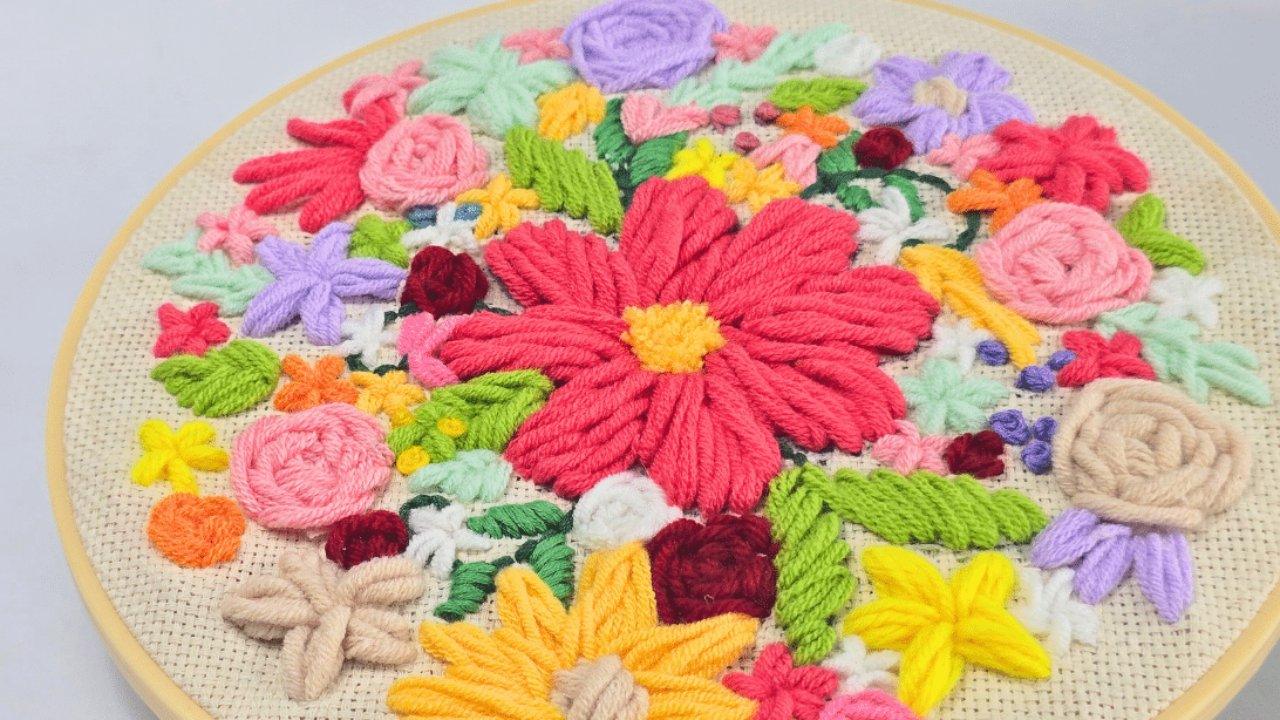
Punch needle swaps floss for yarn and a needle for a hollow tool, and the result is a carpet of raised loops instead of flat stitches. Thread the tool with the wire loop threader, start at the largest shape and pull the first strand right through from the back, then punch your way across the design in rows. Monks cloth is the fabric, a gripper hoop holds it drum tight, and leftover yarn from other projects is exactly what this wants. The flowers come out thick and plush enough to run a hand over, which is the entire appeal.
Get the full tutorial at Sueeye.