Organizing Ideas
22 Cool DIYs To Make With Plates and Dishes
Plate and dish crafts to make this weekend: sharpie mugs baked hard, antique teacup candles, gold leaf bowls, a tiered cake stand and a clay egg tray.
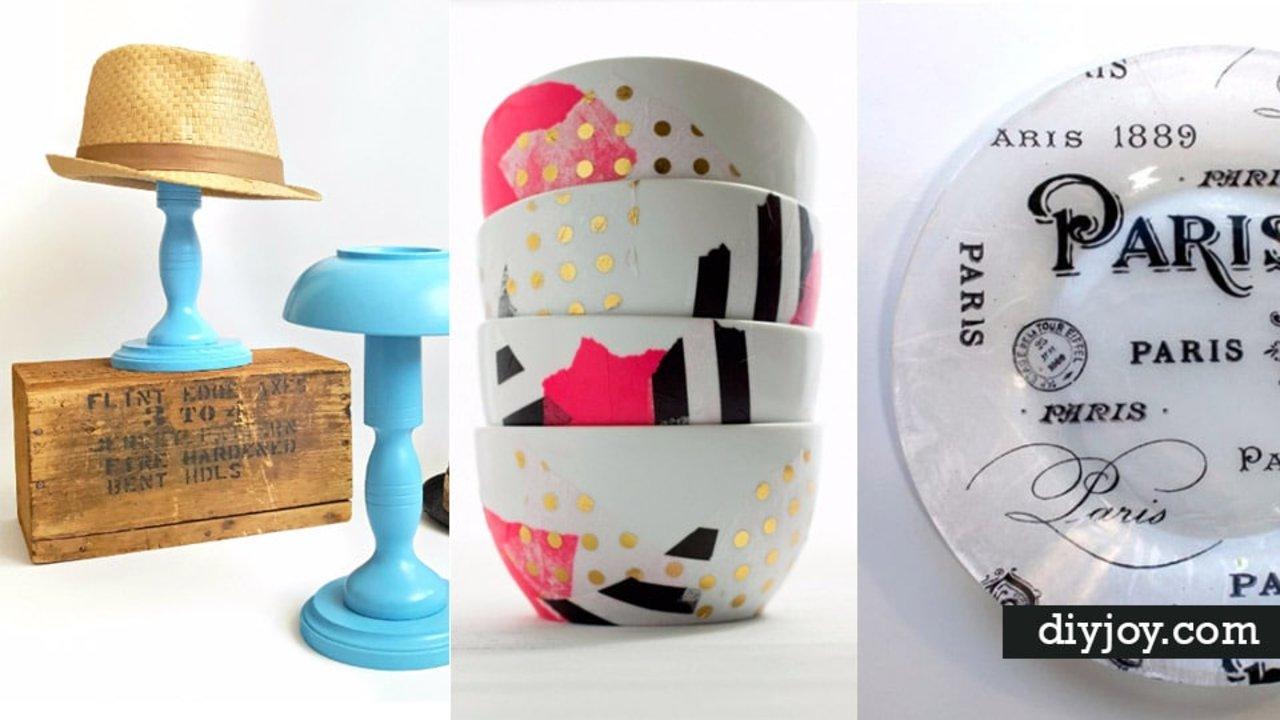
Charity shops are full of plates nobody wants, teacups from sets that lost their teapot forty years ago and wooden bowls that cost ninety nine cents, and that is the entire supply chain for these 22 plate and dish crafts. Some of them turn old china into something else completely: bird feeders on stakes, a shed wall of plate flowers, tiered cake stands drilled through the middle. Some of them make the dish itself the project, in air dry clay or tissue paper and Mod Podge. And several are just a marker and an oven, which is the fastest satisfying craft going. Costs run from nothing to about twenty dollars and most take an afternoon.
1. How to Customize a Mug Using Sharpie
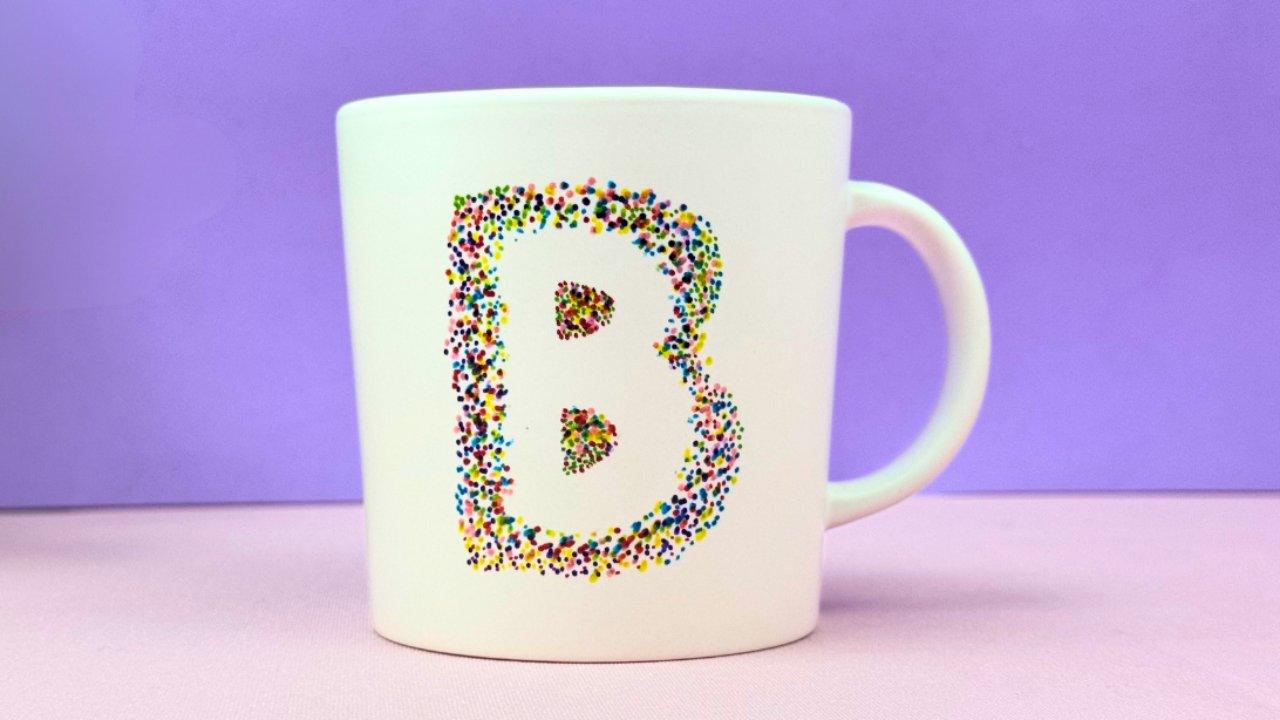
A plain white mug given a single big initial, built entirely out of thousands of tiny colored dots, which is a far more forgiving way to work than trying to draw a clean line freehand. Dots hide every wobble. The letter shape comes from a stencil so the edges stay true, and the color comes from filling in around it with marker tips in whatever shades you have, tight together at the outline and looser toward the edges. It is the personalized gift that costs a mug, and it works for initials, monograms or a short word on a bigger cup.
Get the full tutorial at Sueeye.
2. Gold Animal Ring Dishes
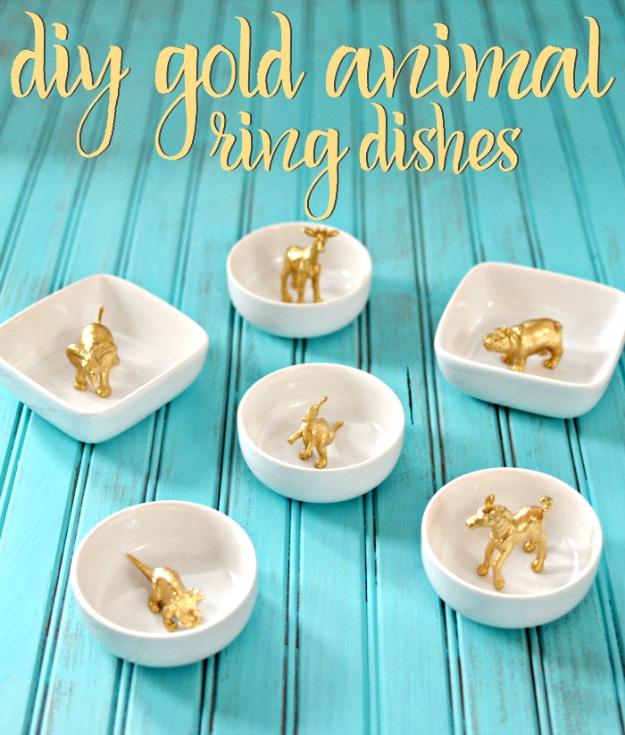
Cheap plastic toy animals spray painted gold and glued into small white ceramic dishes, which is the gift everybody assumes came from a boutique. Taylor Bradford’s advice after making a whole set is worth having: pick tall animals. A giraffe stands proud of the rim and looks like it is standing guard over your rings, where a hippo disappears inside the bowl, and both are charming but only one reads from across a dresser. Spray the animals in a couple of coats to get right into the nooks, then a dab of E6000 on the feet to set them in place. Most of the project is waiting for things to dry.
Get the full tutorial at Taylor Bradford.
3. DIY Customized Mug Using Sharpie
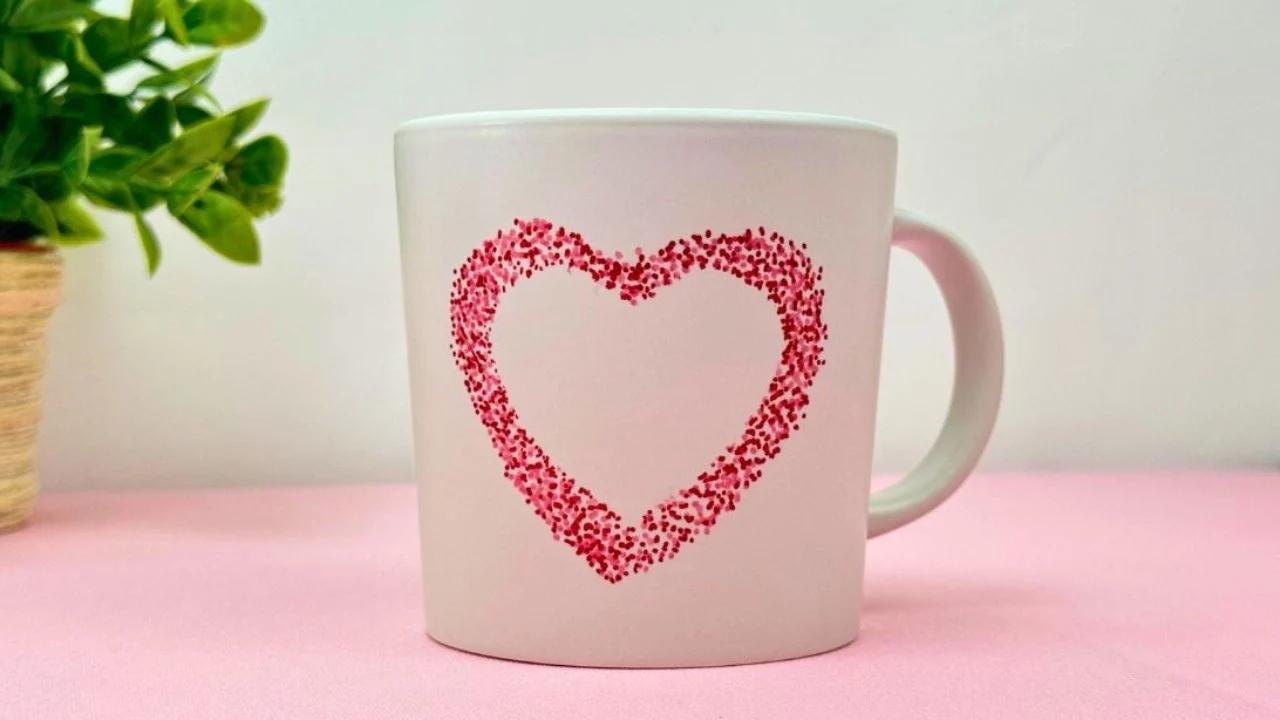
The same dotted marker technique turned into a heart outline, which makes it a Valentine’s gift rather than a monogram one. A heart is the easier shape to attempt first because the outline is a closed curve with no sharp corners to give a shaky hand away, and the dots do the rest. Two shades of pink and red worked together give the outline depth instead of the flat sticker look a single color produces. Keep the dots dense along the line and let them thin out slightly at the outer edge so the shape looks drawn rather than stamped.
Get the full tutorial at Sueeye.
4. Succulent Garden In A Bowl
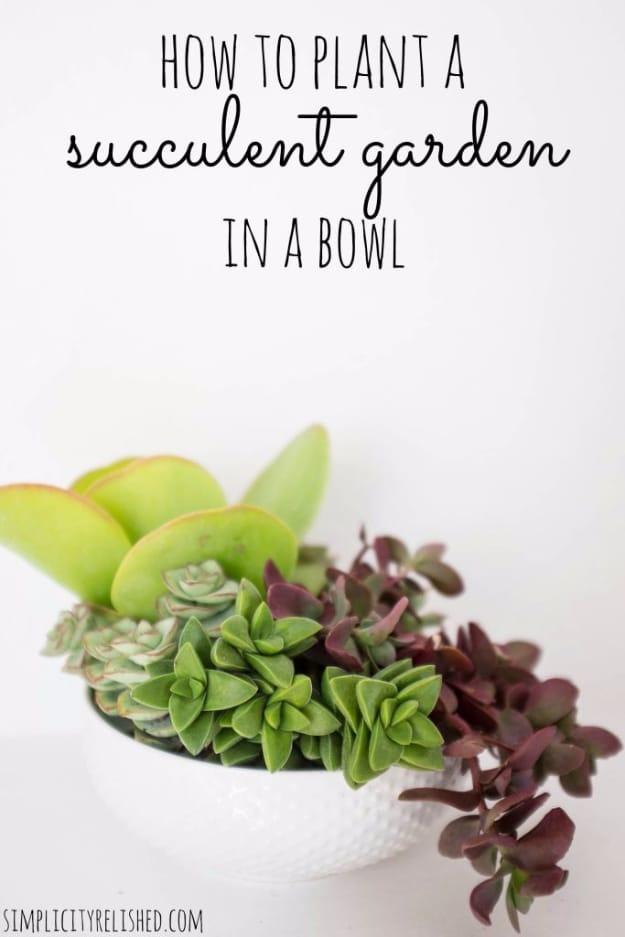
Succulents planted straight into an ordinary cereal bowl, which Simplicity Relished chose for the least romantic and most sensible reason going: bowls are cheaper than pots and most people already own several. Hers came from Target for a few dollars. The honest catch is drainage, or rather the total absence of it, and succulents hate standing in water more than they hate anything else. The workaround is simply to watch the moisture, err on the dry side and push a finger into the soil to check before watering. Any cereal bowl, mug or ramekin will do the job. Avoid wood and plastic.
Get the full tutorial at Simplicity Relished.
5. DIY Air-Dry Clay Decoupage Jewelry Dish
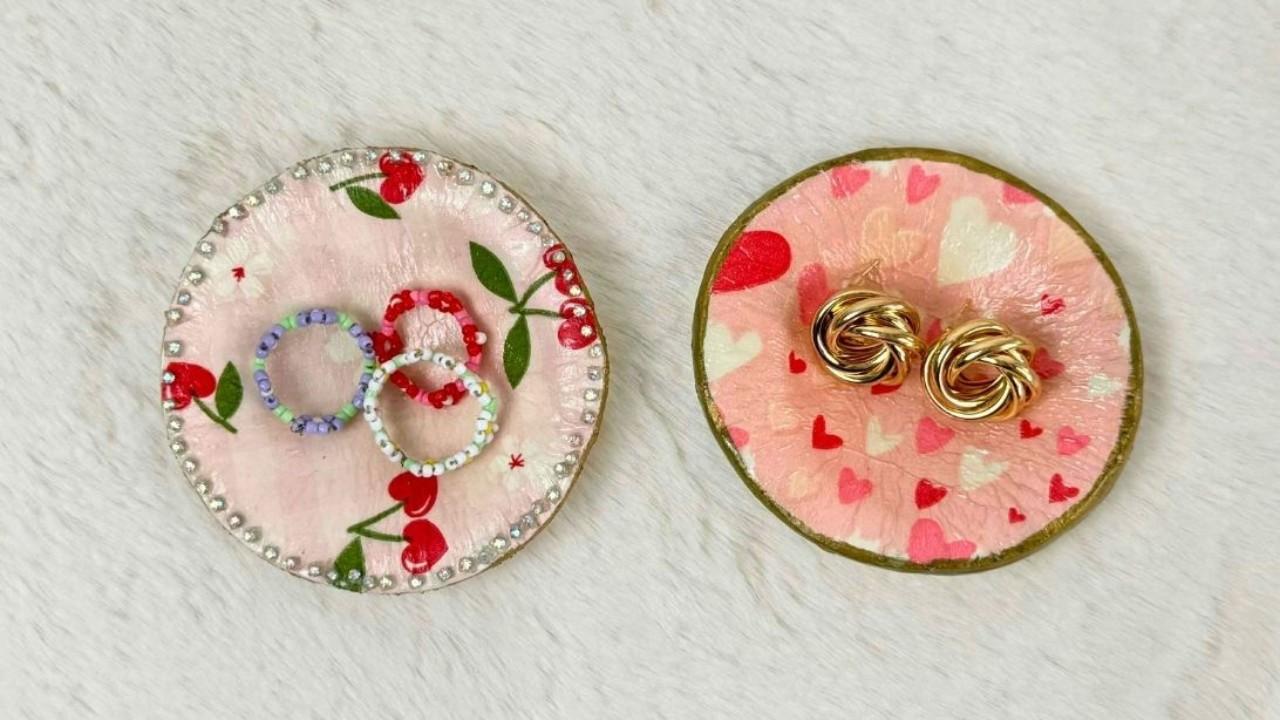
Small round dishes shaped from air dry clay and then decoupaged with a printed napkin, which is what gets you a pattern far finer than anything you could paint on by hand. The napkin layer is the whole point: cherries, hearts, florals, any paper napkin will separate down to its thin printed top ply and mould over a curved surface without creasing. Finish the rim in a contrasting color, gold or white, so the edge reads as deliberate rather than as where the napkin ran out. They hold rings, studs and the earrings that otherwise live on the edge of the sink forever.
Get the full tutorial at Sueeye.
6. DIY Air-Dry Clay Egg Tray
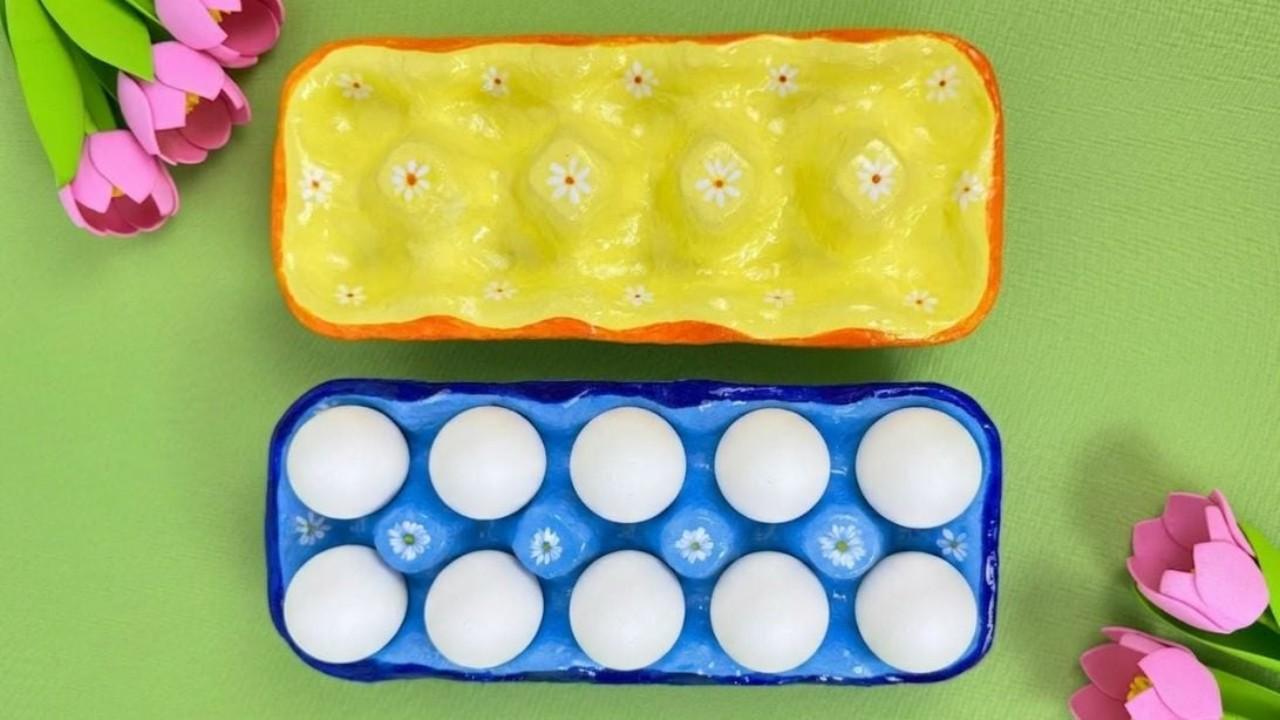
An egg tray built from air dry clay and painted, which is a genuinely odd thing to make until you have owned three flimsy ones in a row. Shop bought trays are either disposable or they crack, and a clay one lasts and looks like something rather than like packaging. Air dry clay needs no kiln and no baking, which is why this is a beginner project despite the shape looking complicated: the wells are pressed in over real eggs. Paint the inside and outside in different colors and the finished thing earns a spot on the counter instead of being hidden in a cupboard.
Get the full tutorial at Sueeye.
7. Teacup Succulent
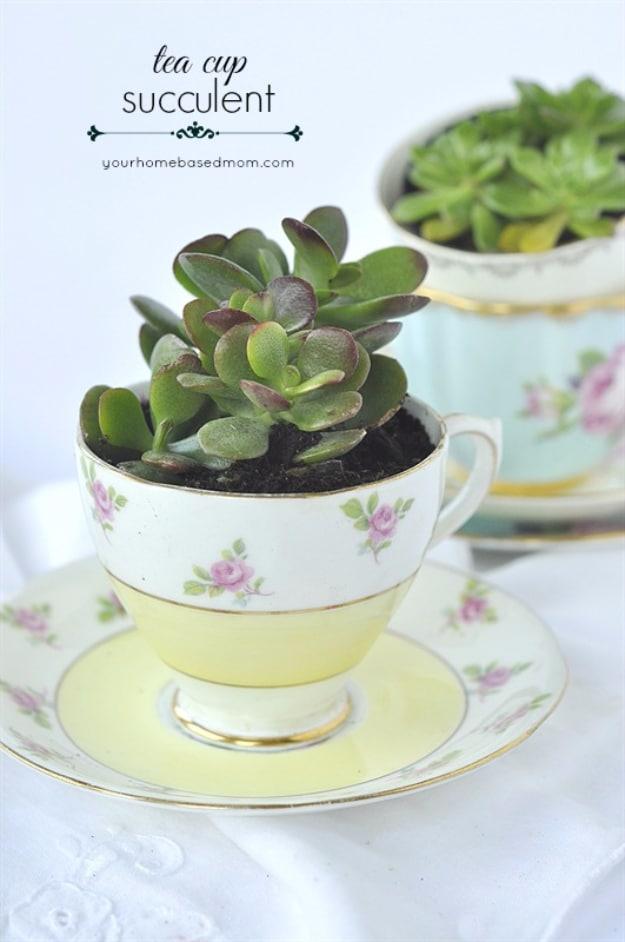
A single jade succulent planted into a vintage teacup on its saucer, which is the prettiest use anyone has found for the cups that outlive their teapots. Leigh Anne Wilkes hunts hers down at estate sales and thrift stores and gives whole sets of them away as a yearly gift, and the one thing she insists on is pebbles. A few stones in the bottom of the cup give the water somewhere to go, because a teacup has no drainage hole at all. Then potting soil and a supermarket succulent, which runs to a couple of dollars and is very hard to kill.
Get the full tutorial at Your Homebased Mom.
8. DIY Plate And Hose Garden Flower Art
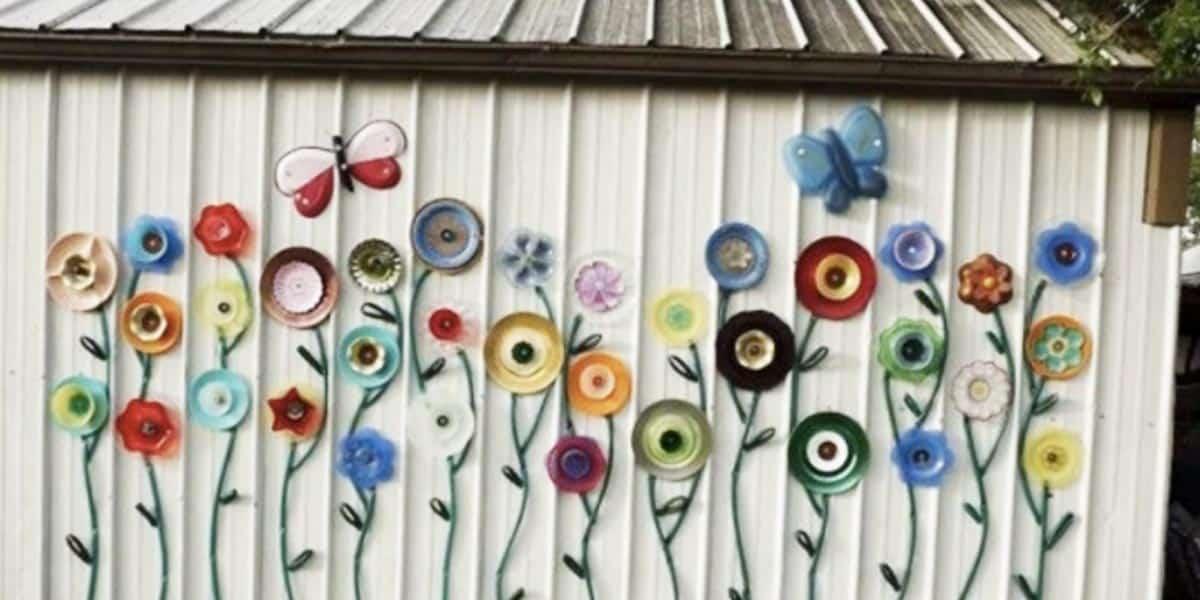
A whole shed wall covered in flowers made from old plates, saucers and bowl lids, stacked in twos and threes for the blooms, with lengths of green garden hose bent into stems and leaves. It is the biggest, loudest project on this list and probably the cheapest per square foot of wall it covers. Layering is what makes the flowers read as flowers: a big plate behind, a smaller saucer in front, a bright lid at the center. The hose does the rest, because it holds a curve without kinking and it already comes in exactly the right green.
Get the full tutorial at Sueeye.
9. DIY Peppermint Platter
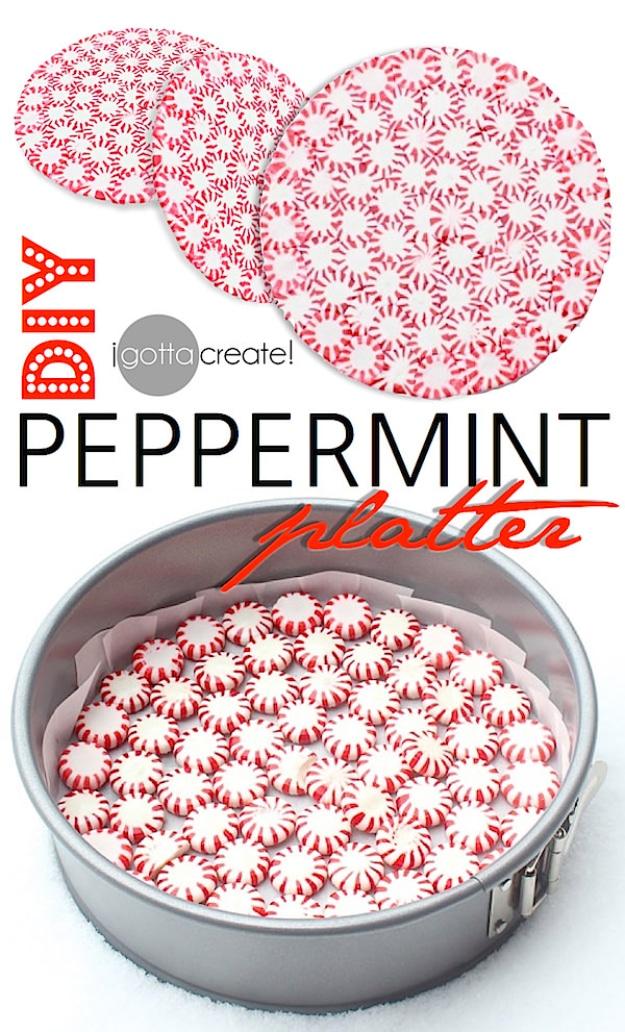
Starlight peppermints melted together into a solid candy platter, which arrives at a Christmas table looking like blown glass and costs about two dollars. Line a springform pan with parchment and fill the bottom with a single layer of peppermints, edges touching, then melt them just until the sweets fuse into one sheet. The springform is what makes it work, since you can release the ring rather than trying to prise a slab of candy out of a solid tin. Serve cookies on it and let people break bits off it afterward, because it is not going to survive the washing up anyway.
Get the full tutorial at I Gotta Create.
10. Hand Lettered Plate DIY
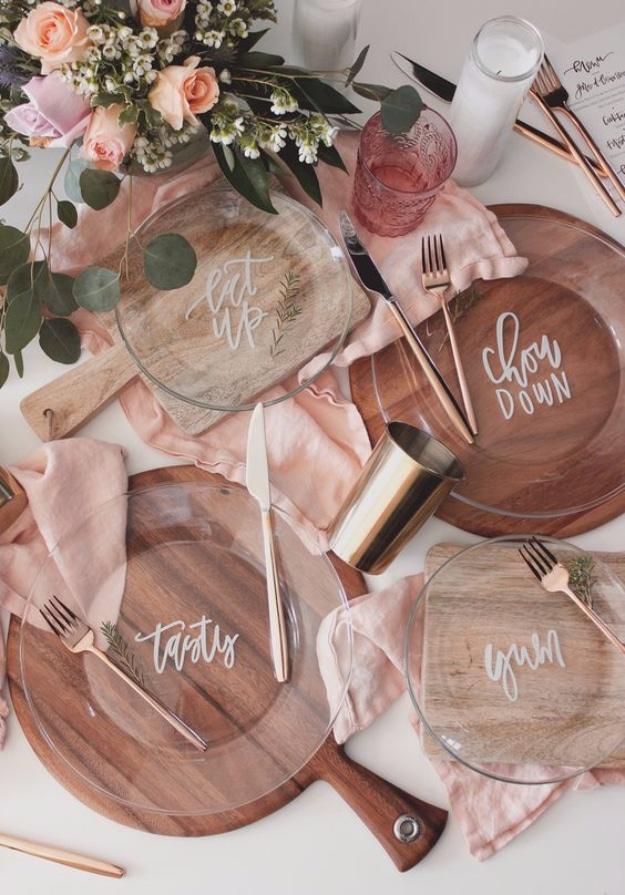
Clear glass charger plates hand lettered in white script and set over wooden boards, so the writing floats above the wood grain instead of sitting on the surface you eat from. A Fabulous Fete makes the practical point first: lettering on a dinner plate is lovely right up until you have to eat off it, unless you enjoy paint in your food. Clear plates solve it completely. The words go on the glass, the food goes on the board or a second plate underneath, and nothing touches the paint. Printable templates made from any font on your computer mean you do not need calligraphy skills at all.
Get the full tutorial at A Fabulous Fete.
11. Hand Painted Porcelain
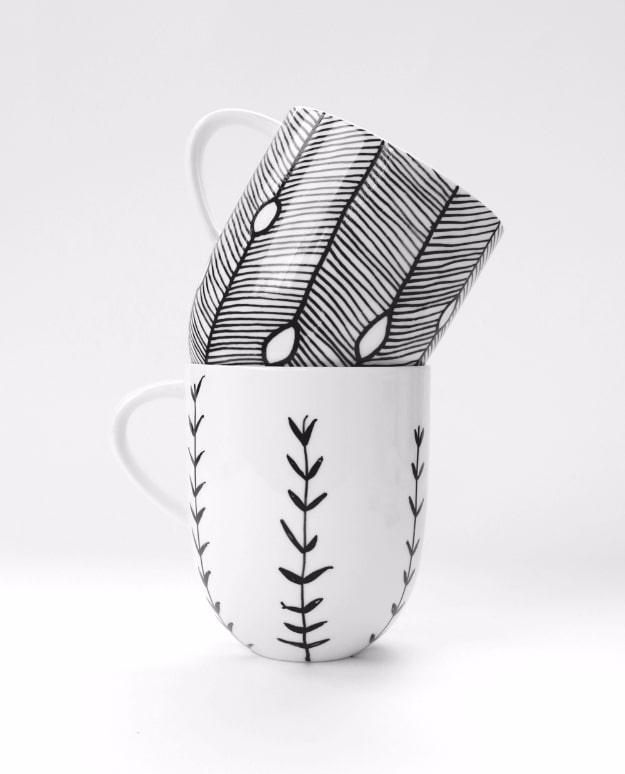
Plain white mugs drawn over in fine black feather and leaf patterns with a porcelain pen, then baked in the oven per the pen’s own instructions. lilaliv is refreshingly blunt about it, saying the project is so simple she is almost embarrassed to call it a DIY, which is exactly why it is worth including. Two things she adds from experience are worth more than the technique. Small mistakes wipe straight off with a cotton pad and a little glass cleaner before baking. And after several trips through the dishwasher the color definitely suffered, so hand wash anything you want to keep sharp.
Get the full tutorial at lilaliv.
12. DIY Hat Stands
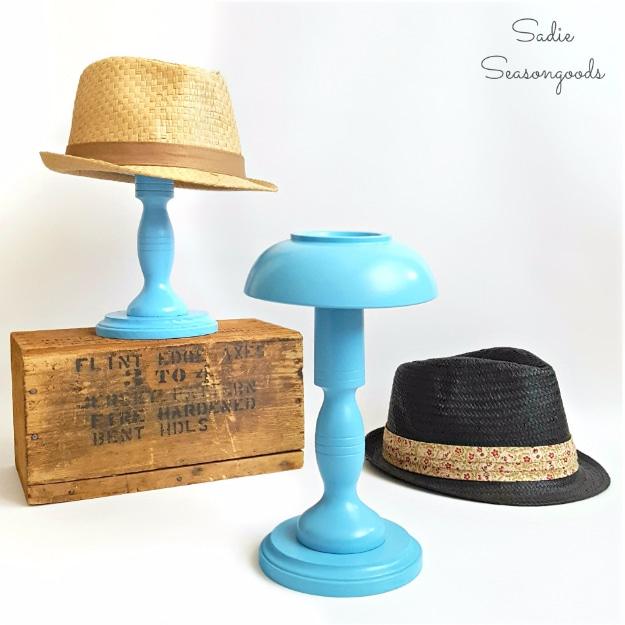
Thrift store wooden bowls turned upside down on painted wooden candlesticks, which is exactly the shape of the antique hat stands that cost a fortune in antique shops. Sadie Seasongoods found the bowls first and went hunting for candlesticks to match them, and the two fixes she had to invent are the useful part. The candlestick tops were rounded, so she sanded them flat to give the bowl a proper seat. And the brass core inside ran too deep to screw through, so each candlestick got a plain wooden craft plaque added underneath as a wider, more stable base.
Get the full tutorial at Sadie Seasongoods.
13. DIY Mod Podge Bowls
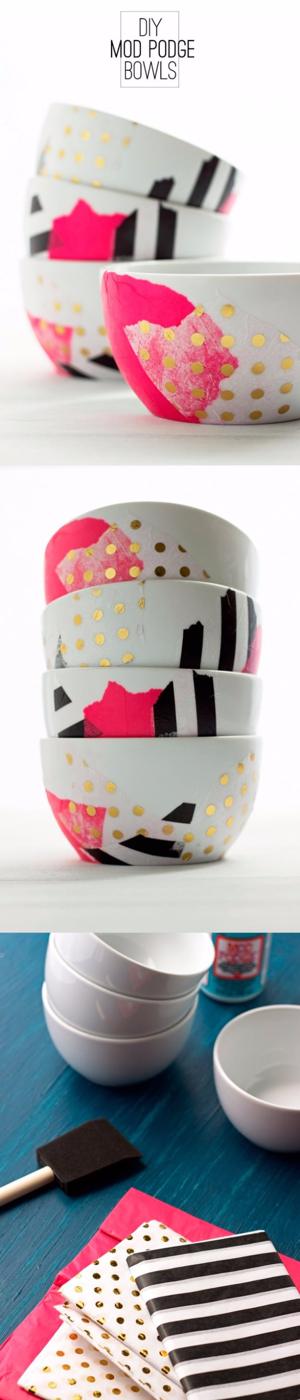
Plain white bowls covered in torn tissue paper and sealed with dishwasher safe Mod Podge, which takes about twenty minutes and turns two dollar bowls into something worth wrapping. Pennies for a Fortune found hers at World Market for around two dollars each with a coupon. Tear the tissue into random bits, brush Mod Podge where you want a piece, press it down and smooth it, then go over that piece with a thin layer to seal it before moving on. Mix patterns as you go. The same technique works on mugs, plates and glasses, and gift bag tissue is the cheapest supply going.
Get the full tutorial at Pennies for a Fortune.
14. Wooden Bowls With Gold Leaf
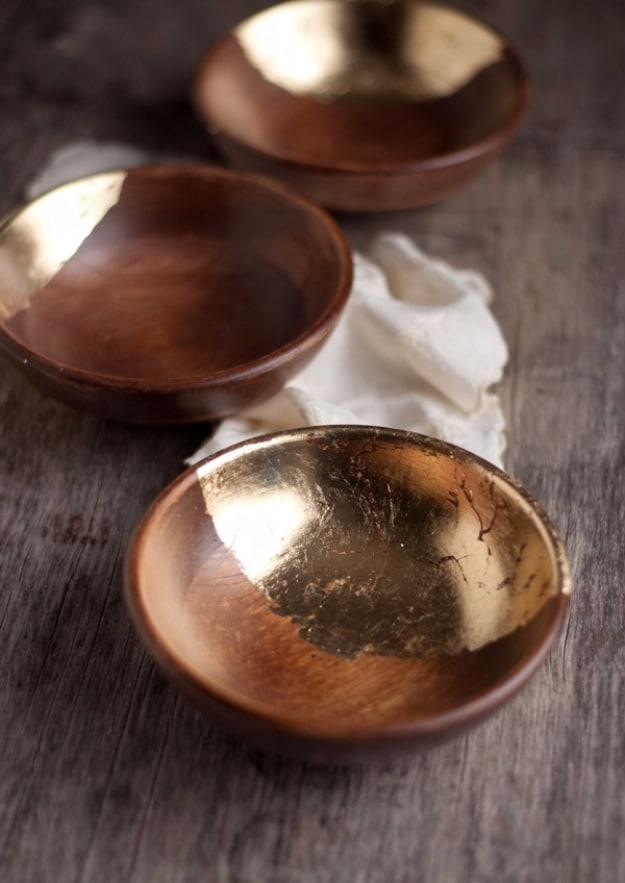
Thrift store wooden bowls with gold leaf laid into the inside curve, where the metal catches the light against the warm wood. this heart of mine gives the tip that saves most first attempts: gold leaf adhesive needs to dry before you lay the leaf, so the surface goes from wet to properly tacky, and skipping that wait is why leaf goes on badly. The curve means the leaf will crack and break as it settles, and that is exactly what you want, because the breaks add character. Press flaky edges back with a gentle finger. Gold leaf makes the bowls unsuitable for food, so treat them as catchalls.
Get the full tutorial at this heart of mine.
15. Painted Wood Bowls
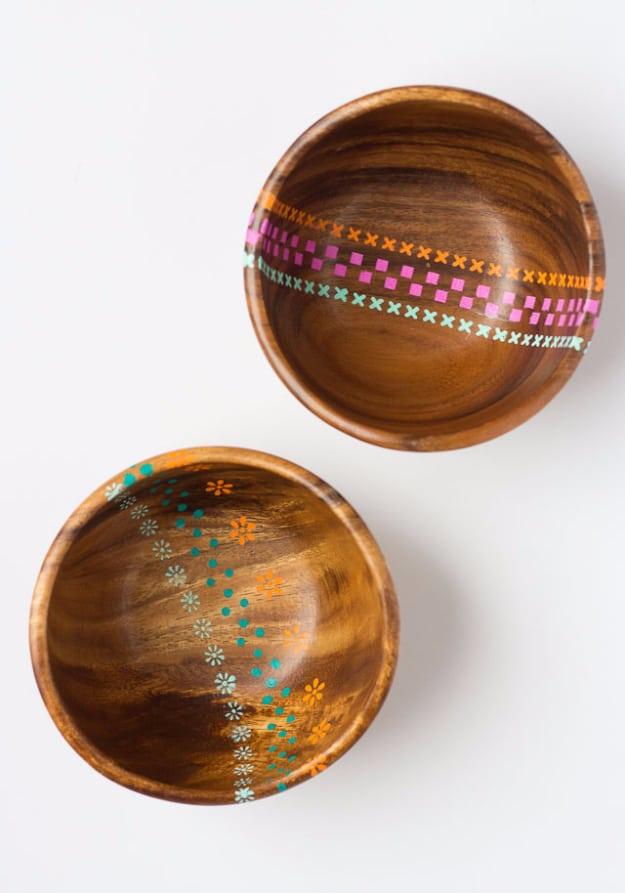
Ninety nine cent thrift store wooden bowls given rows of tiny stenciled crosses, dots and daisies in pink, orange and teal. Design Improvised used adhesive stencils, which are the key to the whole thing, because an adhesive stencil sticks down around a curve where a stiff plastic one simply will not. Smooth it down with a fingernail first so no paint creeps underneath. Thin coat, dry fifteen to twenty minutes, second coat, peel, then move the stencil down and line the next row up against the one above it. Keep a damp rag and a few cotton buds beside you, since wet paint wipes straight off and dry paint does not.
Get the full tutorial at Design Improvised.
16. DIY Confetti Plates
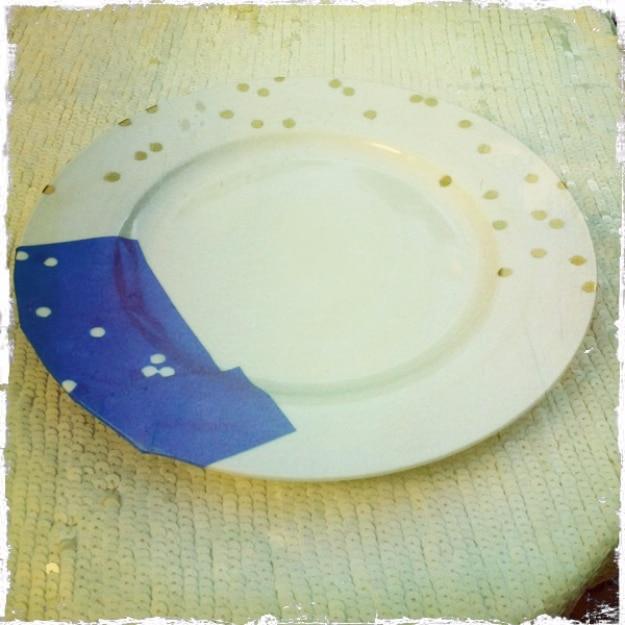
Gold confetti dots sprayed onto a plate through holes punched in painter’s tape, which is a reverse stencil and far tidier than trying to dot anything by hand. Beau and Arrow Events pulls a strip of tape tight, punches holes through it sporadically with a hole punch, presses the strip firmly onto the plate and sprays the whole thing gold. Peel the tape and the dots are left behind, crisp and evenly spaced. Seal the paint afterward to stop it chipping, and keep these out of the dishwasher, because spray paint does not survive one.
Get the full tutorial at Beau and Arrow Events.
17. DIY Antique Teacup Candles
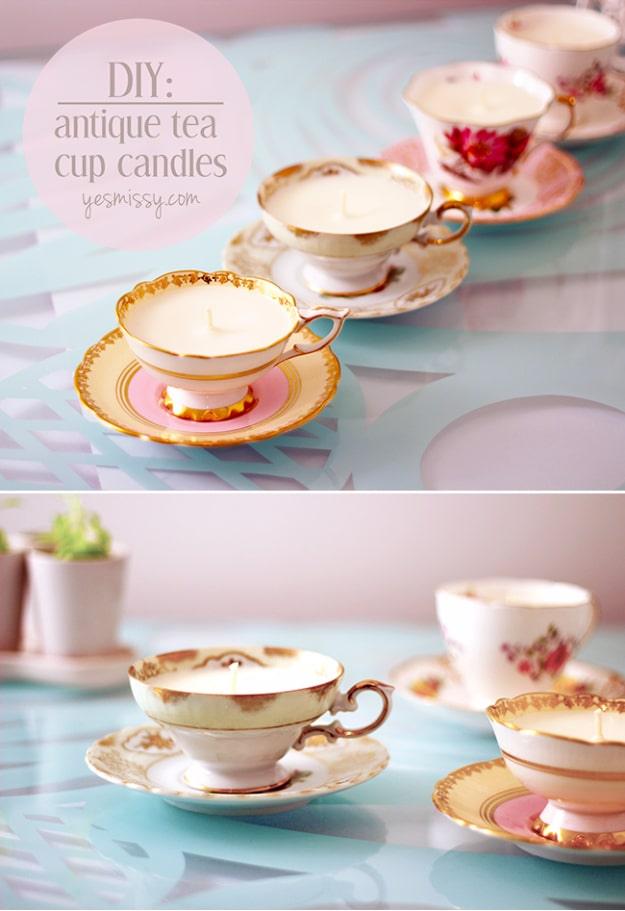
Antique teacups poured as candles, using cups picked up for three to five dollars apiece at a market stall. YesMissy makes the case for soy wax over paraffin and it is a good one: soy burns cleaner with less soot, it has a lower melting point, and it washes out of tools and out of the cups themselves, so a cup can go back to holding tea later if you want it to. Work out about twice the volume of wax flakes to fill each cup. Dry the cups completely before pouring, because wax and water do not mix, and hold the wicks upright with a chopstick or skewer laid across the rim.
Get the full tutorial at YesMissy.
18. DIY Hand Painted Indigo Clay Bowls
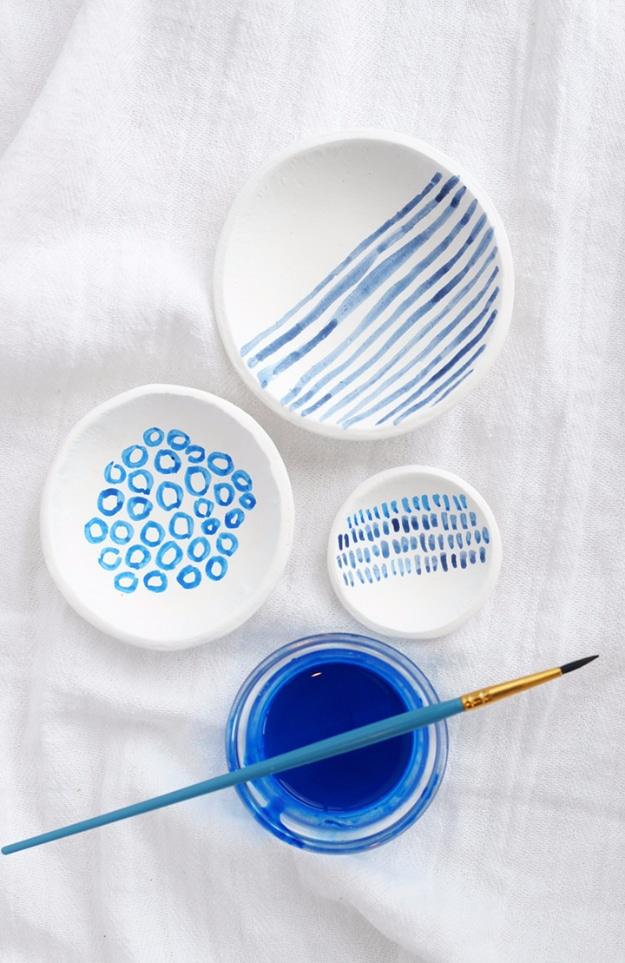
Little white air dry clay catchall bowls painted with indigo stripes, rings and dashes in the loose way a watercolor sketch goes down. Alice and Lois waters acrylic paint down to the darkest indigo she could find and uses a brighter blue alongside it, then works with the thinnest brushes she owns so the marks stay fine rather than heavy. Practicing the patterns on watercolor paper first is what makes them look confident on the clay, and it costs nothing to try. They dry fast, and a spray or brushed coat of Mod Podge seals them. Blue on white is the whole reason these read as expensive.
Get the full tutorial at Alice and Lois.
19. DIY 10 Minute Teacup Bird Feeder
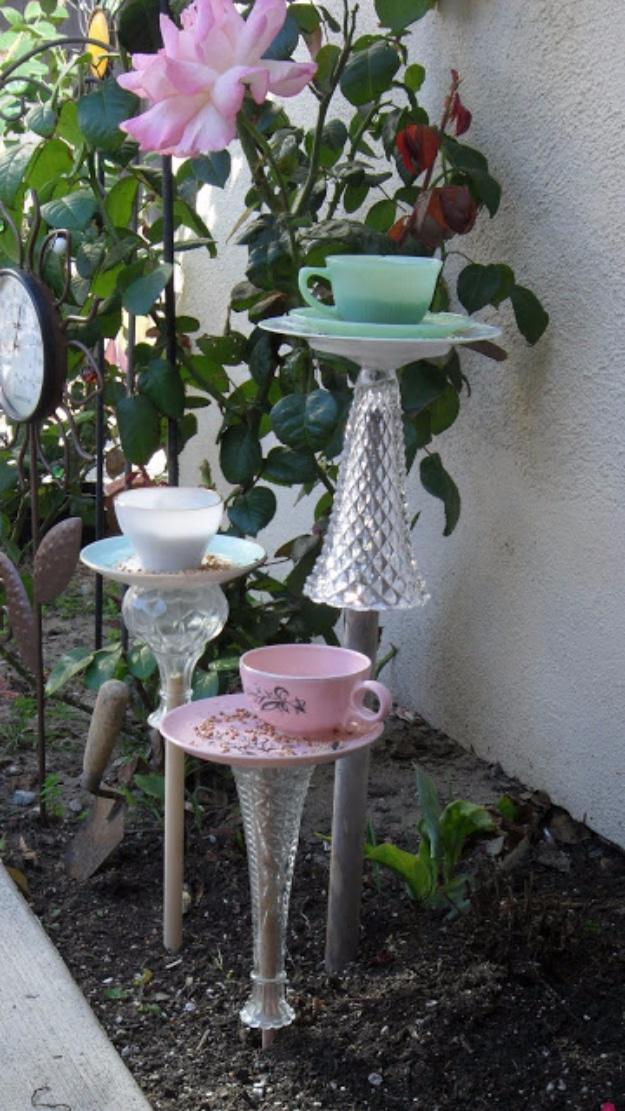
Teacups and saucers glued onto glass vases and wine bottle bases and pushed into a flower bed on dowels, so the birds feed from the china nobody was using. Kaleidoscope of Colors super glues the base of a wine bottle or floral vase to the underside of a saucer, lets it dry, then stakes it with a half inch or smaller wooden dowel cut to varying lengths for height. They are dishwasher safe, which matters more than it sounds. The one hard won correction is worth heeding: Gorilla Glue failed in the heat of the sun and she switched to Loctite Glass Glue, which held.
Get the full tutorial at Kaleidoscope of Colors.
20. DIY Cake Stand

Three floral plates and a teacup drilled through the center and bolted onto a brass rod into a tiered cake stand, which is the project everyone wants and everyone is frightened of. La Chica de la Casa de Caramelo used plates of 25, 20.5 and 15 centimetres and a 6 millimetre ceramic bit, and her method is what stops the china cracking. Test on a cheap plate first. Sit the plate on a block of wood to absorb the drill’s vibration, punch a starting dent with a nail and hammer so the bit cannot wander, switch the hammer action off, and dribble water on as you go so the bit does not overheat. Wear goggles. Allow about ten minutes a hole.
Get the full tutorial at La Chica de la Casa de Caramelo.
21. Gold Sharpie Mugs
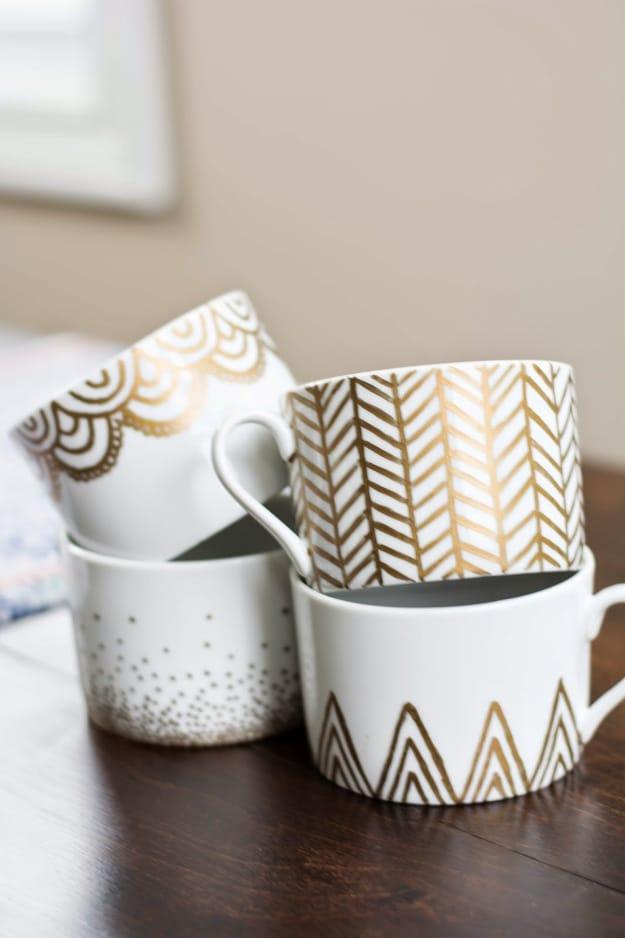
A plain white porcelain tea set drawn over in gold marker with scallops, herringbone, scattered dots and triangles, then baked at 350 degrees for 30 minutes. Jyll Along the Way is honest about the shortcut: online reviews say to use an oil based Sharpie rather than a standard one, and she used a standard one because it was pouring with rain and she was not going out, so she plans to wash them gently. That is useful to know before you commit a whole set. Four different patterns across four mugs beats one repeated pattern, and none of them need drawing skill, only a steady hand and patience.
Get the full tutorial at Jyll Along the Way.
22. Dishwasher Safe Decorated Mugs
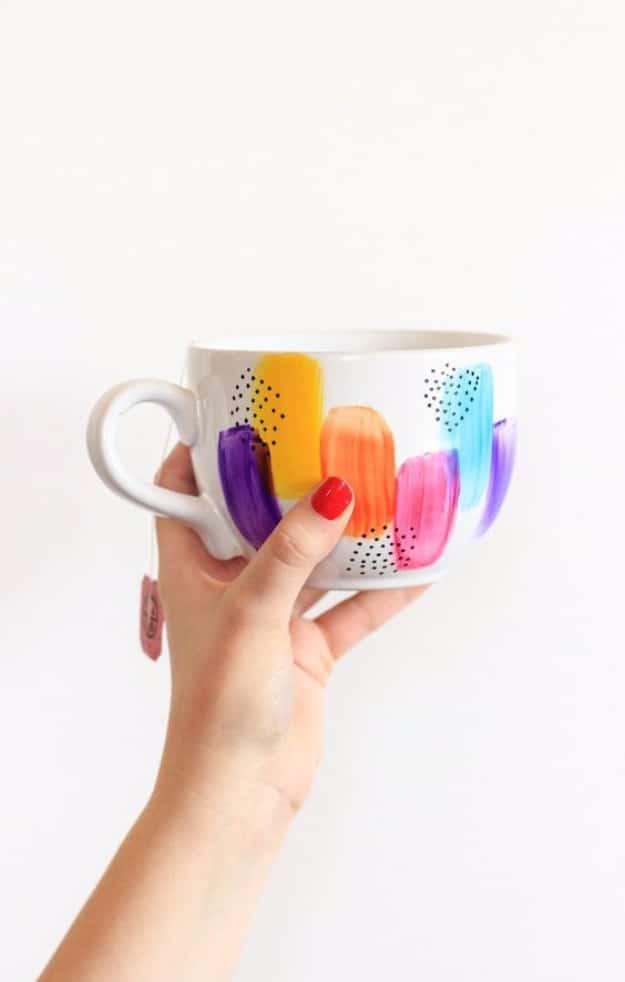
Plain mugs painted in loose blocks of yellow, orange, pink, purple and blue with a scatter of black dots over them, in about twenty minutes plus bake time. Curbly starts with dollar store mugs and lays the color down first, warning that the paint looks thin and slightly transparent on glazed ceramic so each coat has to dry before the next goes on. The pattern goes over the dry color with a marker. Then bake for 40 minutes at 325 degrees, turn the oven off and let the mugs cool down inside it so they do not crack from the temperature change. Skip the baking and the design will not last.
Get the full tutorial at Curbly.