
The Ultimate Guide to DIY Firestarters: Essential for Camping, Backpacking, and Survival
Embarking on an outdoor adventure, whether it’s a serene car camping trip or a challenging backpacking expedition, requires careful planning and reliable gear. Among the most crucial items in any outdoor kit is a dependable way to start a fire. A warm fire provides comfort, a means to cook nourishing meals, and a vital source of light and heat, especially when the wilderness chills. This comprehensive guide introduces you to an incredibly effective, yet remarkably simple and inexpensive DIY firestarter that can make your next outdoor experience safer and more enjoyable.
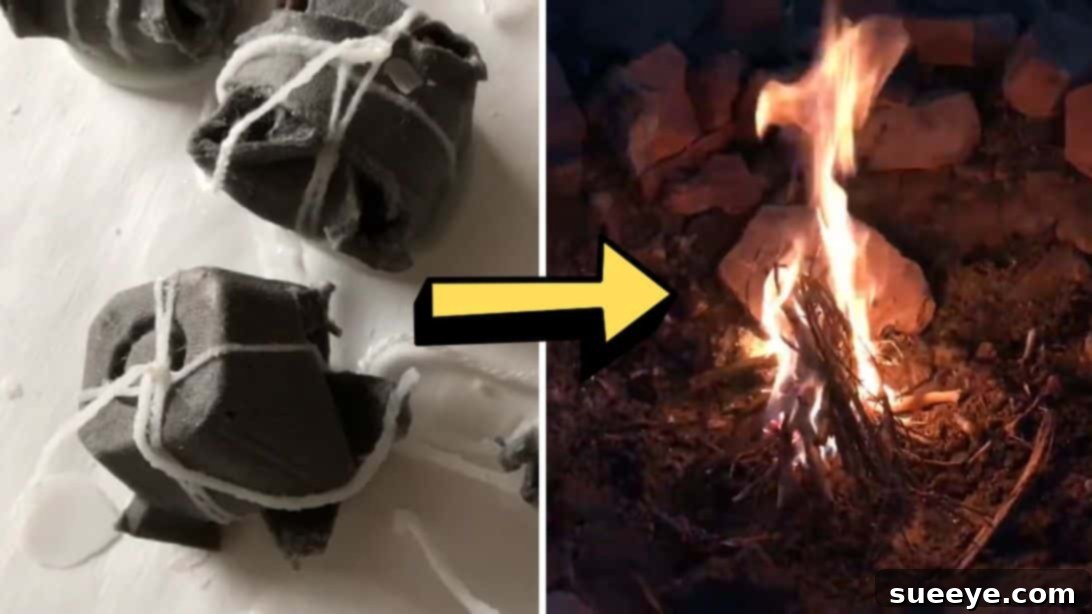
These small, potent pods are designed to ignite quickly and burn consistently, giving you ample time to get your campfire roaring, even in less-than-ideal conditions. What makes them truly stand out is their sustainable nature: they utilize materials you might otherwise discard as junk, transforming them into indispensable tools for survival and convenience. Learn how to repurpose common household items into these amazing firestarting aids through this detailed tutorial, inspired by amandaoutside on YouTube.
Why DIY Your Firestarters? The Benefits You Can’t Ignore
While commercial firestarters are readily available, crafting your own offers a multitude of advantages that go beyond mere cost savings. Here’s why making your own firestarters is a smart move for any outdoor enthusiast:
- Cost-Effective: The primary materials for these firestarters are often things you already have at home or can acquire for next to nothing. This dramatically cuts down on your outdoor gear expenses.
- Reliability: Knowing exactly what goes into your firestarter means you can trust its performance. The wax-coated, densely packed design ensures a long, steady burn, crucial for igniting damp kindling or larger logs.
- Eco-Friendly Repurposing: By giving new life to egg cartons, dryer lint, or old newspapers, you contribute to reducing waste. It’s a satisfying way to practice sustainability while preparing for your adventures.
- Empowerment and Skill Building: There’s a certain satisfaction that comes from creating your own essential gear. It enhances your self-reliance and understanding of survival principles.
- Customization: You can experiment with different types of stuffing (e.g., more lint for a quicker flame, tighter packing for a longer burn) to tailor your firestarters to specific needs or conditions.
Essential Materials for Your Homemade Firestarters
Gathering your supplies is the first step in this rewarding DIY project. The beauty of these firestarters lies in their simplicity and the accessibility of their components. Most items are likely already in your home or can be easily found.
- Empty Egg Carton: Opt for cardboard egg cartons, as they are porous and absorb wax well. Plastic cartons will not work. These provide the perfect individual compartments for each firestarter pod and a structure that burns effectively.
- Parchment Paper: This non-stick paper is essential for cooling your wax-dipped firestarters without them adhering to your work surface. Waxed paper or silicone baking mats can also work.
- Scissors: A sturdy pair of scissors will be needed for cutting the egg carton and trimming excess string.
- Yarn or Dental Floss: This acts as a binding agent, holding the stuffing inside the egg carton pod. Unwaxed dental floss works exceptionally well due to its strength and ability to absorb wax, enhancing its burn time. Any natural fiber string will do.
- Clean Unscented Candle Wax: Old candle stubs, paraffin wax, or even beeswax can be used. Ensure it’s unscented to avoid unpleasant fumes or flavors if you’re cooking near the fire. The wax is key for waterproofing and extending the burn time of your firestarter.
- Tin Can: An empty, clean tin can (like from vegetables or soup) serves as a makeshift double boiler for melting the wax safely. Never melt wax directly over an open flame or electric burner without a double boiler setup.
- Dryer Lint, Newspaper, or Packing Paper: These are your primary fuel sources. Dryer lint is excellent due to its fine fibers and flammability. Shredded newspaper or packing paper also work effectively as a combustible core. The goal is a highly flammable, easily compressible material.
Step-by-Step Instructions: Crafting Your Reliable Firestarters
Follow these detailed steps carefully to create your high-performance firestarters. Safety and precision in each stage will ensure the best results.
Step 1: Preparing and Stuffing the Pods
Begin by preparing the foundation of your firestarters – the egg carton pods. This stage focuses on creating the individual units and filling them with combustible material.
- Prepare the Egg Carton: Take your empty cardboard egg carton. Carefully cut off the flat side flaps and the top lid, leaving only the bottom tray with its distinct egg-holding depressions intact. This ensures you have uniform, open pods.
- Separate the Pods: Using your scissors, meticulously cut the bottom tray into 12 individual egg carton pods. Try to maintain the original cup shape of each depression as much as possible, as this shape helps contain the stuffing and wax.
- Stuff with Combustible Material: Now, it’s time to fill these pods. Take a piece of your chosen stuffing material—dryer lint, newspaper, or packing paper. Tear it into smaller, manageable pieces. Roll or compress this material tightly with your hands into a compact ball. The goal is to maximize density within the pod. Stuff this compressed ball firmly into each egg carton pod. The more tightly packed, the longer it will burn.
- Secure the Stuffing: To prevent the stuffing from falling out, gently fold the four corners of the egg carton pod inwards, over the top of the stuffed material. This creates a neat, secure packet.
- Tie the Pods: Cut a piece of yarn or dental floss, approximately 10-12 inches long. Wrap this string securely around the stuffed pod, much like you would wrap a small present. Ensure the string crosses over the folded corners, holding them firmly in place. Pull it snug and tie a double knot to guarantee it won’t unravel during the waxing process or storage. The string itself will also absorb wax and contribute to the initial flame.
Step 2: Waxing the Pods for Extended Burn and Waterproofing
The waxing process is crucial as it waterproofs the firestarters and significantly extends their burn time. This step requires careful handling of melted wax.
- Melt the Candle Wax Safely: Place small pieces of clean, unscented candle wax into your tin can. Set this tin can into a larger pot of simmering water – this is the safest way to melt wax using a double boiler method, preventing it from overheating or catching fire. Stir occasionally until the wax is completely melted and smooth. Never leave melting wax unattended.
- Prepare Your Work Area: While the wax melts, prepare a clean, protected work surface. Lay down a cloth or old towel to catch any drips, and place a sheet of parchment paper beside it. The parchment paper will be where your finished firestarters cool and harden.
- Dip Each Pod: Once the wax is fully melted, carefully remove the tin can from the hot water (using oven mitts or tongs). Individually dip each prepared egg carton pod into the melted wax. Submerge it completely, ensuring the wax saturates the entire pod and its stuffing. Let it soak for a few seconds to allow maximum absorption.
- Cool and Harden: Lift the wax-covered pod from the can, allowing any excess wax to drip back into the can. Then, place the dipped pod onto the parchment paper to cool down and harden. The wax will solidify relatively quickly. Repeat this process for all your pods.
- Trim Excess String: Once the firestarters have completely cooled and the wax is firm, inspect them. If there are any excessively long pieces of yarn or dental floss protruding, trim them down with your scissors. Leave just enough for easy lighting.
With these steps completed, your durable, long-burning firestarters are ready for action!
Using Your DIY Firestarters Effectively
When you’re ready to ignite your campfire, using these firestarters is incredibly straightforward. Simply place one firestarter in the center of your prepared kindling, ensuring good airflow. Light a corner of the wax-coated pod. The wax-soaked string and cardboard will catch fire quickly, and the entire pod will begin to burn. These firestarters are designed to burn for a good 10 minutes or more, providing a sustained flame that gives your kindling and smaller firewood ample time to catch fire, even if they are slightly damp.
Their compact size makes them perfect for any camping or backpacking trip, easily stowed in a waterproof bag or container. They are particularly valuable in challenging conditions, such as when wood is damp, or a strong breeze makes conventional fire starting difficult. The wax acts as a protective layer and a fuel enhancer, ensuring your fire gets off to a robust start every time.
Crucial Fire Safety Tips for Every Outdoor Enthusiast
While having reliable firestarters is great, knowing how to manage your fire safely is paramount. Always prioritize safety to protect yourself, others, and the environment.
- Clear Your Area: Before lighting any fire, clear a 10-foot radius around your fire pit of all flammable materials like dry leaves, grass, and twigs.
- Never Leave a Fire Unattended: A burning fire should always be supervised. Even a small ember can cause a large wildfire if left unchecked.
- Have Water and Shovel Ready: Always have a bucket of water and a shovel nearby to extinguish sparks or small flames that might escape the fire pit.
- Completely Extinguish Your Fire: Before you leave your campsite or go to sleep, ensure the fire is completely out. Drown the embers with water, stir them with a shovel, and then drown them again. Feel the ashes with the back of your hand to confirm they are cool to the touch. If it’s still warm, it’s not out!
- Be Aware of Conditions: Pay attention to local fire regulations and weather conditions. High winds or dry spells increase the risk of wildfires, and fire bans may be in effect.
Conclusion: Embrace Self-Reliance on Your Next Adventure
These DIY firestarters are more than just a convenient tool; they represent a step towards greater self-reliance and environmental consciousness in your outdoor pursuits. By repurposing everyday materials, you create an indispensable item that will reliably aid you in starting fires for warmth, cooking, and light, no matter where your adventures take you. The process is simple, cost-effective, and deeply satisfying. So, next time you plan a trip into the wild, remember to pack these homemade wonders and experience the confidence that comes with being well-prepared.
Get ready to ignite your adventures with ease and embrace the spirit of DIY preparedness!
*All image credit belongs to amandaoutside via YouTube. Follow and subscribe to her channel for more inspiring outdoor tips and DIY projects!