
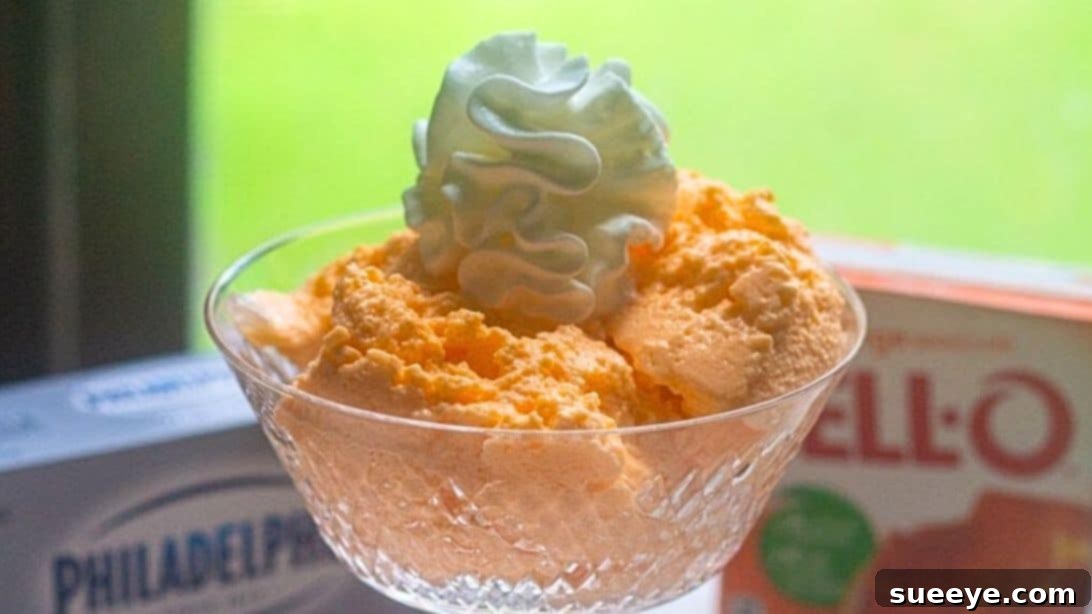
If the mere mention of Jell-O desserts evokes a flood of sweet childhood memories, then you’re in for a delightful treat. Prepare to be whisked back to a simpler time with this incredibly easy 1960s Jell-O dessert recipe, graciously shared by Kevin Lee Jacobs. This vintage delight is not just simple to prepare and undeniably delicious, but it also remarkably requires only three core ingredients. It’s a testament to the era’s culinary ingenuity, proving that unforgettable flavors don’t need complicated steps or extensive shopping lists.
Jell-O was more than just a dessert in the mid-20th century; it was a cultural phenomenon. During the 1950s and 1960s, these vibrant, jiggly creations graced countless dinner tables, becoming a staple at family gatherings, potlucks, and holiday celebrations. Its popularity stemmed from its affordability, versatility, and the ability to stretch ingredients to feed a crowd—a significant advantage in post-war homes. This made gelatin dishes omnipresent in every vintage cookbook, from community compilations to national bestsellers. Retro desserts like colorful gelatin salads, elegant stained glass cakes, fluffy cherry or pineapple fluffs, and the beloved strawberry pretzel salad all leveraged the magic of a simple box of Jell-O to create iconic, memorable dishes.
RELATED: The Easiest 4-Ingredient Orange Marmalade Recipe
The Enduring Charm of 1960s Jell-O Desserts
The mid-century era truly embraced Jell-O, transforming it from a simple molded jelly into an art form. Its bright colors and jiggly texture brought a sense of fun and novelty to the dinner table. Moreover, Jell-O’s ease of preparation fit perfectly into the lifestyle of busy homemakers who sought convenience without sacrificing taste or presentation. Recipes often combined Jell-O with ingredients like cottage cheese, canned fruit, or—in this particular case—creamy full-fat cream cheese, to create a range of sweet and savory dishes that defined an era. This particular orange Jell-O dessert stands out because it combines the familiar, cheerful citrus flavor with a rich, velvety texture, elevating it beyond a simple gelatin dish.
What Makes This Orange Jell-O Dessert Special?
Unlike some of its more elaborate counterparts, such as orange fluff recipes that often incorporate whipped topping and marshmallows, this vintage Jell-O dessert maintains a elegant simplicity. The key to its unique texture and rich flavor lies in the addition of cream cheese, which transforms the vibrant orange gelatin into a smooth, creamy, and wonderfully satisfying treat. It’s a delightful balance of tang and sweetness, firm enough to hold its shape yet melt-in-your-mouth soft. This dessert comes together with surprising ease and speed during the active preparation phase, making it perfect for last-minute cravings or spontaneous entertaining. However, a crucial step involves a few hours of patient chilling in the refrigerator to allow it to set perfectly, developing its signature texture. Give this timeless classic a try—it’s guaranteed to become a new favorite!
Here’s another recipe for you: Easy Orange Creamsicle Salad Recipe
Old-Fashioned Jell-O Dessert Ingredients
The beauty of this retro Jell-O dessert lies in its minimal ingredient list, proving that deliciousness doesn’t always require a pantry full of items. Here’s a closer look at what you’ll need and why each component is essential:
- 3/4 cup of Boiling Water: This hot liquid is crucial for fully dissolving the Jell-O powder, ensuring a smooth, lump-free gelatin base.
- 3 ounces Package of Orange Jell-O: The star of the show! A standard small box is all you need to impart that iconic, zesty orange flavor and vibrant color.
- 8 ounces of Full-Fat Cream Cheese: This is the secret ingredient that elevates the dessert. Full-fat cream cheese contributes a luxurious creaminess and richness, balancing the sweetness of the Jell-O and creating that wonderful, smooth texture. Ensure it’s softened to room temperature for easier blending.
- Ice Cubes: Not just for chilling! Ice cubes are vital for quickly cooling down the dissolved gelatin mixture, which helps it to thicken and set properly and rapidly, preventing separation.
- Mandarin Oranges (optional): For a burst of fresh, juicy citrus flavor and added visual appeal. Canned mandarin oranges, drained well, are a convenient choice.
- Whipped Cream (optional): A classic topping that adds a light, airy contrast and extra indulgence, perfect for serving.
Ingredient Notes and Variations:
While the recipe shines in its simplicity, a few notes can enhance your experience or offer creative alternatives:
- Cream Cheese Choice: While full-fat cream cheese is recommended for the best texture and richness, you can experiment with reduced-fat cream cheese. Be aware that it might result in a slightly less firm set or a subtly different texture.
- Jell-O Flavors: Don’t limit yourself to orange! This recipe works beautifully with other Jell-O flavors like cherry, lime, strawberry, or lemon. Each flavor will create a unique nostalgic experience.
- Adding Fruit: Beyond mandarin oranges, consider other canned or fresh fruits that pair well with your chosen Jell-O flavor. Drained pineapple bits, sliced peaches, or berries can be lovely additions, but avoid fresh kiwi or pineapple, as enzymes in these fruits can prevent gelatin from setting.
How to Make a Jell-O Dessert: Step-by-Step Guide
Creating this delightful 1960s Jell-O dessert is surprisingly straightforward. Follow these steps for a perfect, creamy, and nostalgic treat.
Step 1: Prepare the Gelatin Base
Begin by carefully measuring 3/4 cup of water into a microwave-safe bowl. Heat the water in the microwave until it reaches a rolling boil, which typically takes 1 to 2 minutes depending on your microwave’s power. Once boiling, immediately add the entire 3-ounce package of orange Jell-O powder to the hot water. Stir continuously for approximately 2 minutes, or until every last granule of Jell-O is thoroughly dissolved. It’s crucial to ensure no undissolved particles remain, as this will affect the final texture of your dessert. A completely clear, vibrant orange liquid is what you’re aiming for.
Step 2: Incorporate the Cream Cheese
Next, transfer the softened, full-fat cream cheese into a blender. Pour the recently dissolved, warm Jell-O mixture directly over the cream cheese in the blender. Blend the ingredients together on a low to medium speed until they are just combined and the mixture appears smooth and homogenous. Be careful not to over-blend, as this can incorporate too much air, potentially altering the dessert’s final texture and making it less dense and creamy. The goal is a uniform, velvety liquid with no visible lumps of cream cheese.
Step 3: The Ice Bath for Quick Setting
To expedite the setting process and achieve the desired firm yet creamy consistency, prepare an ice bath. Fill a measuring cup with ice cubes, then add cold water until the total volume reaches 3/4 cup. Carefully pour this ice water mixture into the blender with the cream cheese and Jell-O. Blend again for a short period, just until all the ice has melted and the mixture is well blended and thoroughly chilled. This rapid cooling helps the gelatin to begin setting immediately, contributing to the dessert’s signature texture and preventing ingredient separation.
Step 4: Chill to Perfection
Once blended, transfer the creamy orange Jell-O mixture into an airtight, freezer-safe bowl or individual dessert cups. If you prefer to add a textural element and extra burst of flavor, gently fold in drained mandarin oranges at this stage, or simply arrange them on top of the mixture. Securely cover the bowl with its lid or plastic wrap to prevent a film from forming and to keep any refrigerator odors out. Place the covered dessert into the refrigerator and chill for a minimum of 3 to 4 hours, or until it is completely set and firm to the touch. Patience here is key for achieving the perfect jiggly yet stable consistency.
Step 5: Serve and Enjoy!
Once your old-fashioned Jell-O dessert is perfectly set and firm, it’s ready to be served. For an elegant presentation, use an ice cream scoop to portion generous servings into individual dessert cups or small bowls. If desired, crown each serving with a dollop of fresh whipped cream, which adds a beautiful contrast in texture and a touch of extra indulgence. A few extra mandarin orange segments or a sprig of mint can also make for a delightful garnish. Share this nostalgic treat with family and friends and watch as it brings smiles and perhaps a few stories of yesteryear. Enjoy every creamy, vibrant bite!
Tips for a Perfect 1960s Jell-O Dessert
- Ensure Jell-O Dissolution: Don’t rush Step 1. Fully dissolved gelatin powder is vital for a smooth, lump-free texture.
- Room Temperature Cream Cheese: Softened cream cheese blends much more easily and smoothly with the warm Jell-O, preventing lumps and ensuring a uniform consistency.
- Avoid Over-Blending: While blending is necessary, over-blending after adding the cream cheese can incorporate too much air, which might lead to a less dense and creamy final product. Blend just until combined.
- The Ice Cube Trick is Key: Don’t skip the ice cubes. They rapidly cool the mixture, helping the gelatin set quickly and preventing the cream cheese and gelatin from separating as it chills.
- Chill Thoroughly: Patience is a virtue here. A minimum of 3-4 hours, or even overnight, ensures the dessert is perfectly set and firm, providing the ideal texture.
- Get Creative with Garnishes: While whipped cream and mandarin oranges are classic, consider a sprinkle of orange zest, a maraschino cherry, or even a light dusting of finely chopped nuts for extra flair.
- Individual Servings: Pouring the mixture into individual ramekins or dessert cups before chilling makes serving incredibly easy and elegant.
Serving and Storage Suggestions
This delightful Jell-O dessert is incredibly versatile for serving. It’s a fantastic addition to potlucks, family dinners, holiday spreads, or simply as a light, refreshing treat on a warm afternoon. Serve it alongside coffee or tea, or as a vibrant ending to any meal. For storage, keep any leftovers tightly covered in an airtight container in the refrigerator. It will maintain its wonderful texture and flavor for 3-5 days. Freezing is generally not recommended for Jell-O desserts with cream cheese, as the freezing and thawing process can significantly alter the creamy texture, making it grainy or watery.
Frequently Asked Questions About This Jell-O Dessert
Here are answers to some common questions about making this classic Jell-O dessert:
- Can I use sugar-free Jell-O? Yes, you can substitute sugar-free Jell-O for the regular variety if you’re looking to reduce sugar content. The setting and texture should remain consistent.
- What if my Jell-O doesn’t set? This can happen if the Jell-O wasn’t fully dissolved, or if certain fruits (like fresh pineapple or kiwi) were added before setting, as their enzymes prevent gelatin from firming. Ensure proper dissolution and adequate chilling time.
- Can I make this dessert ahead of time? Absolutely! This is an excellent make-ahead dessert. Prepare it the day before, or even two days in advance, and keep it covered in the refrigerator until ready to serve.
- Can I use a different type of cream cheese? While full-fat cream cheese is recommended for the best results, you can use reduced-fat cream cheese. Be aware that the texture might be slightly less rich, and it may not set quite as firmly. Avoid whipped cream cheese, as its lighter consistency isn’t suitable for this recipe.
- What if I don’t have a blender? While a blender creates the smoothest texture, you can try using an electric hand mixer. Ensure the cream cheese is very soft, and blend thoroughly with the dissolved Jell-O until completely smooth before adding the ice water.
Easy 1960s Jell-O Dessert: A Timeless Treat
In conclusion, this easy 1960s orange Jell-O dessert with cream cheese is a testament to the enduring appeal of simple, delicious, and nostalgic recipes. With its vibrant color, creamy texture, and refreshing citrus flavor, it’s a dessert that effortlessly bridges generations, bringing a taste of the past into the present. Whether you’re a seasoned baker or a beginner in the kitchen, this 3-ingredient wonder offers a foolproof way to create a crowd-pleasing treat. So, gather your ingredients, follow these simple steps, and prepare to delight your taste buds with a classic that never goes out of style. It’s more than just a dessert; it’s a delightful trip down memory lane. Give it a try – you won’t be disappointed!