
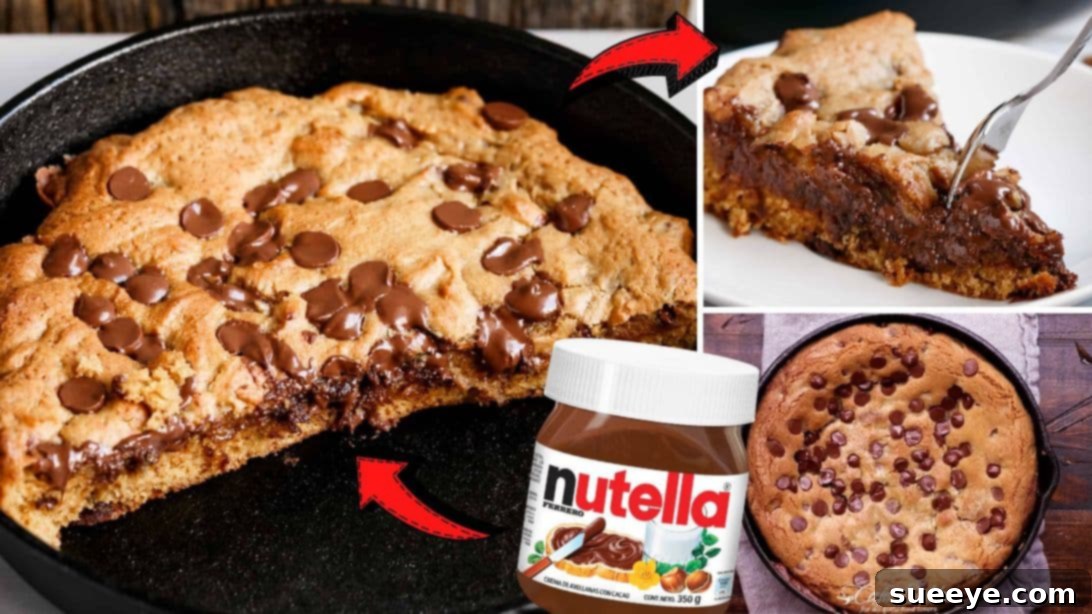
Irresistible 30-Minute Skillet Chocolate Chip & Nutella Cookie Recipe
There’s something truly magical about a warm, gooey cookie fresh from the oven, especially when it’s big enough to share (or not!). For me, the ultimate indulgence is a colossal skillet cookie, a dessert that promises comfort, deliciousness, and a touch of rustic charm. Inspired by the brilliant creators at Cafe Delites on YouTube, I discovered a recipe that consistently delivers pure joy: the Skillet Chocolate Chip and Nutella Cookie. This isn’t just any cookie; it’s a wonderfully quick and effortlessly easy treat, requiring only a handful of common ingredients and minimal effort. Perfect for last-minute cravings or a spontaneous family dessert, this recipe is guaranteed to impress. Prepare to fall in love with its crispy edges, soft, chewy center, and the delightful surprise of melted Nutella hidden within. Your family and friends will undoubtedly sing your praises. Let’s dive into creating this heavenly dessert!
Why Choose a Skillet Cookie? Unlocking the Best Texture and Flavor
Baking a cookie in a skillet isn’t just a fleeting trend; it’s a culinary revelation that dramatically enhances the dessert experience. The cast-iron skillet, a workhorse of the kitchen, is renowned for its exceptional heat retention and remarkably even heat distribution. These qualities translate directly into a superior cookie: you’re guaranteed those coveted golden-brown, slightly crispy edges that provide a delightful textural contrast, while the center remains wonderfully soft, gooey, and perfectly chewy. This unique baking environment ensures every bite is a harmonious blend of textures.
Beyond the perfect bake, there’s an inherent rustic charm to serving a dessert directly from the pan. It’s less fuss, less cleanup, and truly an inviting presentation that encourages communal enjoyment. Imagine the pure delight of scooping warm, melty cookie straight from the skillet, perhaps topped with a dollop of vanilla ice cream or a cascade of chocolate sauce – it’s an experience unto itself. This method also often simplifies the baking process considerably, as you eliminate the need to portion out individual cookies, saving precious time and effort. It’s a single, glorious cookie ready to be devoured, offering convenience without compromising on indulgence.
The Irresistible Duo: Chocolate Chips & Nutella – A Match Made in Dessert Heaven
While a classic chocolate chip cookie is undeniably a timeless winner, the intelligent addition of Nutella elevates this skillet cookie to an extraordinary level of decadence. The rich, creamy hazelnut spread melts into luscious, warm pockets of pure bliss within the tender cookie dough, creating a truly decadent and unexpected surprise in every single bite. The robust, slightly bittersweet notes of dark or semi-sweet chocolate chips perfectly complement the sweet, nutty, and subtly chocolatey notes of Nutella. This combination isn’t just good; it’s a symphony of flavors and textures, a culinary match made in dessert heaven that tantalizes the taste buds.
This pairing offers a complexity of flavor that goes far beyond a standard cookie, transforming a simple treat into a gourmet experience. The hazelnut undertones of Nutella add a sophisticated depth, while the chocolate chips provide bursts of intense cocoa flavor. Whether you’re a long-time Nutella enthusiast or new to its enchanting magic, prepare to be utterly captivated by how it transforms a humble cookie into an unforgettable, truly indulgent dessert. It’s a testament to how two simple ingredients can create something truly extraordinary when combined thoughtfully.
Ingredients: Crafting Perfection from Simple Staples
One of the most appealing aspects of this Skillet Chocolate Chip and Nutella Cookie recipe is its reliance on readily available, simple pantry staples. You don’t need any exotic or hard-to-find ingredients to achieve absolutely fantastic results. However, paying attention to the quality and proper preparation of each component is key. Here’s a closer look at what you’ll need and why each ingredient plays a crucial role in the final perfection of your cookie:
- ½ cup (113g) of unsalted butter, softened to room temperature: Softened butter is absolutely essential for proper creaming with the sugars. This process incorporates air, creating a light, airy base for your cookie dough, which translates to a tender, delicate crumb. Using unsalted butter gives you precise control over the overall salt content of the cookie.
- ½ cup (100g) of lightly packed light brown sugar: Brown sugar is a game-changer for cookie texture. It contributes significantly to the cookie’s irresistibly chewy texture and infuses it with a deeper, molasses-rich, caramel-like flavor that pairs exquisitely with both chocolate and Nutella. Ensure it’s lightly packed for accurate measurement.
- 1/3 cup (67g) of granulated sugar: Granulated sugar provides the necessary sweetness and plays a vital role in achieving those wonderfully crisp edges that contrast beautifully with the soft interior. The combination of both brown and granulated sugars creates a perfectly balanced flavor and texture profile.
- 2 tsp of pure vanilla extract: Vanilla is not just a flavor; it’s a powerful flavor enhancer that brings warmth, depth, and a delightful aromatic quality to the cookie. It beautifully complements and elevates the complex notes of chocolate and hazelnut. Always opt for good quality pure vanilla extract for the best results.
- 1 large egg: The egg serves as a critical binder, holding all the ingredients together seamlessly, and contributes significantly to the richness and overall structure of the cookie. For optimal incorporation and emulsification, ensure your egg is at room temperature.
- 1 cup (125g) of all-purpose flour or plain flour: Flour forms the fundamental structure of the cookie. Accurate measurement is crucial here: spoon the flour into your measuring cup and then level it off with a straight edge, rather than scooping directly from the bag, which can compact the flour and lead to a dense, dry cookie.
- ½ tsp of baking soda: This essential leavening agent reacts with the acidic components in the brown sugar to help the cookie rise and spread, contributing directly to its signature soft and wonderfully chewy texture.
- 1/3 tsp of salt: Often underestimated, salt is a crucial ingredient that balances the sweetness, prevents the cookie from tasting flat, and profoundly enhances all the other flavors in the cookie, particularly the rich chocolate notes.
- ½ cup (85g) of dark or semi-sweet chocolate chips: The choice of chocolate chips will profoundly impact the final flavor profile. Dark or semi-sweet chips provide a lovely, sophisticated contrast to the sweetness of the Nutella and sugars. Feel absolutely free to use your favorite type and brand of chocolate chips here.
- ½ cup (150g) of Nutella, melted slightly for easier spreading: Ah, the star ingredient! Melting the Nutella slightly, either gently in a microwave or a warm water bath, makes it much more pliable and easier to spread evenly over the cookie dough. This ensures delicious, molten pockets of hazelnut goodness are distributed perfectly throughout the cookie.
Directions: Your Step-by-Step Guide to Skillet Cookie Bliss
Making this Skillet Chocolate Chip and Nutella Cookie is surprisingly straightforward and incredibly rewarding. Follow these detailed steps carefully, and you’ll be enjoying a warm, decadent, and utterly irresistible treat in very little time.
Step 1: Preparation and Dough Mixing – Building the Flavor Foundation
Begin your baking journey by preheating your oven to a precise 350°F (175°C). Ensuring your oven reaches and maintains the correct temperature before the cookie enters is critical for even baking and prevents a common pitfall of unevenly cooked desserts. Next, prepare your 9-inch cast-iron skillet or a similar-sized oven-safe baking dish. The key here is to line it meticulously with parchment paper. This crucial step serves multiple purposes: it prevents the cookie from sticking to the pan, makes it incredibly easy to lift the entire cookie out once baked if you wish to transfer it, and significantly simplifies cleanup. Set your perfectly prepared skillet aside, ready for action.
Now, in a large mixing bowl, combine the star trio: your perfectly softened butter, the lightly packed light brown sugar, and the granulated sugar. Using either an electric mixer on medium speed or a sturdy whisk with plenty of elbow grease, beat these ingredients together until the mixture transforms into a light, fluffy, and beautifully creamy consistency. This creaming process is fundamental; it incorporates air into the fat and sugar, which is vital for achieving a tender, melt-in-your-mouth cookie texture. Next, crack in the large egg and pour in the pure vanilla extract. Continue to whisk or beat until all these ingredients are thoroughly combined and the mixture is smooth and cohesive. Remember to scrape down the sides of the bowl periodically with a spatula to ensure every bit of ingredient is incorporated evenly, leaving no unmixed pockets.
Moving on to the dry ingredients: gently sprinkle in the all-purpose flour, baking soda, and salt directly over your wet mixture. Mix these dry ingredients into the wet on a low speed with your electric mixer, or carefully fold them in with a spatula, until they are just combined. Exercise caution at this stage: it is absolutely crucial not to overmix the dough. Overmixing can overdevelop the gluten in the flour, which will result in a tough, dense cookie, rather than the desired soft and chewy texture. A few small lumps in the dough are perfectly acceptable. Finally, take half of your chosen chocolate chips and gently fold them into the dough until they are evenly distributed. Resist the urge to add all of them now; reserve the remaining half for topping later, which will create a beautiful presentation.
Step 2: Layering, Baking, and Savoring Your Masterpiece
With your delectable cookie dough ready, it’s time to assemble your masterpiece. Take approximately half of your prepared cookie dough and carefully scoop it into the parchment-lined skillet or baking dish. Using the back of a spoon, your fingertips, or an offset spatula, gently but firmly spread this first layer of dough evenly across the entire bottom of the pan. It doesn’t need to be absolutely perfect, but aim for a relatively flat and consistent base to ensure even baking.
Next, retrieve your slightly melted Nutella. Generously and carefully spread this luxurious hazelnut spread over the entire surface of the first cookie dough layer. As you spread, be sure to leave a small border—about an inch of space—around the very edges of the dough. This intentional border is a clever trick; it helps to create a natural seal that encapsulates the Nutella during baking, preventing it from oozing out excessively and ensuring it remains a delightful, molten surprise tucked within the heart of the cookie. The slightly melted Nutella will spread much more easily and uniformly.
Now, carefully scoop the remaining cookie dough over the Nutella layer. Gently spread it out to completely cover the Nutella, doing your best to smooth the top as much as possible. This step might feel a bit delicate, but take your time and work patiently to ensure the Nutella is fully encased. Once the top layer is spread, generously sprinkle the reserved chocolate chips all over the entire surface of the cookie dough. This not only adds an extra burst of chocolatey goodness but also creates a beautiful, inviting visual appeal once the cookie is baked.
Carefully transfer your skillet to the preheated oven. Let it bake for approximately 25 to 30 minutes. It’s important to note that the exact baking time can vary slightly depending on the calibration of your individual oven, so vigilance is key. You’re looking for the edges of the cookie to be beautifully golden brown and set, while the very center should still appear slightly soft and wonderfully gooey. For the ultimate moist and chewy skillet cookie, it is always better to slightly underbake than to overbake. A tooth-pick inserted in the center might not come out clean, which is often a sign of perfection for this type of cookie. Once baked to perfection, carefully remove the skillet from the oven and transfer it to a wire rack. Allow it to cool for at least 10 minutes before attempting to serve. This crucial cooling period allows the cookie to set properly, preventing it from crumbling or falling apart when scooped, and also intensifies the flavors as they meld and settle. Serve warm, perhaps with a generous scoop of premium vanilla bean ice cream that melts enticingly into the warm cookie, a luxurious drizzle of extra Nutella, or a dusting of powdered sugar, and prepare to be utterly amazed by your homemade masterpiece!
Expert Tips for the Perfect Skillet Cookie Every Time
Achieving a bakery-quality skillet cookie right in your own kitchen is more attainable than you might think, especially when you arm yourself with a few professional pointers. These tips will help ensure your Skillet Chocolate Chip and Nutella Cookie turns out perfectly every single time, delighting everyone who tries it:
- Embrace Room Temperature Ingredients: This is a golden rule in baking. Ensure your butter and egg are at proper room temperature. This state allows them to emulsify better with the sugars, creating a smoother, more uniform dough structure, which in turn leads to a more tender and beautifully textured final product.
- Master Accurate Measuring: Baking is often described as a science, and for good reason! Precision in measuring is paramount. For flour, always use the ‘spoon and level’ method: spoon the flour into your dry measuring cup until it overflows, then level it off with the back of a straight edge (like a knife). Never scoop directly from the flour bag, as this compacts the flour, leading to an excess amount that can result in a dry, dense cookie.
- The Art of Not Overmixing: Once you’ve added the flour to your wet ingredients, mix only until they are just combined. Overmixing vigorously or for too long develops the gluten in the flour, which leads to a tough, rubbery, and dense cookie, detracting from that desired soft and chewy texture. A few small lumps in the dough are perfectly fine and often a sign you’ve mixed just enough.
- Parchment Paper is Your Best Friend: While a well-seasoned cast iron skillet boasts impressive non-stick properties, lining it with parchment paper is a foolproof guarantee for easy removal and significantly simpler cleanup. It’s a minimal extra step that yields tremendous benefits, especially if you plan to transfer the cookie to a cutting board for slicing, or simply want to avoid any potential sticking.
- Know Your Oven: Every oven is a unique beast, with its own hot spots and temperature fluctuations. Pay close attention to your cookie as it bakes. If the edges are browning too quickly, or if your cookie is done before the recommended time, you might need to adjust your oven temperature slightly for future bakes to ensure consistent results.
- Resist the Urge to Overbake: For that truly ultimate gooey, soft-centered experience, it is almost always better to slightly underbake your skillet cookie than to overbake it. The cookie will continue to cook gently from residual heat after it’s removed from the oven, a phenomenon known as “carryover cooking.” Aim for golden edges and a slightly soft, still-jiggly center.
- Appreciate the Importance of Cooling: This step requires patience, but it’s absolutely crucial! Resist the immediate urge to dive in the moment it comes out of the oven. The recommended 10-minute cooling period on a wire rack allows the cookie to properly set and firm up. This prevents it from falling apart when scooped, and more importantly, allows the flavors to deepen and meld, enhancing the overall texture and taste.
Creative Variations & Customizations: Make It Your Own!
While this recipe for the Skillet Chocolate Chip and Nutella Cookie is undeniably fantastic as is, feel absolutely free to unleash your inner baker and experiment with these delightful variations and customizations. Baking is an art, and personal touches make it even more enjoyable:
- Explore Different Chocolates: Instead of solely using dark or semi-sweet chocolate chips, consider incorporating milk chocolate chips for a sweeter profile, or even white chocolate chips for a distinctly different flavor dynamic. A thoughtful mix of various chocolate types can also create wonderful complexity and visual appeal.
- Add Nutty Delights: For an added layer of crunch and rich flavor, gently fold in a handful of finely chopped walnuts, pecans, or almonds into the cookie dough. Toasting the nuts lightly before adding them can further enhance their flavor.
- Experiment with Other Spreads: If Nutella isn’t quite your preference, or you’re looking for a unique twist, consider spreading a luscious layer of Biscoff spread, creamy peanut butter, or even a tangy fruit preserve (like raspberry or apricot) for an exciting and personalized flavor experience.
- A Sophisticated Sea Salt Finish: Elevate the flavors with a simple yet profound addition. A light sprinkle of flaky sea salt over the top of the cookie dough just before baking can beautifully enhance and balance the rich chocolate and caramel notes, adding a gourmet touch.
- Individual Mini Skillet Cookies: For charming individual servings, divide the cookie dough into several smaller oven-safe mini skillets. Be sure to adjust the baking time accordingly, as smaller cookies will bake faster.
- Toppings Galore for an Ultimate Indulgence: After baking, transform your warm cookie into an even more extravagant dessert. Top it with a generous scoop of your favorite ice cream, a decadent drizzle of caramel or hot fudge sauce, a dollop of fresh whipped cream, or a sprinkling of extra chocolate shavings.
Serving and Storage Tips: Enjoying Your Skillet Cookie to the Fullest
This magnificent skillet cookie is undeniably at its absolute best when enjoyed warm, ideally scooped directly from the pan. For the ultimate dessert experience, pair a warm slice with a tall, cold glass of milk, a creamy scoop of vanilla bean ice cream that melts enticingly into the warm cookie, or a comforting mug of hot coffee or tea. The contrast of temperatures and textures is pure bliss.
Should you be fortunate enough to have leftovers (a rare occurrence with this delicious treat!), proper storage will help maintain its freshness. Cover the skillet tightly with plastic wrap or aluminum foil, or transfer individual slices to an airtight container. The cookie can be stored at room temperature for up to 2-3 days, or if you prefer a longer shelf life, in the refrigerator for up to 5 days. To reheat, simply pop individual slices or the entire leftover cookie back into a preheated oven at 300°F (150°C) for about 5-10 minutes, or until it’s warmed through and gloriously gooey again. For a quicker reheat of individual portions, a microwave works wonders – about 15-30 seconds should do the trick.
We hope this expanded guide helps you create the most incredible Skillet Chocolate Chip and Nutella Cookie you’ve ever tasted. It’s a truly rewarding baking experience that brings warmth and joy to any occasion. Happy baking!
*All image credit belongs to Cafe Delites via YouTube. Follow and subscribe to her channel for more incredible recipes and culinary inspiration!