
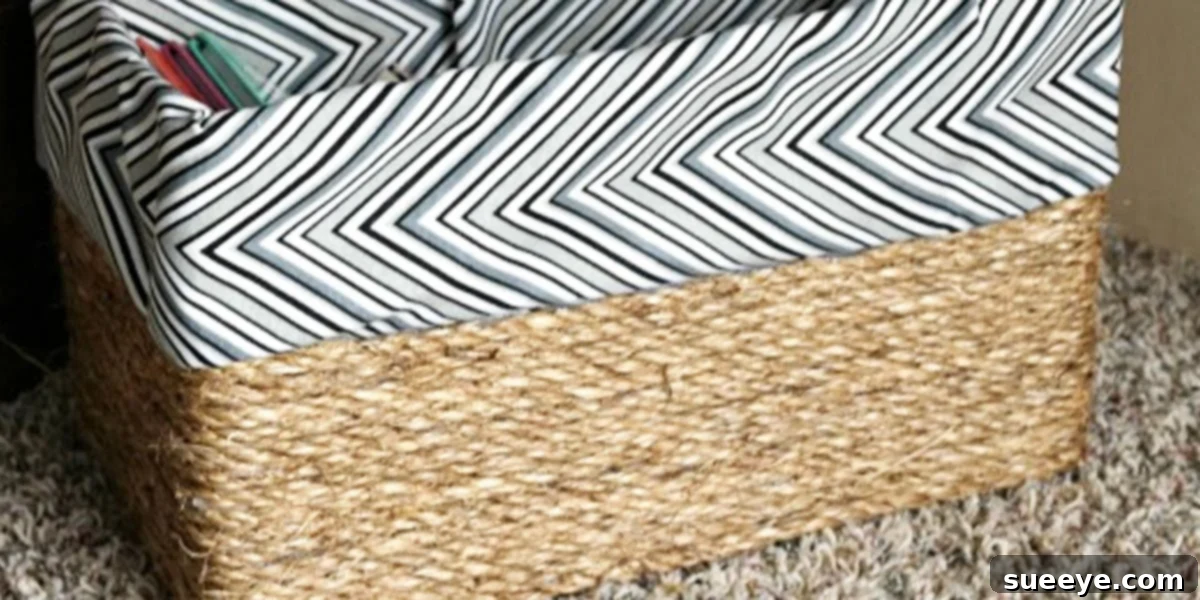
Transforming Cardboard Boxes into Stylish Jute Baskets: Your Ultimate DIY Guide
Are you tired of clutter taking over your home? Do you dream of beautifully organized spaces without breaking the bank? What if we told you that elegant, functional storage solutions are just a few simple steps away, using materials you likely already have or can find for next to nothing? Prepare to be amazed as we unveil a game-changing DIY project: turning ordinary cardboard boxes into stunning jute rope baskets!
This ingenious craft blew my mind when I first discovered it. I instantly knew I had to try it, and the results were beyond my expectations. Gone are the days of overflowing drawers and piles of miscellaneous items. My home now boasts an array of attractive, custom-made baskets, perfectly housing everything from craft supplies and important documents to cherished photographs. This isn’t just a project; it’s a money-saving, life-organizing revelation!
Why DIY Your Storage Baskets? The Power of Upcycling and Personalization
In a world increasingly focused on sustainability and mindful consumption, upcycling old cardboard boxes offers a fantastic way to contribute to a greener planet. Instead of discarding these materials, you’re giving them a new lease on life, transforming potential waste into valuable household items. This eco-friendly approach not only reduces landfill waste but also fosters a sense of accomplishment and creativity.
Beyond the environmental benefits, crafting your own baskets provides unparalleled opportunities for personalization. Store-bought baskets, while convenient, often come with a generic look and a hefty price tag. By contrast, your DIY jute baskets can be tailored to perfectly match your home’s aesthetic, chosen size, and specific storage needs. Imagine baskets that fit perfectly into your shelving units, complement your color scheme, and are designed precisely for the items you wish to store – be it office supplies, children’s toys, or pantry staples. This level of customization is simply unattainable with mass-produced options.
Furthermore, the satisfaction of creating something beautiful and functional with your own hands is immeasurable. It’s a therapeutic process that yields tangible rewards, allowing you to infuse your personality into your home decor. Plus, the cost savings are significant. With just a few dollars spent on jute rope and hot glue, you can create baskets that would cost many times more in a retail store.
Essential Materials You’ll Need
Gathering your supplies is the first exciting step in this creative journey. The beauty of this project lies in its simplicity and accessibility. Here’s what you’ll need:
- Sturdy Cardboard Boxes: The foundation of your baskets. Look for boxes of varying sizes that are clean and in good condition. Cereal boxes, shipping boxes, or even old shoe boxes work wonderfully. The sturdier the box, the more durable your final basket will be.
- Natural Jute Rope or Sisal Rope: This is what gives your basket its signature rustic charm. You can find jute rope at craft stores, hardware stores, or online. Different thicknesses are available; a medium thickness (around 1/4 inch or 6mm) is generally easy to work with and provides good coverage. Consider buying a generous amount, as you’ll be wrapping the entire exterior of your box.
- Hot Glue Gun and Plenty of Glue Sticks: Your primary adhesive. Ensure your glue gun is in good working order and stock up on extra glue sticks. This project uses a fair amount of glue to securely fasten the rope.
- Sharp Scissors or a Utility Knife: For cutting the rope cleanly and precisely, and for any initial box preparation.
- Optional: Fabric for Lining: If you desire a lined interior for aesthetic purposes or to protect delicate contents, choose a fabric that complements your rope and home decor. Cotton, linen, or even an old bed sheet can work.
- Boning Tool or Butter Knife (optional): Extremely helpful for tucking fabric neatly, especially if you opt for the lining.
- Measuring Tape or Ruler (optional): Useful for cutting fabric accurately.
Step-by-Step Guide: Crafting Your Jute Rope Baskets
Let’s dive into the hands-on process. This tutorial is designed to be straightforward and achievable for crafters of all skill levels.
Step 1: Preparing Your Cardboard Box
Begin by selecting your cardboard box. If necessary, remove any tape or labels and ensure the box is clean and free from dust. For added durability, you might want to reinforce the bottom and sides with extra packing tape, especially if the box feels a bit flimsy. If your box has flaps, you can either trim them off for a completely open top or fold them inwards and glue them down to create a double-layered rim, providing extra sturdiness for the basket’s opening.
Step 2: Starting the Rope Wrap
This is where the transformation truly begins. Take your jute rope and your hot glue gun. Apply a bead of hot glue to a bottom corner of your box. Press the end of the jute rope firmly into the glue, holding it for a few seconds until it adheres. Now, begin wrapping the rope around the base of the box. As you wrap, apply a bead of hot glue every few inches along the box. The key here isn’t to fully coat the box in glue, but rather to strategically place glue spots to secure the rope. This method saves glue, speeds up the process, and ensures the rope remains taut and neatly aligned. Keep your wraps snug and flush against each other to avoid gaps.
Step 3: Continuing the Wrap for Consistent Coverage
Continue wrapping the rope, layer by layer, moving upwards from the base of the box. Maintain consistent tension on the rope as you wrap to ensure a uniform appearance. Always make sure the rope layers are sitting tightly against the previous layer. When you reach a corner, ensure your rope turns smoothly without creating a bulge or leaving a space. Apply glue at the start of each new side and periodically along the length, especially at the corners, for extra security. If your rope runs out, simply glue the end down securely and start a new piece by gluing its end right next to the previous one, aiming to conceal the join as much as possible.
Step 4: Incorporating an Optional Fabric Liner (No-Sew Method)
If you wish to add a fabric lining to the upper portion of your basket, continue wrapping and securing the rope until you’ve covered approximately two-thirds of the box’s height. This leaves the top third exposed for the fabric. Now, measure the circumference of your box to determine the length of fabric you’ll need. For the width, measure the exposed area above the rope (e.g., 3 inches). You’ll need a fabric strip that is twice this exposed width plus an additional 1 inch for seam allowance (so, for a 3-inch exposed area, you’d cut a 7-inch wide strip).
Take your fabric strip and fold over one long edge by about half an inch, pressing it flat. This will be the neat top edge. Now, with the right side of the fabric facing the box, apply a thin bead of hot glue along the very top edge of the rope you just wrapped, working one side of the box at a time. Press the folded edge of your fabric against the hot glue. Use a boning tool or a butter knife to firmly tuck the fabric tightly against the rope, creating a crisp seam. Repeat this process for all four sides of the box, ensuring a smooth and wrinkle-free attachment.
Once the fabric strip is securely attached around the entire circumference of the box, fold the remaining fabric upwards and over the top edge of the box, tucking it neatly into the inside. Apply additional hot glue to the inside of the box to secure the fabric lining firmly in place. This “no-sew” method creates the elegant look of a lined basket without the need for a sewing machine or advanced stitching skills. You can choose to fully line the box if you prefer, depending on what you plan to store and whether the inside will be visible.
Step 5: The Finishing Touches
Once you’ve reached the top edge of your box (or the top of your fabric lining), trim the end of your jute rope neatly. Apply a generous dab of hot glue to secure the very end of the rope invisibly to the previous coil. Press firmly until it cools and sets. Double-check all your rope layers to ensure they are secure. You can add decorative elements such as small leather handles, or even a simple rope loop for easier pulling from shelves. Your DIY jute rope basket is now complete!
Tips for Success and Creative Variations
- Patience is Key: While this project is relatively quick (I made one in about 45 minutes for less than $5 in supplies!), taking your time with each step ensures a professional-looking result.
- Consistent Glue Application: Don’t skimp on the glue where it’s needed, but also avoid excessive amounts that can seep through the rope.
- Safety First: Hot glue guns can cause burns. Work carefully and have a cool damp cloth nearby in case of accidents.
- Varying Textures: Experiment with different thicknesses or colors of jute or sisal rope for unique effects. You could even combine a thinner rope with a thicker one for visual interest.
- Add Handles: Create simple rope handles by cutting two shorter pieces of rope, forming a loop, and hot-gluing them securely to the top edge of the basket on opposite sides.
- Decorative Embellishments: Consider adding a faux leather tag, a fabric label, or even some dried flowers for an extra touch of charm.
- Reinforce the Bottom: For very heavy items, you might want to cut an extra piece of cardboard to fit the inside bottom of the basket and glue it down for additional strength.
Unleash Your Inner Organizer: Uses for Your New Baskets
The versatility of these DIY jute baskets is truly incredible. Once you start making them, you’ll find endless places in your home where they can bring both order and aesthetic appeal:
- Craft Room Organization: Store yarn, fabric scraps, paint tubes, and various crafting tools.
- Office Decluttering: Perfect for holding important documents, stationery, small office supplies, or even cables.
- Pantry Storage: Organize snacks, spice packets, small food items, or cleaning supplies.
- Bathroom Essentials: Keep toiletries, towels, or hair products neatly contained on open shelves.
- Nursery & Kids’ Rooms: A stylish way to store diapers, small toys, books, or baby essentials.
- Entryway Catch-All: Use them near the door for keys, mail, gloves, or other small items that tend to accumulate.
- Living Room Style: Place them on shelves or under console tables to hold remotes, magazines, or throws, instantly elevating your decor.
See how easy it is to create your very own, custom storage solutions? You absolutely can do it! This project is not just about making a basket; it’s about reclaiming your space, expressing your creativity, and discovering the joy of handmade home decor. Get ready to transform your home, one beautiful jute basket at a time.
For a visual guide and more inspiration, consider searching for “DoltOnaDime rope basket tutorial” online. Many creators offer step-by-step videos that can help you visualize the process and get started on your organizational journey today!