DIY Decor
39 Cutest Crafts for Boys to Make at Home
Crafts for boys that actually get made: 39 easy kids crafts, from glow in the dark fireflies and fire breathing dragons to painted minion stones.
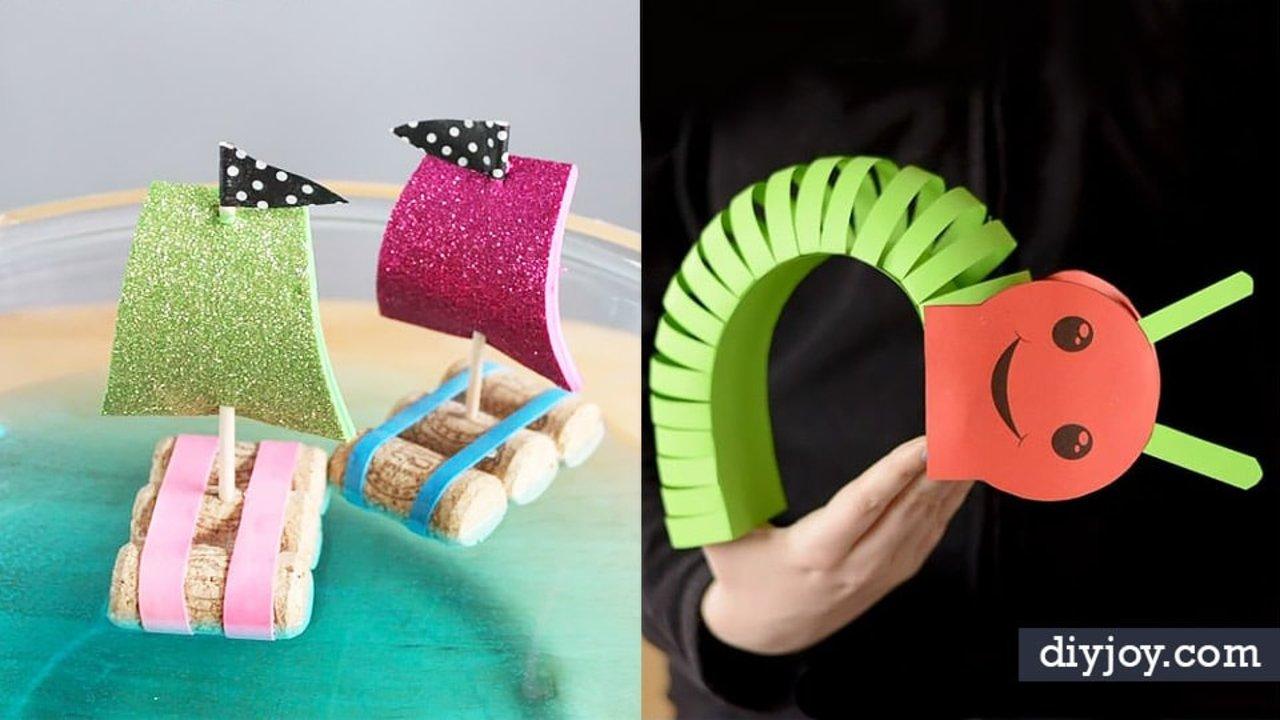
Nobody sits a seven year old boy down for a craft that takes two hours and ends in a doily. These crafts for boys are the other kind: a toilet paper roll that breathes tissue paper fire when you blow into it, a water bottle with a glow stick inside that turns into a firefly after dark, beach pebbles that come home as monsters. I have volunteered to run the group project at more school events than I can count, and the thing I have learned is that the winner is never the prettiest one. It is the one they can play with afterward. Almost everything here costs whatever is already in your recycling bin, most of it is done inside an afternoon, and a good half of it survives being thrown across a living room.
1. Cork Sail Boats
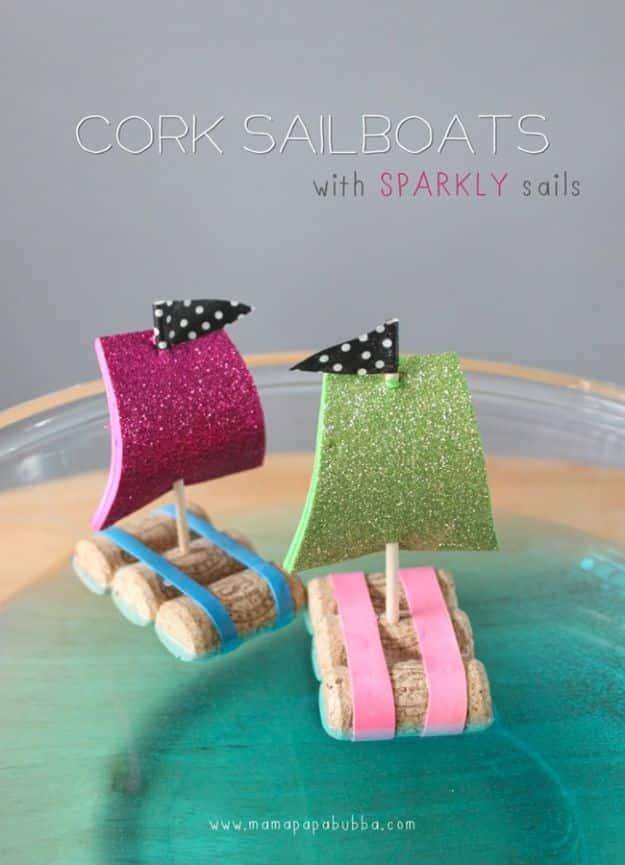
Three wine corks, two thick elastic bands around them, and you have a hull that genuinely floats. Poke a hole through the centre cork with a nail, stand a mini dowel in it, and cut the sail from a foam sheet rather than paper, because foam is waterproof and paper turns to mush in about four minutes. Glitter foam is the version worth hunting for. These live in the bathtub or a washing up bowl afterward, which is the whole point, and a batch of six takes one glass of wine’s worth of saving up.
Get the full tutorial at Mama.Papa.Bubba.
2. Bottle Cap Bugs
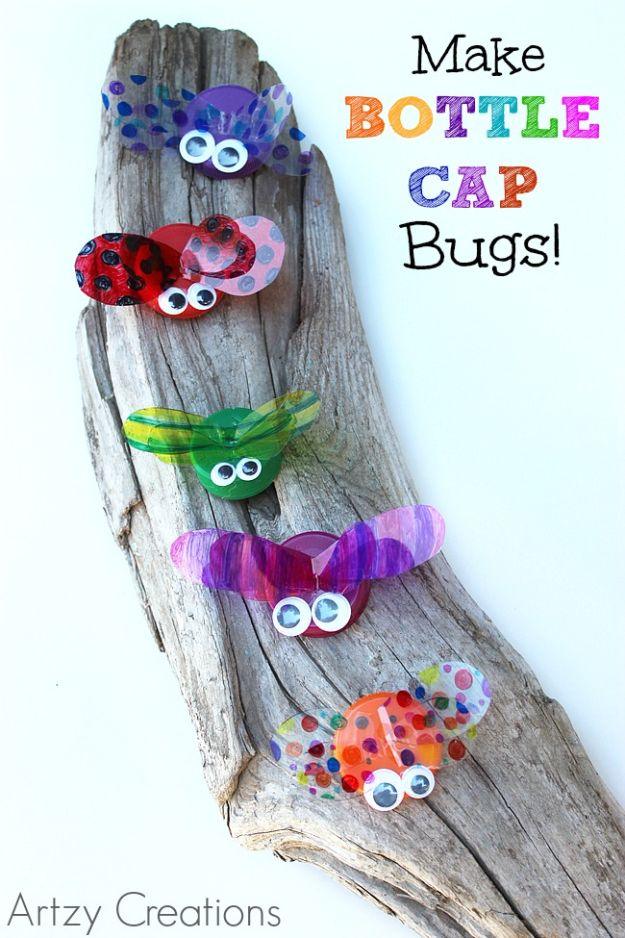
Bottle caps become beetles, bees and ladybugs, and the wings are the clever part: cut them from transparency film in any shape at all, then color them with Sharpies so the light comes through. One warning from the art teacher who wrote this up, and it is the difference between good and streaky. Sharpie drags. Color slowly, and keep little hands off anything that was just filled in, because one careless palm smears an entire wing. Hot glue holds best, school glue works, and the googly eyes go on last.
Get the full tutorial at Melanie of Artzy Creations for This Grandma Is Fun.
3. Pirate Treasure Chest
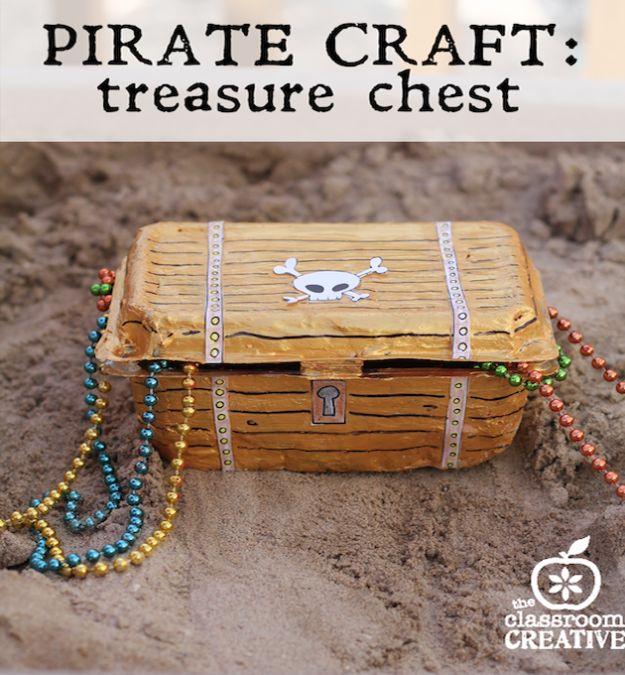
The chest starts life as a plastic strawberry container, which is why this costs nothing and why the lid already hinges. Two layers of ripped newsprint and Mod Podge go over the outside, and the one thing to get right is leaving the interior snaps of the lid uncovered, or it will never close again. Printables give you the skull, the lock and the straps, then a thick black Sharpie fakes the wooden planks. Fill it with beads and bottle caps and it holds an entire summer of pirate week.
Get the full tutorial at The Classroom Creative.
4. Balloon Elephant Card
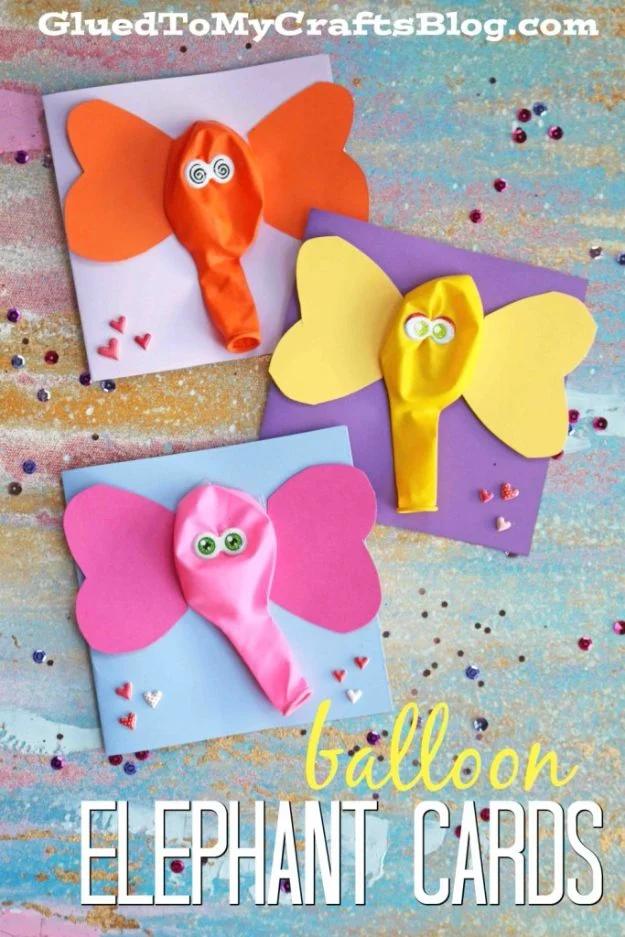
An uninflated balloon glued to the front of a card becomes an elephant’s head and trunk, and the receiver gets to peel it off and keep it. Glue dots hold it best; tape or foam adhesive if you have none. Two heart shapes cut sideways make the ears, googly eyes go above, and that is genuinely the whole build. It is a card and a party favor at once, so it earns its place at a birthday or a classroom Valentine’s exchange. Older children only on this one, and stay in the room, because balloons and small kids do not mix.
Get the full tutorial at Glued To My Crafts.
5. How To Make Pine Cone Spiders
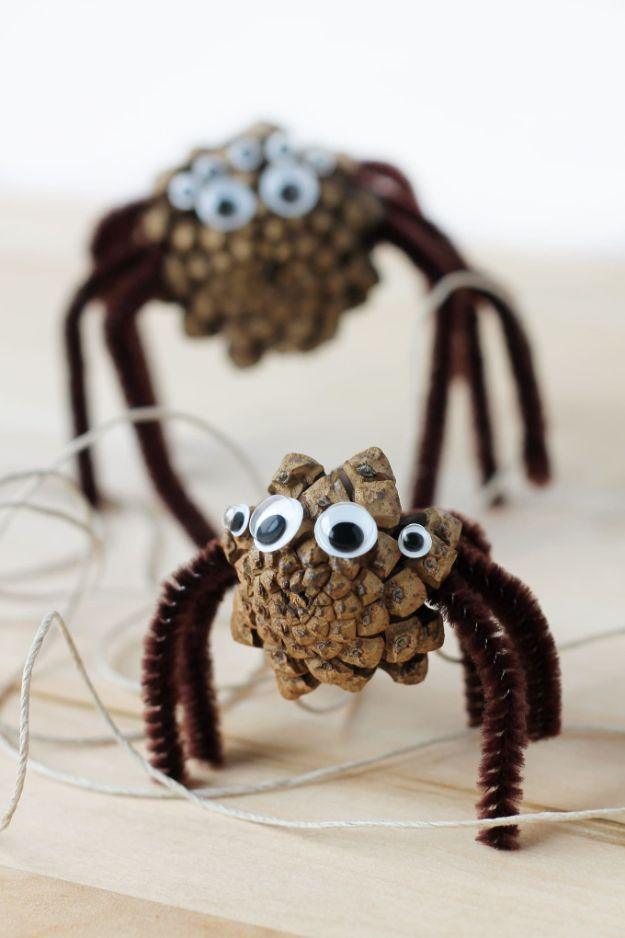
Four pipe cleaners wrapped around the middle of a pine cone give you eight legs, and the whole thing takes about five minutes once the pine cones are collected. Collecting them is really the activity, so make the walk part of it. A low temperature glue gun is the right tool here, since the scales are fiddly and a hot one will get fingers. Googly eyes, as many as you like, and nobody has ever complained that a spider has too many. They sit on a shelf all October and cost nothing at all.
Get the full tutorial at Fireflies and Mud Pies.
6. Handprint Penguin Craft
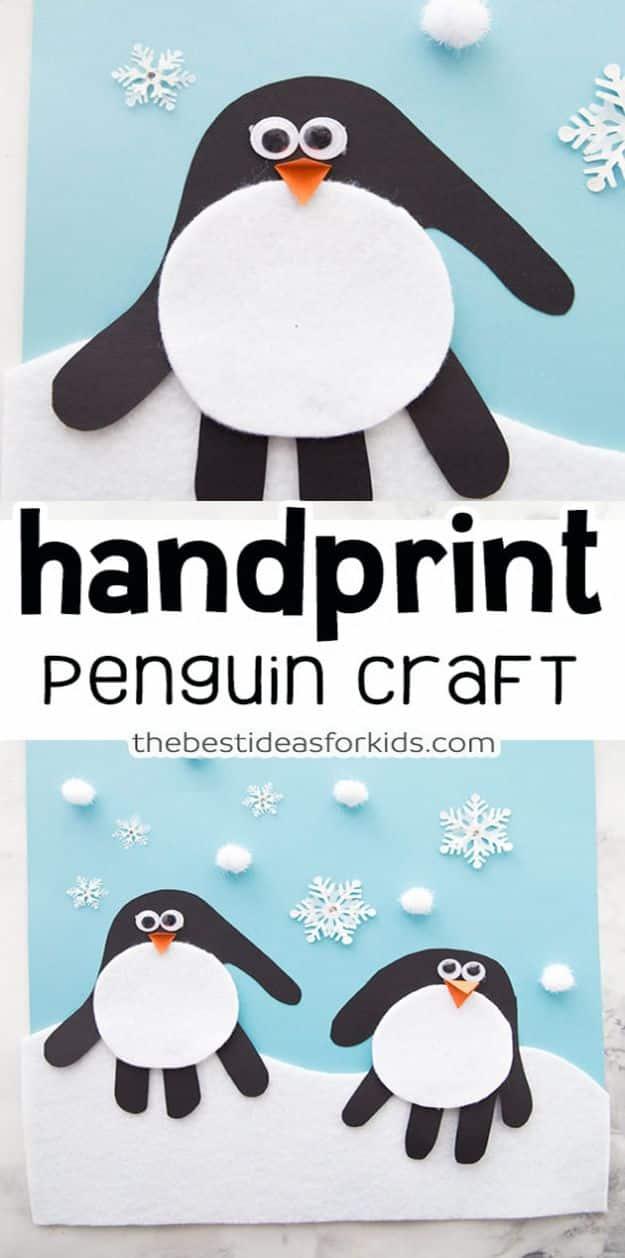
A handprint traced on black cardstock, flipped upside down, becomes a penguin’s body with the fingers as tail feathers. Use twelve by twelve cardstock rather than letter size and two handprints fit on one page, which matters if you have two children and no interest in refereeing. White felt cut in a wave along the bottom is the snowbank, an orange triangle is the beak, and snowflake stickers finish it. The reason to make this one is the reason to make any handprint craft: the hand it was traced from will not be that size for long.
Get the full tutorial at Kimberly McLeod at The Best Ideas for Kids.
7. Playdough Bug Fossils
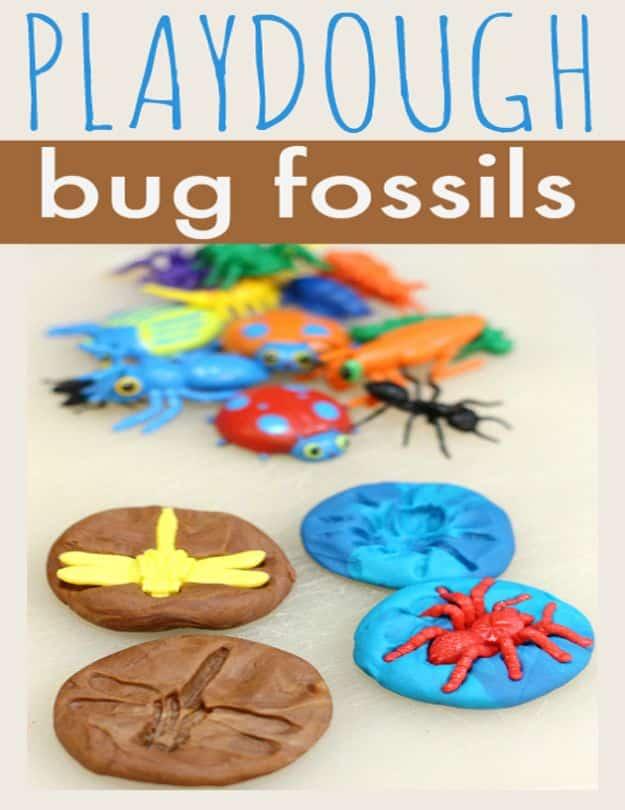
Roll playdough into balls, flatten them into discs, press a plastic bug in hard and peel it off. That is it, and it holds a child’s attention far longer than it has any right to. The trick is the bugs: the cheap smooth ones leave a blob, and the detailed ones leave legs and wing veins and something that genuinely looks like it came out of a rock. Keep one cutting board for playdough only. It doubles as the easiest introduction to fossils anyone has ever run, and the dinosaurs in the toy box finally have a job.
Get the full tutorial at No Time For Flash Cards.
8. Clothespin Airplanes
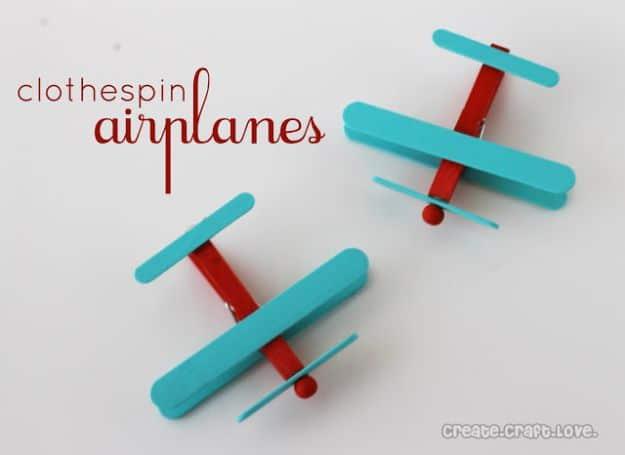
A wooden clothespin is the fuselage and craft sticks are the wings, which is one of those ideas that seems obvious about four seconds after somebody shows you. Take the clothespin apart first and set the spring aside so you can paint the two halves properly, and thread the wooden propeller beads onto a kebab skewer while you paint them, which stops the whole thing becoming a finger painting session. Hot glue the wings top and bottom, add the rudder, then the propeller. They clip onto a lunch bag, which makes them a party favor as well as a toy.
Get the full tutorial at Create Craft Love.
9. How To Make Glove Monsters Tutorial
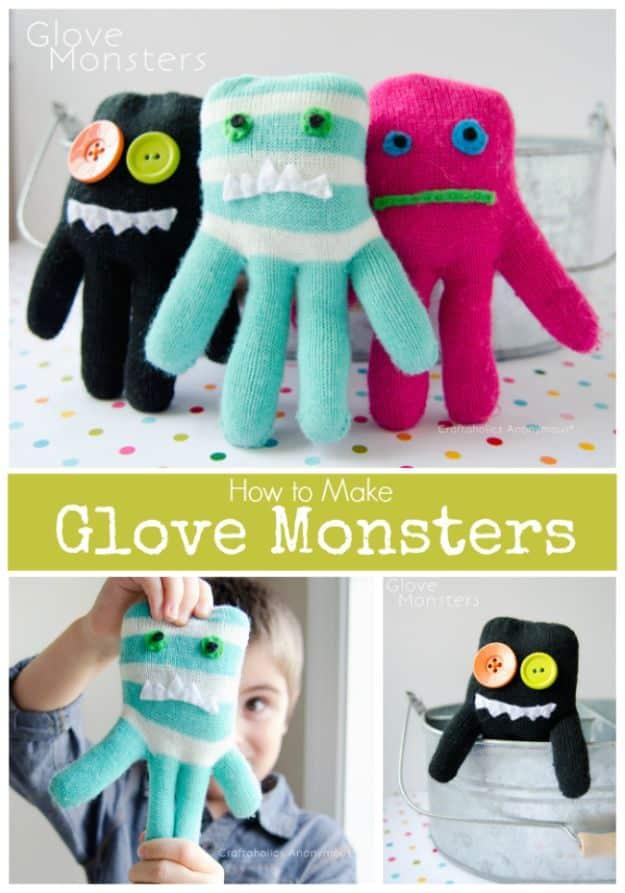
Every winter produces orphan gloves, and this is the best answer anybody has found for them. Turn the glove inside out, sew a U shape across it on a machine with a walking or roller foot, turn it back and stuff it, and the four fingers become legs while the thumb becomes an arm. Buttons and scraps of felt do the faces, and the mismatched ones always come out best. It is a genuinely good first project for a beginner at the machine, because knit fabric hides a wobbly seam better than anything else you will ever sew.
Get the full tutorial at Craftaholics Anonymous.
10. Fun DIY Kaleidoscope Kids Craft
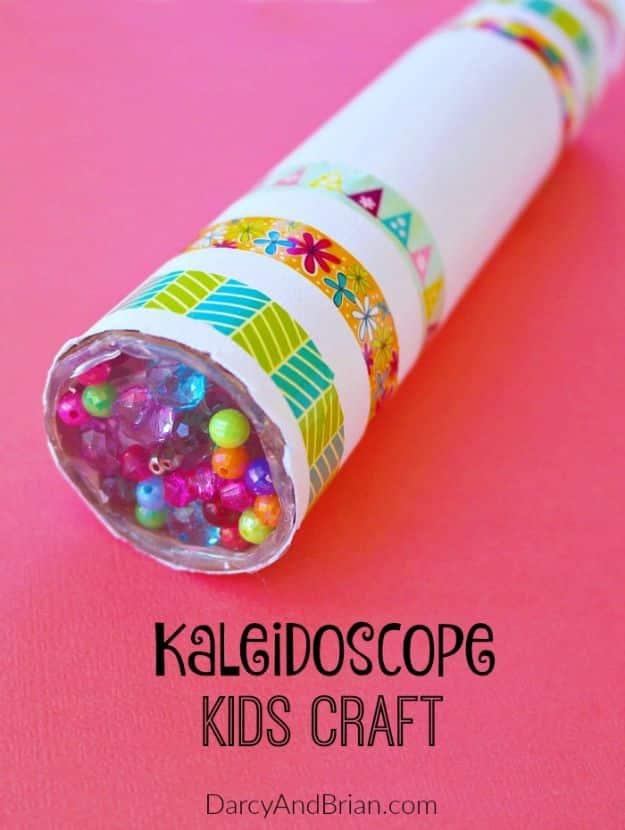
A paper towel tube, a lining of crumpled aluminum foil and a handful of beads in the end, and you get a working kaleidoscope with no mirrors in it anywhere. It does not behave exactly like a real one, and the pattern it gives is genuinely good enough that nobody minds. What makes this worth the twenty minutes is that it comes with a free science lesson nobody has to sit through: reflection, symmetry, why the pattern changes when you turn it. Decorate the outside in washi tape and it looks like something from a museum shop.
Get the full tutorial at Darcy and Brian.
11. Fire Breathing Dragon Craft
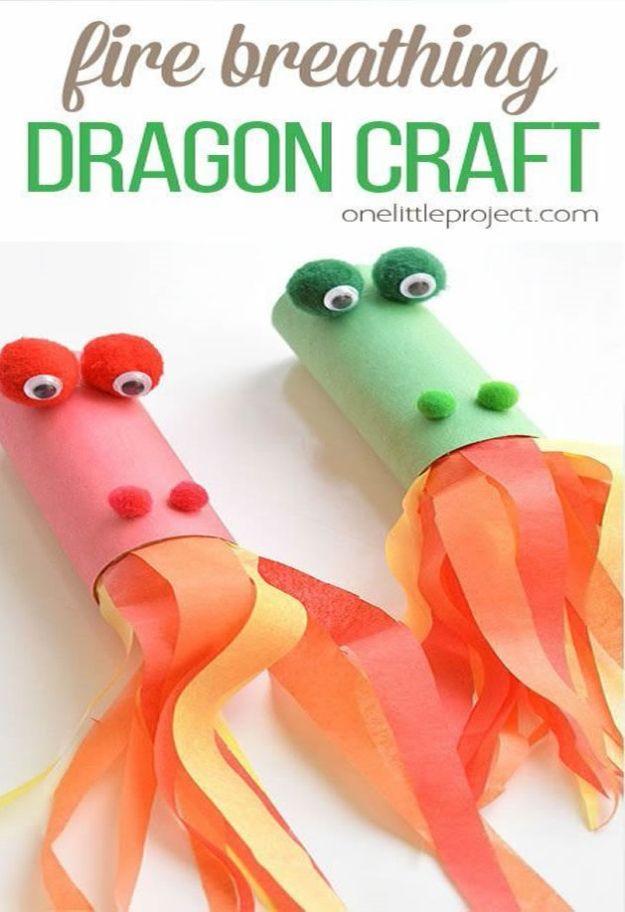
This is the one every child on the list will demand to make twice. A toilet paper roll gets a face, pom pom eyes and strips of orange and red tissue paper taped inside one end, and when you blow through the other end the flames leap out of the dragon’s mouth. No toilet rolls in the house? Cut a paper towel or wrapping paper tube to the same length. Pom poms are notoriously bad at staying stuck, so use a mini glue gun or glue dots rather than school glue, which will let go in about an hour.
Get the full tutorial at One Little Project.
12. Cute Seashell Turtle Craft
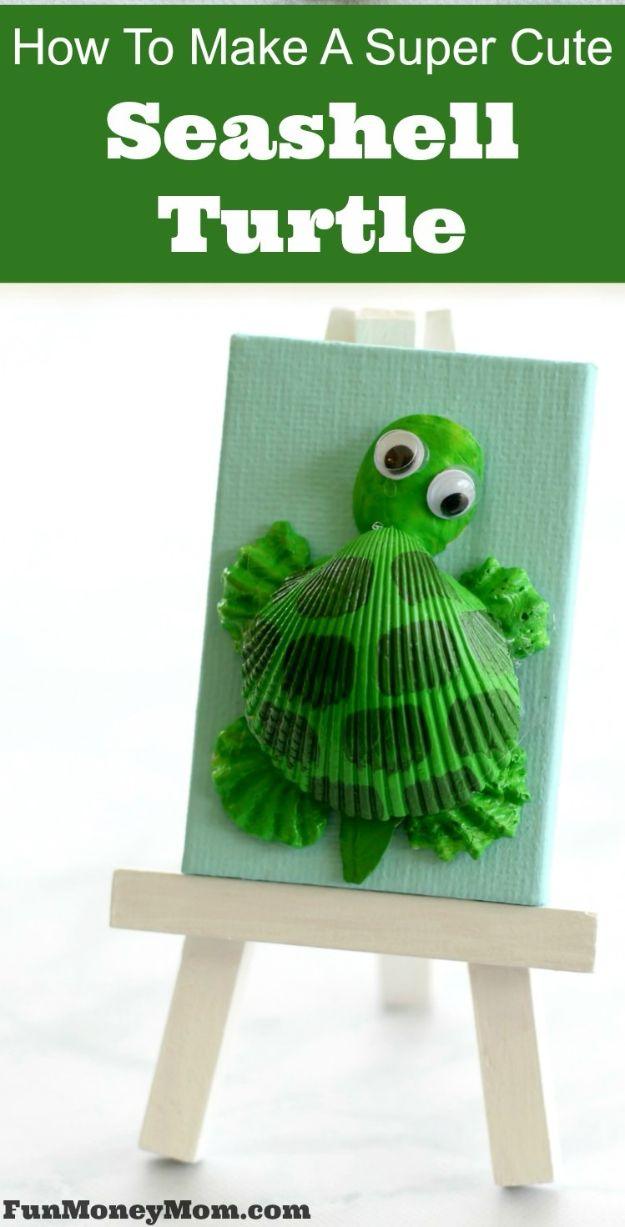
One large shell is the turtle’s shell, four small ones are the feet, another is the head and a tiny one is the tail, so the beach walk becomes a materials hunt with a purpose. Hot glue holds shells to each other better than anything else. What lifts this above a fridge craft is mounting it: the original was built on a small canvas with a mini easel from the craft aisle, painted blue first, and the finished thing looks like a piece of art rather than a holiday souvenir. A pocketful of shells finally has somewhere to go.
Get the full tutorial at Fun Money Mom.
13. 3D Caterpillar Paper Craft
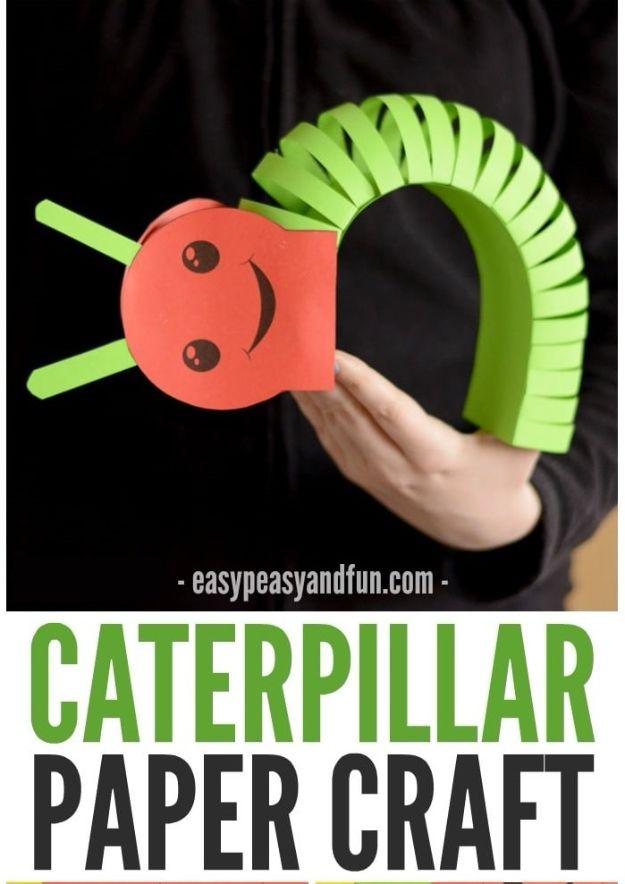
Strips of green paper build up into a body that wiggles when you hold it, which is why these turn into puppets roughly four seconds after the last strip goes on. There is a printable template if you want the shapes accurate, or you can go freehand and let the caterpillar come out however it comes out. Be honest about the age though: there is a lot of cutting in this one, and a preschooler will need a grown up with the scissors. For anyone in kindergarten and up it is excellent fine motor practice disguised as a bug.
Get the full tutorial at Andreja at Easy Peasy and Fun.
14. Paper Strip Cardinal Craft
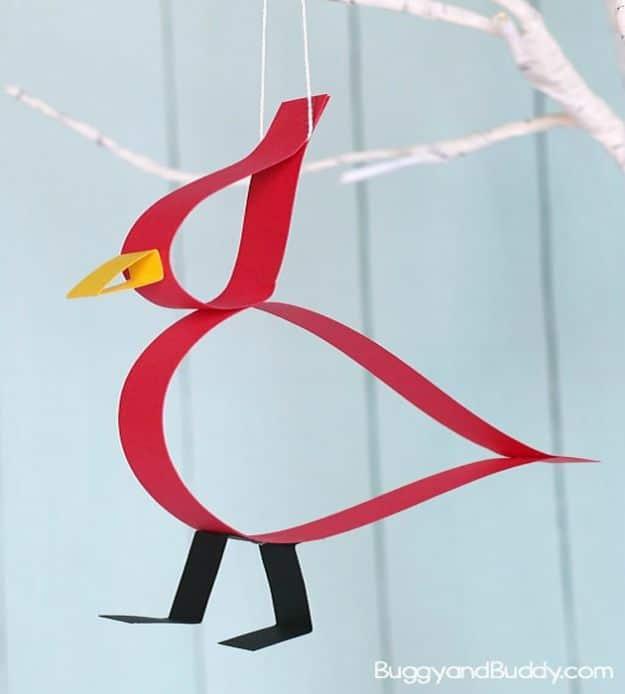
Four strips of paper, bent and glued, and a cardinal appears out of nothing. The measurements are worth following exactly because they are what makes the bird read as a bird: six inches by three quarters for the head, eleven by three quarters for the body, two black two inch strips for the legs and a yellow two inch strip for the beak. There is a free template if measuring is not the mood. Add a loop of string and it hangs on a Christmas tree, which is a rare thing for a paper craft to earn.
Get the full tutorial at Buggy and Buddy.
15. No Sew Fleece Octopus Tutorial
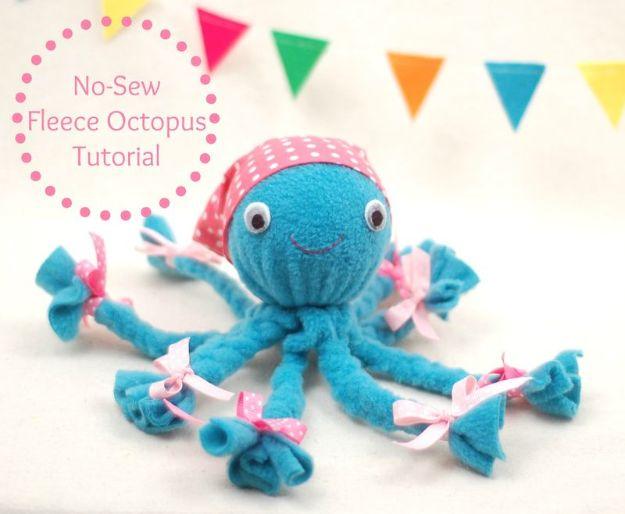
The yarn octopus from every 1960s craft booklet, here updated in fleece, and the update is the good part: fleece does not need hemming, so the entire thing is cut and knotted with no stitches anywhere. Eight lengths get knotted into legs, the head gets stuffed and tied off, and what you end up with is soft enough to actually sleep with rather than one of those craft-shaped objects that lives on a shelf. Ribbons tied round each leg finish it. A good one for a rainy afternoon with no sewing machine in sight.
Get the full tutorial at Abby Glassenberg at While She Naps.
16. Paper Giraffes
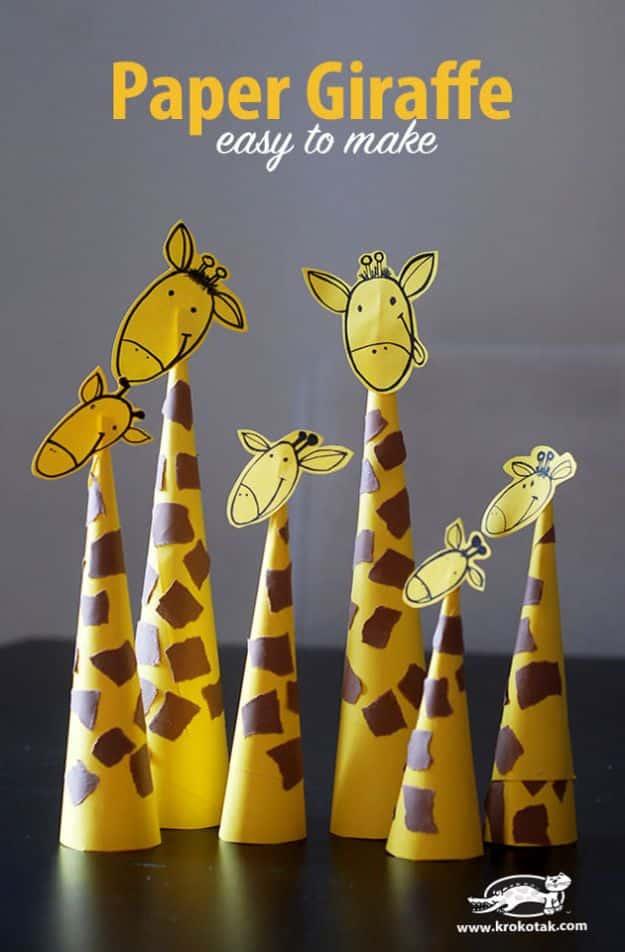
A cone of yellow paper, a head folded on top, a few brown spots, and the giraffe stands up on its own. The proportions do all the work here. Long legs, long neck, tiny head, and something about that combination makes them look pleased with themselves standing in a row on a windowsill. Make one and you will make five, because the second one takes about four minutes. This is the cheapest craft on the entire list: a sheet of paper, a marker, and a bit of glue to hold the cone shut.
Get the full tutorial at Krokotak.
17. Marbling With Oil And Food Coloring
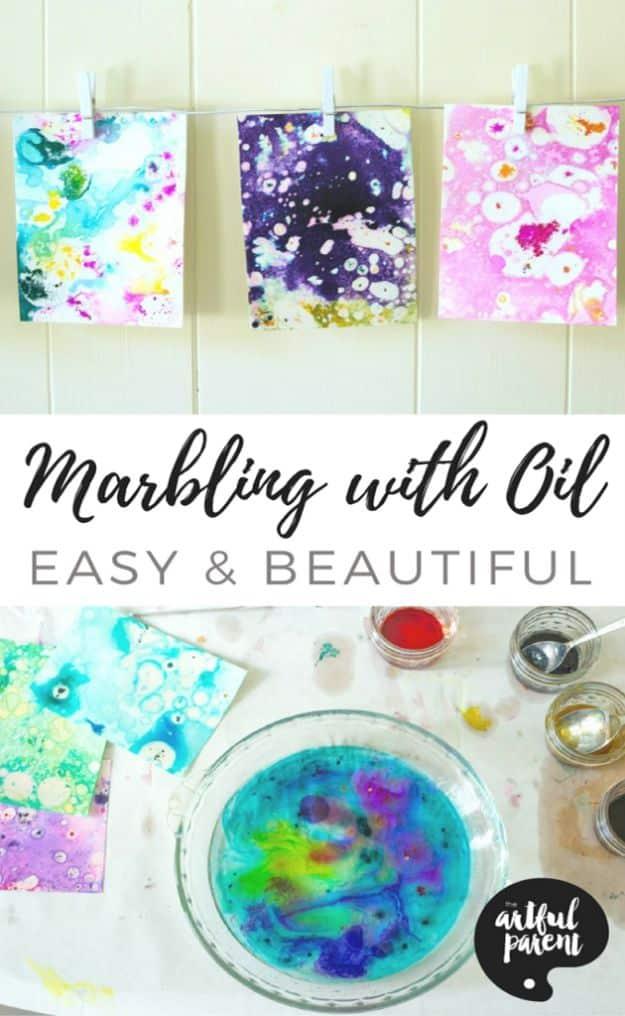
Oil and water refuse to mix, and this whole project is built on that fact. Float oil and food coloring together on water, lay a sheet of paper on top, and where the oil bubbles sit the color cannot reach the paper, so you get sharp white spots inside pools of color. Every single sheet comes out different, and the effect looks far more expensive than a bowl of water and a bottle of cooking oil has any business looking. It is properly messy. Do it outside, or on a surface you have already given up on.
Get the full tutorial at The Artful Age, formerly The Artful Parent.
18. Pop Bottle Firefly
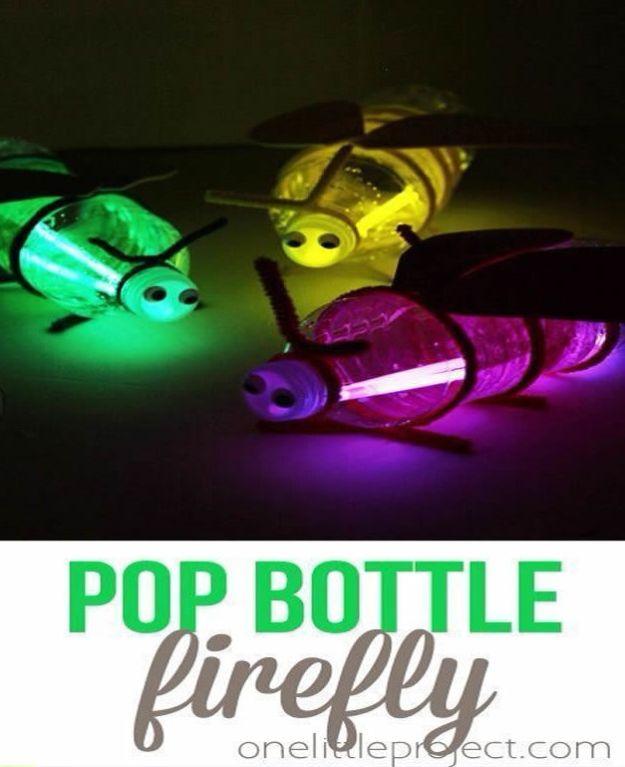
A clear water bottle wrapped in one inch strips of tissue paper and Mod Podge, three pipe cleaners twisted round the middle for legs, foam wings, googly eyes on the cap and a fourth pipe cleaner at the neck for antennae. Then the good bit: drop a glow stick inside. Tissue paper is slightly transparent, so the whole body lights up instead of just the middle, and it works on a campout, a summer birthday or a rainy day with the lights switched off. Small bottles make a whole swarm without much effort.
Get the full tutorial at Megan of Homemade Ginger for One Little Project.
19. Button Art
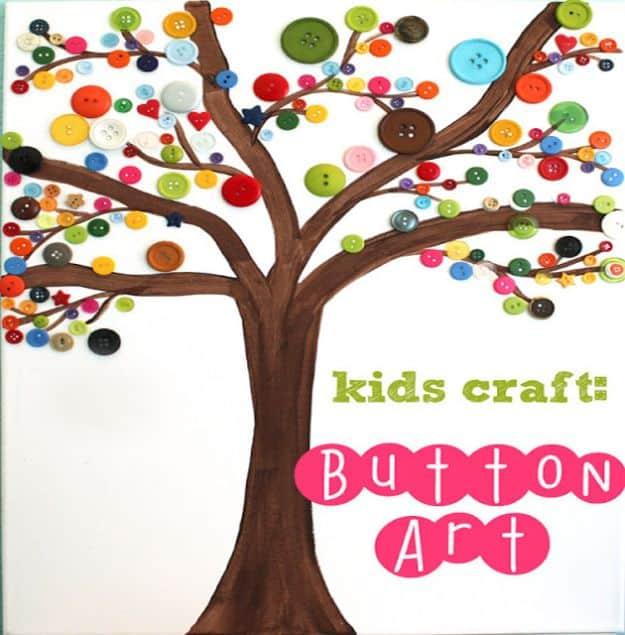
Paint a bare tree on a canvas, then fill the branches with buttons in every color you own. That is the project, and what makes it good is that the sorting comes first: tipping out the button jar and separating by size and color is half an hour of quiet on its own, and it is a genuine early maths lesson wearing a disguise. Tacky glue holds better than school glue on something as smooth as a button. Keep a close eye on anyone still at the putting-things-in-mouths stage.
Get the full tutorial at Simply Designing.
20. Soda Straw Weaving
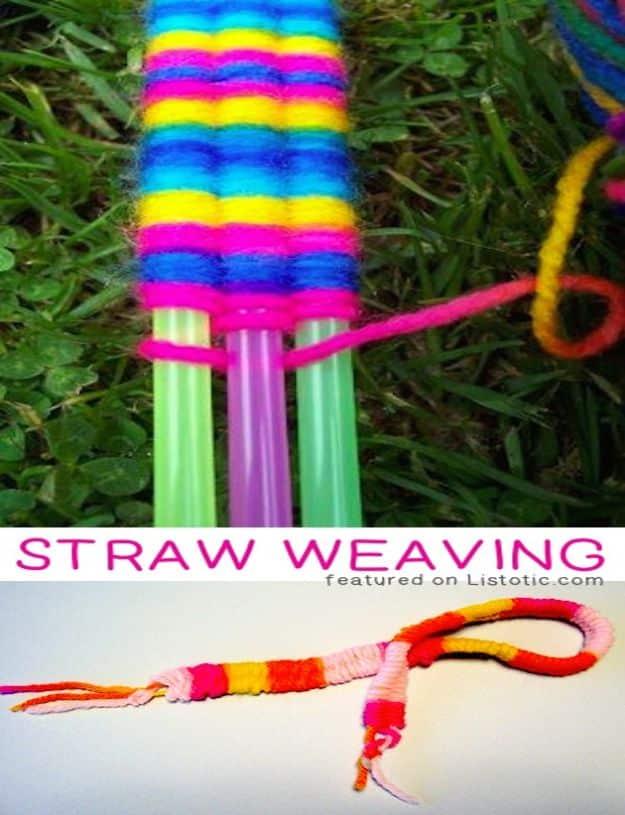
Weaving needs a loom, and a handful of drinking straws is a loom. Thread a length of yarn through each straw, tie the ends together, then weave over and under across the straws while sliding the finished work down off them. Cut the straws to four or five inches for a bracelet, six or seven for a bookmark. Sliding the straws out at the end, and finding an actual woven band underneath, is the part everyone remembers. Measure the warp yarn as the straw length plus five or six inches, or you will run short.
Get the full tutorial at The Imagination Factory.
21. Handprint Campfire Craft
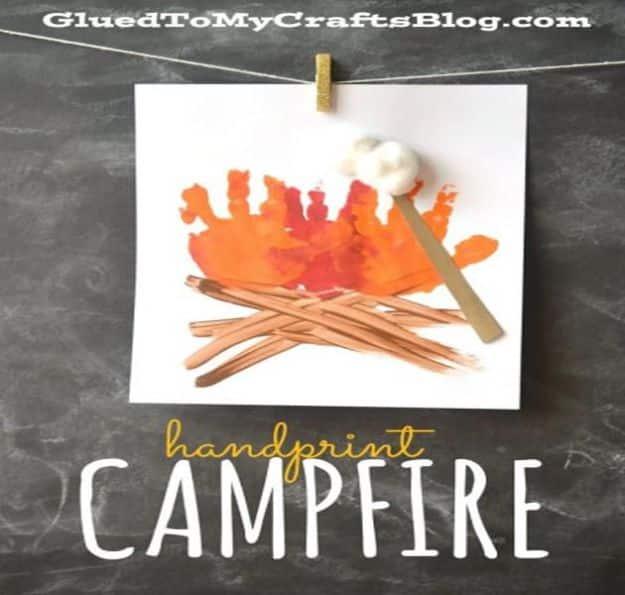
Orange and red painted handprints, overlapping, make a surprisingly convincing fire, and a few craft sticks or real twigs laid across the bottom make the logs. A white pom pom on a stick is the marshmallow. It photographs better than an actual campfire does, and unlike a photograph it records exactly how big those hands were in the summer of whatever year it is. Any handprint craft is really a keepsake with a craft attached, and this is one of the better disguises.
Get the full tutorial at Glued To My Crafts.
22. Homemade Rubber Stamp
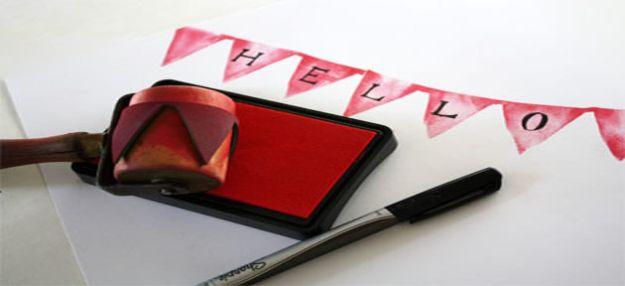
Cut a shape from craft foam, glue it to an old wooden roller with rubber cement, and you have a repeating stamp that rolls a bunting pattern right across a parcel. Two things the original maker learned the hard way and passed on: let the cement dry completely before the roller goes anywhere near ink, and use a fresh ink pad, because a half dried one gives you a ghost of a print. A smaller roller is easier for small hands to steer. Once a child has carved their own design, every card and bag in the house is getting stamped.
Get the full tutorial at Skip To My Lou, after Cathe Holden.
23. Easy Sun Craft For Kids
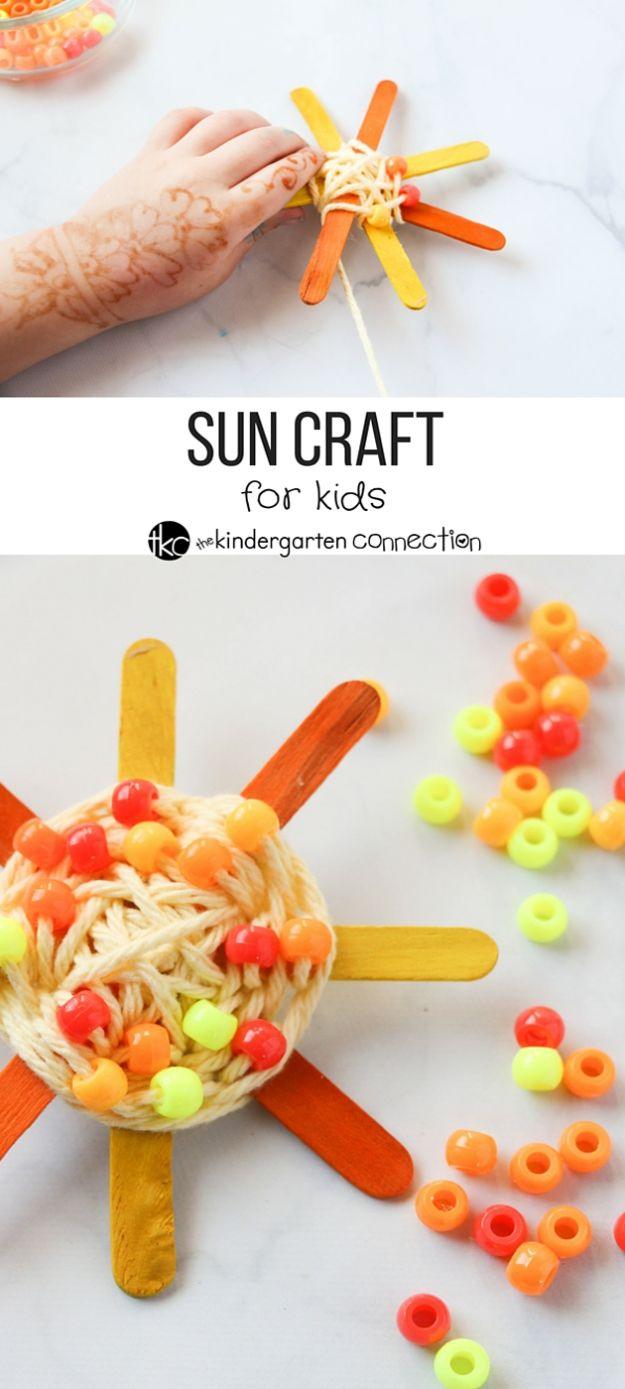
Four popsicle sticks crossed and wrapped in yarn, with pony beads threaded on as you go, and the result is a bright woven sun. It is a simpler cousin of the traditional God’s eye, and the beads are the smart bit: they add the color changes without anyone having to tie in a new length of yarn, which is where that craft usually falls apart for small hands. Tape one end of the yarn so it threads like a shoelace. Three feet of yarn and about twenty beads per sun, so a whole class costs almost nothing.
Get the full tutorial at Jennifer at The Kindergarten Connection.
24. DIY Paper Bag Football Craft
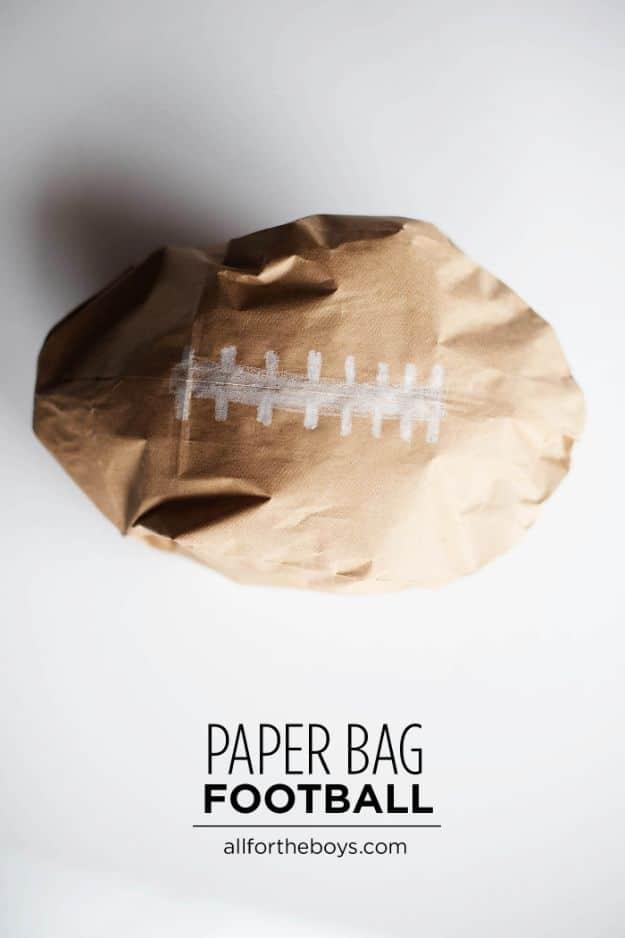
Draw the laces on a brown paper lunch bag with a white crayon, fold and glue the bottom corners in, stuff it with crumpled paper, then seal the open end in the same shape. You get a football light enough to throw indoors without anybody losing a lamp, which is the entire reason it exists. Make a few in team colors, set up a wastepaper basket as a target, and it will get you through most of a game day with the little ones occupied.
Get the full tutorial at Allison Waken at All for the Boys.
25. Minion Stones
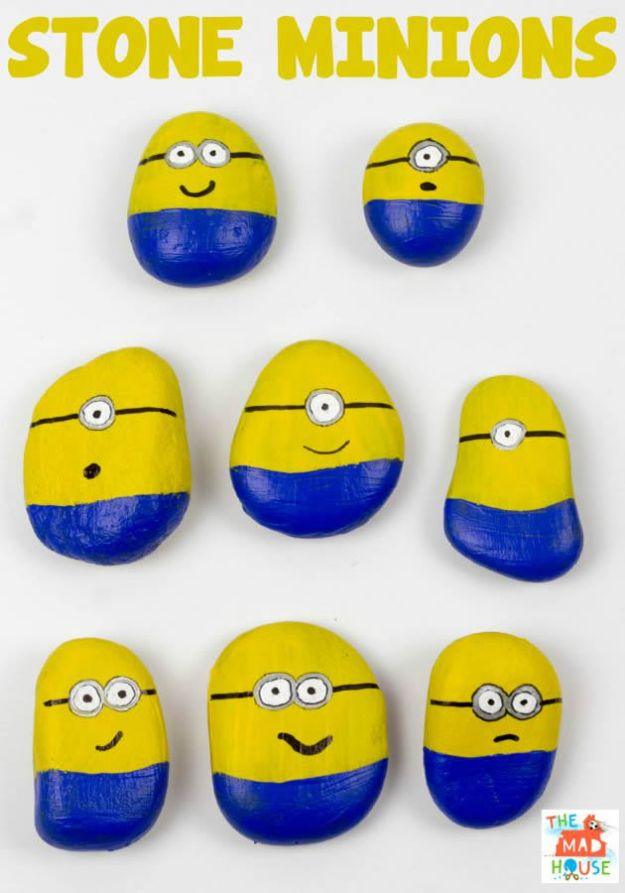
Yellow acrylic, two coats, over a smooth beach or river stone, then the blue overalls across the bottom and the goggles in silver Sharpie with a black fine tip over it. They are unmistakable, they cost nothing, and hunting the right shaped stones is half the activity. Wash the stones first, and be warned that the original maker ran hers through the dishwasher, to her husband’s considerable surprise. Yellow needs the second coat, so this is a craft that fits around a day of going in and out of the house rather than one sitting.
Get the full tutorial at Mum In The Madhouse.
26. Tape Resist Watercolor Painting
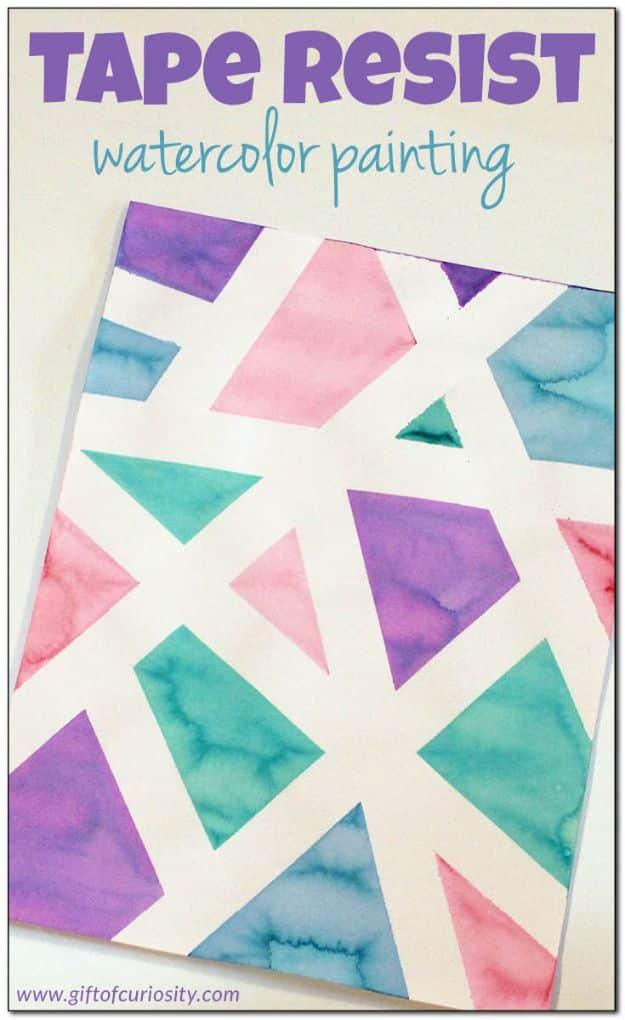
Lay masking tape across the paper in a pattern, paint watercolor over the whole thing, wait for it to dry, then peel the tape off. Underneath are crisp white lines that look completely deliberate, and the peel is the best two seconds of the entire project. This is the trick that turns a four year old’s painting into something you would actually frame, and it works with any color scheme at all. Use low tack tape or press the edges down hard, because paint creeping underneath is the only way this goes wrong.
Get the full tutorial at Gift of Curiosity.
27. Rock Monsters
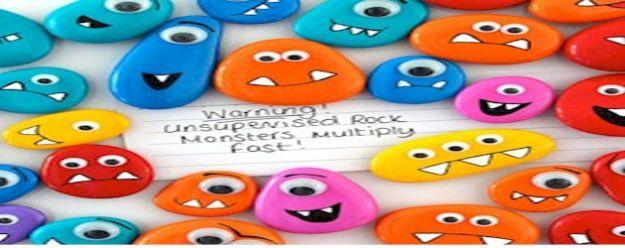
Every child comes home from the beach with pockets full of pebbles, and here is where they go. Two coats of acrylic on each side, then a face drawn with a fine tipped black marker, which is much easier than trying to paint one with a brush. Aim for stones about three to five centimetres across: smaller ones are fiddly, bigger ones are too heavy if you want to glue a magnet on the back. Smooth pale stones take paint best. Every one ends up with a different expression, which is why nobody ever makes just one.
Get the full tutorial at Free Kids Crafts.
28. Altoid Tin Reuse Bug Craft Toy
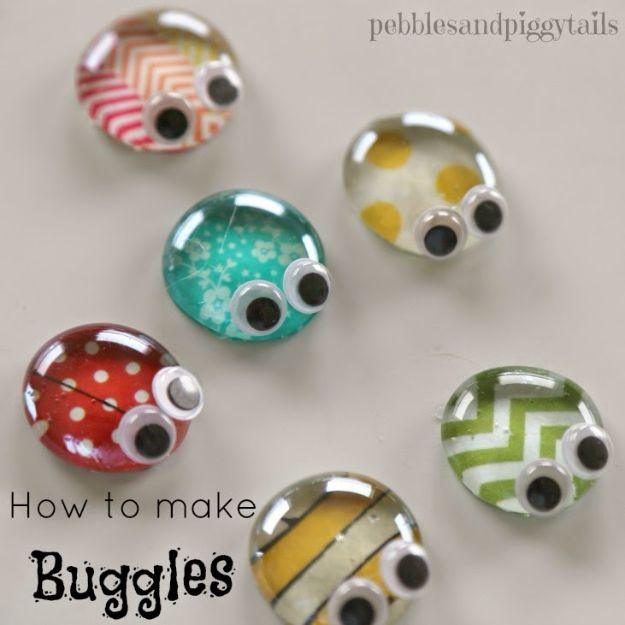
Flat backed clear glass gems, googly eyes and leftover scraps of patterned paper, and each one becomes a tiny creature that fits in a pocket. The Altoid tin is not an afterthought, it is the house: the whole collection lives in it, travels in a handbag and comes out in a waiting room or a restaurant when somebody is about to lose patience. Use a strong clear glue rather than school glue, because a gem will not stay stuck to paper otherwise. Children name them, trade them and lose exactly one per week.
Get the full tutorial at Making Life Blissful.
29. Fun And Easy Leaf People Craft
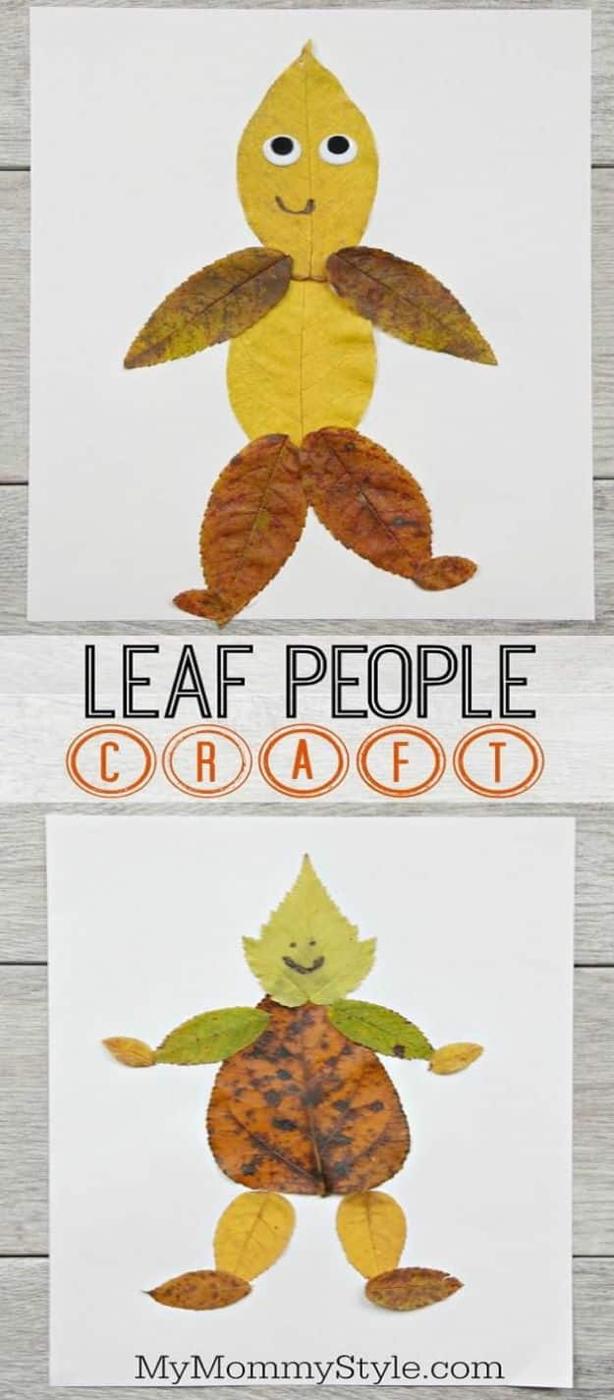
A walk in October with a purpose. Collect leaves in every shape and size you can find, then glue them to paper as bodies, arms, legs and hair, and add googly eyes and a drawn face. There is no correct answer, which is why it works for a very wide age range at the same table. One practical warning: leaves keep drying out after you glue them and will curl away from the paper, so glue them down thoroughly, or laminate the finished picture if you want it to survive until spring.
Get the full tutorial at Camille at My Mommy Style.
30. Painting On Wet Glue
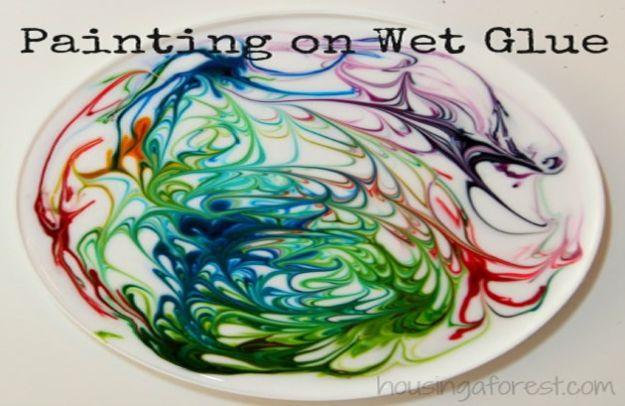
Pour a puddle of white school glue onto a plate or a lid, drop food coloring into it, then drag a toothpick through and watch the colors marble. It dries hard and glossy with real raised texture, which is completely unlike anything else you get out of a paint set. Drying takes a long time, so this is a make-it-and-leave-it project, and everybody will come back to poke it eleven times before it sets. Peel the dry disc off a plastic lid and it hangs in a window as a sun catcher.
Get the full tutorial at Housing a Forest, after Babble Dabble Do.
31. Cereal Box Aquarium Craft
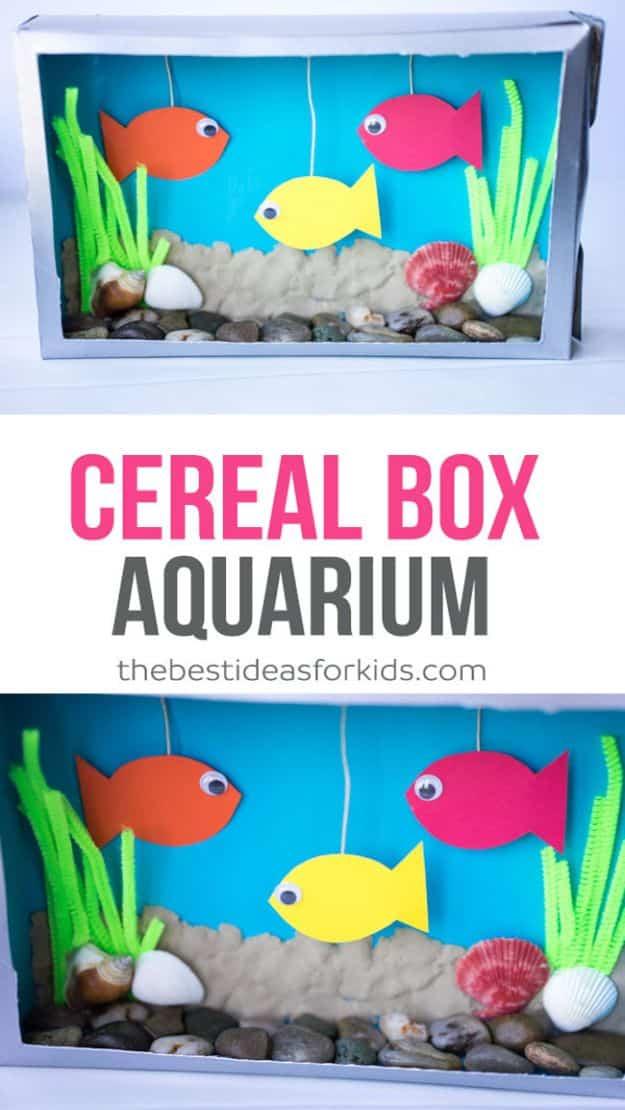
A cereal box laid on its side, cut open at the front, painted blue inside and filled with paper fish on threads, pebbles and a scattering of kinetic sand on the bottom. Arranging the fish takes longer than making them, every time. What makes this one worth the effort over the other cardboard crafts is that it stands up on a shelf afterward and stays there, which very few paper projects manage. An adult handles the craft knife. A free fish template saves the arguments about whether a fish looks like a fish.
Get the full tutorial at Kimberly McLeod at The Best Ideas for Kids.
32. Easy Paper Bunny Craft
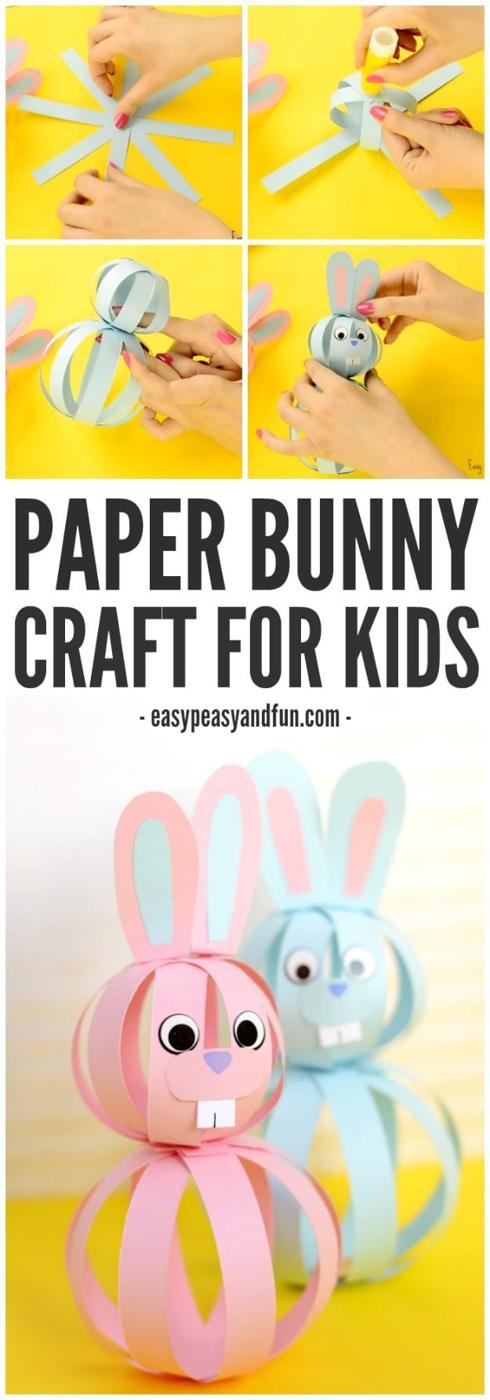
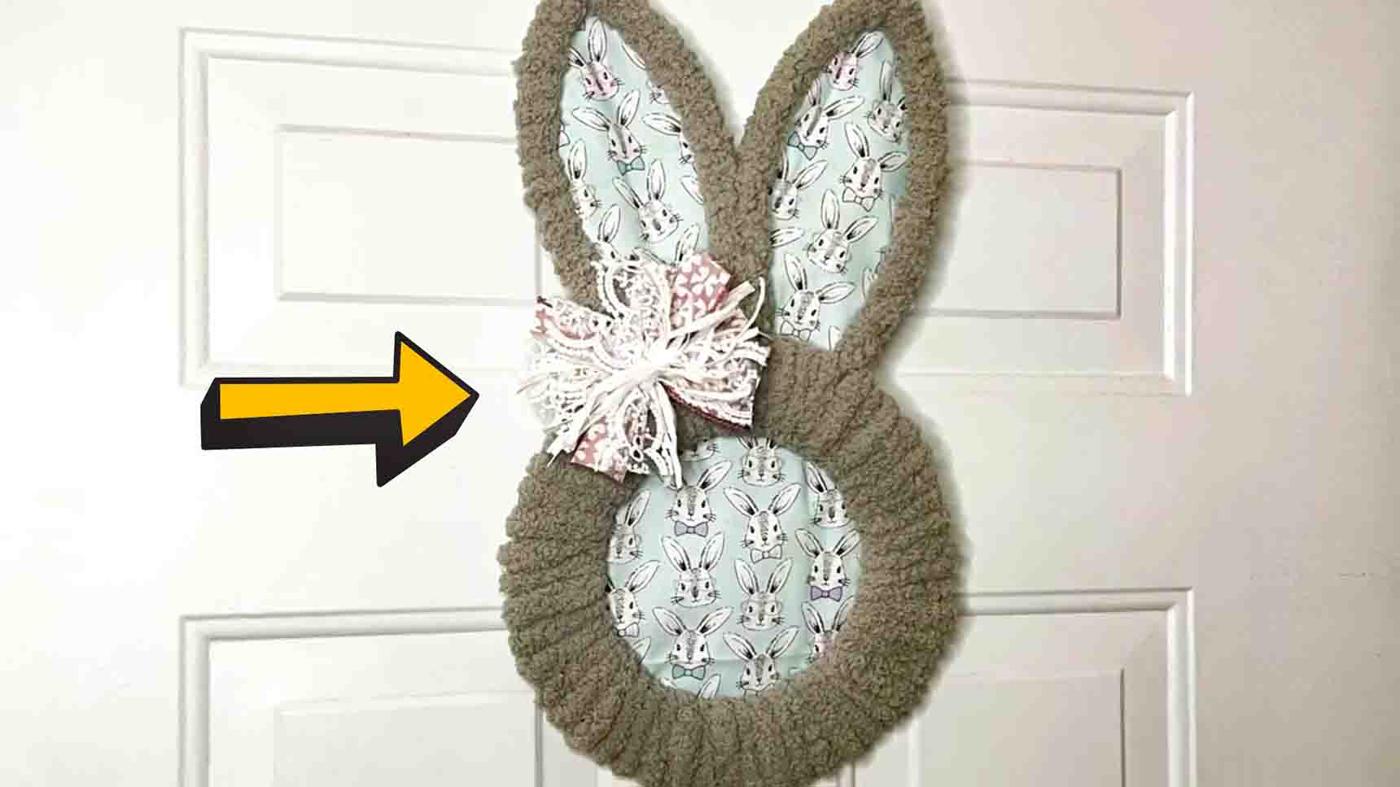
Strips of paper looped into a round body and a head, two long ears, and a bunny appears with almost no cutting at all. Baby blue and baby pink are the Easter version, though it works in any color and any time of year. Make a dozen, hang them along a length of string and you have a garland, which is a very good classroom job. Preschoolers will struggle with the body, so give them the head only and let the older ones handle the loops. It takes about ten minutes once you have done one.
Get the full tutorial at Andreja at Easy Peasy and Fun.
33. Glass Stained Window Ornaments Crafts
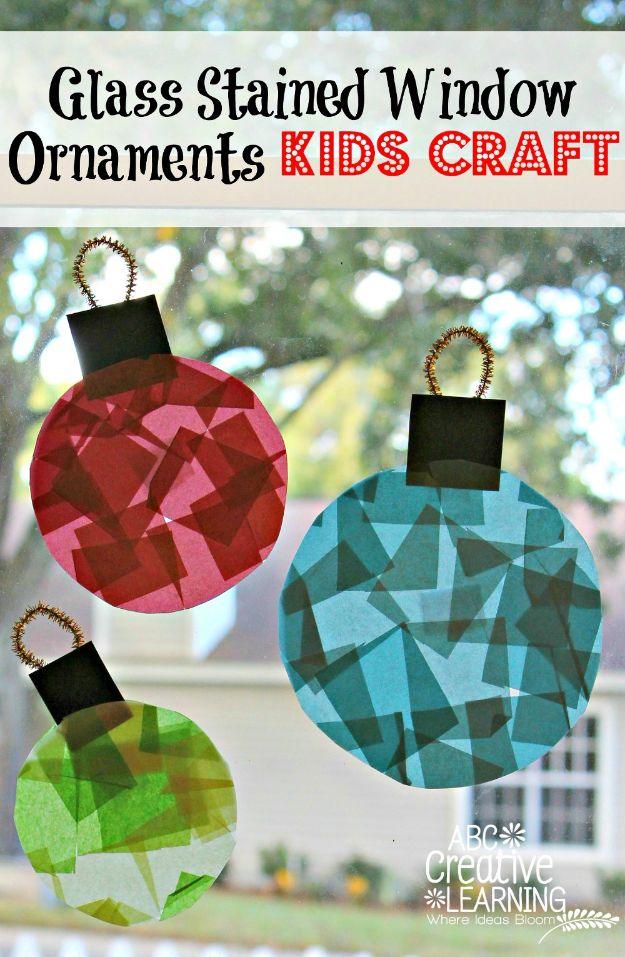
Two squares of clear contact paper, sticky sides facing, with torn tissue paper trapped between them, then a black construction paper frame around the outside to make it read as leaded glass. Stick them on a window and the light comes through properly, which is the whole reward and it never gets old. A gold or silver pipe cleaner bent into a loop turns each one into an ornament. Tearing the tissue rather than cutting it gives better edges, and toddlers can do this one, which is rare for something that looks this good.
Get the full tutorial at Simply Today Life.
34. Blooming Tree Kid's Craft For Tu B'shevat
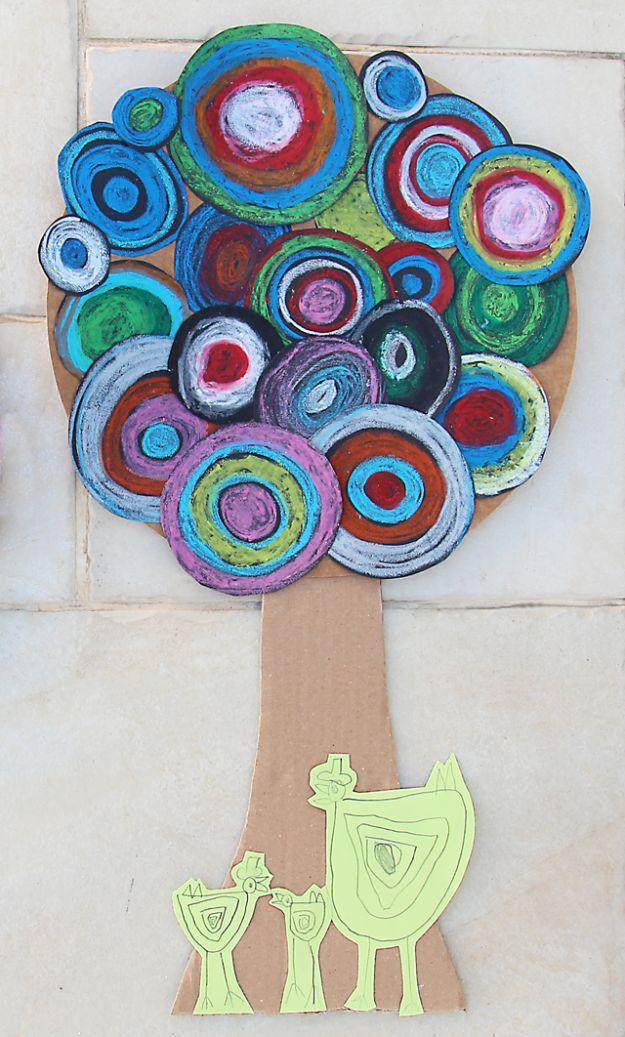
Draw concentric circles in oil pastel on black paper, cut them out, and glue the whole lot onto a round piece of cardboard until it reads as a tree in full blossom. The original used a recycled pizza base sleeve, which is exactly the right thickness and free. A cardboard trunk tapes on behind, and after that it is open season: drawn birds, fruit, houses, or a bare trunk, all of which look right. Add an easel back if the cardboard is stiff enough and it will stand on a shelf instead of needing a hook.
Get the full tutorial at Creative Jewish Mom.
35. Cardboard Tube Elephant Craft
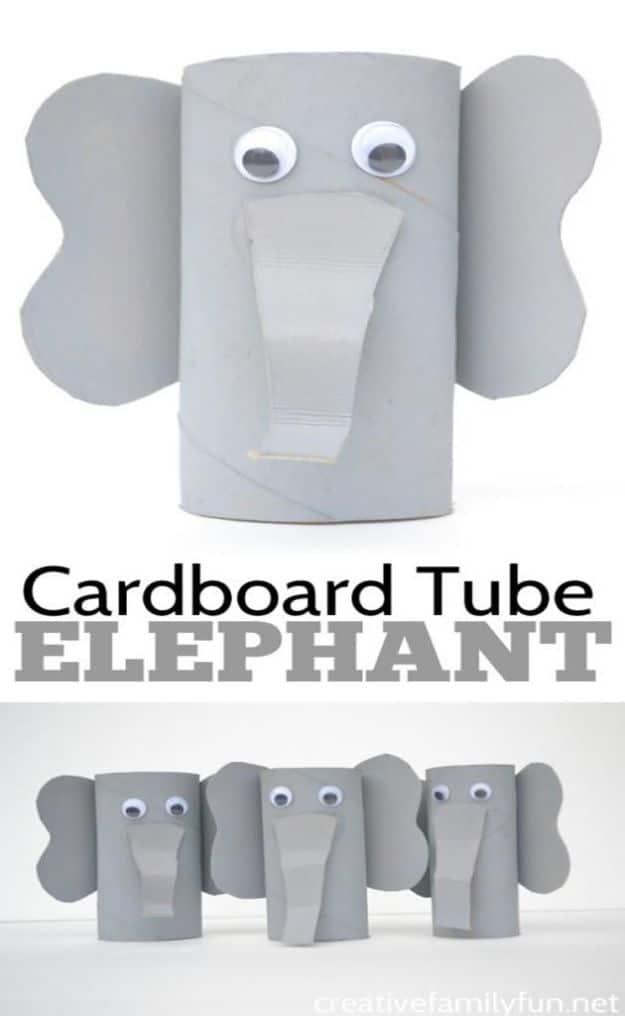
Paint a cardboard tube gray, cut two fat bean shapes for ears and one tapered strip for the trunk from a cereal box, paint those too, then fold the trunk accordion style before gluing it on. That fold is what stops it looking like a gray tube with a flap. Ears go on the back so the gray side faces forward, trunk goes high enough that its end sits level with the bottom of the tube, eyes above. They multiply. One elephant becomes a herd on the windowsill before dinner.
Get the full tutorial at Creative Family Fun.
36. Trolls Poppy Popsicle Stick Craft
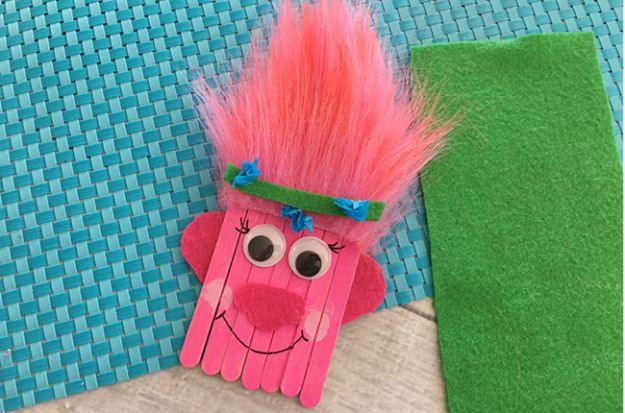
Seven popsicle sticks glued vertically across two half sticks laid an inch and a half apart, painted pink, and that flat panel is the face. Pink felt makes the ears and the nose, googly eyes go above, and the hair is a strip of faux fur an inch wider than the panel and four to five inches tall, glued along the top and folded to a point. A green felt headband with blue flowers finishes her. The hair is the whole personality of this thing, so do not be tempted to trim it neatly.
Get the full tutorial at Craft Create Cook.
37. Blow Painting Fun Art With A Straw
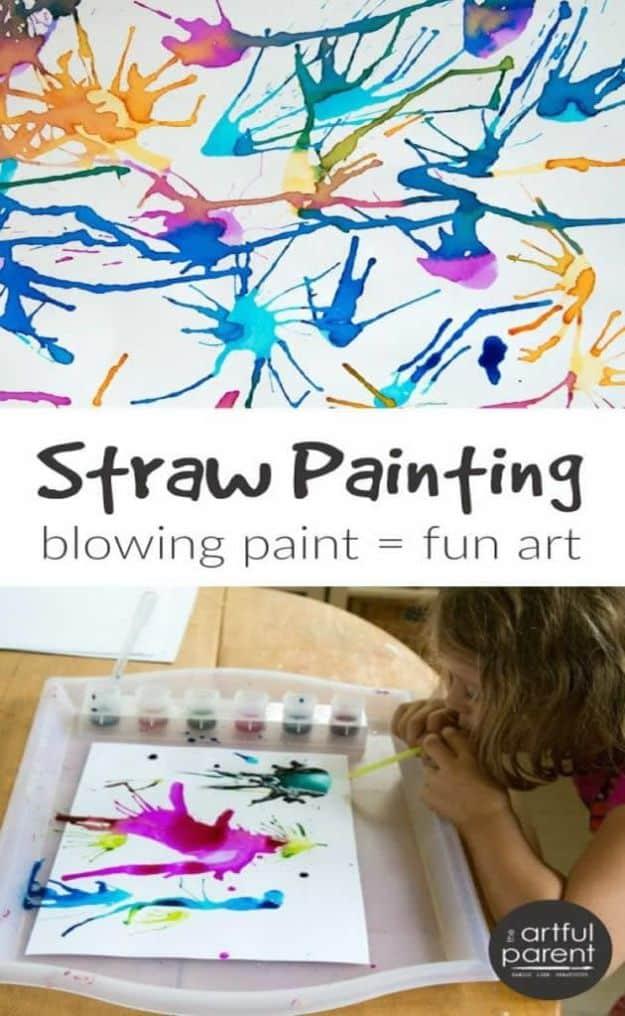
Put a blob of runny paint on the paper, aim a straw at it and blow. The paint skitters off in branching lines that nobody could draw deliberately, and every single sheet is different. Thin the paint with water until it moves easily, because thick paint just sits there and disappoints everyone. Blowing hard makes small children light headed, so take breaks and make it a game of how many blobs each. The results genuinely look like fireworks, and this one is repeatable without ever getting boring.
Get the full tutorial at The Artful Age, formerly The Artful Parent.
38. Eggheads Cress Hair
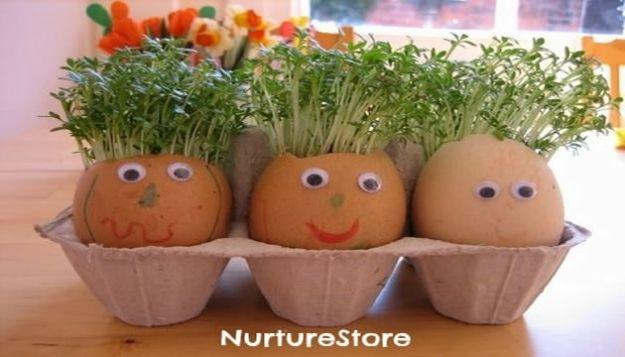
Crack the top off an egg neatly rather than the side, wash the shell, and you have a little pot with a face waiting to be drawn on it. Damp cotton balls inside, a generous sprinkle of cress seed on top, and a windowsill. Five or six days later it has a full head of green hair, which means starting it the weekend before Easter gets you there exactly. No cress in the shops? Grass seed, alfalfa and chia all work. Half the pleasure is the daily inspection, and the haircut afterward is edible.
Get the full tutorial at NurtureStore.
39. Tie Dye T-shirt Bag
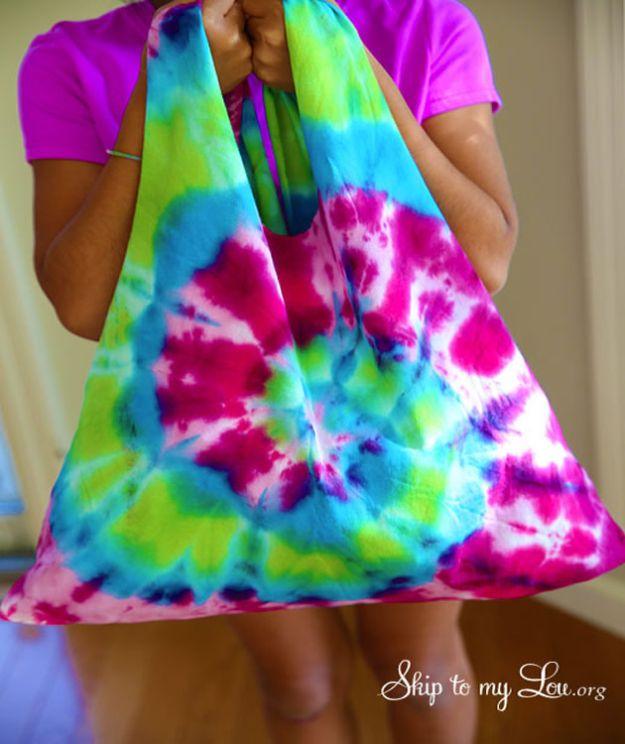
Tie dye a plain cotton t-shirt, then cut it down and sew it into a bag that a child will actually carry to the pool all summer. A one step kit is the way to do this at home, because it comes with the dye, the bottles, the bands and the gloves, and skips the soda ash and soaking that the serious kits need. Prewash the shirt if you can stand the delay. The sewing is a matter of minutes, which is the surprise here: the dyeing is the long part and the bag is the quick part.
Get the full tutorial at Skip To My Lou.