
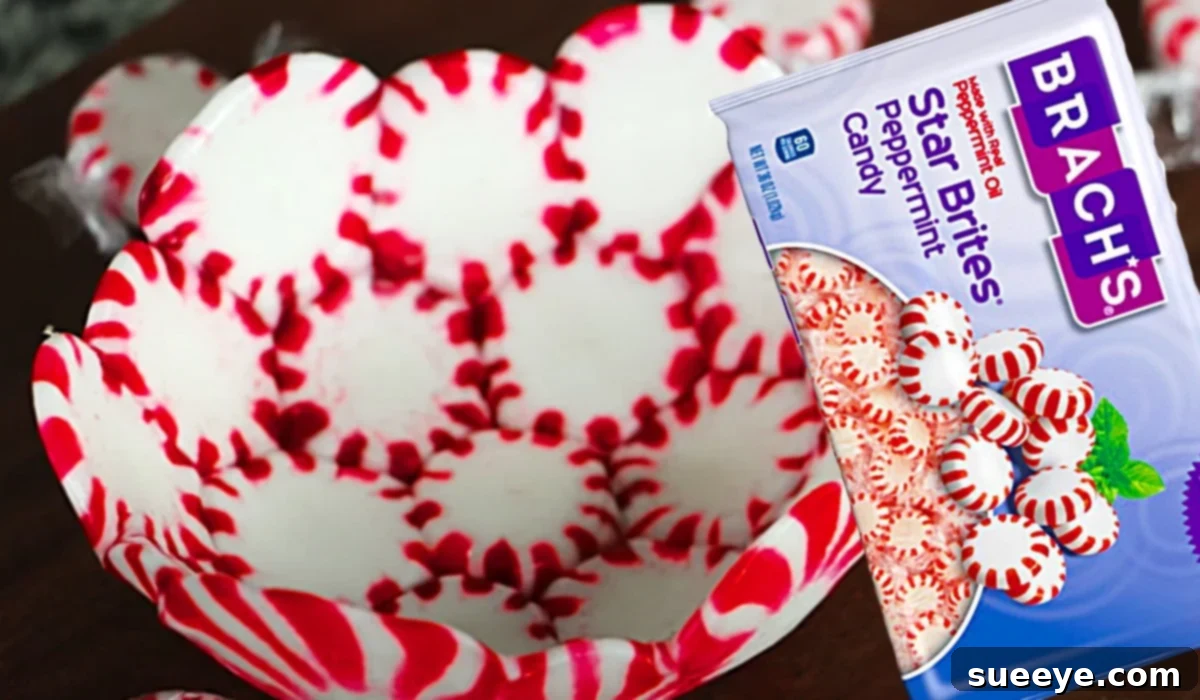
Craft Irresistible DIY Peppermint Bowls: Your Ultimate Guide to Festive Holiday Decor and Gifting
The holiday season sparkles with opportunities for creativity, warmth, and heartfelt gestures. Among the myriad of festive crafts, the DIY peppermint bowl stands out as a truly enchanting and versatile project. Imagine a beautiful, edible bowl, shimmering with the vibrant red and white swirls of classic peppermint candy, ready to hold your favorite holiday treats or serve as a unique decorative accent. I recently stumbled upon a delightful video tutorial by Baby Gizmo on YouTube, showcasing just how simple it is to create these stunning candy bowls. Instantly, I knew these charming creations would be the perfect addition to my holiday decor and would make incredibly thoughtful, personalized gifts for friends, family, and loved ones. These peppermint bowls aren’t just pretty; they’re incredibly functional and add a magical touch to any festive celebration.
Why Craft DIY Peppermint Bowls for the Holidays?
Beyond their undeniable charm, making your own peppermint bowls offers a host of benefits that perfectly align with the spirit of the season. Firstly, they are wonderfully cost-effective. A bag of peppermints is relatively inexpensive, allowing you to create multiple bowls without breaking the bank, especially when compared to store-bought holiday decor or gifts. Secondly, crafting these bowls is a fantastic activity for all ages. It’s simple enough for children to participate with adult supervision, fostering creativity and a sense of accomplishment. Imagine the joy of making something beautiful and unique with your family!
Moreover, homemade gifts carry a special sentiment. A peppermint bowl, filled with homemade cookies, fudge, or candies, and lovingly wrapped, communicates a level of care and personal effort that a mass-produced item simply cannot. It’s a gift that says, “I made this just for you.” As decorative pieces, they bring a whimsical and festive atmosphere to any room. Placed as a centerpiece on a dining table, a candy dish on a coffee table, or even as an accent on a mantelpiece, their vibrant colors and classic scent evoke immediate holiday cheer. They are not just decor; they are conversation starters and memory makers, embodying the joy and generosity of the Christmas season.
Gather Your Essentials: Materials for Perfect Peppermint Bowls
The beauty of this DIY project lies in its simplicity and the minimal number of materials required. Before you begin your peppermint bowl adventure, ensure you have these key items on hand:
-
A Bag of Peppermints: The Star of the Show
You’ll need a generous supply of individually wrapped peppermints. Standard, round peppermints work best for achieving the classic swirled pattern. The quantity will depend on the desired size and number of bowls you plan to make. For a single medium-sized bowl (approximately 6-8 inches in diameter), you might need 50-70 peppermints. Ensure they are fresh and not sticky, as this can affect their melting consistency. -
A Glass or Metal Bowl: Your Shaping Template
This will serve as the mold for your peppermint creation. Choose a heat-safe glass or metal bowl with the desired shape and size for your finished candy dish. A smooth, gently curved bowl works best for easy removal. Ensure the bowl is clean and completely dry before use. You’ll be draping the melted peppermints over the *outside* of this bowl, so its exterior shape is what matters most. -
A Baking Sheet: The Foundation for Melting
Any standard baking sheet will do. It needs to be large enough to accommodate your peppermint circle comfortably without crowding. A sturdy baking sheet will ensure even heat distribution and prevent warping during the baking process. -
Parchment Paper: Non-Stick Magic
This is crucial for preventing the melting peppermints from sticking to your baking sheet. Use good quality parchment paper that can withstand oven temperatures. Do not substitute with wax paper, as it is not oven-safe and can melt, creating a mess and potentially ruining your project. -
Optional Tools: Spatula, Oven Mitts, and Kitchen Timer
While not strictly essential, a sturdy spatula or turner can be helpful for gently lifting the melted peppermints. Oven mitts are a must for safety when handling hot baking sheets and bowls. A kitchen timer will help you keep track of baking times, ensuring your peppermints melt just right.
Step-by-Step Guide: Crafting Your Festive Peppermint Bowls
With your materials ready, let’s dive into the simple yet magical process of transforming ordinary peppermints into extraordinary candy bowls. Following Baby Gizmo’s tutorial, this process is straightforward and incredibly rewarding.
Step 1: Preparation is Key
Begin by preheating your oven to 350°F (175°C). While the oven heats, line your baking sheet with a sheet of parchment paper, ensuring it covers the entire surface. This non-stick barrier is absolutely critical for the success of your peppermint bowl. Next, unwrap your peppermints. This might seem tedious, but it’s part of the mindful, enjoyable process. Ensure all wrappers are completely removed and discard them.
Step 2: Arranging Your Peppermint Masterpiece
On the parchment-lined baking sheet, arrange your unwrapped peppermints in a single layer to form a circle. You can create a simple, tightly packed circle, or get creative with a spiraling pattern, or even overlap them slightly for a more organic look. The size of this circle will dictate the final size of your peppermint bowl. Keep in mind that the peppermints will spread slightly as they melt, so leave a small margin from the edges of the parchment paper. For a seamless bowl, ensure there are no large gaps between the candies. A good technique is to start with a central peppermint and build outwards in concentric circles until you reach your desired diameter.
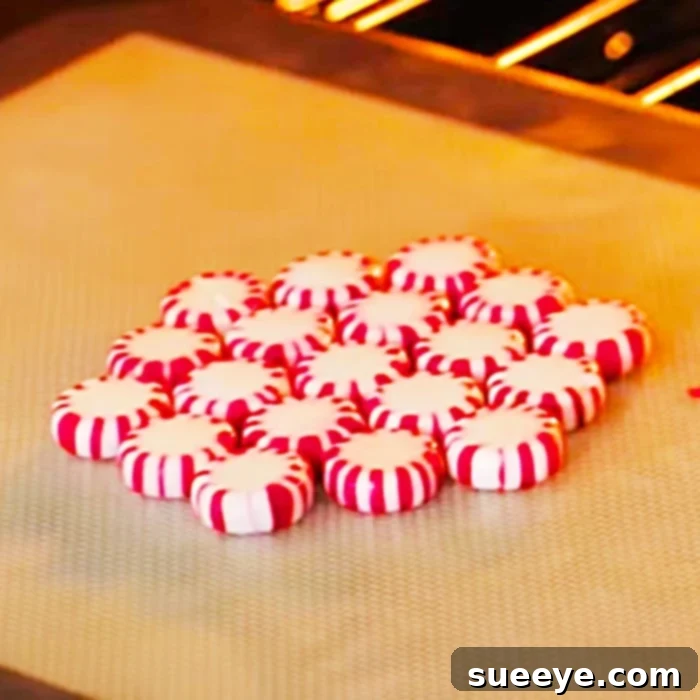
Step 3: The Melting Magic in the Oven
Carefully transfer your baking sheet with the peppermint circle into the preheated oven. Bake the peppermints for approximately 5-8 minutes. Keep a close eye on them! The exact baking time can vary depending on your oven and the thickness of your peppermint layer. You want the peppermints to melt just enough so that they fuse together and become pliable, but not so much that they spread excessively thin or begin to caramelize and turn brown. They should look glossy and slightly bubbly, forming a cohesive, translucent sheet of candy. As soon as you see them fully melted and fused, it’s time for the next crucial step.
Step 4: Shaping Your Peppermint Bowl
This step requires quick and careful action. With oven mitts on, remove the baking sheet from the oven. Immediately, while the candy sheet is still warm and pliable, gently lift the parchment paper with the melted peppermints and carefully drape it over the outside of your chosen glass or metal bowl (which should be inverted, bottom-side up, on a clean surface). Smooth the melted candy gently around the curves of the bowl using the parchment paper as a barrier to protect your hands from the heat. Work quickly but carefully to avoid tearing the candy. You can gently press the edges down to form a lip if desired. The warmth of the candy will allow it to conform beautifully to the shape of the bowl.
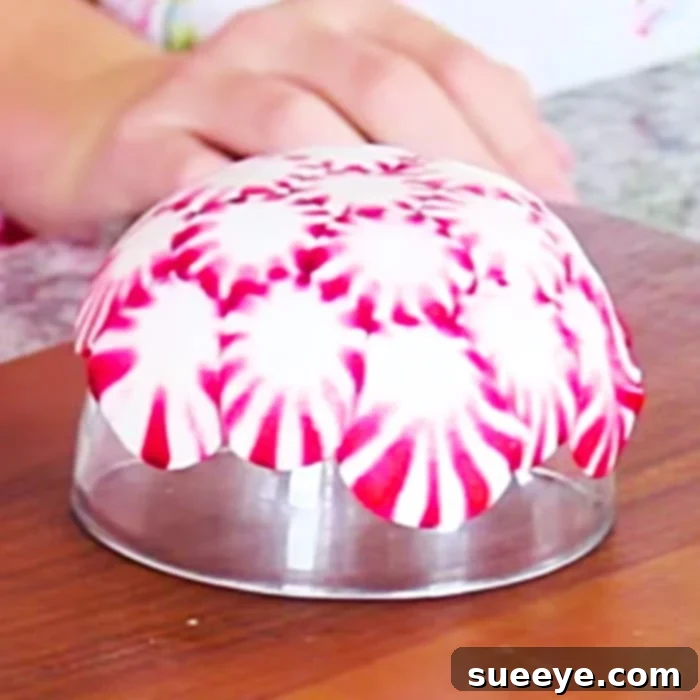
Step 5: The Cooling Process and Finishing Touches
Once your peppermint candy is shaped over the bowl, allow it to cool completely. This usually takes about 15-30 minutes at room temperature, or you can speed up the process by placing it in the refrigerator for 10-15 minutes. As the candy cools, it will harden and retain the bowl’s shape. Once completely cool and firm, gently peel the parchment paper away from the peppermint bowl. If you used a glass bowl, the candy should separate easily. You now have a beautiful, edible peppermint bowl ready for decoration, filling, or gift wrapping! Handle your finished bowl with care, as it is made of candy and can be fragile.
Creative Uses and Gifting Ideas for Your Homemade Peppermint Bowls
The versatility of these DIY peppermint bowls is truly remarkable. Once crafted, they open up a world of possibilities for adding festive charm to your home or creating memorable holiday gifts.
Festive Home Decor
These bowls are naturally striking and bring an immediate sense of holiday cheer. Use them as:
-
Centerpieces: Fill a large peppermint bowl with pinecones, small ornaments, or a collection of red and white candies for a stunning festive centerpiece on your dining table or coffee table.
-
Candy Dishes: The most obvious and delightful use! Keep them on your entryway table, living room, or kitchen island, brimming with various candies like M&Ms, jelly beans, gumdrops, or even more peppermints. Guests will marvel at their edible nature!
-
Cookie Holders: Display a small batch of your favorite holiday cookies, such as gingerbread men, sugar cookies, or shortbread, in a peppermint bowl for an extra special touch.
-
Votive Candle Holders: For a purely decorative (and non-edible) use, place a small LED votive candle inside for a soft, festive glow. Do not use real flame candles, as the heat will melt the candy.
Thoughtful, Edible Gifts
Peppermint bowls make truly unique and heartwarming gifts. The personal touch of a homemade gift, combined with the delightful contents, is sure to be cherished. Here are some ideas for filling and packaging:
-
Sweet Treats Extravaganza: Fill the bowl with an assortment of homemade goodies like chocolate truffles, peanut brittle, fudge, or a mix of store-bought gourmet candies. This is an excellent way to showcase your baking skills alongside your crafting prowess.
-
Hot Cocoa Kit: Line the bowl with a small piece of cellophane, then fill it with hot cocoa mix, mini marshmallows, chocolate chips, and perhaps a small candy cane stirrer. Perfect for a cozy winter evening!
-
Nut Mix: For those who prefer a savory option, a selection of candied nuts or a festive spiced nut mix would be a delightful surprise.
-
Presentation is Key: Once filled, wrap the entire peppermint bowl in clear cellophane or a food-safe plastic bag. Secure it at the top with a beautiful festive ribbon, a personalized gift tag, and perhaps a sprig of evergreen or holly. This not only makes the gift look exquisite but also protects the candy bowl from humidity and dust.
-
Hostess Gifts: Heading to a holiday party? A homemade peppermint bowl filled with treats is an unforgettable hostess gift, guaranteed to impress.
Expert Tips for Crafting Perfect Peppermint Bowls
While the process is simple, a few expert tips can ensure your peppermint bowls turn out perfectly every time:
-
Temperature Control is Crucial: Ovens can vary. Watch your peppermints closely. They should be just melted and pliable, not burnt or overly thin. If they melt too much, they might become brittle. If not enough, they won’t fuse properly.
-
Patience is a Virtue (for Cooling): Do not rush the cooling process. If you try to remove the candy bowl from the mold before it’s completely hardened, it might crack or lose its shape. Let it cool fully, either at room temperature or in the refrigerator.
-
Peppermint Quality Matters: While most standard peppermints will work, using good quality, fresh candies can result in a more vibrant color and a smoother melt. Avoid older peppermints that might have become sticky or discolored.
-
Handling While Warm: The melted candy is hot! Always use oven mitts when handling the baking sheet and when shaping the candy over the mold. The parchment paper acts as a good buffer, but direct contact can cause burns.
-
Storage Solutions: To keep your peppermint bowls fresh and firm, store them in an airtight container at room temperature. Avoid direct sunlight or high humidity, as both can cause the candy to become sticky or melt. They generally last for several weeks if stored properly.
-
Experiment with Shapes: Don’t limit yourself to just round bowls. You can use different shaped oven-safe bowls (e.g., square, oval) to create unique candy dishes. Just ensure the external surface is smooth for easy candy removal.
Troubleshooting Common Peppermint Bowl Issues
Even with simple crafts, sometimes things don’t go exactly as planned. Here are solutions to common issues you might encounter:
-
Why is my bowl sticky? This usually happens due to humidity in the air. Peppermint candy is hygroscopic, meaning it absorbs moisture. To prevent this, work in a dry environment and store your finished bowls in an airtight container as soon as they are cool. If already sticky, you can try lightly dusting with cornstarch, but prevention is best.
-
My bowl broke when I removed it! This could be due to several reasons: not letting it cool completely, or the candy being too thin from over-baking. Ensure the candy is fully hardened before attempting to remove it. If it was too thin, next time reduce baking time slightly or ensure your peppermint arrangement is denser.
-
The peppermints aren’t melting evenly. This can be caused by an uneven oven temperature or inconsistent spacing of peppermints on the baking sheet. Try rotating the baking sheet halfway through baking. Ensure your peppermints are arranged in a single, relatively even layer without large gaps or thick clusters.
-
The candy stuck to my mold bowl. Always use parchment paper between the melted candy and the shaping bowl. If you skipped this step or the parchment tore, the candy might adhere. If it does, try carefully prying it with a thin, dull knife or warming it slightly (very gently) to loosen, but be cautious not to melt it completely.
Embrace the Holiday Spirit with DIY Peppermint Bowls!
Creating DIY peppermint bowls is more than just a craft; it’s an experience that adds magic, flavor, and a personal touch to your holiday celebrations. Whether you’re making them to adorn your festive table, to package as heartfelt gifts, or simply for the pure joy of crafting, these beautiful candy dishes are sure to impress. With a few simple ingredients and a dash of creativity, you can transform ordinary peppermints into extraordinary holiday treasures. So, gather your supplies, put on some cheerful holiday music, and get ready to craft some truly memorable and delicious peppermint bowls. Happy crafting and happy holidays!