
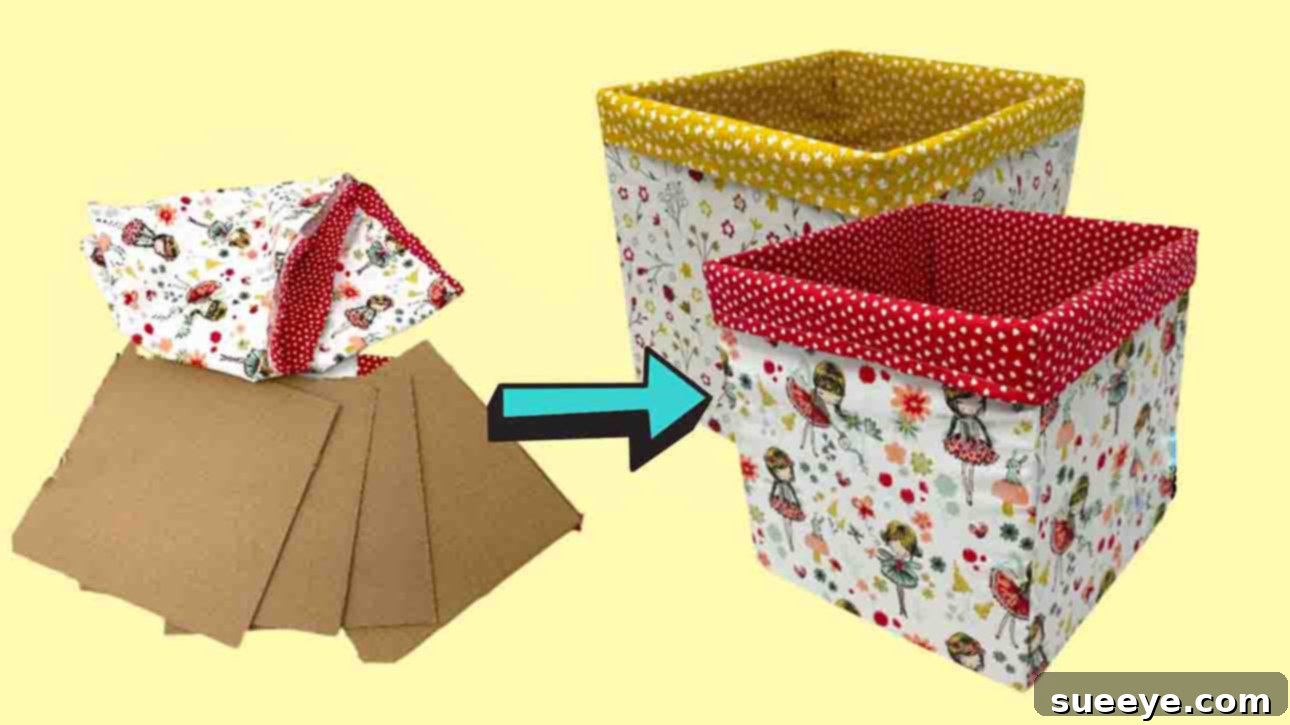
Are you envisioning a more organized and aesthetically pleasing home without breaking the bank? This comprehensive guide will empower you to create your very own DIY washable fabric storage boxes. Not only is this project incredibly rewarding and beginner-friendly, but it also provides a fantastic opportunity to repurpose spare fabrics and cardboard, contributing to a sustainable lifestyle while saving you money. Imagine beautifully organized spaces with bins that perfectly complement your decor, all crafted by your own hands. Get ready to transform your living areas with these versatile, durable, and easy-to-maintain storage solutions. Follow this detailed tutorial, inspired by the creative insights from Sewing Craft DIY on Youtube, and embark on your journey to a tidier, more stylish home today.
Easy DIY Washable Storage Box Tutorial: Craft Your Own Fabric Bins for Home Organization
Creating custom storage solutions for your home doesn’t have to be a daunting or expensive task. With this easy-to-follow DIY washable storage box tutorial, you can craft attractive and robust fabric bins perfect for any room. Whether you’re looking to declutter a bustling craft room, organize children’s toys, or simply bring a sense of order and elegance to your living space, these fabric boxes are an ideal choice. Their standout feature? They are fully washable, ensuring long-lasting cleanliness and functionality, making them perfect for high-traffic areas or items that tend to get dusty. Let’s gather our supplies and dive into this exciting and practical sewing adventure!
The Benefits of Crafting Your Own Fabric Storage Boxes
Opting for DIY storage solutions, especially these washable fabric boxes, comes with a multitude of advantages that go beyond simple organization.
- Exceptional Cost Savings: Say goodbye to expensive store-bought bins. By utilizing fabric scraps, old textiles, and readily available cardboard, you can significantly reduce expenses, making stylish organization accessible on any budget.
- Sustainable and Eco-Friendly: Embrace the power of upcycling! This project is a fantastic way to give new life to discarded fabrics and cardboard, minimizing waste and promoting a more sustainable approach to home decor and organization.
- Limitless Customization Options: Unlike mass-produced items, your DIY boxes can be tailored to your exact aesthetic. Choose fabrics that perfectly match your existing decor, personal style, or specific room themes, allowing for truly unique and personalized storage.
- Designed for Durability and Easy Maintenance: Crafted with sturdy fabrics and removable cardboard inserts, these boxes are built to last. The washable design ensures they can be easily cleaned, maintaining hygiene and freshness, which is particularly beneficial for kids’ playrooms or craft storage.
- Perfect for Sewing Beginners: This tutorial is specifically designed with simplicity in mind, offering clear, step-by-step instructions that make it an excellent project for those new to sewing. Build your skills while creating something genuinely useful!
- Incredibly Versatile for Any Space: From organizing clothing, blankets, and linens in bedrooms to tidying up toys in playrooms, storing books on shelves, or containing craft supplies and office essentials, these bins adapt to virtually any organizational need throughout your home.
Essential Materials You’ll Need:
Preparation is key to a smooth crafting experience. Gather all your materials before you begin, ensuring you have everything at hand for a seamless project. The beauty of this DIY lies in its accessibility, utilizing common household items and basic sewing supplies.
- Two Different Fabrics (of your choice): Select medium to heavy-weight, washable fabrics for optimal durability and structure, such as cotton canvas, duck cloth, denim, or even sturdy quilting cotton. You’ll need one fabric for the visible exterior of the box and another for the interior lining. Consider how patterns and colors will complement each other and your home decor.
- Sturdy Cardboard: High-quality corrugated cardboard is essential for the structure. Repurpose old shipping boxes or purchase new cardboard sheets. You will need enough to cut five precise square pieces for the sides and bottom of your storage box. The thickness of the cardboard will influence the rigidity of your finished box.
- Fabric Clips or Sewing Pins: These are indispensable for holding fabric pieces together securely while you’re sewing. Fabric clips are often preferred for thicker fabrics as they grip firmly without creating holes, unlike pins.
- Sharp Fabric Scissors or Rotary Cutter: For clean, accurate cuts, invest in good quality fabric scissors or a rotary cutter. If using a rotary cutter, ensure you also have a self-healing mat and a clear ruler for precise straight lines, which can significantly speed up the cutting process.
- Sewing Machine: A standard home sewing machine will be perfectly capable of handling this project. Ensure it’s in good working order, properly threaded, and has a fresh needle suitable for the fabric weight you’re using.
- All-Purpose Polyester Thread: Choose a high-quality thread that closely matches your main outer fabric color for a professional and seamless finish. Polyester thread is strong and durable, ideal for a washable item.
- Measuring Tape or Long Ruler: Accuracy in measurements is paramount in sewing. A flexible measuring tape or a rigid ruler (preferably both) will ensure your fabric pieces are cut to the exact dimensions needed.
- Iron and Ironing Board: Often overlooked, ironing is a critical step in sewing. Pressing seams and creating crisp folds will dramatically improve the neatness and professional appearance of your finished storage box.
- Hot Glue Gun and Glue Sticks (Optional): This is an optional tool for attaching the fabric cover to the bottom cardboard piece, providing a neat, finished look to the interior bottom. Fabric glue can also be used as an alternative.
Step-by-Step Guide to Crafting Your Washable Storage Box:
Follow these detailed instructions carefully to construct a durable and stylish washable storage box. Precision in each step will ensure a beautiful and functional end product.
Step 1: Preparing and Sewing the Fabric Components
The foundation of your storage box relies on accurate fabric preparation and meticulous sewing. Take your time with these initial steps to ensure a professional and sturdy finish.
- Measure and Precisely Cut Your Fabrics:
- For the lining fabric (which will form the inner structure and pockets for the cardboard sides), cut one rectangular piece measuring approximately 33 ½ inches (86.5 cm) in length by 10 7/8 inches (29 cm) in width.
- For the outside fabric (the visible exterior of your box), cut one rectangular piece measuring approximately 33 ½ inches (86.5 cm) in length by 10 ¼ inches (26 cm) in width.
Pro Tip: Use a rotary cutter and mat for the most accurate and straight cuts, especially important when dealing with longer fabric pieces. Always double-check your measurements before cutting.
- Mark the Lining Fabric for Cardboard Pockets:
- Lay your lining fabric piece flat on your work surface, wrong side facing up.
- Starting from one of the shorter ends, measure and mark lines across the width of the fabric. These lines will create the individual pockets for your cardboard inserts.
- The first section should measure 8 ½ inches (22.5 cm) from the edge. Draw a clear line across the fabric.
- The next two sections should each measure 8 ¼ inches (22 cm). Draw lines for these sections.
- The final section will naturally measure 8 ½ inches (22.5 cm) to the opposite short end.
- These four lines are critical guides for your internal sewing, defining where the cardboard walls will sit.
- Create Fabric Tubes for the Box Body:
- Take both your lining fabric piece and your outside fabric piece. Fold each fabric piece in half lengthwise, ensuring the wrong sides of the fabric are facing outwards (right sides together).
- Carefully align the raw long edges of each folded fabric piece. Secure them with pins or fabric clips along the entire length.
- Using your sewing machine, sew down this long raw edge on both fabric pieces with a consistent 3/8 inch (1 cm) seam allowance. This will form two distinct fabric tubes.
- Press the seams open on both tubes to reduce bulk and create a smoother, flatter finish.
- Hem the Top Edges for a Clean Finish:
- For each of the fabric tubes you’ve just created, turn down the top raw edge towards the wrong side by approximately 3/8 inch (1 cm) and press firmly with an iron.
- Fold it over again by another 3/8 inch (1 cm) to create a clean, double-folded hem. Press again.
- Secure these hems with clips or pins.
- Stitch all the way around the top edge of each fabric tube to secure the hem in place. This step creates a neat and durable finished top edge for your storage box.
- Assemble the Fabric Box Body and Create Pockets:
- Turn the outer fabric tube right side out.
- Keep the lining fabric tube wrong side out.
- Carefully slide the wrong-side-out lining fabric tube inside the right-side-out outer fabric tube. Their wrong sides should now be facing each other.
- Align the side seams of both tubes perfectly. Also, ensure the bottom raw edges are matched up. You’ll notice the lining fabric’s top hem might be slightly longer, which is intentional for securing the cardboard later.
- Now, carefully sew along the first line you marked on the lining fabric earlier. Make sure you are sewing through both layers of fabric (the outer and the lining). This creates the first pocket division.
- Repeat this process, sewing along the next two marked lines. You should now have four distinct fabric sections, forming the “pockets” that will hold your cardboard side walls. This step is crucial for defining the structure and rigidity of your box.
- At this stage, you will have four open vertical sides, with four distinct corner seams ready for the bottom attachment.
- Prepare the Bottom Fabric Piece:
- From your outer fabric, cut one perfect square piece measuring 8 ¾ inches (22.5 cm) by 8 ¾ inches (22.5 cm). This fabric square will form the bottom of your storage box.
- Attach the Fabric Bottom to the Box Body:
- With your main fabric box body (the four open vertical sides) still configured with wrong sides together, take one of the bottom corners.
- Take your 8 ¾-inch square bottom fabric piece. Align one edge of this bottom square with one of the bottom raw edges of your box body, ensuring the right sides of the fabric are facing each other.
- Clip or pin the bottom square to the raw edges of both the outer and lining fabrics of your box body at once. You are essentially attaching one side of the bottom square to one of the four bottom edges of your box.
- Sew with a precise 3/8 inch (1 cm) seam allowance, starting from one corner and sewing until you reach the next corner line/point of the box body.
- Carefully pivot your fabric at each corner and continue this process for all four sides, attaching the square bottom to each of the four vertical fabric panels.
- Once all four sides are sewn, finish the raw edges of the bottom seams to prevent fraying and enhance durability. A zigzag stitch or a serger stitch all around these raw edges is highly recommended.
Step 2: Inserting Cardboard and Completing Your Storage Box
With your fabric body beautifully sewn, it’s time to give your storage box its sturdy, defined shape using cardboard inserts. This final step brings your handmade creation to life, transforming soft fabric into a functional organizer!
- Cut Your Cardboard Pieces Accurately:
- From your chosen sturdy cardboard, carefully cut five identical square pieces. Each piece should measure precisely 8 inches (20.5 cm) by 8 inches (20.5 cm).
- You will use four of these pieces for the side walls of your box and one for the bottom insert. Ensure your cuts are clean and straight for a snug, professional fit within the fabric pockets.
- Insert the Side Cardboard Panels:
- Take your beautifully sewn fabric box body. Carefully slide one of the 8″x8″ (20.5×20.5cm) cardboard squares into each of the four vertical fabric pockets you created in Step 1.
- Gently push each cardboard piece all the way down until it rests firmly at the bottom of its respective pocket. The fabric should envelop the cardboard snugly, creating firm, upright walls.
- Secure the Top Edges of the Box:
- Once all four side cardboard pieces are securely in place, you’ll notice the slightly longer lining fabric hem (from Step 1, part 5) extending above the top edge of the cardboard.
- Fold this excess lining fabric neatly over the top edge of each cardboard piece and press it down firmly. This action creates a clean, finished top edge for your box and helps to secure the cardboard inserts within their pockets. For extra security and a truly polished look, you can hand-stitch this fold down from the inside, though friction often holds it well.
- Prepare and Insert the Bottom Cardboard Piece:
- You have two excellent options for integrating the fifth cardboard piece into the bottom of your box:
- Option A (Simple & Quick): Simply slide the remaining 8″x8″ (20.5×20.5cm) cardboard piece directly into the bottom of your fabric box. It will rest neatly on the fabric bottom you sewed earlier, providing a firm base.
- Option B (Polished & Fully Finished Look): For an extra touch of elegance and a more durable base, you can cover this fifth cardboard piece with fabric. Cut a piece of your outer fabric measuring 8 ¾ inches (22.5 cm) by 8 ¾ inches (22.5 cm). Center the cardboard piece on the wrong side of this fabric square. Apply hot glue (or fabric glue) to the edges of the cardboard, then neatly fold the fabric edges over the cardboard and secure them. Trim any excess fabric to prevent bulk. Once this fabric-covered cardboard piece is complete, slide it into the bottom of your box.
- Final Shaping and Enjoyment:
- Gently adjust and shape your box, ensuring all cardboard pieces are properly seated and the fabric is taut and smooth around them.
- Your beautifully handcrafted DIY washable storage box is now complete! Step back and admire your new, functional, and stylish addition to your home organization efforts.
Expert Tips for a Successful Project and Professional Finish:
Achieving a professional-looking finish on your DIY storage boxes is easily attainable with a few key techniques and considerations.
- The Power of Pressing: Never underestimate the importance of your iron! Pressing your fabric pieces before cutting ensures accuracy, and pressing seams after each sewing step will create crisp, flat seams, dramatically improving the overall neatness and professional appearance of your finished box.
- Utilize a Walking Foot: If your sewing machine comes equipped with a walking foot attachment (or if you can purchase one), use it! A walking foot helps feed multiple layers of fabric evenly through the machine, which is incredibly beneficial when working with thicker materials and several fabric layers, preventing shifting and puckering.
- Practice Makes Perfect: Especially if you’re new to sewing or working with a new fabric, take a few moments to practice your stitches on fabric scraps. This allows you to check your machine’s tension, stitch length, and ensure everything is running smoothly before you work on your main project.
- Precision in Measuring and Cutting: The success of this project heavily relies on accurate measurements and clean cuts. Even slight discrepancies can affect how well the cardboard fits into the fabric pockets and the overall squareness of your box. Measure twice, cut once!
- Thoughtful Thread Color Selection: While a thread color that perfectly matches your main fabric is ideal for a seamless look, if an exact match isn’t available, choosing a slightly darker shade will often blend in better and be less noticeable than a lighter one.
- Reinforce Stress Points: Always remember to backstitch at the beginning and end of each seam. This simple step locks the stitches in place, preventing them from unraveling, which is crucial for items that will experience regular use and potential stress, like a storage box.
Creative Customization Ideas for Your Fabric Storage Boxes:
Once you’ve mastered the basic construction of this washable fabric box, the possibilities for customization are endless. Unleash your creativity to make each box uniquely yours!
- Varying Sizes for Every Need: Don’t limit yourself to just one size! Adjust the measurements to create a collection of boxes in different dimensions. Small ones are perfect for organizing desk drawers, medium bins fit neatly on shelves, and larger boxes are ideal for laundry, toys, or bulky linens.
- Adding Practical Handles: Enhance the functionality and portability of your boxes by adding handles. You can sew sturdy fabric loops into the side seams, attach elegant leather straps, or install metal grommets with rope handles for a more rustic or modern look.
- Decorative Embellishments: Personalize your boxes with unique decorative elements. Consider adding appliqués of shapes or letters, intricate embroidery, fabric labels for easy identification, contrasting fabric trims, pom-pom fringes, or decorative stitching.
- Integrated Internal Dividers: For larger boxes, sewing in fabric dividers can create multiple compartments, which is excellent for organizing smaller items like socks, underwear, baby clothes, or craft supplies, keeping everything neatly separated.
- Crafting Matching Lids: To keep contents dust-free and out of sight, design a matching fabric lid. You can incorporate a cardboard insert into the lid for rigidity and use simple fabric ties or Velcro to secure it to the box.
- Themed Fabrics for Every Room: Let your fabric choices reflect the personality of each room. Opt for playful, vibrant prints for a child’s playroom, elegant and subtle patterns for a sophisticated living room, or sturdy, utilitarian fabrics for a garage or workshop.
Care and Maintenance for Your Washable Fabric Box:
One of the most appealing features of this DIY project is its washability. To ensure your fabric storage box remains in excellent condition and serves you for years to come, follow these simple care instructions:
- Remove Cardboard Inserts: Before washing, it is absolutely crucial to carefully remove all five cardboard inserts (four from the sides and one from the bottom) from their fabric pockets. Washing cardboard will ruin its structure.
- Machine Wash the Fabric Body: Place the empty fabric body of the box into your washing machine. Wash it in cold water on a gentle cycle, using a mild detergent. Avoid using harsh bleach, which can fade colors and damage the fabric fibers.
- Gentle Air Drying is Best: After washing, reshape the fabric body and air dry it. You can lay it flat on a clean surface or hang it on a clothesline. Avoid tumble drying on high heat, as excessive heat can cause the fabric to shrink, warp, or become damaged, making it difficult to reinsert the cardboard.
- Iron if Necessary: Once the fabric body is completely dry, you may want to lightly iron it to smooth out any wrinkles and achieve a crisp, neat appearance before reassembling.
- Carefully Reinsert Cardboard: When the fabric is thoroughly dry and (optionally) ironed, carefully slide the cardboard pieces back into their respective pockets and the bottom. Take your time to ensure they are seated correctly for a firm, structured box.
Elevate Your Home Organization with Handmade Charm
Transforming your home into an organized sanctuary is about more than just tidiness; it’s about cultivating a peaceful, efficient, and enjoyable living environment. These DIY washable fabric storage boxes are far more than simple containers; they are a testament to your creativity, resourcefulness, and commitment to a beautifully ordered home. By investing a little time and effort into this rewarding project, you gain custom-made solutions that perfectly fit your unique needs and aesthetic preferences, all while embracing a sustainable approach to home decor.
Say goodbye to generic, often flimsy, store-bought bins and embrace the profound satisfaction of handmade organization. Whether you’re decluttering your precious craft supplies, meticulously organizing a nursery, or simply making your living room more inviting and functional, these versatile and charming boxes will prove to be invaluable assets. We sincerely hope this comprehensive tutorial has inspired you to pick up your sewing machine and embark on the delightful journey of creating beautiful, functional storage for every corner of your home. Happy sewing and happy organizing – your perfectly tailored space awaits!