DIY Lighting Ideas
45 Cheap DIY Home Decor Projects on Any Budget
Cheap DIY home decor on any budget: 45 projects from dollar store planters and rope baskets to framed mirrors, floating shelves, rag rugs and wall art.
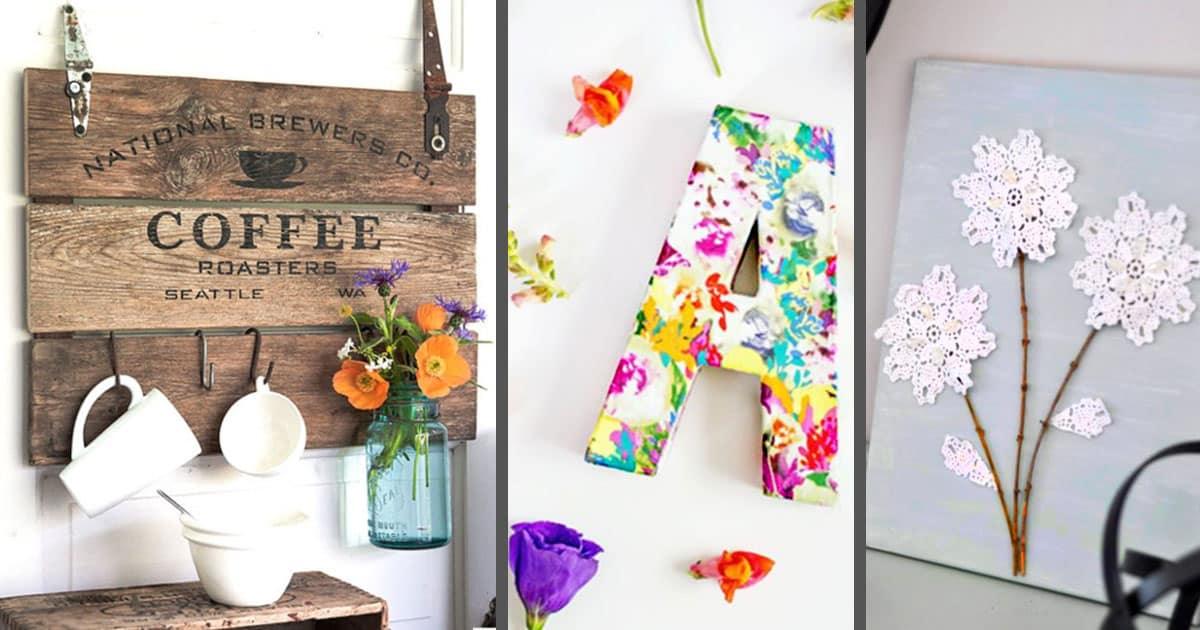
Good rooms are not expensive rooms, they are rooms where somebody made a decision. These cheap DIY home decor projects are proof: a dollar store laundry basket wrapped in rope, a plain glass vase taped and sprayed into something geometric, floating shelves for sixty dollars, a lamp that reads as a two hundred and forty five dollar Pottery Barn piece and cost twenty five. There are mirrors framed in wood and in glass gems, a rag rug woven out of old jeans, a sailboat made from a branch. Four of them are ours, filmed from the first cut to the last. Every outside tutorial credits the person whose idea it was.
Cheap DIY Home Decor Projects
1. Gold Geometric Globe Planter
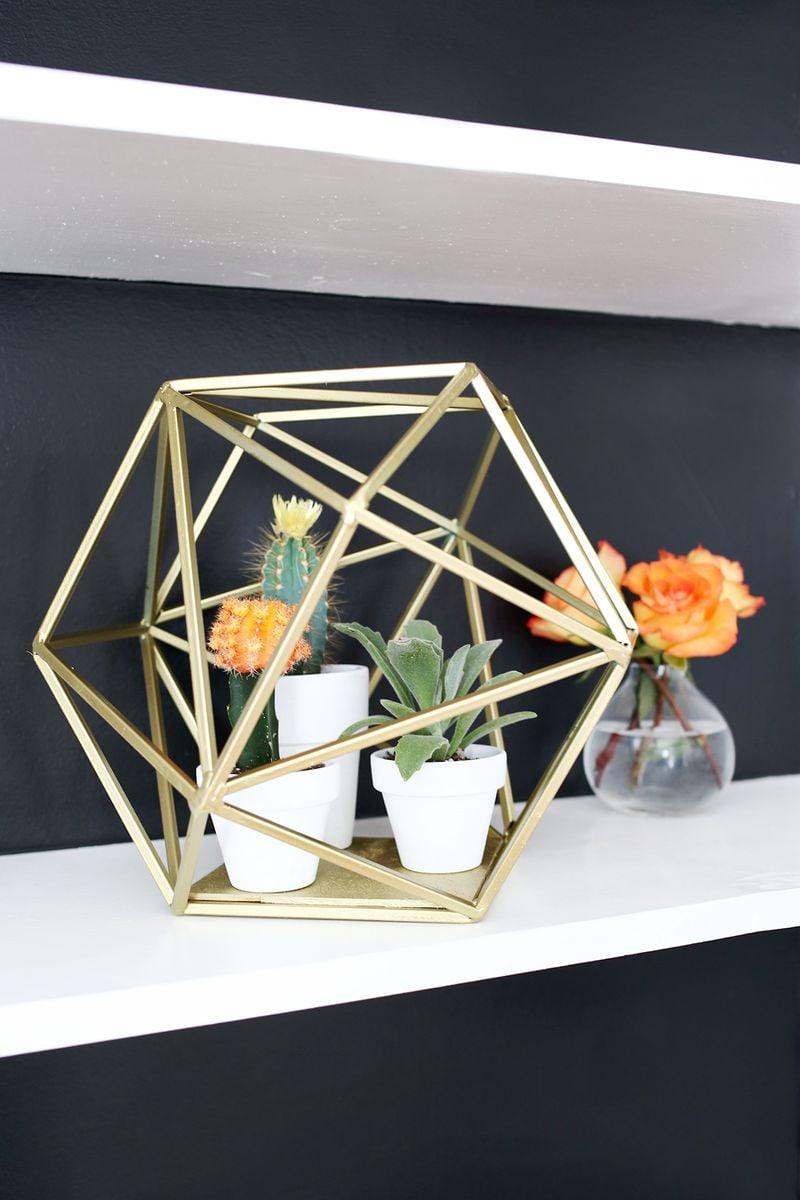
A metal geometric decor globe from the craft store, sprayed gold and turned into a planter, with three small terra cotta pots painted white and lowered through the openings so the succulents sit down inside the frame. The shape is the whole project: a faceted cage that holds plants without hiding them, and reads as expensive because the angles are clean. A piece of balsa wood cut to the inside of the base and glued in gives the pots a floor to stand on. Against a dark wall the gold does all the work.
Get the full tutorial at A Beautiful Mess.
2. Coffee Crate Lid Sign
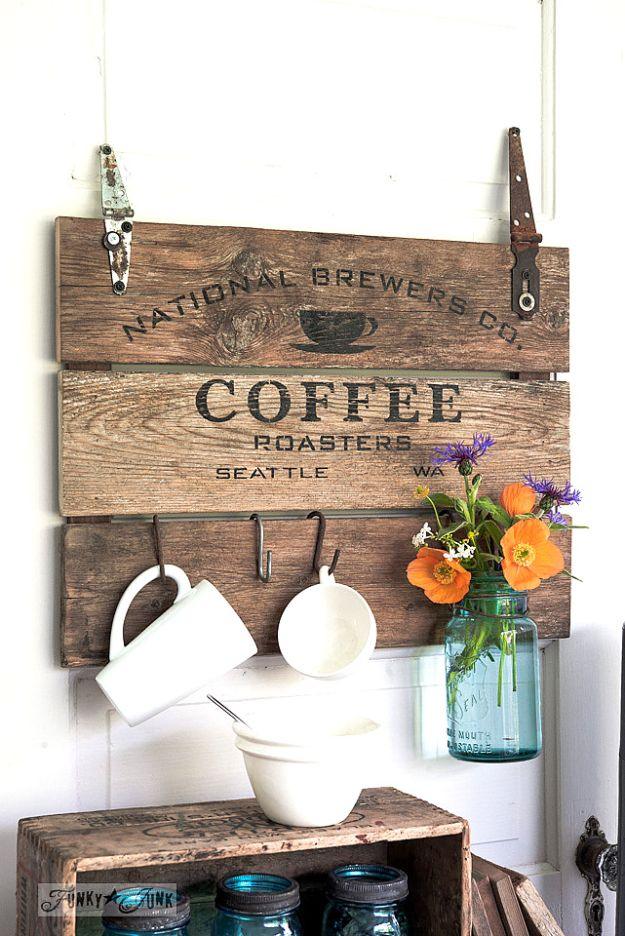
Three weathered fence planks laid side by side, stencilled with an old coffee roasters logo and hung from salvaged strap hinges, with S hooks along the bottom board holding mugs. Two support boards behind hold the planks together and push the sign off the wall, which is what creates the clearance the hooks need. The trick to making a new sign look genuinely old is hardware placed where hardware would actually go, and rusty S hooks cost a fraction of proper cup hooks.
Get the full tutorial at Funky Junk Interiors.
3. DIY Ampersand Art
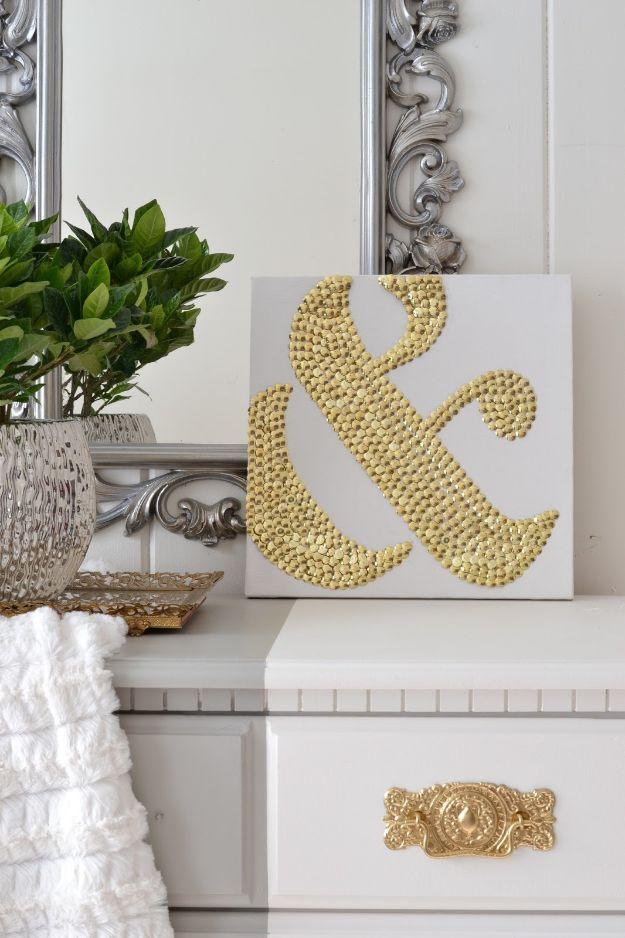
About seven hundred gold thumbtacks pressed into a twelve by twelve canvas in the shape of an ampersand, and nothing else. No paint on the symbol, no stencil showing, just the heads of the tacks catching light in a hundred different directions, which is why a photograph of it looks textured rather than flat. Draw the shape first and fill the outline in rather than working freehand. Gold reads warmer than silver against a white canvas, and silver is surprisingly hard to buy in bulk anyway.
Get the full tutorial at LiveLoveDIY.
4. DIY Rustic Wood Chalkboard
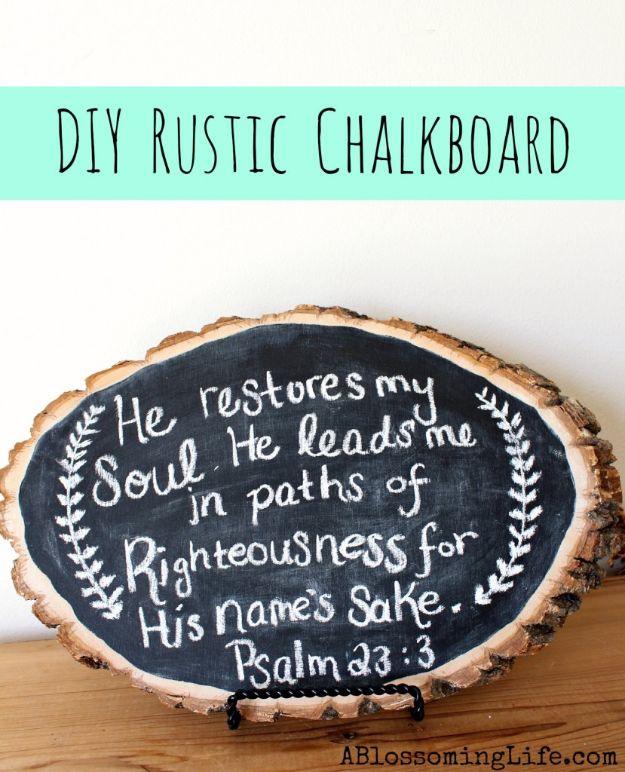
A cross-cut slice of log with the bark still on the edge, its flat face painted with chalkboard paint and set on a small easel. Follow the natural line of the wood with the brush rather than painting a neat oval, because the uneven edge is what keeps it rustic instead of craft-fair. One light coat, an hour to dry, then a second coat and a full day before it gets used. Season the surface first by rubbing chalk all over it and wiping it off, or the first thing written stays forever.
Get the full tutorial at A Blossoming Life.
5. DIY Metallic Rope Throw Basket
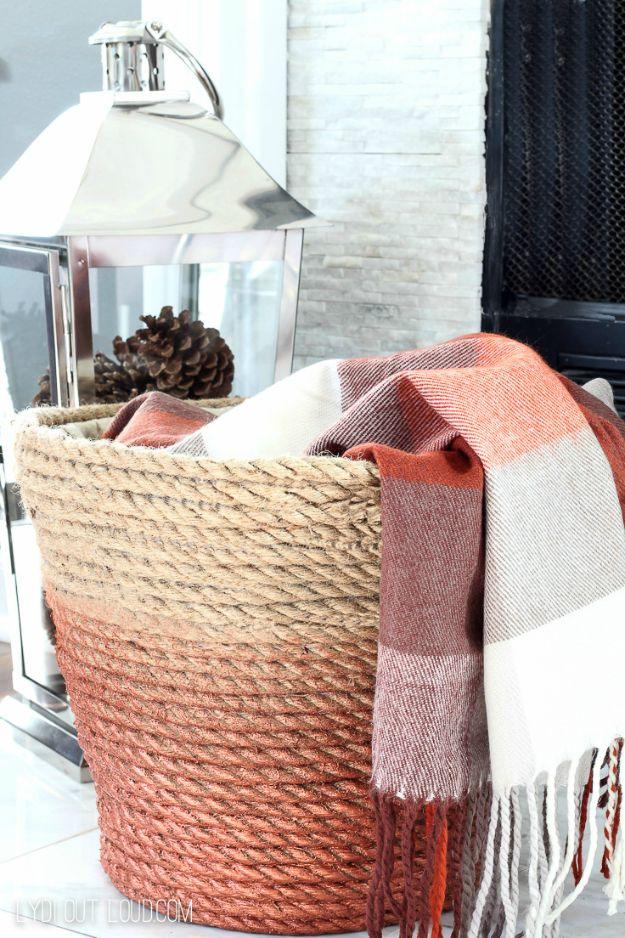
Underneath the rope this is a dollar store laundry basket, which is the sort of fact that changes how you look at a dollar store. Jute rope wound round the outside from the base up gives it the weight and texture of a woven hamper, and a copper ombre fading down from bare jute at the rim makes it look like a considered piece rather than a covered bucket. Lined with fabric inside and filled with a plaid throw it holds its shape beside a fireplace. Under an hour, start to finish.
Get the full tutorial at Lydi Out Loud.
6. DIY White Brick Vase
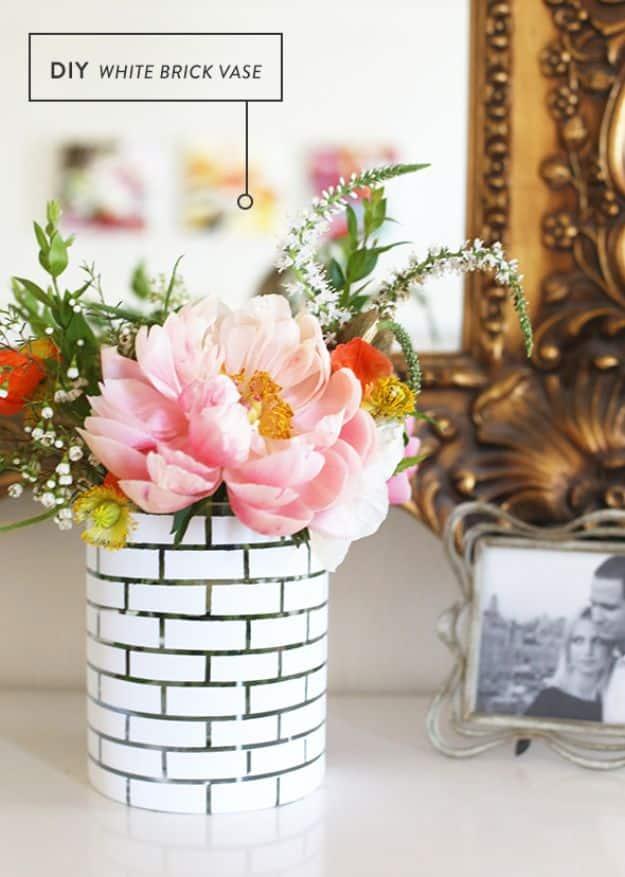
A plain glass cylinder masked with very thin tape into a brick pattern, sprayed white, and peeled to leave crisp clear brick lines through a white wall. Wrap the horizontal courses first about half an inch apart, then add the short vertical pieces about an inch apart to break the rows. Cover the base with wide painter’s tape before you spray. If any paint creeps under the tape it scrapes straight off glass with a knife, which is the quiet reason this works so well on a vase and not on wood.
Get the full tutorial at Say Yes.
7. DIY Mirror Boxes
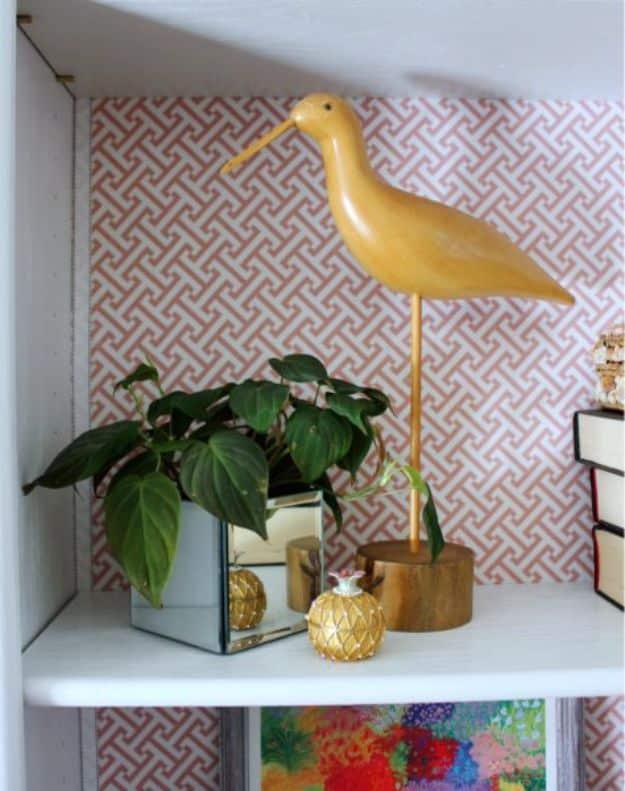
Five square craft-store mirrors and a glue gun, and that is the entire supply list. Beveled mirrors for the four sides, a flat one for the base, and a thin line of hot glue along the back edge of each side aligned to the outside edge of the base. Work fast, because the glue sets almost immediately, and if a side goes on crooked just peel it off and start again. Add a little glue at the inside corner seams for stability, and cork pads underneath so it does not scratch the shelf.
Get the full tutorial at Hi Sugarplum.
8. DIY Floral Monogram
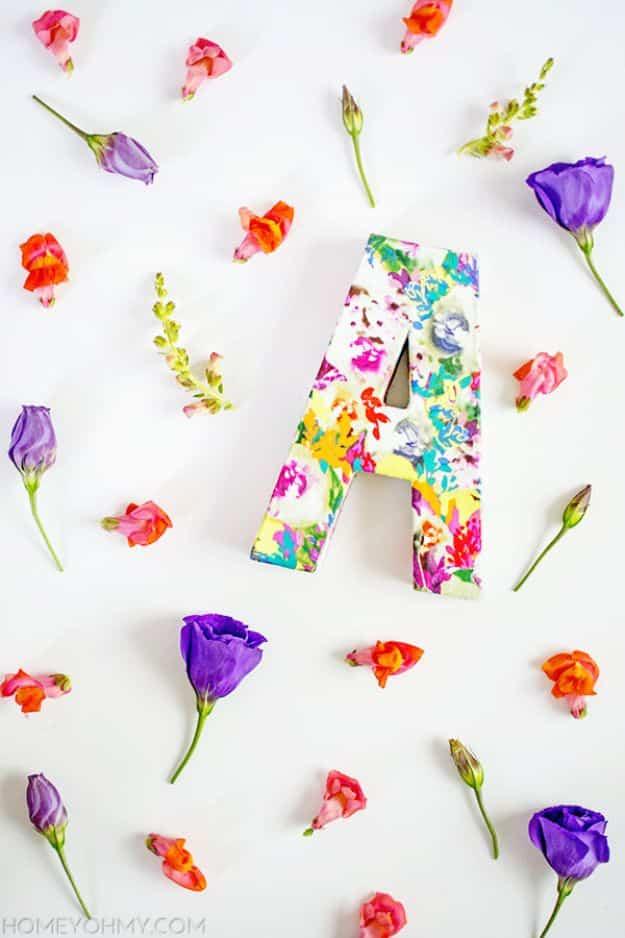
A cardboard letter from the craft store, covered panel by panel in a loud floral cotton. Trace each face of the monogram onto the fabric, cut the pieces out, and Mod Podge them down with a foam brush, then seal the whole thing with another coat over the top. The inside edges and the hole in the middle of an A get measured and cut as separate strips. Simple is the right call here, because a fabric that busy needs nothing done to it beyond being wrapped around a shape.
Get the full tutorial at Homey Oh My.
9. Hanging Wall Planters
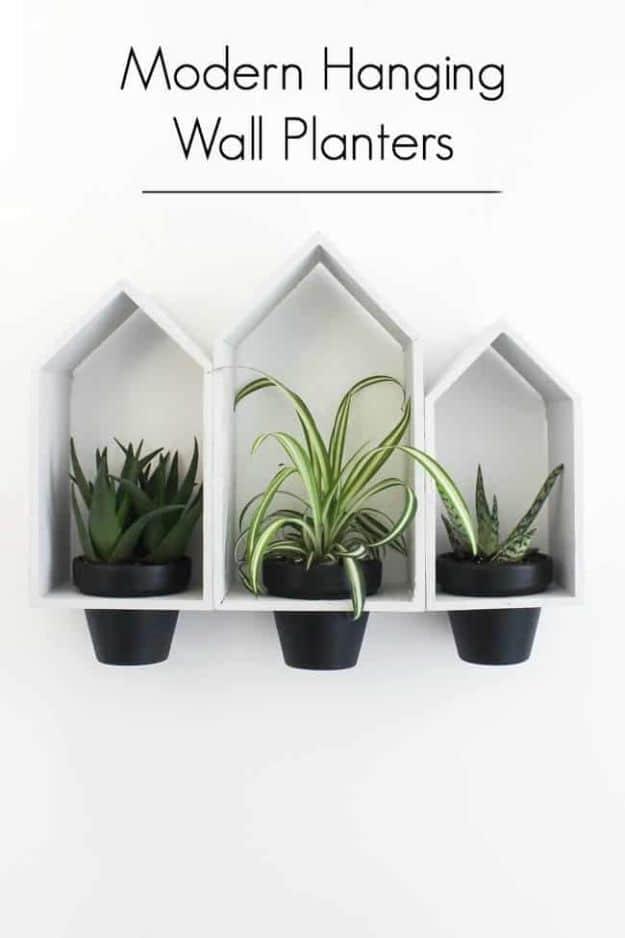
Three little wooden house shelves from the dollar store, painted black and white, each with a terracotta pot fitted through a hole cut in the base so the plant sits inside the frame and the pot hangs below. The cut is the only real step, sized to a three and five eighths inch pot so the rim catches and the body drops through. Painted in two flat colors and hung as a row of three, they look like a set somebody designed rather than three impulse buys off a dollar store shelf.
Get the full tutorial at Lindi and Russ.
10. DIY Hula Hoop Chandelier
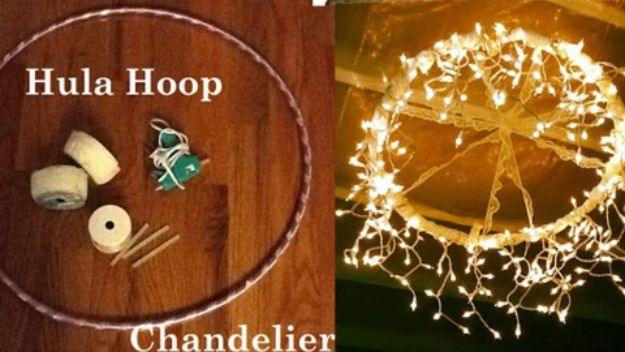
A hula hoop wrapped and hung flat, with strings of fairy lights draped across and around it until the whole ring glows. The hoop costs a couple of dollars and the lights are whatever is in the Christmas box, which is why this turns up at every wedding and porch party you have ever admired. Hang it low over a table or a corner of a deck. Wrapping the hoop first in ribbon or twine matters more than it sounds, because it hides the plastic and gives the lights something to grip.
Get the full tutorial at Sueeye.
11. Simple Macrame Wall Hanging
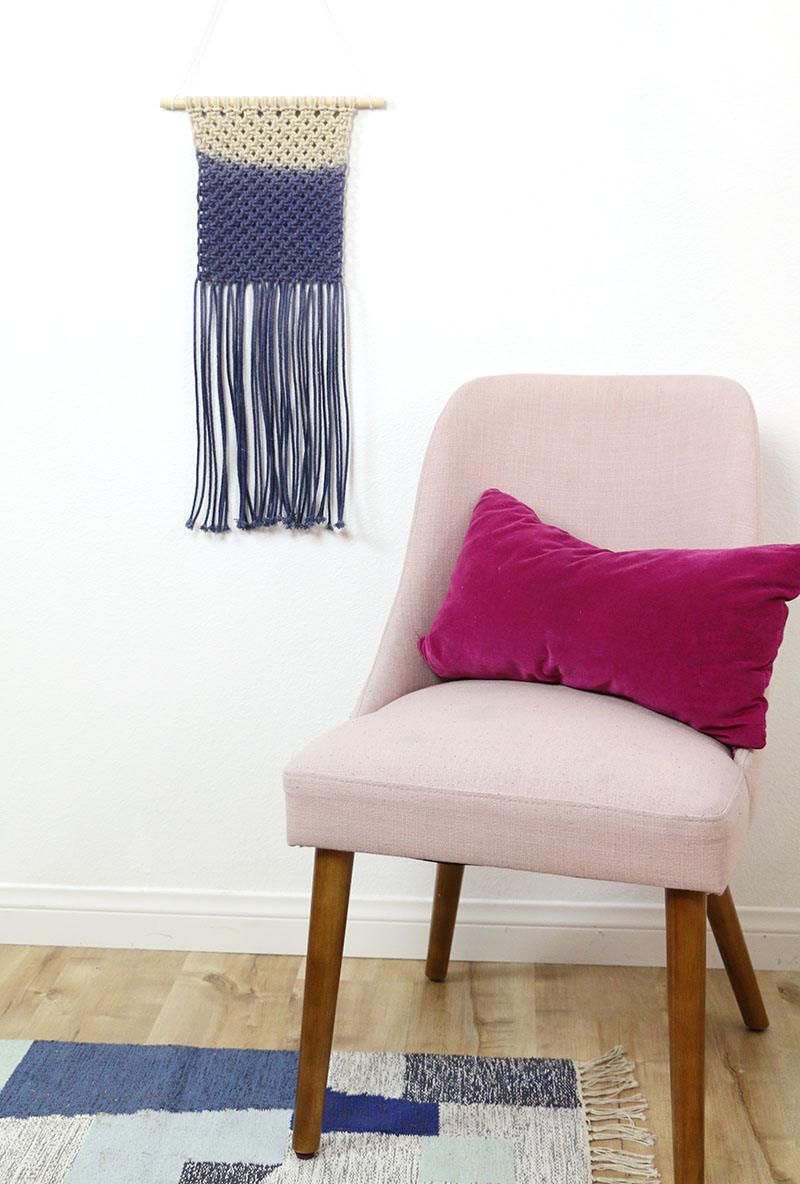
Three millimetre cotton macrame cord knotted onto a twelve inch dowel, worked in a single repeating square knot and then dip dyed so the fringe runs from natural cream into deep indigo. One knot for the whole piece is the point: it is a beginner project that does not look like one, because the color does the interest instead of the knotwork. Mix the dye with salt and a little dish soap, and dip the bottom section rather than the whole panel so the cream at the top stays clean.
Get the full tutorial at Persia Lou.
12. Shadow Box Wall Shelves
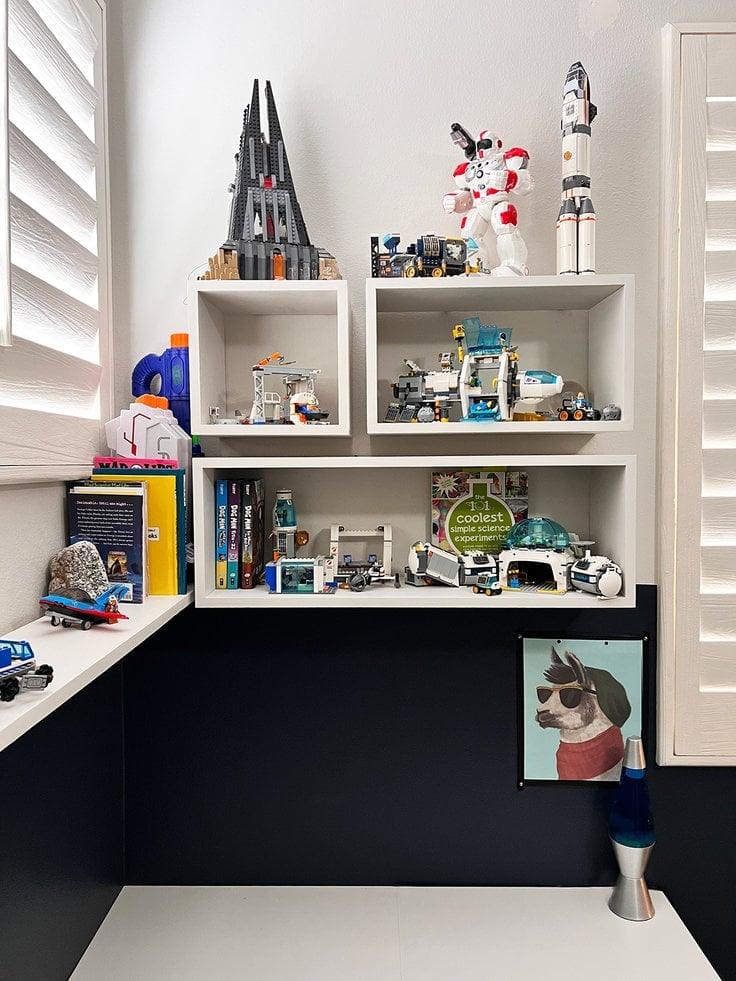
Open-fronted boxes screwed to the wall, three of them staggered, holding the Lego collection that was previously all over the floor. Built from three quarter inch MDF or plywood offcuts at eight inches deep, which is enough to take a built model without swallowing it. Painted the same white as the wall they vanish and the contents pop. The depth is the decision to make before you cut: shallower and things fall out, deeper and the shelf starts casting a shadow over everything you put in it.
Get the full tutorial at Kenarry.
13. DIY Starburst Mirror
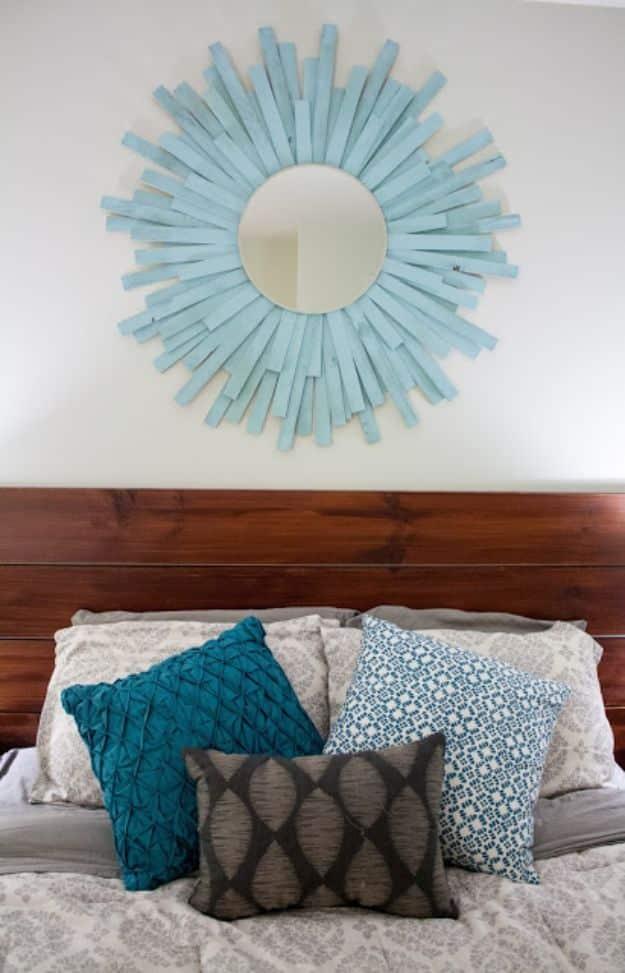
Contractor shims fanned out around a fourteen inch mirror, in three lengths alternating so the rays land at different depths, and the whole thing sprayed a soft pale blue. A ten inch wooden circle glued to the back of the mirror gives the shims something to sit against and something to hang from. Two hours of hands-on time and under twenty seven dollars in materials, which is the kind of maths that explains why this mirror shape has been quietly everywhere for a decade.
Get the full tutorial at Sgt. Pepper's Kitchen.
14. Picture Frame Luminaries
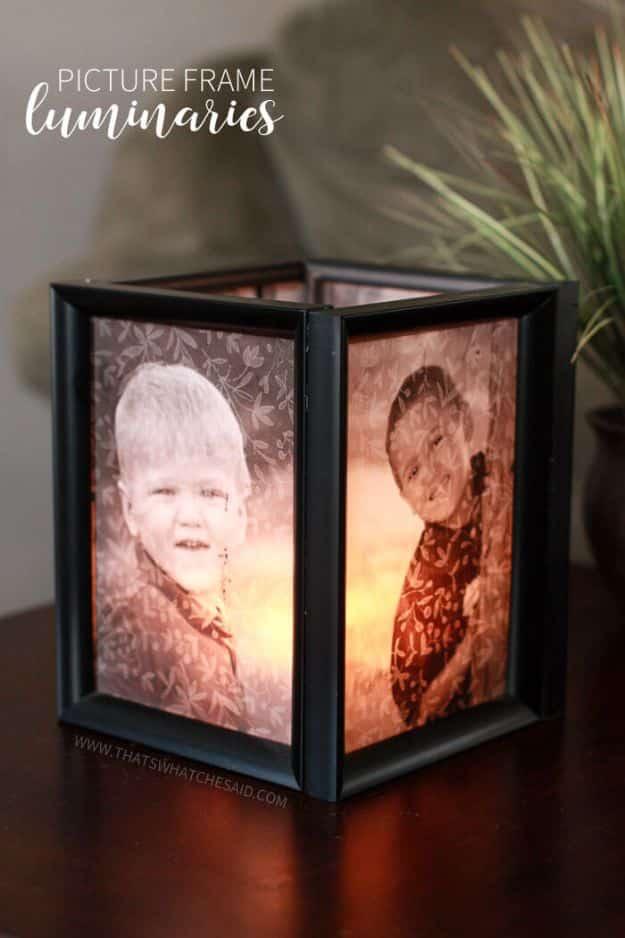
Four five-dollar-store photo frames glued into a square lantern, with printed vellum instead of photographs so a candle inside lights the images from behind. The frame choice is the one thing that will sink this if you get it wrong: you need frames with square flat edges and with the little retaining pegs set into the frame itself, not into the cardboard backing, because the backings do not get used. Print onto vellum, not paper, and the light comes through soft instead of blocked.
Get the full tutorial at That's What Che Said.
15. Modern Plywood Planter Box
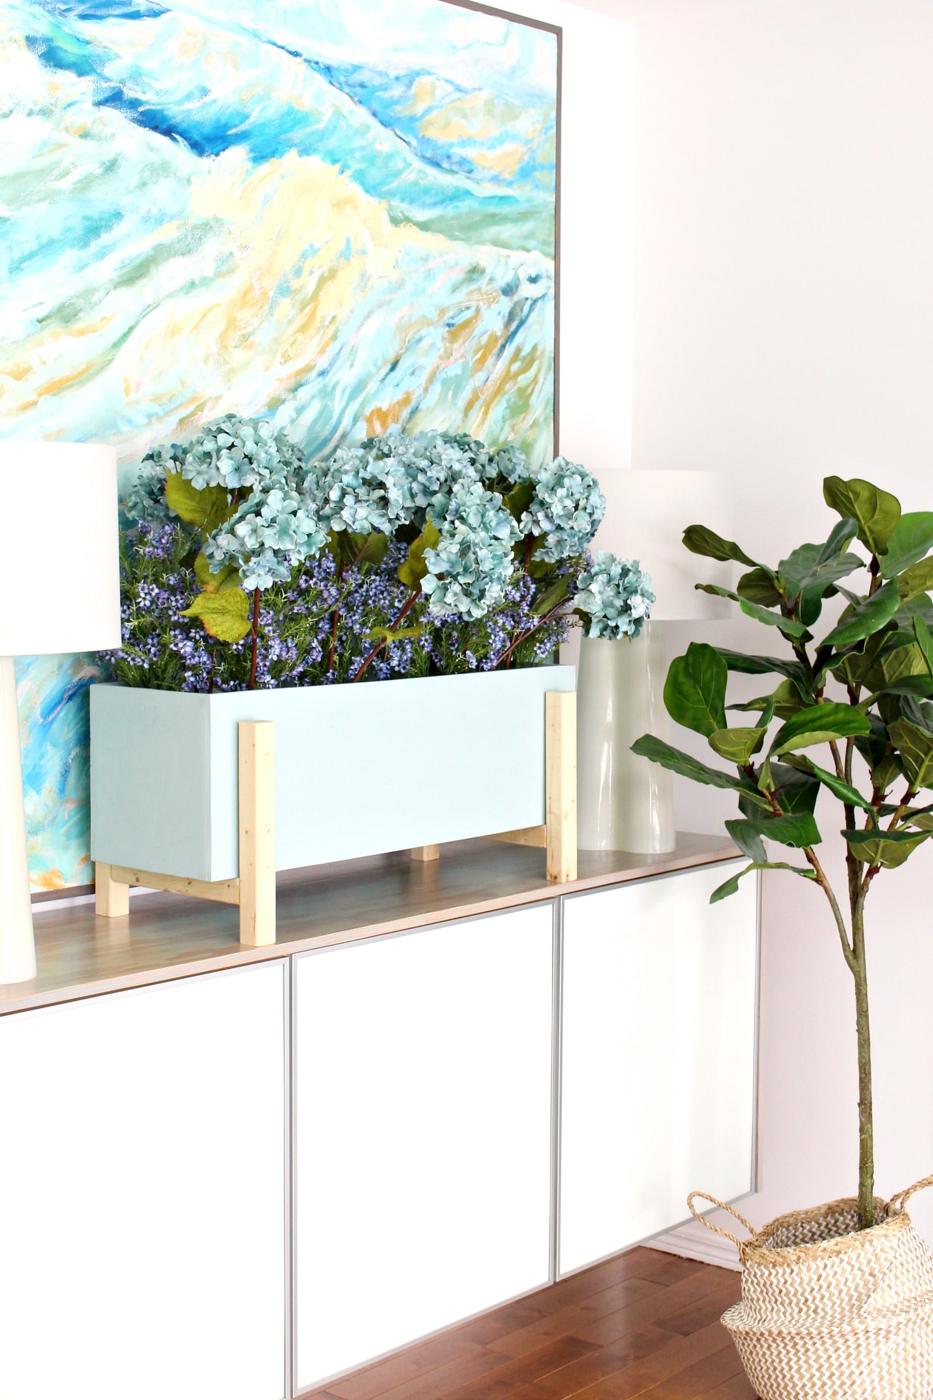
A half inch plywood box on splayed furring strip legs, painted pale blue and filled with hydrangeas. No mitered corners, no joinery: butt joints and wood glue, with an air nailer or clamps holding the seams until the glue sets in about half an hour. The cut list is two pieces at thirty one and a half by ten for the front and back, two at ten by ten for the sides, and a base at thirty and a half by nine. Sand the corners lightly afterwards so nothing catches.
Get the full tutorial at Dans le Lakehouse.
16. White Floating Shelves for a Small Laundry Room
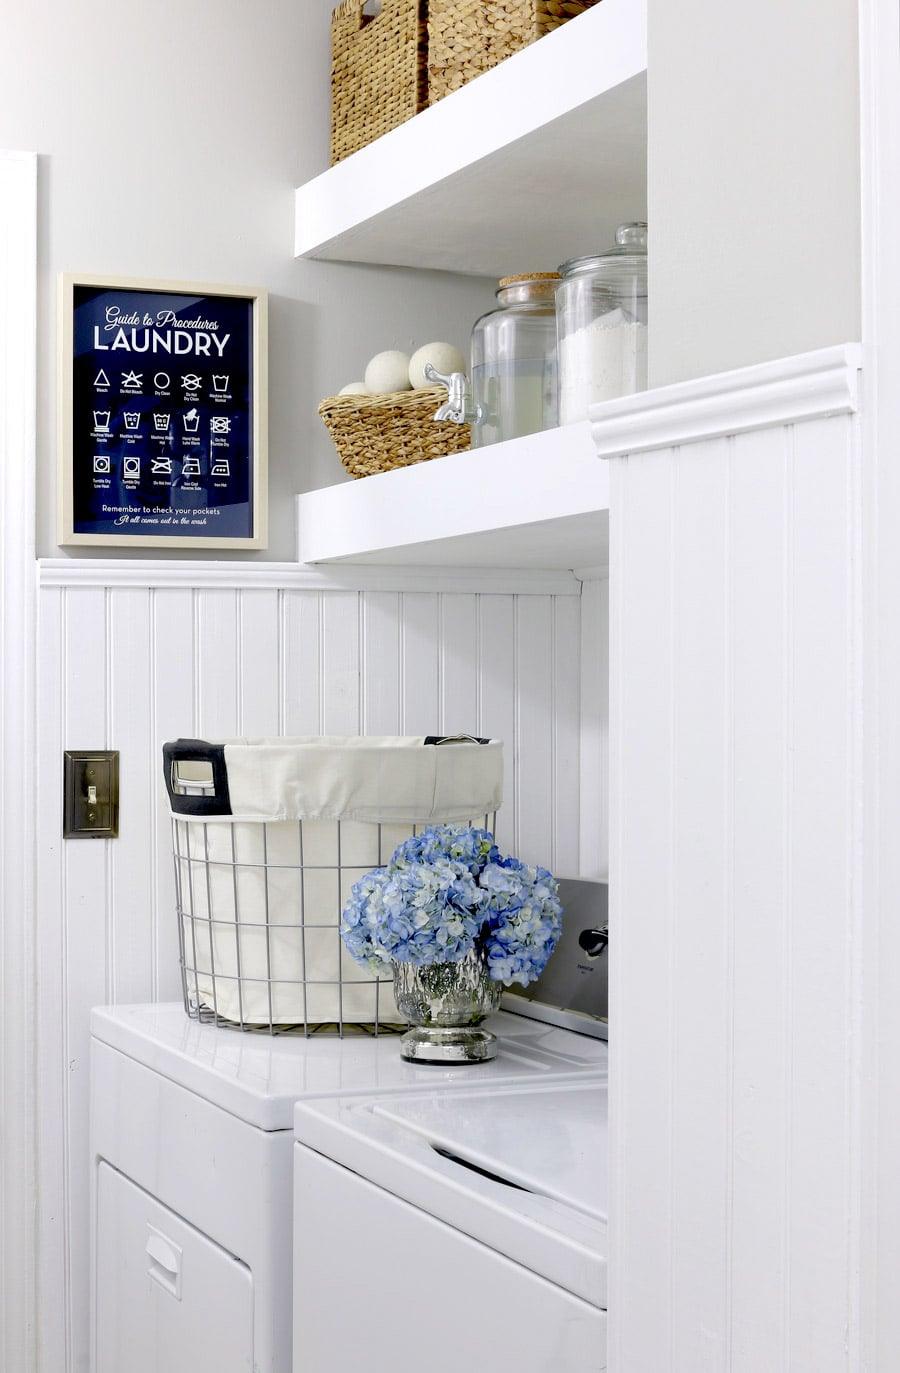
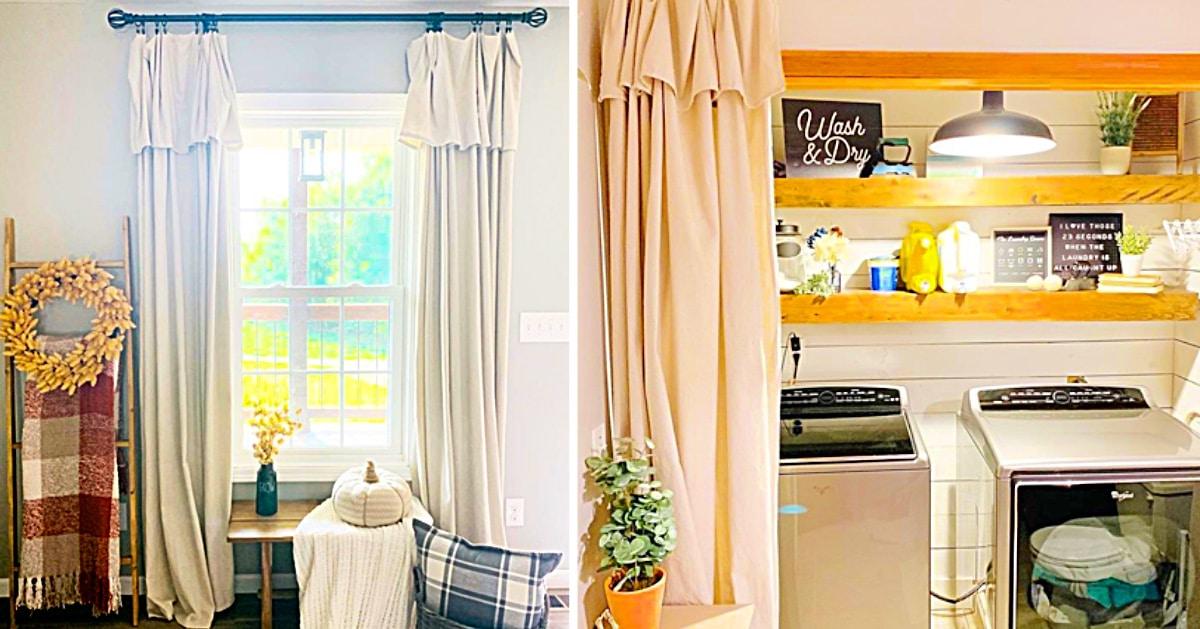
Chunky white floating shelves built to sixty six inches long and eighteen inches deep, replacing the wire shelving that came with the room. They are a two by four frame screwed into the studs and then wrapped in quarter inch plywood and one by six trim ripped down to four inches, so the thickness is a shell over a skeleton rather than solid timber. Wood filler, caulk and paint hide every seam. Two custom built-in shelves came to about sixty dollars in lumber.
Get the full tutorial at Jen Woodhouse.
17. DIY Photo Canvas Prints With Authentic Texture
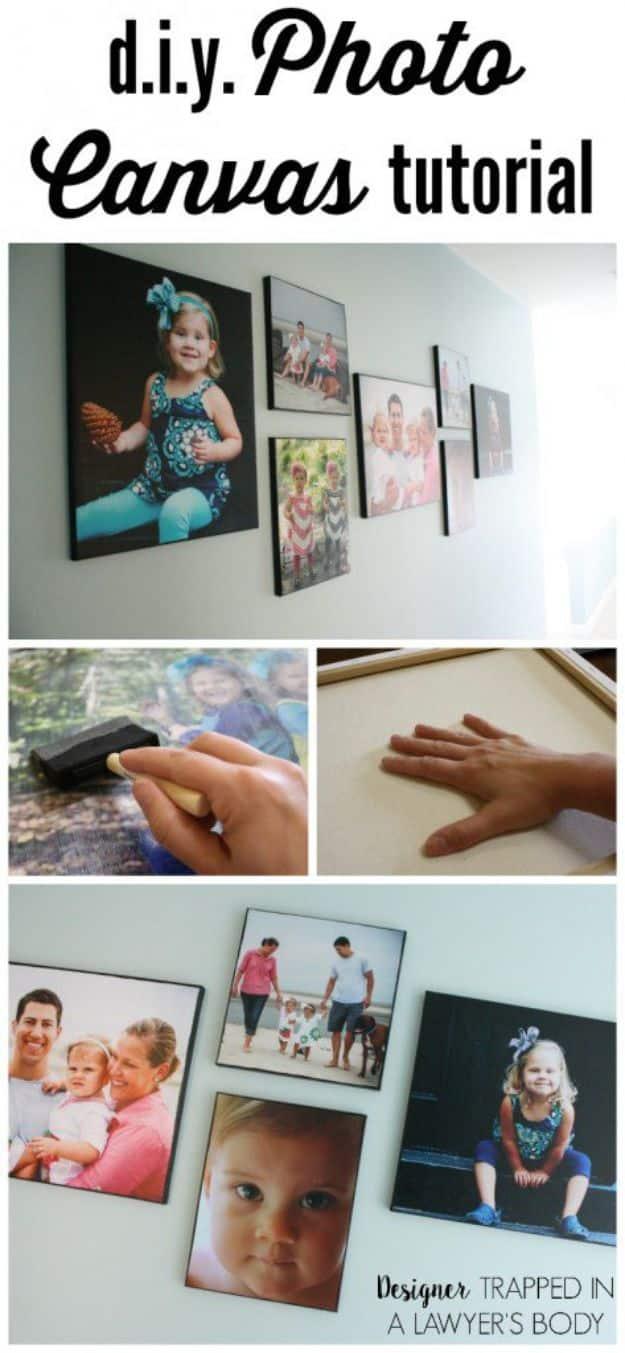
Enlarged photo-lab prints mounted onto blank canvases so they take on real canvas texture, which is the part that sells them as expensive. Two warnings matter more than any of the steps. Do not use prints made on a home printer, and do not use poster prints from an office supply shop, because those come off banner paper and the paper peels away later. Get the enlargement done at a photo lab on proper photo paper. Old canvases from a thrift shop work perfectly well underneath.
Get the full tutorial at Designer Trapped in a Lawyer's Body.
18. DIY Confetti Letter Wall Decor
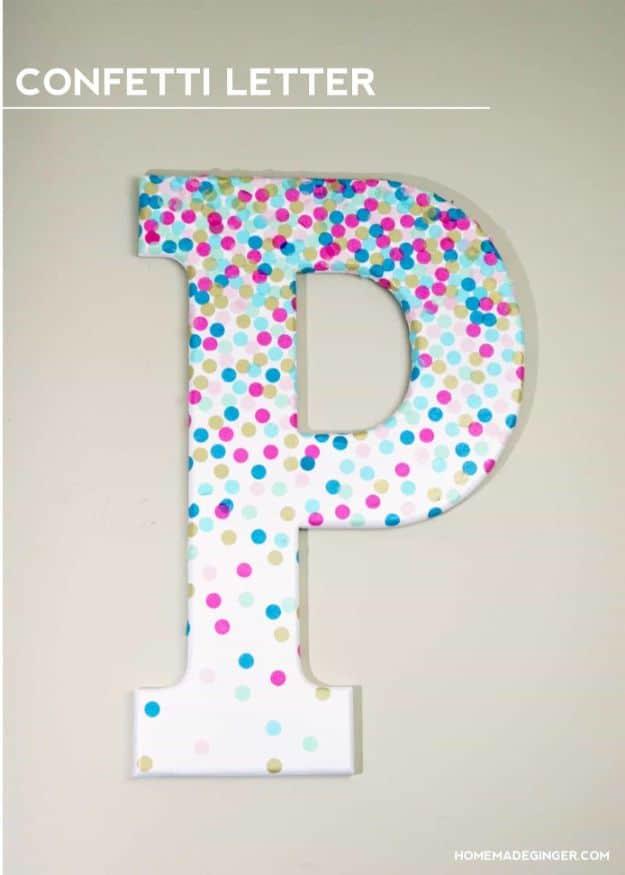
A big papier-mache letter painted white, then covered in hand-punched tissue paper dots in pink, turquoise, gold and pale blue. Mod Podge dries fast, so work one small section at a time: brush the glue, lay the confetti on, move along. Space the dots out as you come down the letter so the top is dense and the bottom scatters, which is what makes it read as thrown confetti rather than a polka dot pattern. Do the sides too, or it looks unfinished from an angle.
Get the full tutorial at Mod Podge Rocks.
19. DIY Jute Rope Love Sign
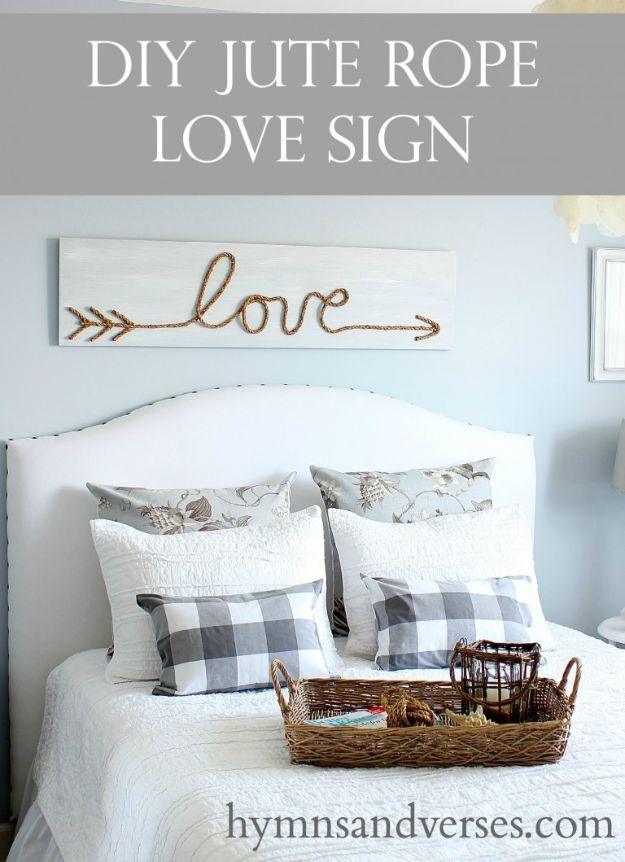
A word spelled out in jute rope and mounted on a whitewashed board. The rope is stiffened first: corn starch and water mixed into a paste, a whole bottle of glue stirred in, then the rope dunked section by section with gloves on. Write the word on waxed paper with a marker first and lay the wet rope over your own handwriting, weighting the letters down with anything heavy and washable until it sets. Once it hardens it holds its shape and gets tacked to the board with finish nails.
Get the full tutorial at Hymns and Verses.
20. DIY Yarn Chandelier
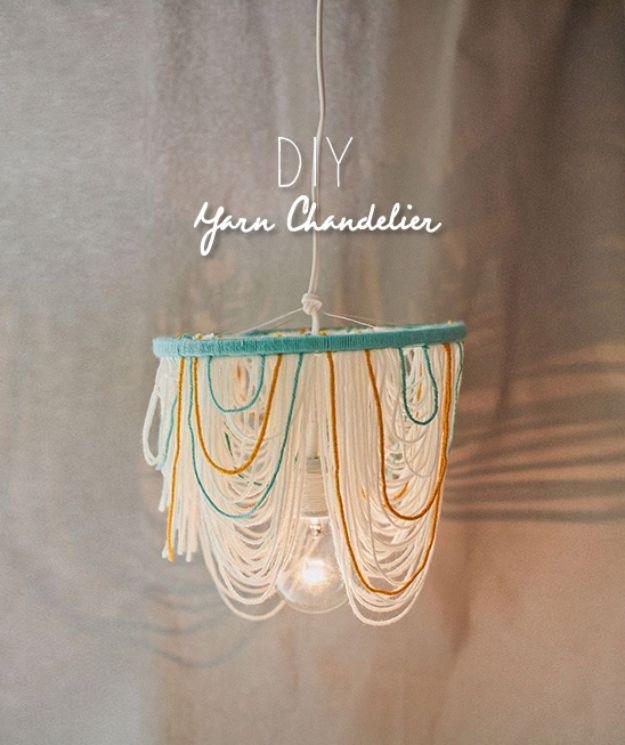
A twelve inch sewing hoop wrapped in yarn, with loops of cream, mustard and turquoise swagged around it and hanging down in long draping curves under a bare bulb. It softens a hard light rather than blocking it, which is the reason it photographs as warm instead of dim. Double stick tape wrapped onto the inner hoop first is what stops the yarn sliding as it is looped on, and a wire fixed across the centre is what the lamp cord and socket hang from. Keep the loops uneven in length so the silhouette is scalloped rather than flat.
Get the full tutorial at Wedding Chicks.
21. DIY Rustic Shutter Bench
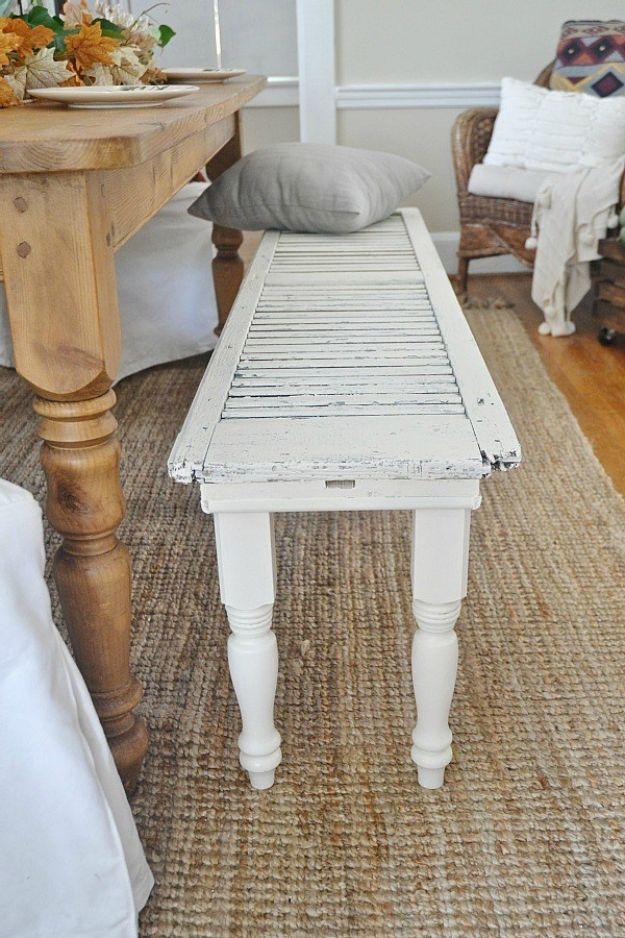
A chippy white louvred shutter laid flat and set on four turned white table legs, standing in for a bench along a dining table. The shutter is the seat and the whole design, which is why the flaking paint and the worn edges are worth leaving exactly as found. Legs are the only thing to buy. It reads as a genuine salvage piece because it mostly is. Drive the fixings into the shutter’s own stiles rather than into a louvre, because those side rails are the thickest timber in it and the only part that will hold a leg.
Get the full tutorial at Liz Marie Blog.
22. Book Topiary
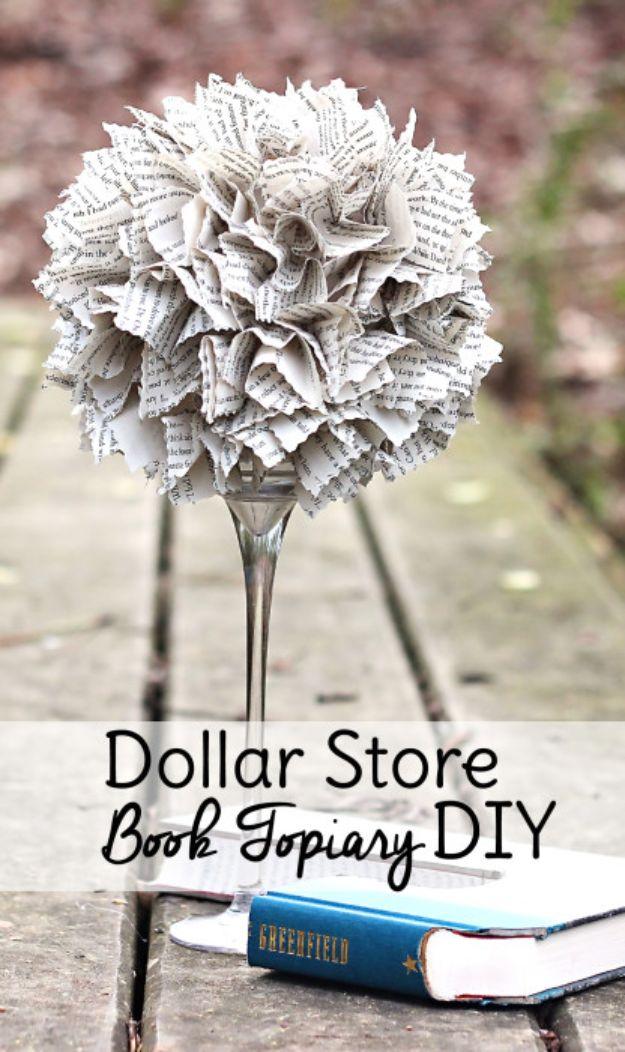
Pages cut from a charity shop paperback with pinking shears, ruffled and glued onto a four inch styrofoam ball, then set into a dollar store candle holder so it stands like a topiary. A paper trimmer keeps the strips even and pinking shears give the ruffled edge that makes the ball look like petals instead of scrunched paper. Run a stamp pad along the cut edges first if you want a darker aged look. The whole centerpiece is built from dollar store supplies and one old book.
Get the full tutorial at Sweet T Makes Three.
23. Succulent Terrarium
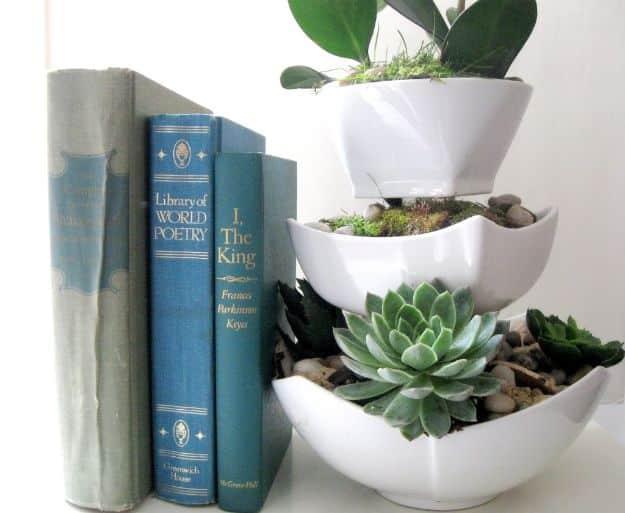
Three white ceramic bowls stacked and offset, glued with clear drinking glasses hidden between them as spacers, each bowl planted with succulents and river pebbles. The glasses do not need painting because the plants and stones cover them completely once it is filled. Bowls need an opening wide enough to get a plant into and the stack wants to sit slightly off centre so it looks grown rather than engineered. Layer pebbles under the soil, since succulents want dry roots and there is no drainage hole anywhere in this.
Get the full tutorial at Craftberry Bush.
24. DIY Rustic Sailboat
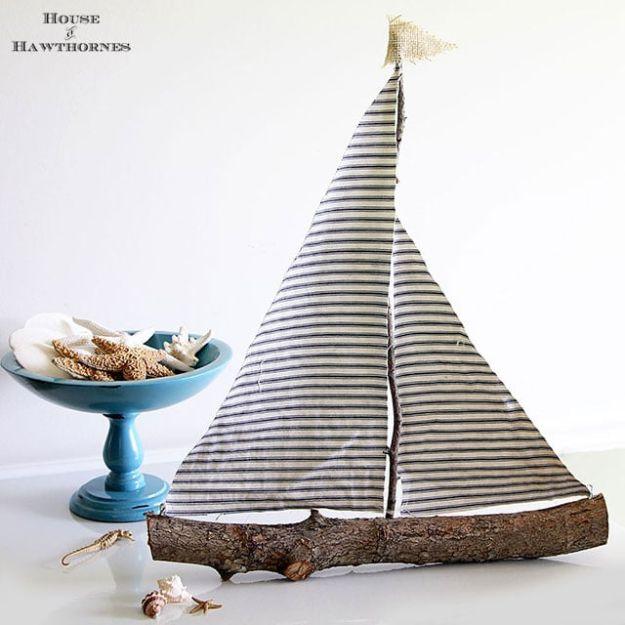
A dead branch about sixteen inches long as the hull, a seventeen inch twig hot glued into a drilled hole as the mast, and two sails cut from vintage ticking as scalene triangles. Eyelet screws go in each end of the branch and the sails get sewn to them, then sewn to the mast, then sewn along the top. A small double-sided triangle of fabric glued to the top makes the flag. Fifteen minutes of work, and most of that is threading a needle.
Get the full tutorial at House of Hawthornes.
25. Dresser Mirror
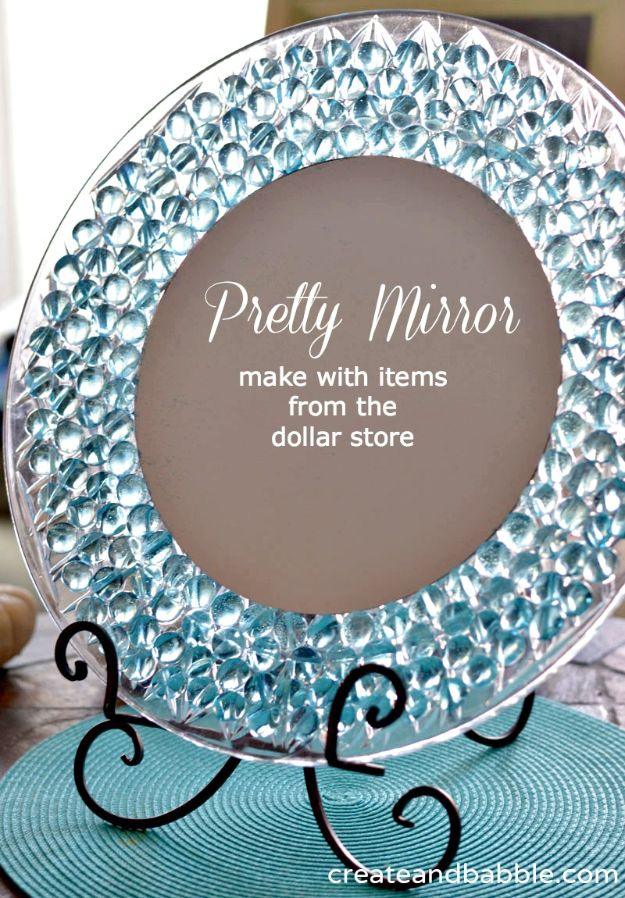
Pale blue glass gems glued around a round mirror set into a large acrylic tray from the dollar store, and the whole thing propped on a plate stand. Two or three bags of gems cover the rim. Use a glue that grips non-porous surfaces, because neither glass nor acrylic gives an ordinary adhesive anything to hold onto, and leave it to cure overnight before it moves. It ends up heavy enough that a plate stand beats hanging it, which turned out better anyway.
Get the full tutorial at Create and Babble.
26. Cheap to Chic Vase Makeover
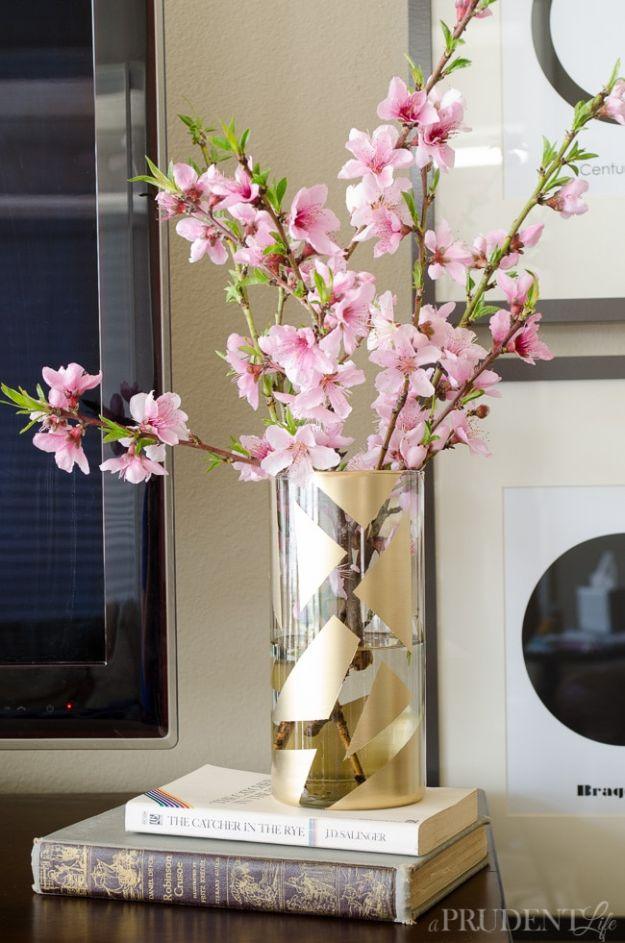
A plain glass cylinder masked with washi tape into triangles and quadrangles, then sprayed gold so the taped shapes stay clear. Run a strip of tape around the inside lip and stuff paper towels down the neck before spraying, or gold ends up on the inside of the vase where flower water will sit. A few light coats rather than one heavy one, then pull the tape carefully while the paint is still fresh. One dollar of glass, and it reads as a boutique piece.
Get the full tutorial at Polished Habitat.
27. Pottery Barn Knockoff Rope Knot Lamp
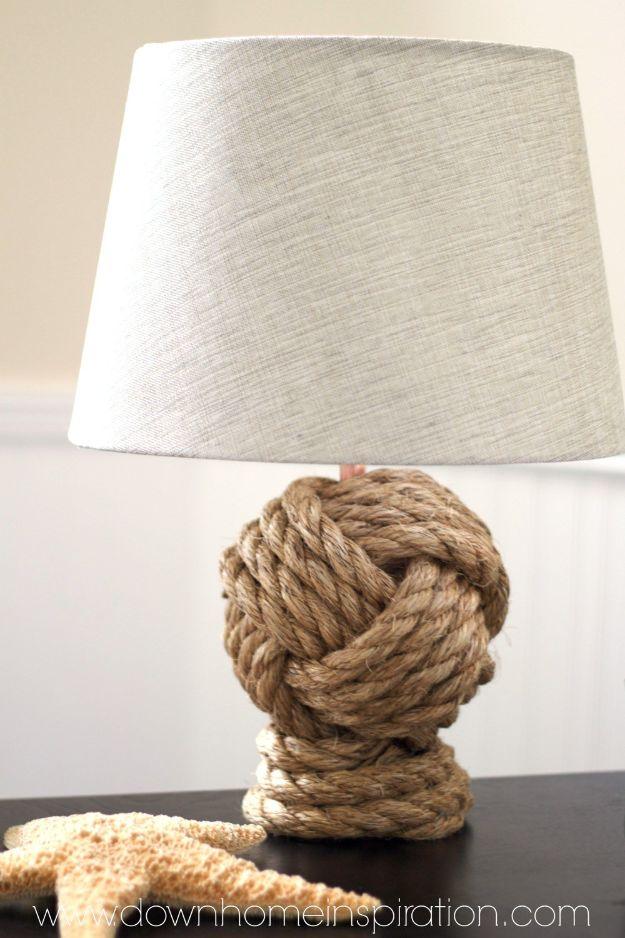
The base is a monkey fist knot, the nautical knot used to weight the end of a throwing line, tied around a four inch foam ball and mounted on a short length of copper pipe. Twenty five dollars against two hundred and forty five for the version it copies. Practise the knot on something thin first, a rounded shoelace around a marble, before committing to thick rope, and watch a video or two rather than working from stills. Wrap four circles round one hand, then four more at ninety degrees.
Get the full tutorial at Down Home Inspiration.
28. DIY Aged Layered Painted Candlesticks
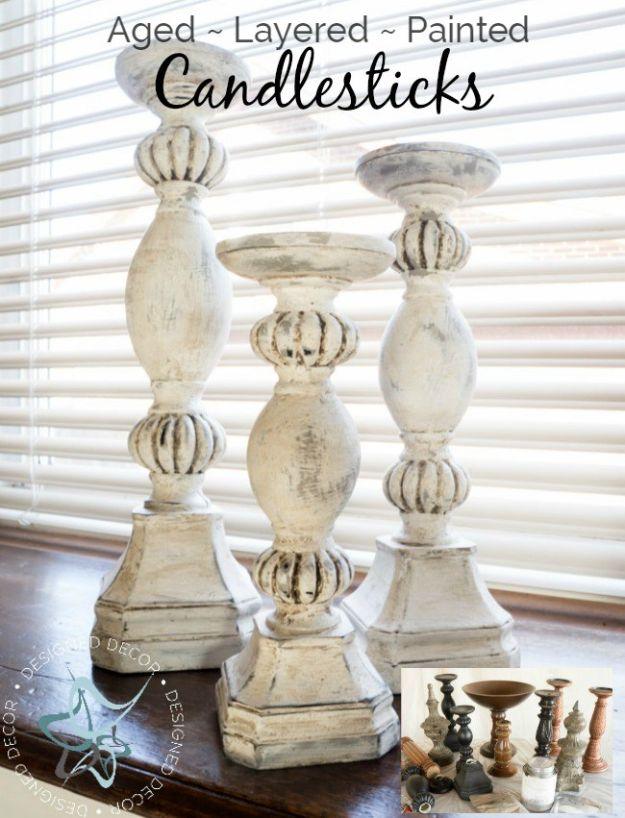
Thrifted wooden candlesticks in mismatched shapes, layered with paint and sanded back until they read as one collection of old carved wood. The inset photo of the raw candlesticks shows what they started as: black, brown, brass and every finish in between, each bought for under five dollars and several for a dollar. Layering is what unites them, because the same sequence of colors sanded back the same way makes shapes that have nothing in common look like they were found together.
Get the full tutorial at Designed Decor.
29. Wood Framed Bathroom Mirror
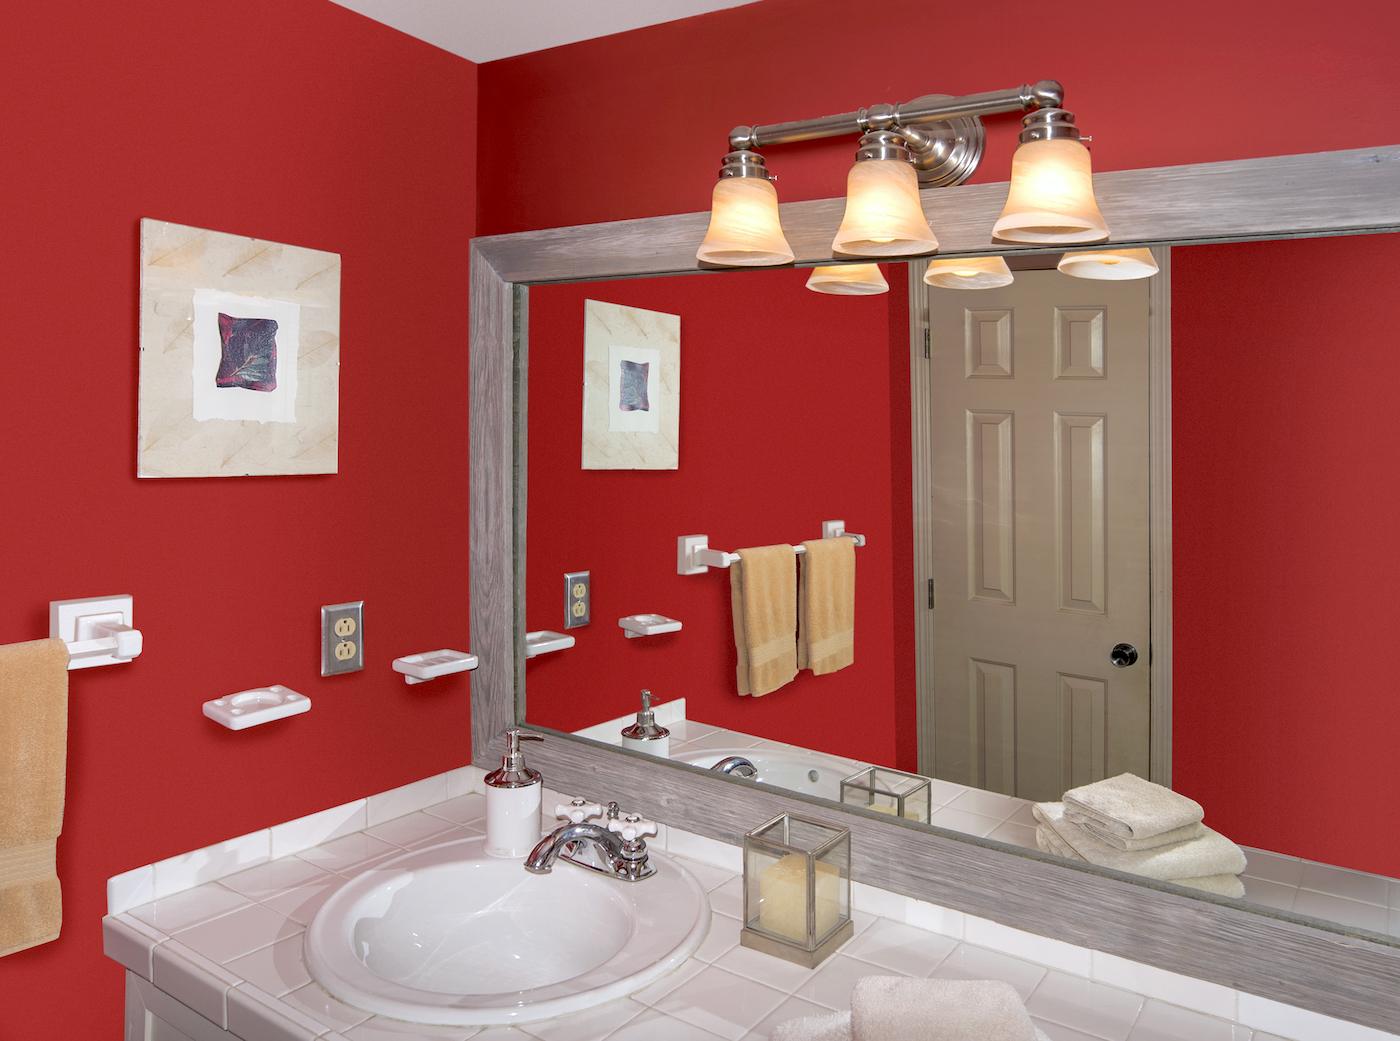
A builder-grade frameless mirror clipped to the wall, framed with stained wood and instantly worth three times what it looks. A basic three by five foot frameless mirror runs about fifty dollars and the same mirror with a wood frame runs over three hundred, which is the entire argument for building one for around twenty five. The clever part is that the frame is not glued to the glass, so it lifts off later if the room changes, rather than committing the mirror to one style forever.
Get the full tutorial at DIY Candy.
30. DIY Farmhouse Style Hanging Wire Baskets
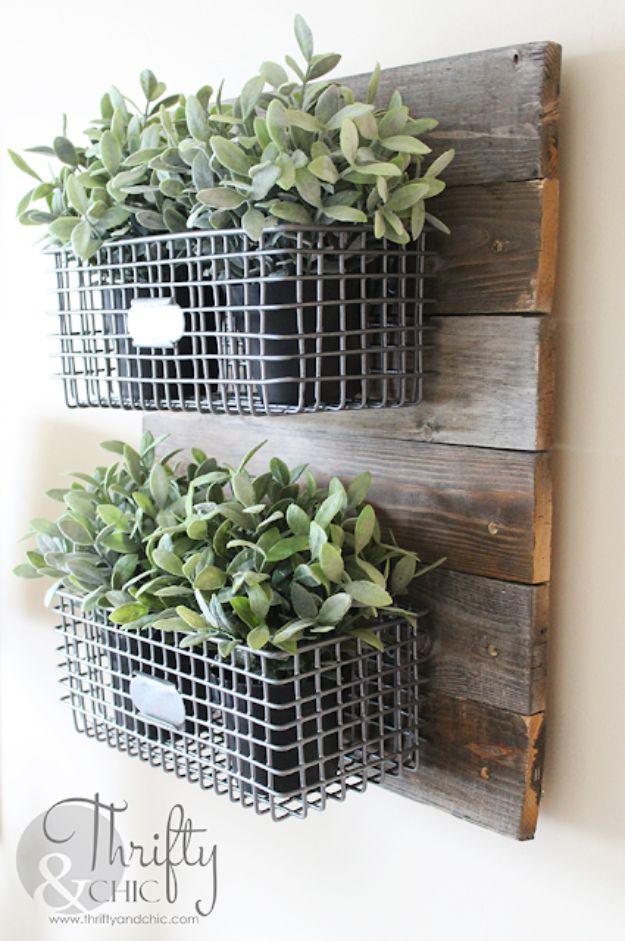
Weathered grey slats glued and nailed into a backing board, with two galvanized wire baskets mounted on the face and filled with faux lamb’s ear. The wood is old bench legs headed for the firewood pile, which is why the grey is real weathering rather than stain, and nothing you buy looks quite like it. Wood glue plus inch and a quarter nails holds the slats together, a D-ring on the back hangs the whole thing. Baskets came to six dollars each.
Get the full tutorial at Thrifty and Chic.
31. DIY Curtain Rods
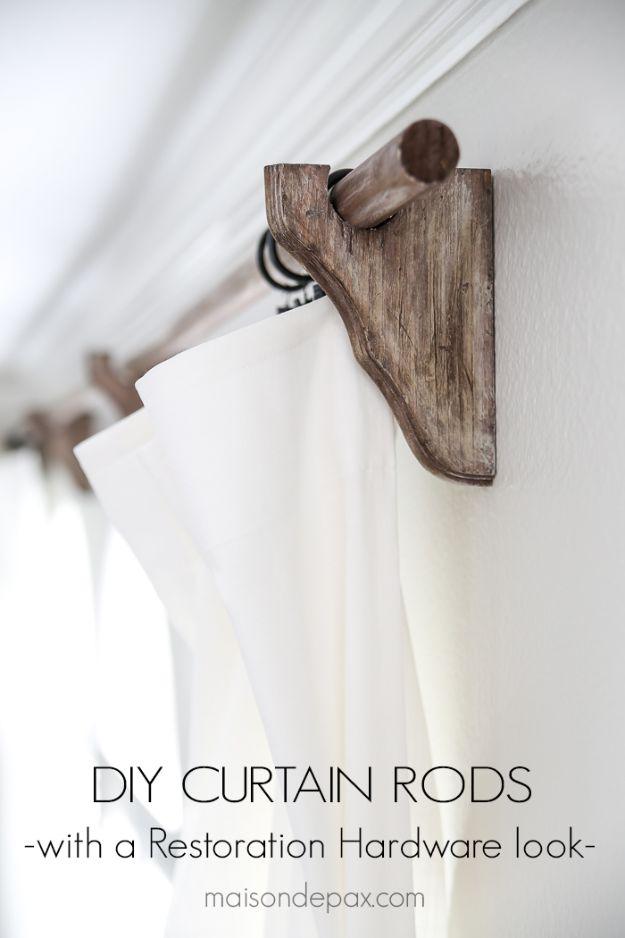
Wooden dowels for rods and chunky sawn brackets that carry the weight, stained a weathered grey so a window treatment reads as solid hardwood rather than a thin metal pole. The bracket is the design: a deep wedge-shaped block with a notch cut for the dowel to drop into, which lets the rod lift out without unscrewing anything when curtains come down for washing. Far sturdier and far cheaper than the store versions it is styled after, which is generally how this trick works.
Get the full tutorial at Maison de Pax.
32. Round Denim Rag Rug
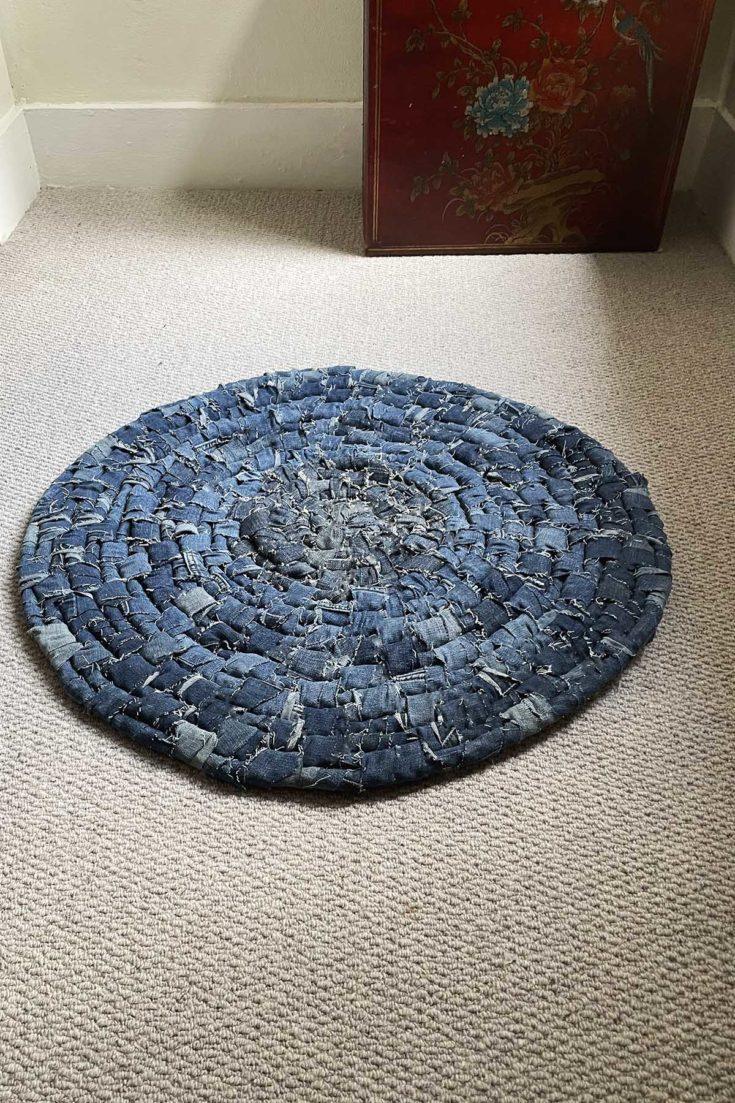
Old jeans cut into strips and wrapped and woven around a coil of rope, spiralling out into a round rug in every shade of indigo the family wardrobe had to offer. No sewing machine, no crochet hook, no knitting. Roughly eight legs, or four pairs of jeans, covers a rug this size, though that varies with the cut and the size of the jeans. Denim is the ideal choice because it is tough, plentiful and that color range is impossible to buy.
Get the full tutorial at Pillar Box Blue.
33. Distressed Metal Candle Shade
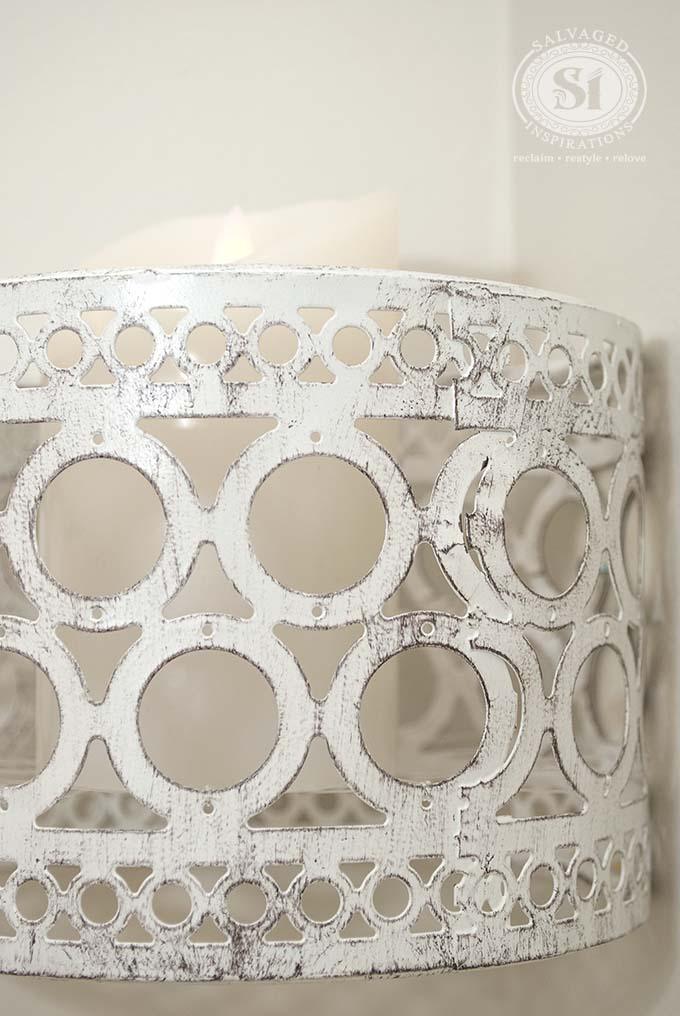
A thrifted decorative metal cylinder, painted white and distressed back, hung on the wall with a candle apparently floating inside it. The floating is fishing line: criss-crossed in a pattern through the existing holes around the bottom of the cylinder and knotted off, making an invisible shelf strong enough to hold the candle. Where a cylinder has no holes, tiny ones get drilled. Ten minutes of actual work, and battery candles rather than flames, which matters when the shelf is made of fishing line.
Get the full tutorial at Salvaged Inspirations.
34. DIY Twine Pears
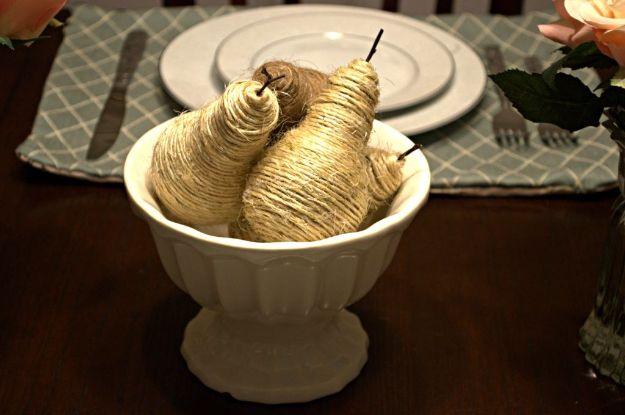
Dollar store light bulbs wound tightly in natural twine from the base up, with a clipped twig glued into the small end for a stem, piled in a white compote on a dinner table. The bulb is the pear, which is the whole trick, and a burnt out one works just as well as a new one. Choose the shorter, smaller bulbs, because a long middle never reads as a pear. Once the winding reaches the round part, add a dab of hot glue on every turn or the rows bunch and unwind. Two dollars for the lot.
Get the full tutorial at My Love of Style.
35. Tissue Paper Flamingo
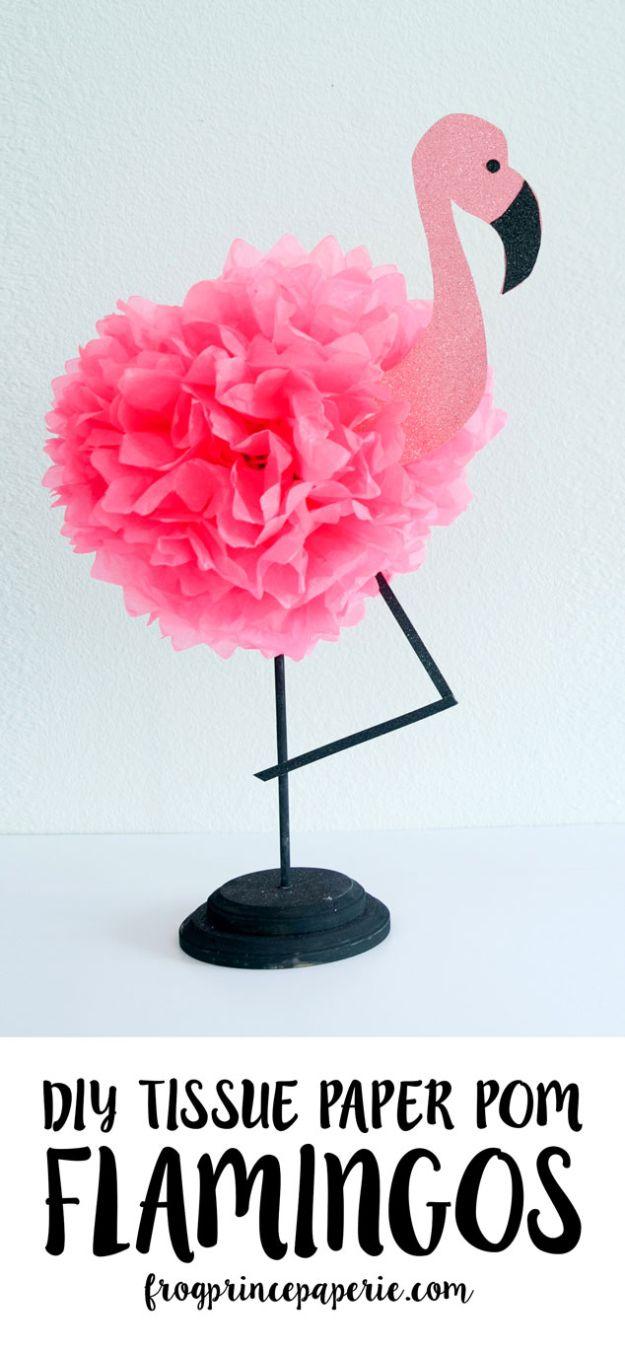
A pink tissue paper pom opened into a full round ball for the body, with a head, beak and stick legs cut from pink and black glitter cardstock, mounted on a dowel in a round base so it stands up like a little lawn ornament. Cardstock, not paper, for the head, because it has to hold itself upright out of the pom. Hot glue is the adhesive that actually grips glitter paper, which is a thing worth knowing before you waste an afternoon on double sided tape.
Get the full tutorial at Frog Prince Paperie.
36. Key Frame
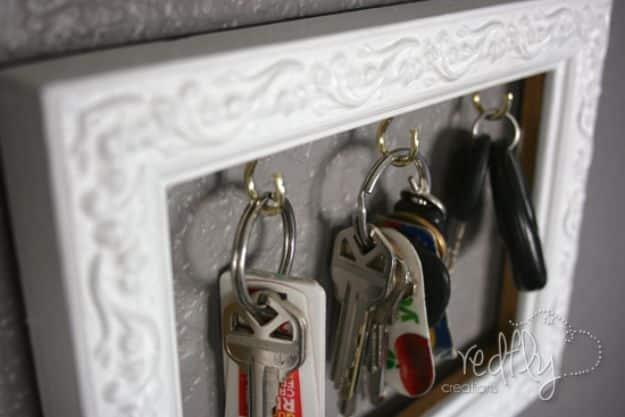
A small white ornate picture frame hung empty with gold cup hooks screwed into the inside of the bottom rail, so keys hang inside the frame like a tiny exhibit. The frame has to be thick enough to take a hook, which is the one specification that rules most frames out, and around eight and a half by six and a half inches is the sweet spot. Gold hooks against white give it a bit of bling. Second hand shops are the right place to find one.
Get the full tutorial at Redfly Creations.
37. DIY Gold Animal Figurines
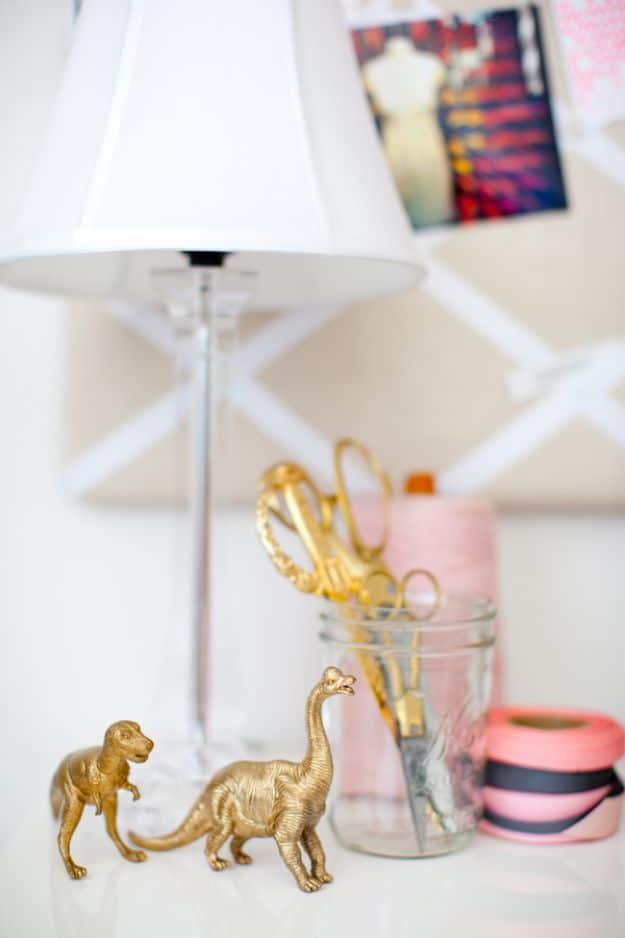
Plastic toy animals sprayed gold and set on a desk, which is a two-ingredient project and one of the most reliably good-looking things on this page. Gold spray paint and a bag of figurines, a couple of light coats outdoors, and overnight to dry. Dinosaurs photograph best because the silhouettes are busy, but a pig and an elephant work just as well. The reason it reads as expensive is the uniform finish, so resist the urge to paint them different colors.
Get the full tutorial at Southern Curls and Pearls.
38. DIY Leaf Doormat
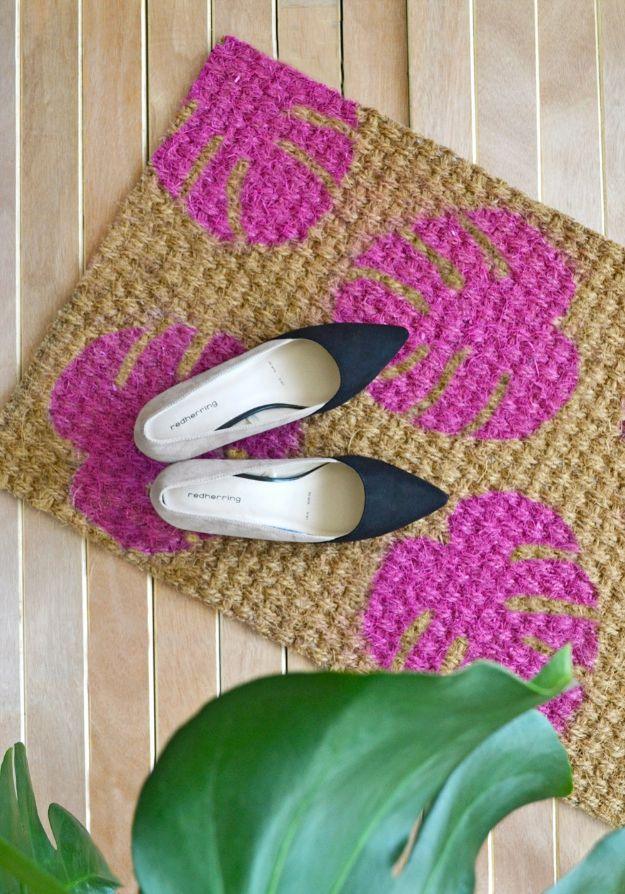
A plain coir doormat stencilled with hot pink monstera leaves, using a template drawn by hand and cut out of sturdy cardboard. The catch with a leaf shape is the gaps between the fronds: cut them too thin and two coats of paint close them up and the pattern disappears into a blob. Leave at least an inch of space between the separations. Coir takes paint much better than a fabric mat and stands up to actual boots, which is the entire job of a doormat.
Get the full tutorial at Enthralling Gumption.
39. DIY Rope Lantern Vases
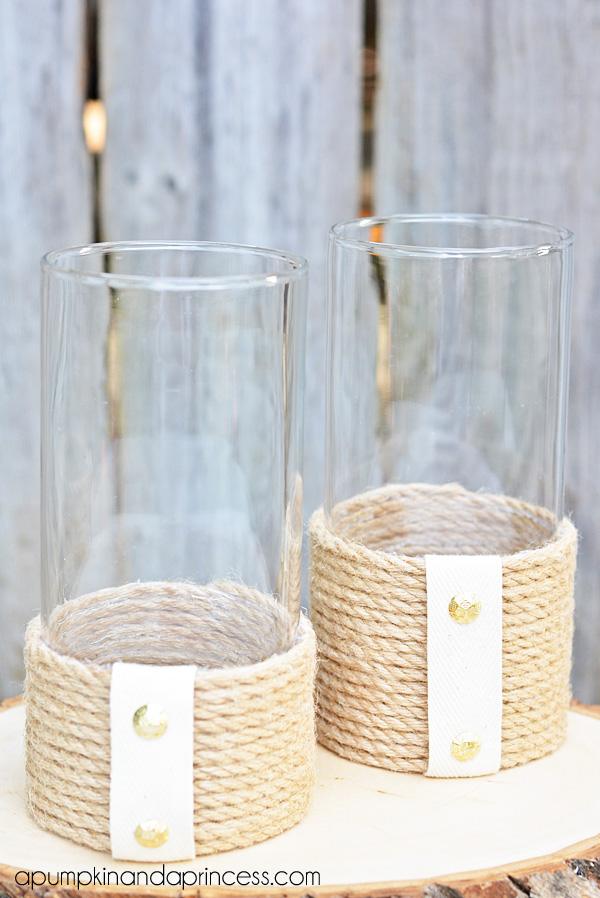
Clear glass cylinders with the lower third wrapped in sisal rope and a vertical strip of white twill banded across the front, finished with gold upholstery nails. Three dollars each, against twenty and twenty five for the designer versions they copy. Glue the twill down first, flipping the front face onto the bottom so the join hides, then wrap the rope over it. Twill for several vases costs about fifty cents and the nails run just over a dollar for twenty four.
Get the full tutorial at A Pumpkin and a Princess.
40. DIY Faux Crystal Knobs
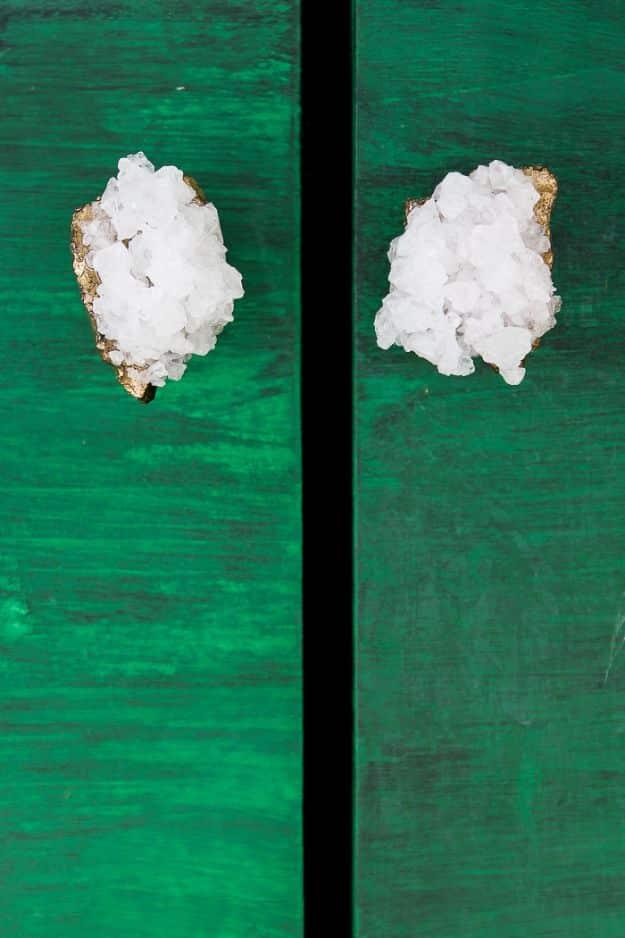
Quartz-looking clusters with gilded edges glued onto plain flat knob bases and fitted to a green painted cabinet. The knobs themselves are one step: E6000 on the flat base, press the crystal firmly on, leave it upright overnight. The crystals are the project before that, made separately and left to cure fully overnight before any glue touches them. Nestle the finished knobs into a bowl of rice while they dry so nothing tips over, which is a genuinely excellent trick.
Get the full tutorial at Rain on a Tin Roof.
41. DIY Boxwood Wreath
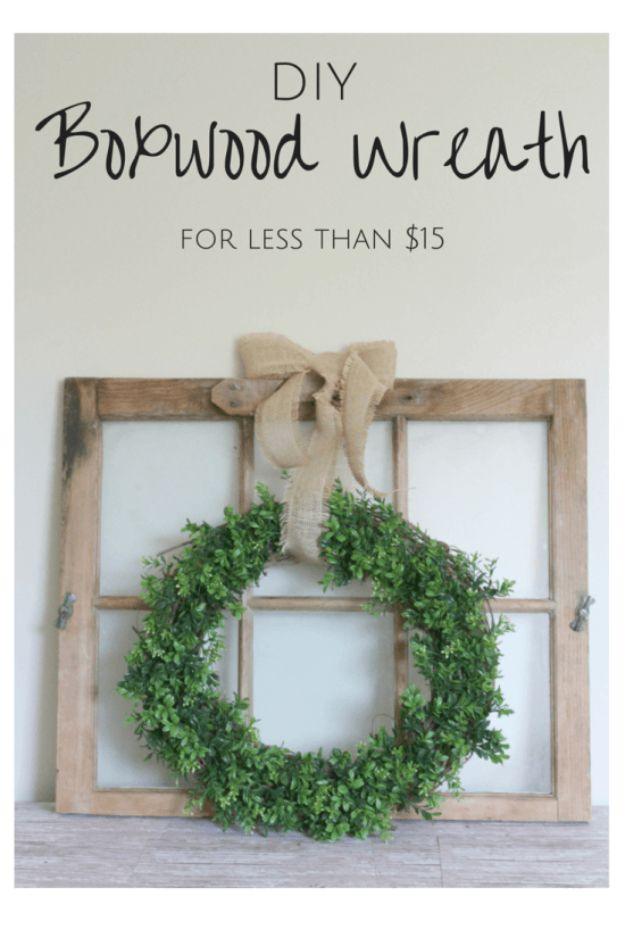
A full round boxwood wreath tied with a wide burlap bow, hung on an old salvaged window frame leaned against a wall. The window is doing half the work here and is worth copying even if the wreath is bought: an old sash frame gives a wreath a background and a frame at once, and turns one object into an arrangement. Boxwood is the reason it can stay where it is, because it holds its color long after anything else hung on a wall has gone brown and brittle.
Get the full tutorial at Table and Hearth.
42. How to Make Clay Flower Mirror In 1 Hour
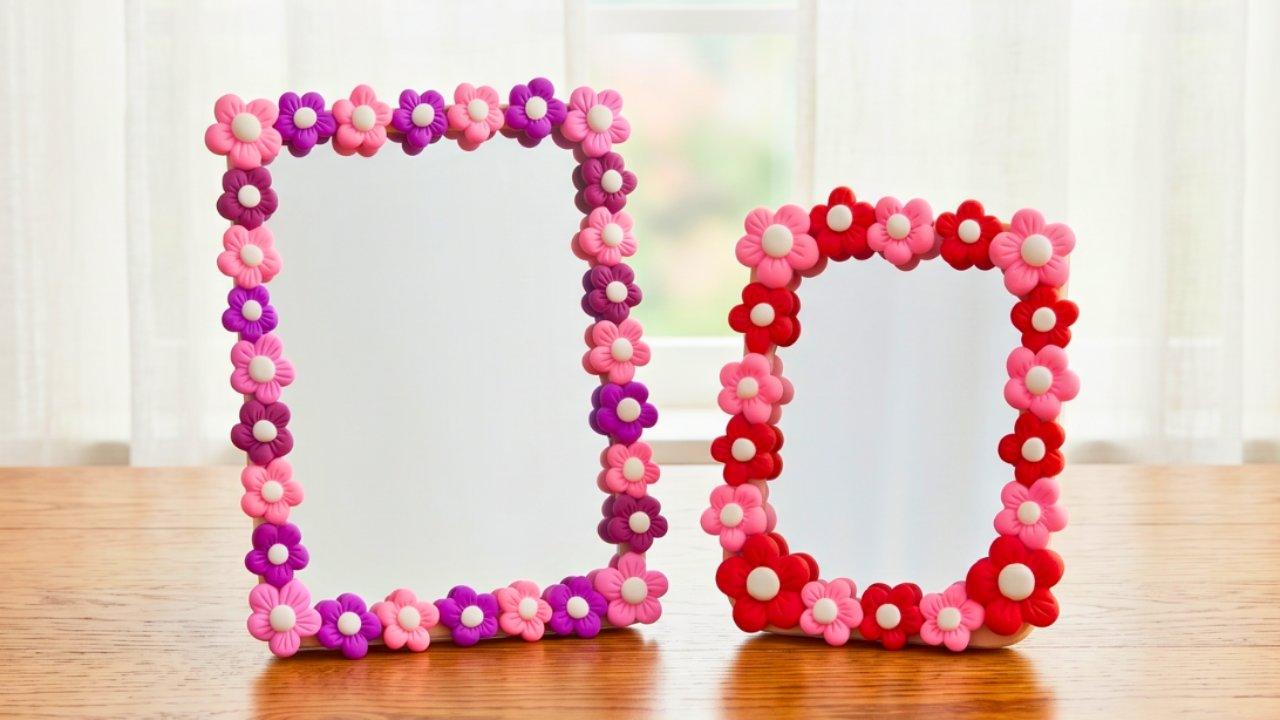
A plain round mirror rimmed with soft clay flowers, which turns a dollar store mirror or a mirror already on the wall into something worth looking at. Soft clay is the reason this works for beginners. It is lightweight and easy to shape, and unlike traditional air dry clay it does not need constant wetting or leave you with sticky hands mid-petal. Build the flowers, press them on around the rim, and the whole thing comes together inside an hour.
Get the full tutorial at Sueeye.
43. DIY Decoupage Vase Using Napkin Paper
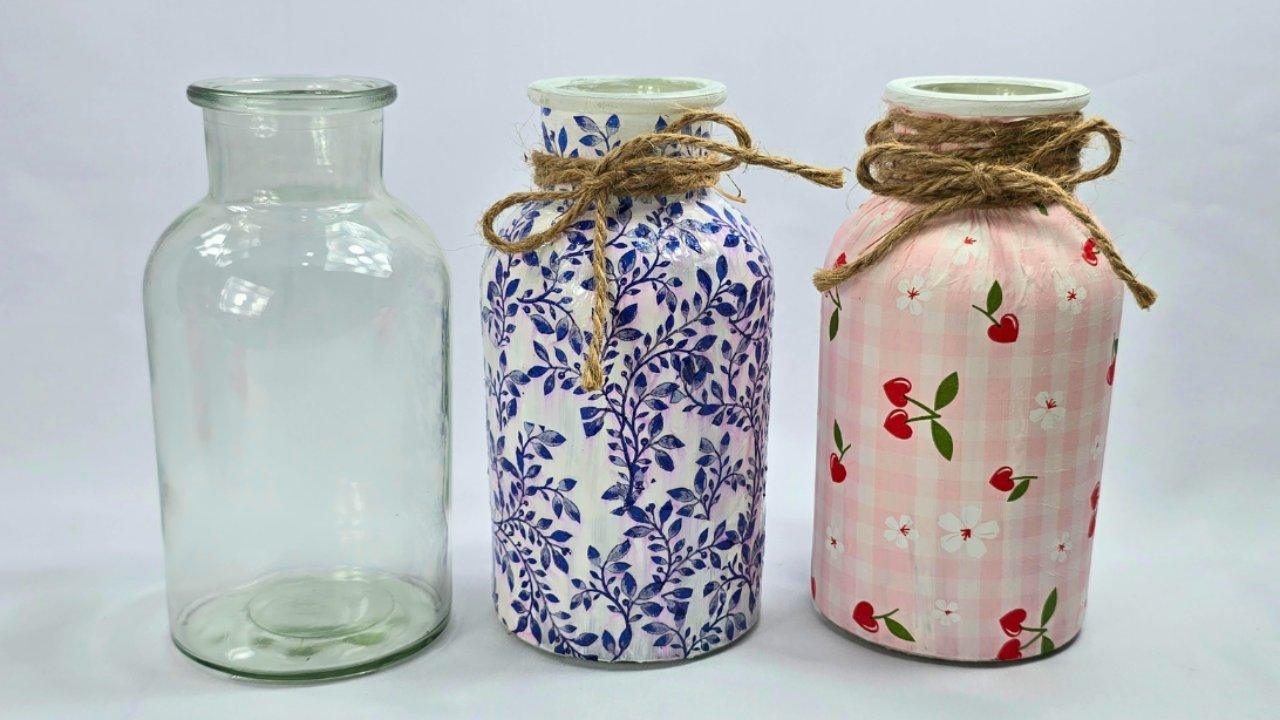
An empty glass jar decoupaged with printed paper napkins, which is the cheapest possible route from recycling bin to centerpiece. Napkins are the material to use rather than wrapping paper or card, because they are thin enough to disappear into the glue and take the curve of a jar without creasing. Glass, napkins, glue, nothing else. The jar in the tutorial came from the dollar store and sat around for months waiting for a purpose, which is relatable.
Get the full tutorial at Sueeye.
44. How to Make a Jute Rope Tray
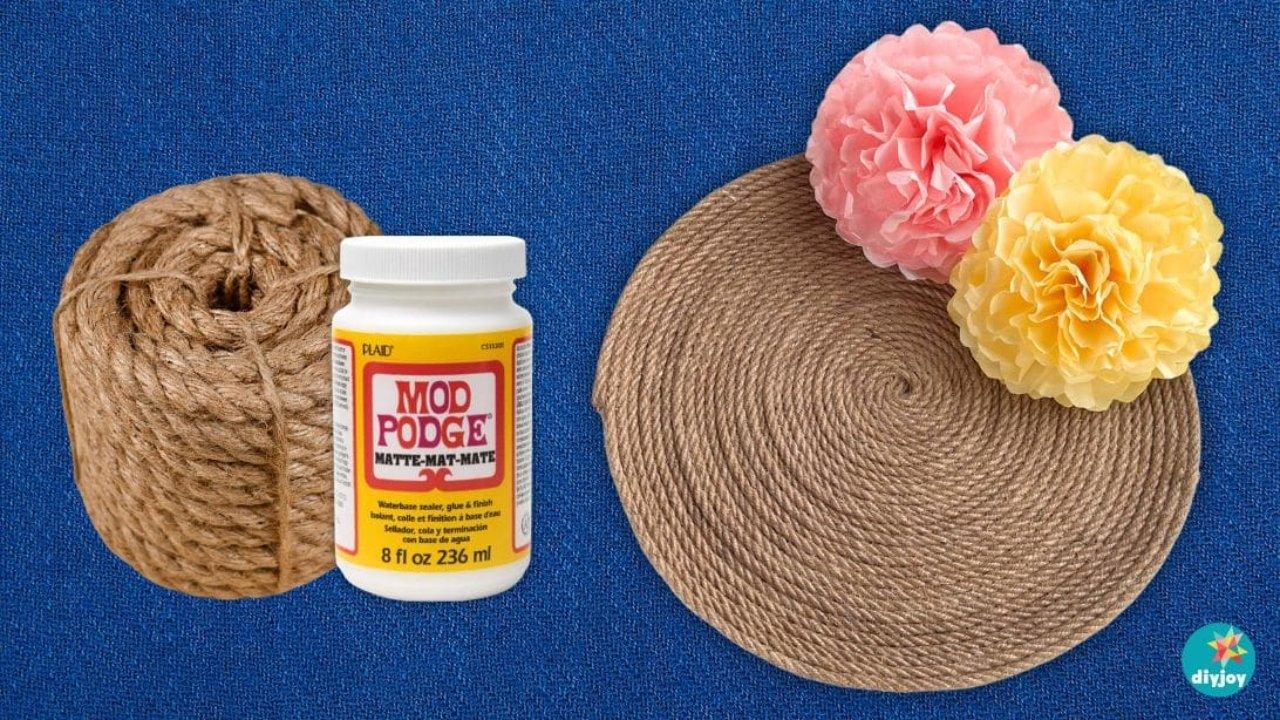
Jute rope coiled into a flat tray using nothing but Mod Podge, for a couple of dollars against the price of the boho trays in the shops. The size is entirely up to you because you are building the coil rather than filling a mould, so it can be made to fit a specific spot on a coffee table, and handles or embellishments can be added as it goes. It is forgiving enough for a complete beginner and the texture is the whole appeal.
Get the full tutorial at Sueeye.
45. Textured Heart Canvas Art Painting
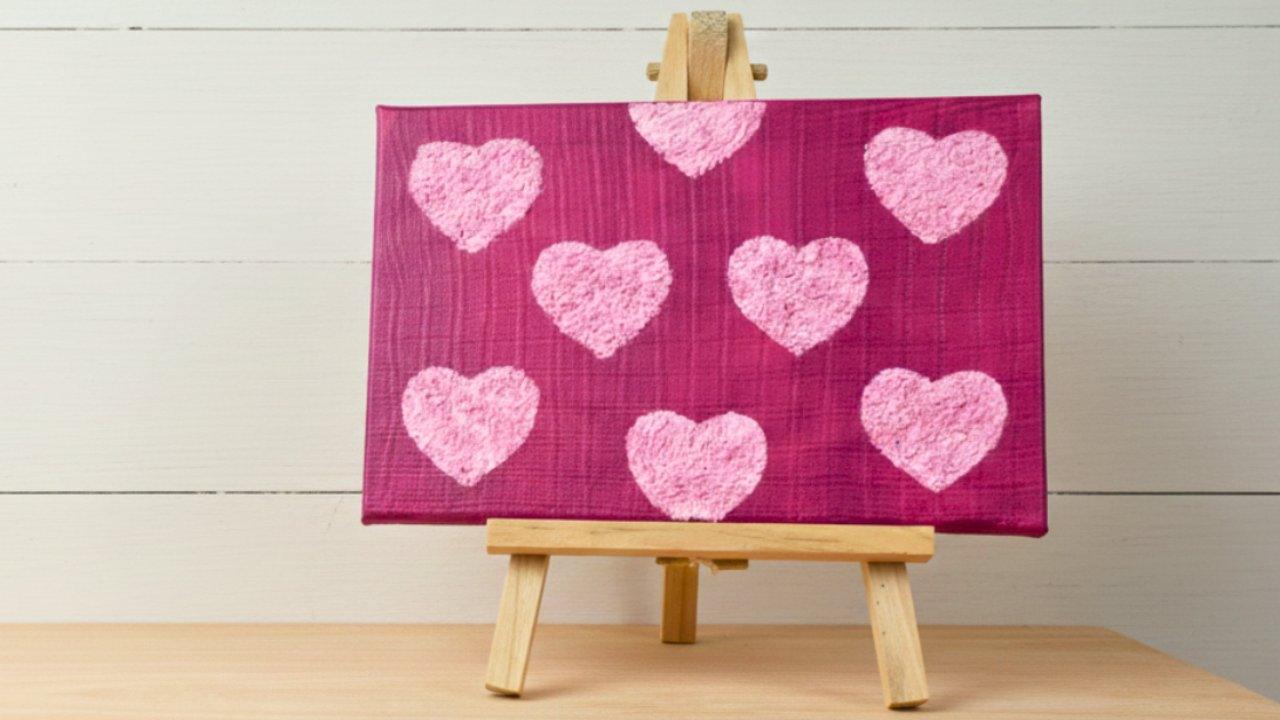
A heart built up in thick texture on a stretched canvas using tissue paper under the paint, so the surface has real relief rather than a flat painted shape. No drawing skill is needed, which is the honest appeal: the texture carries the piece and the color finishes it. The tutorial makes the point that nobody starts out able to paint and that intention matters more than technique, which is a better attitude to bring to a blank canvas than most art advice manages.
Get the full tutorial at Sueeye.