
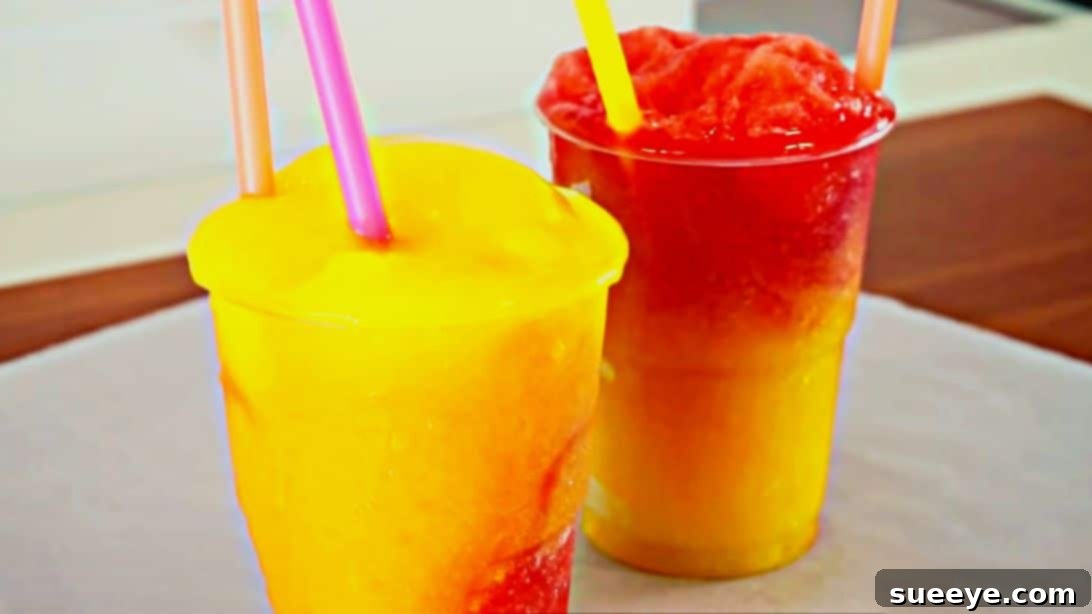
Master the Art of Homemade Fruit Slushies: Your Ultimate Refreshing Summer Treat
When the sun blazes and the mercury rises, there’s nothing quite as satisfying as a frosty, fruit-filled slushy to cool you down and invigorate your senses. Forget those overly sweet, artificially flavored store-bought versions; we’re diving into the delightful world of homemade fruit slushies, inspired by the fantastic recipe from Emma’s Goodies on YouTube. This isn’t just any slushy recipe; it’s a meticulously crafted method designed to deliver a burst of bold, natural fruit flavor, a perfectly smooth texture, and an incomparable icy chill that truly hits the spot.
Unlike many quick-fix slushy recipes that often result in a watery, diluted drink, Emma’s approach focuses on maximizing the natural essence of the fruit. The secret lies in a carefully balanced blend and the inclusion of a simple, homemade sugar syrup that ensures a richer, more concentrated taste profile. This means you’re not just getting a cold drink; you’re getting a vibrant, intensely fruity experience that will transport you straight back to the joyful days of childhood, but with a sophisticated, natural twist. Prepare to elevate your summer refreshment game with these unbelievably delicious and incredibly easy-to-make fruit slushies!
The Essentials: Simple Syrup and Fresh Fruit Ingredients
Crafting the perfect homemade slushy begins with the right ingredients. The beauty of this recipe is its simplicity, relying on fresh, high-quality fruit and a fundamental sweetening agent – a homemade simple syrup. This combination not only enhances flavor but also gives you complete control over the sweetness level and ingredient quality, making it a healthier and more enjoyable option than many commercial alternatives.
- 1 cup + 1 tablespoon of water
- 2/3 cup of granulated sugar
- A pinch of salt (enhances flavor and balances sweetness)
- 11 ounces (approximately 1.5-2 cups) of fresh fruit, prepared (peeled, pitted, and chopped as needed)
Crafting Your Flavor Profile: Delicious Fruit Combinations
One of the most exciting aspects of making your own slushies is the freedom to experiment with different fruit combinations. Emma’s Goodies offers several expertly curated pairings that guarantee a sensational taste. Each combination is designed to highlight the unique characteristics of the fruit while achieving optimal sweetness and tang.
- Tropical Mango Delight:
- 11 ounces of ripe mango, peeled and cubed
- 3 tablespoons of fresh lemon juice (brightens the mango’s sweetness)
- 5 tablespoons of homemade simple syrup (adjust to mango’s sweetness)
- Experience: A sun-kissed, creamy, and wonderfully sweet slushy with a subtle citrus kick.
- Berry & Cherry Blast:
- 11 ounces of mixed berries (strawberries, blueberries, raspberries) and pitted cherries
- 1 teaspoon of pure vanilla extract (adds a warm, aromatic depth)
- A hint of lemon zest (brightens and complements the berry flavors)
- 5 tablespoons of homemade simple syrup (adjust to berry tartness)
- Experience: A vibrant, antioxidant-rich slushy bursting with tangy-sweet berry goodness and a fragrant vanilla finish.
- Refreshing Watermelon Cool-Down:
- 11 ounces of seedless watermelon, cubed
- 5 tablespoons or less of homemade simple syrup (watermelon is naturally sweet)
- Experience: The ultimate thirst-quencher, incredibly light, hydrating, and naturally sweet – perfect for the hottest days.
- Sweet Peach Serenity:
- 11 ounces of ripe peaches, peeled and pitted, then sliced
- 5 tablespoons of homemade simple syrup (highlights peach’s delicate sweetness)
- Experience: A beautifully mellow and fragrant slushy, embodying the sweet essence of summer peaches.
Feel free to choose one of these delicious suggestions or get creative with your own fruit medley! The key is to select fresh, ripe fruit for the most impactful flavor.
Step-by-Step Directions: Crafting Your Perfect Fruit Slushy
Creating these sensational slushies is a straightforward process, broken down into two main stages: preparing the simple syrup and fruit, and then blending and freezing to achieve that irresistible icy texture. Follow these instructions carefully for the best results, ensuring a flavorful and perfectly textured treat every time.
Step 1: Preparing Your Foundation – Homemade Simple Syrup and Fruit
The first critical component of this recipe is the simple syrup. This ensures that the sugar dissolves completely, providing an even sweetness throughout your slushy without any grainy texture. It’s a fundamental step that sets this recipe apart.
To begin, place a small saucepan on your stove over medium heat. Add the measured water, granulated sugar, and a pinch of salt to the pan. Stir these ingredients continuously as the mixture slowly comes to a gentle simmer. Continue stirring until you observe that all the sugar crystals have completely dissolved into the water, forming a clear, syrupy liquid. Once dissolved, immediately remove the saucepan from the heat. It is crucial to let this simple syrup cool down completely to room temperature before incorporating it with the fruit. Rushing this step could negatively impact the final texture and flavor of your slushy.
While the simple syrup cools, turn your attention to the star of the show: the fresh fruit. Choose one of the delightful fruit combinations mentioned above, or your own preferred fruit. Prepare your chosen fruit by washing it thoroughly. If necessary for your fruit type (like mangoes or peaches), carefully peel the skin. Then, remove any pits or seeds. Finally, cut the fruit into uniformly small pieces. Smaller pieces will blend more easily and create a smoother consistency, ensuring that your slushy is perfectly velvety.
Step 2: Blending to Perfection, Freezing, and Serving
With your simple syrup cooled and fruit prepared, you’re ready to transform these fresh ingredients into a sensational slushy. This step involves blending, a crucial freezing period, and the final touch for that ideal slushy consistency.
Carefully place your freshly sliced and prepared fruit into a high-speed blender. Add the cooled simple syrup to the blender. The exact amount of simple syrup you add can be adjusted based on the natural sweetness of your chosen fruit and your personal taste preference. For instance, naturally sweet watermelon might require less, while tart berries might benefit from the full recommended amount. If using, now is the time to add any additional flavorings such as lemon juice, vanilla extract, or lemon zest, as specified in your chosen fruit combination. Secure the lid on your blender and process the mixture until it becomes completely smooth and luscious. Ensure there are no large chunks of fruit remaining.
Once blended, pour the fruit mixture through a fine-mesh strainer into a freezer-safe bowl or container. Straining is an important step as it removes any remaining fruit fibers, seeds, or small pulpy bits, guaranteeing an incredibly smooth and refined slushy texture that is a hallmark of this recipe. Cover the bowl or container tightly with plastic wrap or an airtight lid to prevent freezer burn and ice crystal formation on the surface. Place it in the refrigerator’s freezer compartment.
Allow the mixture to freeze for approximately 3 hours. This initial freezing time is critical for developing the slushy’s unique texture. After 3 hours, retrieve the container from the freezer. Using a fork, vigorously stir and fluff up the semi-frozen mixture. This action breaks up larger ice crystals and creates that desirable light, airy, and slushy consistency. Once fluffed, your homemade fruit slushy is ready to be enjoyed! Pour it into your favorite serving cup, perhaps garnish with a fresh fruit slice or a sprig of mint, and savor the refreshing goodness.
If you plan to enjoy your slushy later, perhaps the next day or even next week, you can freeze it for a longer duration. However, remember that freezing it for extended periods will make it much harder. To restore its perfect slushy texture, simply remove it from the freezer, let it sit at room temperature for about 10-15 minutes, and then give it an extra vigorous fluffing with a fork before serving. You might need to break it up a bit more initially before it becomes soft enough to fluff. This ensures that even after prolonged freezing, you can still achieve that delightful, scoopable slushy consistency.
Why Homemade Fruit Slushies are a Summer Must-Have
Beyond being incredibly delicious, making your own fruit slushies at home offers numerous advantages. You gain complete control over the ingredients, allowing you to avoid artificial colors, flavors, and excessive sugars often found in commercial options. This makes your homemade version a much healthier choice, packed with the natural vitamins and antioxidants from fresh fruit. Furthermore, it’s a cost-effective way to enjoy a premium refreshment, especially when fruits are in season. The customization possibilities are endless, allowing you to cater to everyone’s preferences, from sweet to tart, simple to exotic.
This recipe, generously shared by Emma’s Goodies, provides a fantastic foundation for creating genuinely outstanding frozen fruit drinks. It’s a simple pleasure that brings immense satisfaction, whether you’re enjoying a quiet afternoon on the porch or hosting a lively summer gathering. So, embrace the warmth of the season and cool down with a vibrant, flavorful, and incredibly refreshing homemade fruit slushy.
*A special thank you to Emma’s Goodies via YouTube for providing the inspiration and amazing images for this delightful recipe. If you enjoyed crafting these delicious slushies, we highly recommend visiting her YouTube channel for more fantastic cooking and baking ideas. Give her channel a visit and subscribe to discover a world of culinary inspiration!