
Do you adore the timeless elegance of Pottery Barn but often find their price tags a little out of reach? What if we told you that you could achieve that same sophisticated aesthetic for your home, specifically with a stunning spring wreath, for four to five times less than the store price? It’s not just a possibility; it’s an exciting DIY reality waiting for you!
As the days grow longer and nature awakens, it’s the perfect moment to bid farewell to those cozy fall and winter wreaths. Welcome the season of renewal with a fresh, light, and airy spring wreath that truly embodies the spirit of new beginnings. This project offers the ideal blend of ease, affordability, and undeniable class, proving that beautiful home decor doesn’t have to break the bank.
One of the most appealing aspects of this particular DIY project is its incredible speed. You’ll be amazed at how quickly you can transform simple materials into a magnificent accent piece for your home. We’re talking about seeing beautiful results in a flash, which is precisely the kind of craft project that brings immediate satisfaction and a burst of creative joy. And let’s not forget the financial perk – it’s wonderfully inexpensive!
Imagine the delightful feeling of hanging your newly crafted spring wreath, instantly infusing your entryway or living space with vibrant energy. It’s more than just decor; it’s a feeling – a tangible representation of “a spring in your step,” much like the season itself. What makes this wreath particularly captivating is its simple yet profound elegance. While many wreaths tend to be elaborate, this design embraces minimalism, allowing each carefully chosen element to shine, creating a truly refined statement.
Craft Your Dream Spring Wreath: A Pottery Barn Look for Less
Welcome to the world of smart decorating, where high-end style meets budget-friendly creativity. This comprehensive guide will walk you through crafting an exquisite spring wreath that rivals the charm and sophistication of those found in high-end boutiques, all while keeping your wallet happy. Get ready to impress guests and uplift your home’s atmosphere with a touch of handmade artistry.
Embrace the Spirit of Spring with Handmade Decor
The transition from the cooler, often muted tones of winter to the vibrant, refreshing palette of spring is a magical time. Our homes, much like our wardrobes, often benefit from a seasonal refresh. Spring decor is all about lightness, vitality, and a sense of renewal. Incorporating elements like fresh flowers, pastel colors, and natural textures can dramatically alter the mood of your living space, making it feel more open, inviting, and cheerful. A spring wreath on your front door or within your home serves as a perfect beacon for this seasonal shift, signaling warmth and hospitality.
Beyond aesthetics, changing your home decor seasonally can have a positive impact on your well-being. It encourages you to declutter, reorganize, and refresh your surroundings, creating a more stimulating and joyful environment. A DIY spring wreath, crafted with your own hands, adds an extra layer of personal connection and pride to this seasonal transformation.
Unlocking High-End Style on a Budget: The Art of the DIY Dupe
Pottery Barn is renowned for its classic, comfortable, and stylish home furnishings and decor. Their wreaths, often featuring high-quality faux florals and natural bases, exude a sophisticated charm that many aspire to replicate. The secret to achieving this “Pottery Barn look for less” lies in understanding key design principles and smart material sourcing.
The beauty of a DIY dupe is twofold: significant cost savings and the immense satisfaction of creating something beautiful yourself. You gain control over the quality of materials, the exact color palette, and the overall design, allowing for a personalized touch that mass-produced items often lack. This project is an empowering testament to the idea that luxury home decor doesn’t require a hefty price tag; it simply requires a bit of creativity and a willingness to get hands-on.
By opting for a handmade approach, you’re not just saving money; you’re investing your time into a fulfilling creative endeavor. The resulting wreath will be a unique piece of art, imbued with your personal effort and style, making it far more meaningful than any store-bought alternative. It’s about cultivating a home that truly reflects you, without compromising on elegance or quality.
Your Easy Guide to Crafting an Elegant Spring Wreath
This project is designed for everyone, from novice crafters to seasoned DIY enthusiasts. Its simplicity is its strength, ensuring that you can create a beautiful, professional-looking wreath without any complex techniques or specialized tools. Prepare to be delighted by how quickly this charming piece comes together, offering almost instant gratification.
Gathering Your Affordable Materials
One of the true joys of this project is the accessibility and affordability of its components. You won’t need to hunt for obscure items; most can be found at your local discount or craft stores, allowing you to maximize savings without sacrificing style.
- Grapevine Wreath Base: A sturdy and versatile foundation. The original creator found hers at Walmart for approximately $4.74. These are widely available at craft stores like Michaels, Hobby Lobby, or even larger retailers. They offer a natural, rustic charm that beautifully complements floral arrangements.
- Dahlia Floral Picks: These provide the main pop of color and focal points. The original suggestion was two floral picks of Dahlias from The Dollar Tree. Dahlias offer a lush, full bloom that immediately adds a touch of sophistication. Look for picks with multiple flower heads and some greenery for a fuller effect.
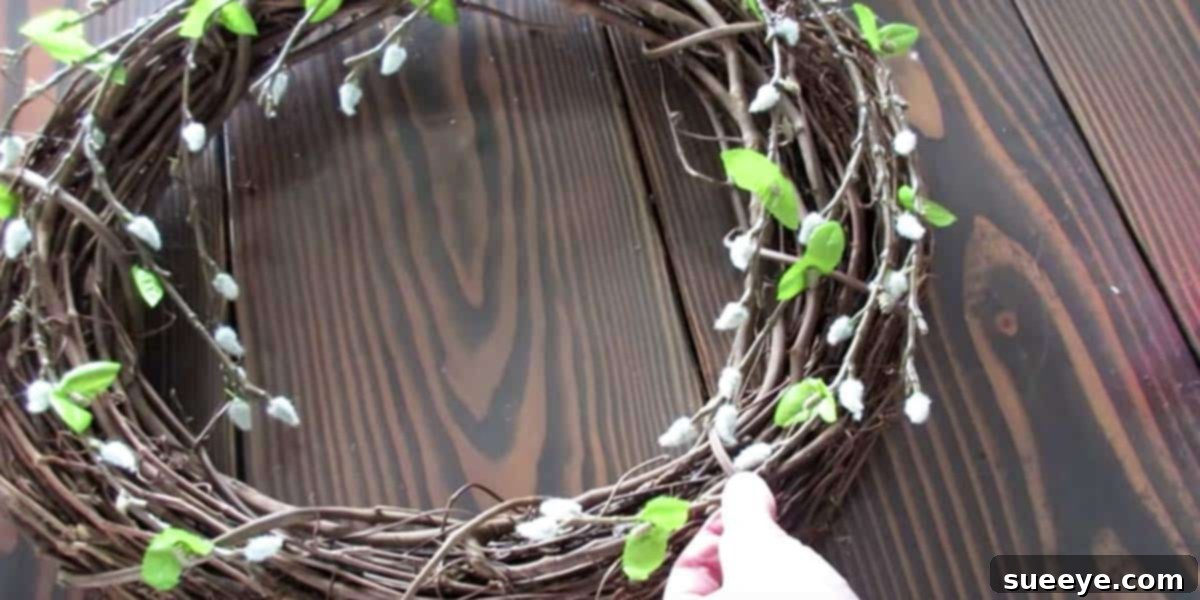
- Pussy Willow Stems: These introduce texture and an ethereal, delicate quality. Four stems were suggested from The Dollar Tree. Pussy willows are iconic for spring, with their soft, fuzzy catkins adding a unique visual and tactile element. They create beautiful height and a sense of natural movement within the wreath.
- Optional: Floral Wire or Hot Glue Gun: While often you can simply tuck the floral stems into the grapevine, having floral wire or a hot glue gun (and glue sticks) on hand can provide extra security, especially if your wreath will be exposed to the elements or handled frequently.
- Optional: Wire Cutters: Useful for trimming floral stems if they are too long or need to be separated from larger picks.
Tips for Material Selection: When choosing your floral picks, consider the overall color palette you desire. While Dahlias are beautiful, feel free to substitute with other spring flowers like peonies, ranunculus, or even realistic-looking tulips, depending on what’s available and what appeals to your aesthetic. For the pussy willows, ensure they have enough individual stems to spread throughout your wreath, adding that lovely airy feel.
Step-by-Step Assembly: Bringing Your Wreath to Life
Creating this wreath is less about rigid instructions and more about intuitive arrangement. The natural structure of the grapevine wreath makes it incredibly forgiving and easy to work with.
- Prepare Your Workspace: Lay out all your materials on a clean, flat surface. This helps you visualize your components and keeps everything within easy reach. If using floral picks with multiple flowers, you might want to gently separate them into individual stems or smaller clusters using wire cutters to give you more flexibility in placement.
- Position the Dahlia Picks: Start with your main floral elements, the Dahlias. Decide on the general flow you want for your wreath. Do you want flowers concentrated at the bottom, spread evenly, or clustered to one side? For a classic look, try arranging the Dahlias in a diagonal sweep or clustering them slightly off-center. Gently push the stems of the Dahlias directly into the woven branches of the grapevine wreath. The natural twists and turns of the branches will often hold them securely in place. Adjust their position until you are happy with the visual balance.
- Integrate the Pussy Willows: Once your primary flowers are in place, it’s time to add the pussy willows. These delicate stems are fantastic for adding height, texture, and a sense of organic movement. Weave the pussy willow stems throughout and around the Dahlias, allowing them to extend outwards and upwards. Their soft, airy quality will contrast beautifully with the fuller Dahlia blooms, creating depth and interest. Distribute them evenly or create small groupings, ensuring they enhance the overall shape without overpowering the flowers.
- Secure Elements (Optional but Recommended): For added durability, especially if your wreath will be hanging on a door that gets frequent use, consider securing your elements. You can use floral wire to wrap around the stems and the grapevine base, or apply small dots of hot glue to the points where the stems meet the wreath. This step is particularly important if any of your floral picks feel loose.
- Final Touches and Fluffing: Once all your elements are placed, take a step back and examine your wreath. Fluff out the flowers and adjust the pussy willows to ensure they look natural and full. Look for any sparse areas and gently rearrange stems to fill them in. You might find you need to add a small additional bloom or adjust an existing one for perfect balance. The goal is to create a harmonious and elegant composition.
Customizing Your Spring Wreath: Personal Touches and Variations
While the Dahlia and Pussy Willow combination creates a wonderfully classic and sophisticated look, the beauty of DIY lies in its infinite possibilities for customization. Feel free to use this design as a springboard for your own creative interpretations.
- Color Palette Exploration: Experiment with different flower colors. Soft pastels like blush pink, lavender, and mint green evoke a gentle spring vibe, while brighter hues like lemon yellow or vibrant fuchsia can create a more energetic statement.
- Adding Diverse Florals: Don’t limit yourself to just two types of flowers. Incorporate other faux spring blooms such as tulips, hyacinths, peonies, or cherry blossoms. You can also add some realistic-looking artificial greenery to provide a lush backdrop and enhance the natural feel.
- Ribbons and Bows: A simple bow made from linen, burlap, or a delicate satin ribbon can add an extra layer of charm. Choose a ribbon color that complements your chosen flowers and enhances the overall theme.
- Natural Embellishments: Consider integrating small natural elements like moss, faux bird’s nests, or tiny decorative eggs for an even more whimsical spring feel. These additions can transform your wreath into a captivating focal point.
- Monogramming: For a personalized touch, attach a small wooden or metal initial to the center or bottom of your wreath.
The key is to let your imagination guide you. This wreath serves as an excellent foundation for expressing your unique style and vision for spring decor.
Styling Your Handmade Masterpiece: Where to Hang Your Spring Wreath
Once your exquisite spring wreath is complete, the next exciting step is deciding where to showcase its beauty. A well-placed wreath can instantly elevate the ambiance of any space.
- The Grand Welcome: Your Front Door: This is the most traditional and often the most impactful spot for a wreath. It creates an immediate sense of welcome and sets the tone for your home’s interior. Ensure your wreath is securely hung and consider adding a UV protective spray if it will be exposed to direct sunlight for prolonged periods.
- Interior Focal Points: Wreaths aren’t just for doors! They make stunning interior accents. Consider hanging your wreath:
- Above a fireplace mantel, perhaps layered with a mirror or a piece of art.
- On a prominent wall in your living room, dining room, or entryway.
- On a kitchen cabinet door for a touch of rustic charm.
- In a guest bedroom to add a welcoming, homey feel.
- Layering and Grouping: For a more sophisticated display, try layering your wreath over a large mirror or a window. You can also group smaller wreaths or incorporate your handmade piece into a gallery wall for an eclectic and personalized look.
Think about the overall flow and color scheme of your home when choosing its placement. The simple elegance of this wreath allows it to integrate seamlessly into a variety of decor styles, from farmhouse chic to modern minimalist.
The Joy of DIY: More Than Just a Wreath
Engaging in DIY projects offers benefits that extend far beyond the finished product. The act of creation itself is therapeutic and rewarding.
- Sense of Accomplishment: There’s an unparalleled pride that comes from pointing to something beautiful in your home and saying, “I made that!”
- Creative Outlet: Crafting provides a wonderful way to express your creativity, de-stress, and take a break from the everyday hustle.
- Personal Connection: Handmade items infuse your home with personality and warmth, creating spaces that truly feel lived-in and loved.
- Inspiring Others: Your beautiful, budget-friendly creation might just inspire friends and family to embark on their own DIY adventures!
This spring wreath project is a perfect example of how a small investment of time and inexpensive materials can yield a truly remarkable piece of decor, enriching both your home and your spirit.
Final Thoughts: Let Your Home Blossom This Spring
You no longer have to envy those high-priced Pottery Barn wreaths from afar. With this easy-to-follow guide, you possess the power to craft an equally beautiful, if not more meaningful, spring wreath for a fraction of the cost. Embrace the opportunity to infuse your home with the refreshing essence of spring, showcasing your creativity and resourcefulness.
This project is a testament to the fact that elegant home decor can be accessible to everyone. So gather your simple supplies, set aside a little time, and prepare to bring a touch of sophisticated, handmade charm into your home this season. We encourage you to try this delightful DIY project and experience the joy of creating something truly special. Share your beautiful creations and let’s spread the inspiration for affordable, beautiful living!