
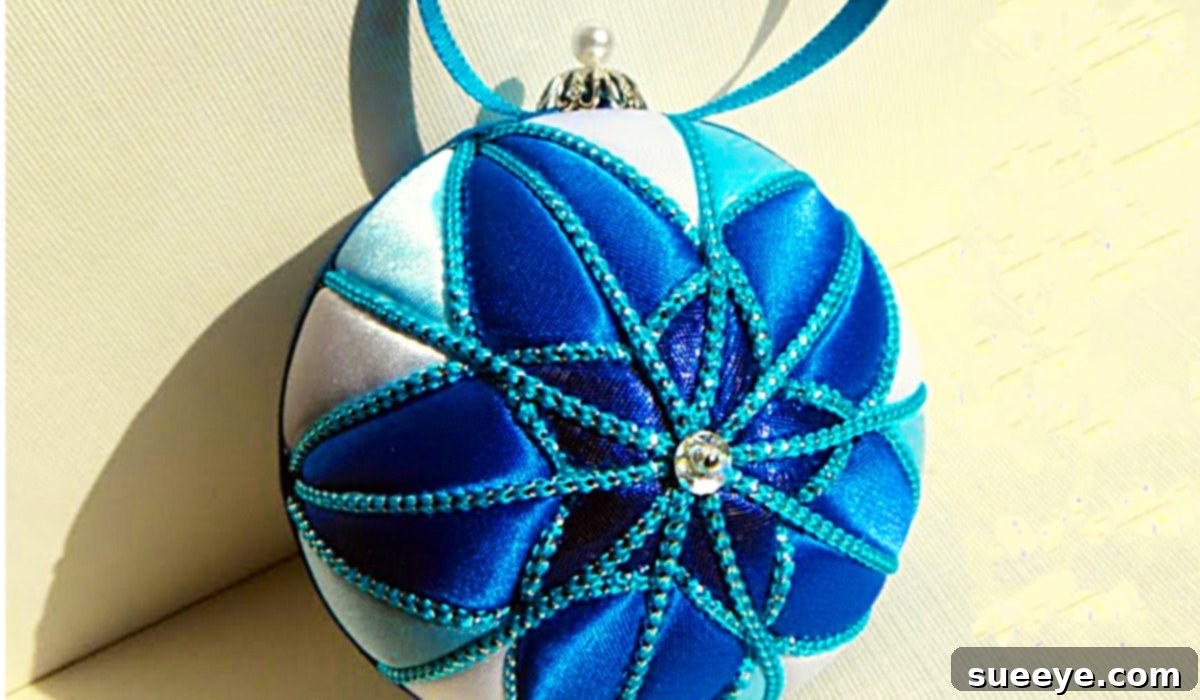
Craft a Stunning No-Sew Blue Star Ornament: Your Guide to Easy DIY Holiday Decor
There’s an undeniable charm that comes with handmade holiday decorations, transforming a simple space into a warm, festive haven. For those who adore the elegance of satin ornaments but prefer to skip the sewing machine, a no-sew technique offers a brilliant solution. Inspired by a captivating video tutorial from Ornament Designs on YouTube, this comprehensive guide will walk you through creating a magnificent blue star ornament that promises to become a cherished part of your festive collection. Having personally experienced the loss of a treasured collection of satin ornaments during a move, discovering such an accessible and beautiful craft has been a delightful way to rebuild those festive memories and create new traditions.
This DIY Christmas ornament project stands out for its simplicity and the minimal materials required. Most crafters, whether seasoned or beginners, will likely find the majority of supplies already stashed away in their creative spaces. From basic straight pins to a trusty hot glue gun, these items are common craft room staples. For the foundational element, blank foam ornaments, often referred to as Styrofoam balls, are readily available at craft stores like JoAnn’s Fabrics, where savvy shopping with digital coupons can yield significant savings, making this project as budget-friendly as it is beautiful. This easy craft project offers a fantastic opportunity to add a personal touch to your holiday decor without the complexity of traditional sewing.
Essential Materials for Your No-Sew Blue Star Ornament
Embarking on this delightful DIY journey requires only a handful of easily accessible materials. Gathering everything beforehand ensures a smooth and enjoyable crafting experience, making the creation of your handmade holiday decor seamless. Here’s what you’ll need to create your stunning blue star ornament:
- Blank Styrofoam Balls: These form the core of your ornament. Available in various sizes, choose one that suits your desired ornament scale. Opt for a smooth, dense foam for easier scoring and a cleaner finish, which will contribute to a professional-looking DIY Christmas ornament. Standard 3-inch or 4-inch balls are popular choices.
- Stretch Satin Scraps: The star of the show! Stretch satin offers a luxurious sheen and is forgiving to work with, conforming nicely to the foam’s curves. While blue is classic for this star design, feel free to experiment with other colors or even patterned satins to match your holiday theme. You’ll need enough to cover the ball in segments, so a quarter-yard or even fabric scraps from previous projects often suffice for this no-sew ornament. Ensure the fabric has a bit of stretch to allow for smooth application.
- Decorative Cord: This element adds a professional, finished look and helps define the star’s points, making your handmade holiday decor truly shine. A metallic blue cord, as seen in the inspiration, perfectly complements the satin, but gold, silver, or even a contrasting color can add unique flair. Look for thin, pliable cords (1/8 inch or less in diameter) that are easy to glue around the intricate star patterns.
- Ribbon: Essential for hanging your completed ornament. A thin satin or velvet ribbon, color-coordinated with your fabric and cord, will provide an elegant loop. Approximately 6-8 inches will be sufficient per ornament. Choose a durable yet decorative ribbon.
- Straight Dressmaking Pins: These are crucial for securing the fabric to the foam. Ensure you have a good quantity of sharp, standard-length pins (e.g., 1 to 1.5 inches long). Look for pins with small, flat heads that won’t protrude too much, ensuring a smooth finish for your easy craft project.
- Tape Measure: For precise measurements and ensuring your star’s segments are symmetrical. A flexible fabric tape measure or a retractable metal one will work perfectly for marking your Styrofoam ornament accurately.
- Pen (with a Hard Tip): A Bic pen or any similar ballpoint pen with a firm tip is ideal. It’s used not just for marking but also for scoring the foam surface, creating the essential guidelines for your design, which is a key step in crafting your beautiful satin ornament.
- Hot Glue Gun: Your primary adhesive tool for this no-sew project. A low-temp glue gun is often safer for beginners, providing sufficient adhesion without extreme heat, but a high-temp gun provides a stronger bond. Ensure it’s in good working order and has a fine tip for precision.
- Glue Sticks: Plenty of glue sticks to feed your hot glue gun. It’s always better to have too many than to run out mid-project when crafting your beautiful Christmas craft. Clear, all-purpose glue sticks are generally best.
Crafting Your Masterpiece: Step-by-Step No-Sew Blue Star Ornament Tutorial
This no-sew blue star ornament tutorial, inspired by Ornament Designs on YouTube, simplifies the creation of a stunning Christmas bauble into a series of manageable, enjoyable steps. Forget the needle and thread; this project relies on clever pinning and strategic gluing to bring your festive vision to life, making it a perfect DIY holiday decor idea suitable for crafters of all skill levels.
Step 1: Preparing Your Workspace and Materials
Before you begin any crafting, establish an organized and comfortable workspace. Gather all your materials on a clean, well-lit surface, ideally one that can withstand minor glue drips or fabric trimmings. This not only makes the process more efficient but also significantly reduces the chances of misplacing small items like pins. Plug in your hot glue gun to allow it to heat up fully while you work on the initial steps, ensuring everything is ready for your easy craft project without unnecessary delays.
Step 2: Scoring the Star Pattern onto the Styrofoam Ball
This is arguably the most crucial step, as it defines the precise shape and symmetry of your star ornament. Precision here ensures a beautiful, balanced outcome, setting the foundation for your elegant satin ornament.
- Find the Center: Begin by identifying a central point on your Styrofoam ball. You can gently press a pin or the tip of your pen to mark it. This central point will serve as a reference for all subsequent measurements.
- Measure and Mark Equidistant Points: Using your tape measure, carefully mark equidistant points around the circumference of the ball. For a classic five-point star, you’ll need five evenly spaced points. For a larger or more intricate star, you might choose more. The key is absolute even spacing. Gently press the pen tip into the foam at each mark to create a small, yet noticeable indentation.
- Connect the Dots – The Star Outline: With your ruler or tape measure as a straight edge, use the hard tip of your pen to score deep lines connecting these points to form your desired star shape. For a traditional five-point star, this usually involves connecting non-adjacent points to form the star’s inner and outer edges. Press firmly enough to create a noticeable groove in the foam, but not so hard that you deform the ball. These grooves will serve as your guiding lines for pinning the fabric, making this a truly no-sew ornament. Accuracy in this step is paramount for a professional-looking finish.
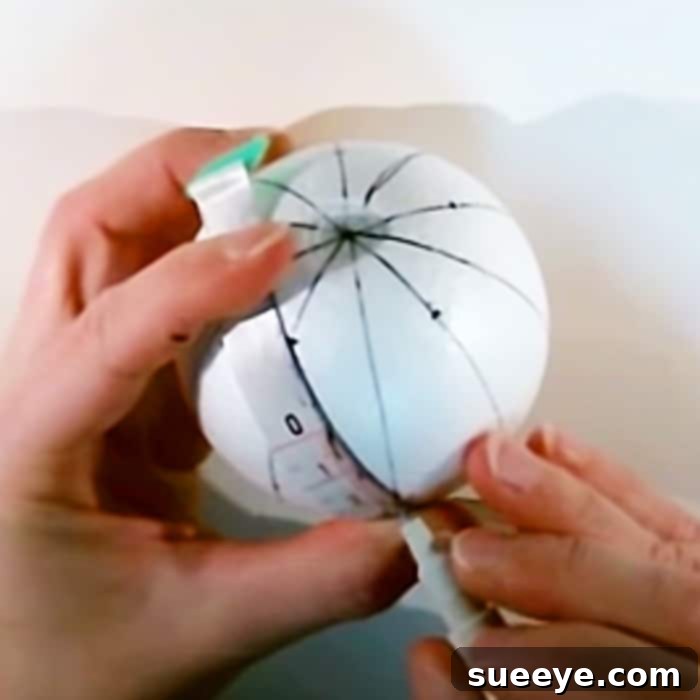
As you can clearly see in the illustrative image above, the scoring creates clear pathways and segments for the fabric. Take your time with this step; a well-defined and symmetrical pattern makes the rest of the process much simpler and ensures a professional-looking finish for your handmade ornament, avoiding any lopsided results.
Step 3: Preparing and Pinning the Satin Fabric
Now comes the fun part – bringing color and texture to your Styrofoam ornament! This step involves carefully cutting and securing the fabric pieces to form the body of the star.
- Cut Fabric Segments: Based on the size of your styrofoam ball and the individual segments of your scored star pattern, cut several small, roughly rectangular or trapezoidal pieces of your stretch satin. These pieces should be large enough to comfortably cover one segment of the star with a little excess (about 1/4 inch on each side) for tucking and pinning. You’ll want pieces that can easily be pushed into the scored lines.
- Begin Pinning a Segment: Take one fabric piece. Begin by tucking one edge of the fabric into a scored line using the tip of your pen or a dull knife (like a butter knife or cuticle stick) to gently push it deep into the groove. Then, use your dressmaking pins to secure the fabric along that entire line, placing pins every 1/2 to 1 inch. The goal is to create a crisp, clean edge along the score line.
- Smooth and Secure the Segment: Smooth the fabric over the corresponding segment of the star. Gently pull the fabric taut, but don’t stretch it excessively, as this can distort the pattern or cause puckering. Pin the opposite edge of the fabric into the adjacent scored line, ensuring it’s smooth and wrinkle-free across the entire segment. Trim any significant excess fabric that protrudes too far from the score lines, ensuring neatness for your DIY Christmas ornament.
- Repeat for All Segments: Continue this process, segment by segment, until the entire star pattern on your Styrofoam ball is covered with satin fabric, neatly pinned along all the scored lines. Overlap the fabric pieces slightly at the seams if needed to ensure full coverage and a seamless appearance, crafting a beautiful base for your blue star ornament.
Step 4: Defining the Star with Decorative Cord
The decorative cord is key to giving your ornament its sharp, finished look, beautifully concealing the pinned edges and enhancing the overall aesthetic of your handmade holiday decor. This step adds a professional touch and visual separation to the star’s points.
- Prepare Your Cord Segments: Cut several pieces of your decorative cord, each long enough to cover one of the scored lines (the ‘seams’ where your fabric pieces meet). It’s better to cut them slightly longer than needed, as you can trim excess later.
- Apply Hot Glue Sparingly: Working carefully, apply a thin, consistent bead of hot glue along one of the pinned score lines. Work in small sections, perhaps 2-3 inches at a time, especially if your glue dries quickly.
- Attach Cord Precisely: Immediately press a piece of decorative cord onto the hot glue, following the scored line precisely. Use the tip of your pen or a craft stick to gently press the cord into the glue without burning your fingers. Hold it in place for a few seconds until the glue sets. Be mindful of hot glue safety at all times.
- Continue Around the Star: Repeat this process for all the scored lines, carefully gluing the cord along each seam. This creates the crisp outlines of your star, effectively hiding all the pinned edges and giving the ornament a polished, professional appearance, transforming it into a stunning satin ornament. Ensure all cord ends meet neatly at the star’s points.
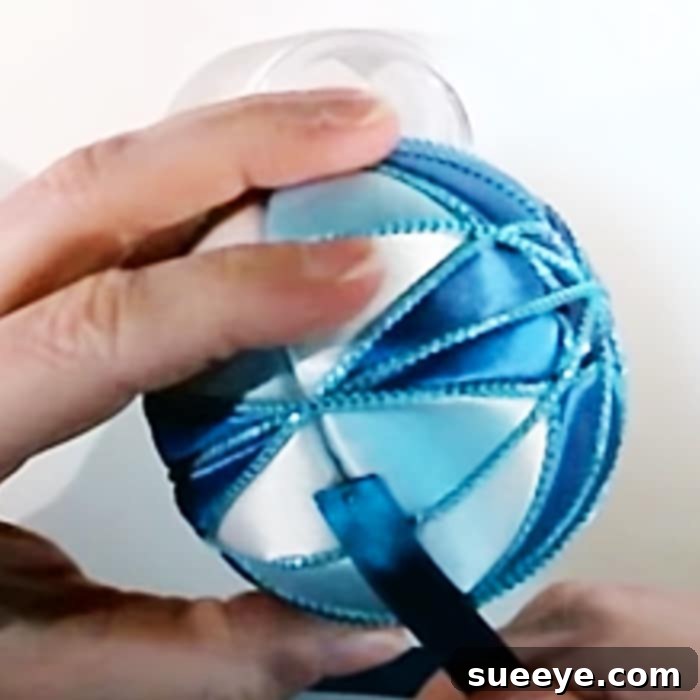
The transformation is evident in the image above, showcasing how the decorative cord beautifully defines the star’s points and adds a touch of elegance and refinement to your no-sew blue star ornament, truly making it a focal point of your holiday display.
Step 5: Adding the Hanging Ribbon
Every beautiful DIY Christmas ornament needs a way to be displayed proudly on your tree, garland, or as part of your overall holiday decor. This final step adds the functional element.
- Form a Loop: Take your chosen ribbon (approximately 6-8 inches in length, depending on how long you want the loop) and fold it in half to create a loop. Ensure the ends are evenly aligned.
- Secure with Glue: Apply a small but generous dab of hot glue to the folded ends of the ribbon.
- Attach to Ornament: Press the glued ends firmly onto the top of your star ornament, ideally at one of the star’s points or a less conspicuous spot that allows the ornament to hang evenly. Hold until secure. For added peace of mind and durability, you can also insert an extra dressmaking pin through the ribbon ends and into the foam, then cover the pinhead with a tiny dot of glue or a small decorative bead, completing your easy craft project with a secure hanging mechanism.
Tips for Success and Creative Variations
To ensure your no-sew blue star ornament turns out perfectly and to inspire future projects, consider these helpful tips and creative variations that can elevate your DIY holiday decor, making each piece uniquely yours:
- Fabric Choices: While stretch satin offers a luxurious look, don’t limit yourself! Velvet provides a rich, opulent feel, brocade adds intricate patterns, and even patterned cotton can create a charming, rustic appeal. Experiment with different textures, patterns, and colors to match various holiday themes, creating a diverse collection of unique handmade ornaments.
- Embellishments: Once your star is complete, consider adding extra sparkle. Small beads, pearls, sequins, or a fine dusting of glitter applied along the cord lines or at the star’s points can elevate its festive charm. Tiny bows, small bells, or charms can also be hot-glued on, personalizing your Christmas craft even further.
- Symmetry is Key: Take your time during the initial scoring phase. A symmetrical initial pattern will lead to a more professional and visually appealing finished ornament, making your Styrofoam ornament truly stand out with its balanced design.
- Hot Glue Gun Safety: Always exercise caution when using a hot glue gun. Work in a well-ventilated area, and avoid touching the hot nozzle or freshly applied glue. Keep a small bowl of ice water nearby for immediate relief in case of accidental burns. Safety first for any easy craft project!
- Personalization: These no-sew ornaments make wonderful, heartfelt gifts. Personalize them by choosing the recipient’s favorite colors, incorporating meaningful charms, or adding a small, handwritten tag with a special message, transforming a simple craft into a cherished keepsake.
- Batch Production: Once you get the hang of it, these ornaments are quick to make. Consider creating them in batches for a cohesive tree theme, for use as party favors, or as thoughtful gifts for friends and family, making holiday crafting efficient and enjoyable.
Embrace the Joy of Handmade Holiday Decor
The simple act of creating something beautiful with your own hands brings immense satisfaction, especially during the festive season. This no-sew blue star ornament project is a testament to how easily you can craft stunning holiday decor without needing extensive sewing skills or specialized equipment. The elegance of the satin combined with the crisp, defined star shape makes for a truly captivating piece that will sparkle on your Christmas tree, embodying the timeless spirit of DIY Christmas ornaments.
Beyond the beauty of the finished product, there’s a unique joy in building or rebuilding a collection of handmade ornaments. Each piece holds a story, a memory of the time and care invested, enriching your holiday experience. For me, recreating these treasured items after losing my original collection has been a profoundly heartwarming experience, bringing back a sense of tradition and personal connection to the holidays. We hope this comprehensive tutorial inspires you to embark on your own creative journey and fill your home with the warmth, charm, and unique character of DIY holiday decorations. Happy crafting and may your holidays sparkle with handmade joy!