
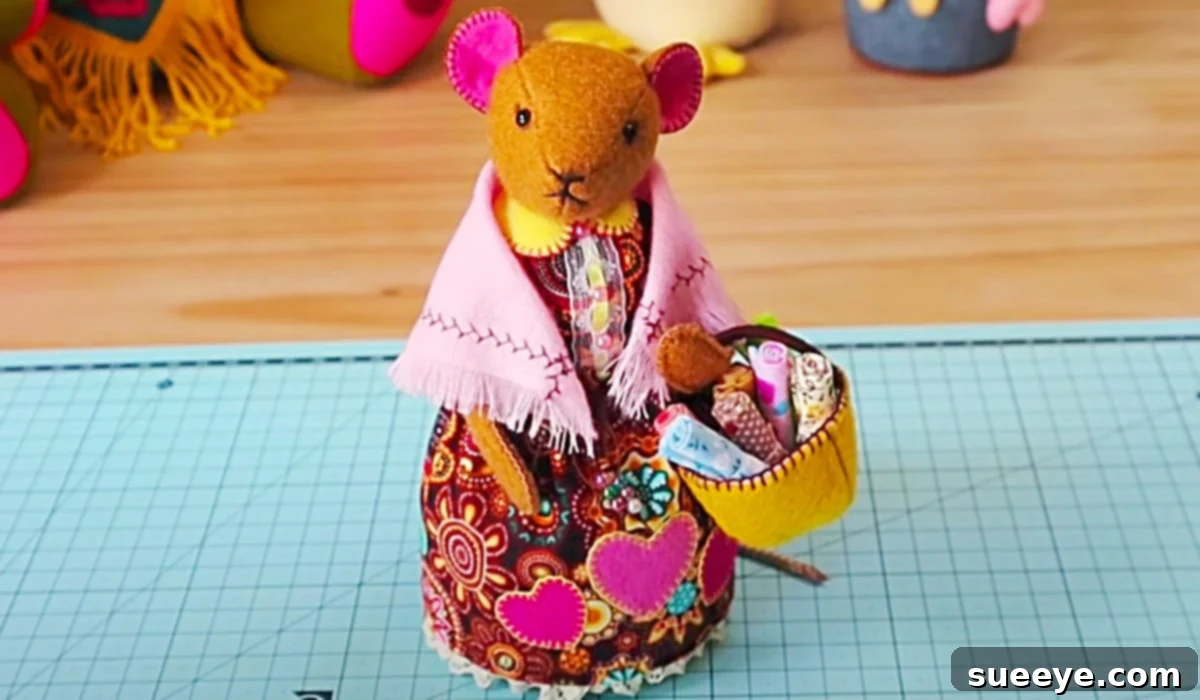
Craft an Adorable Patchwork Mouse: Your Next Favorite DIY Stuffed Animal with a Free Pattern
There’s a unique joy that comes with creating something beautiful and tangible with your own hands, especially when it involves turning forgotten fabric scraps into a delightful treasure. If you’re a fan of charming handmade creations and sustainable crafting, you’re in for a treat! We recently stumbled upon an incredibly sweet project that breathes new life into leftover textiles: a DIY patchwork mouse. This enchanting little creature not only makes for a perfect companion or decorative piece but also offers a fantastic way to utilize those beloved fabric remnants gathering dust in your craft stash. Inspired by a fantastic video tutorial by Pay It Forward on YouTube, this project promises a rewarding experience, culminating in a stuffed animal that’s bursting with character and charm. What makes it even better? It comes with a free, easy-to-follow pattern download, making it accessible for sewers of all skill levels.
Imagine transforming small pieces of fabric, each with its own story, into a whimsical mouse that evokes feelings of nostalgia and warmth. This patchwork mouse project is an ideal “scrap buster,” turning what might otherwise be discarded into a cherished keepsake. For instance, consider using luxurious velvet scraps, perhaps salvaged from old clothing or upholstery, to give your mouse a touch of elegance reminiscent of classic storybook characters like the Velveteen Rabbit. The possibilities for personalization are endless, allowing you to create a truly unique stuffed animal that reflects your style and creativity. Whether you’re looking to craft a thoughtful gift, add a handcrafted touch to your home decor, or simply enjoy a relaxing and fulfilling sewing session, this patchwork mouse tutorial is an excellent choice.
Essential Materials for Your DIY Patchwork Mouse Project
Before diving into the creative process, gathering all your materials is key to a smooth and enjoyable crafting experience. One of the greatest advantages of this project is its flexibility, allowing you to work with what you have and reduce waste. Here’s a detailed list of what you’ll need to bring your patchwork mouse to life:
- Fabric Scraps: This is where the magic of patchwork truly shines! Raid your stash for small pieces of various cottons, linens, flannels, or even silk and velvet. Aim for a mix of patterns and solid colors to create visual interest. Different textures can also add character. Ensure your scraps are clean and ironed for precise cutting.
- Free Pattern Download: The heart of this project! Make sure to download and print the pattern from the provided link. Double-check that it prints at 100% scale to ensure your mouse is the correct size.
- Buttons: These will be used for the mouse’s eyes, adding a charming, classic touch. This project is perfect for showcasing beautiful antique or vintage buttons you might have collected. If the mouse is intended for a small child, consider embroidering the eyes instead of using buttons for safety reasons, or ensure buttons are very securely attached.
- Cotton or Dacron Stuffing: High-quality polyester fiberfill or natural cotton stuffing will give your mouse its plump, huggable form. Make sure you have enough to firmly stuff the head, body, and any other parts as needed.
- Embroidery Floss: Essential for adding delicate facial features like a nose and mouth, and potentially for embroidered eyes if you’re skipping buttons. Choose colors that complement your fabric choices.
- Thick Thread: A strong, durable thread is crucial for sewing the patchwork pieces together and for any parts that will bear stress, like attaching limbs. Polyester all-purpose thread is usually sufficient, but a heavier-duty thread can be used for extra durability.
- A Needle: A sharp, sturdy sewing needle suitable for hand sewing is necessary. If you’re using a sewing machine (highly recommended for speed and neatness), ensure you have the correct needle for your fabric type.
- A Pair of Scissors: Good quality fabric shears are indispensable for clean, precise cuts. Keep them sharp and reserved only for fabric to maintain their edge.
- A Rotary Cutter: While optional, a rotary cutter with a self-healing cutting mat can significantly speed up the cutting process and ensure perfectly straight lines, especially when working with many small patchwork pieces. This tool provides superior accuracy compared to scissors for pattern pieces.
- A Cutting Mat: Paired with a rotary cutter, a self-healing mat protects your work surface and provides a grid for accurate measurements.
- Iron and Ironing Board: Crucial for pressing seams open or to one side, which results in a much neater and more professional finish for your patchwork.
- Pins or Fabric Clips: To hold fabric pieces together securely before sewing, ensuring they don’t shift.
Step-by-Step Directions to Create Your Patchwork Mouse
Creating this patchwork mouse is a delightful journey, broken down into manageable steps. The video tutorial by Pay It Forward on YouTube serves as an excellent visual guide, helping you navigate each stage with confidence. Here’s a more detailed breakdown of the process:
1. Prepare Your Pattern and Fabric
Begin by downloading and printing the free pattern. Carefully cut out all the pattern pieces. Lay out your chosen fabric scraps, considering how different patterns and colors will come together. Iron all fabric pieces to remove wrinkles, ensuring precise cuts. Pin the pattern pieces to your fabric, paying attention to any grain lines indicated on the pattern. Cut out all the fabric components for your mouse, including the head, body, ears, tail, and any dress or accessory pieces. Remember to transfer any markings from the pattern to your fabric, such as dart lines or placement guides for features.
2. Constructing the Cute Little Mouse Head
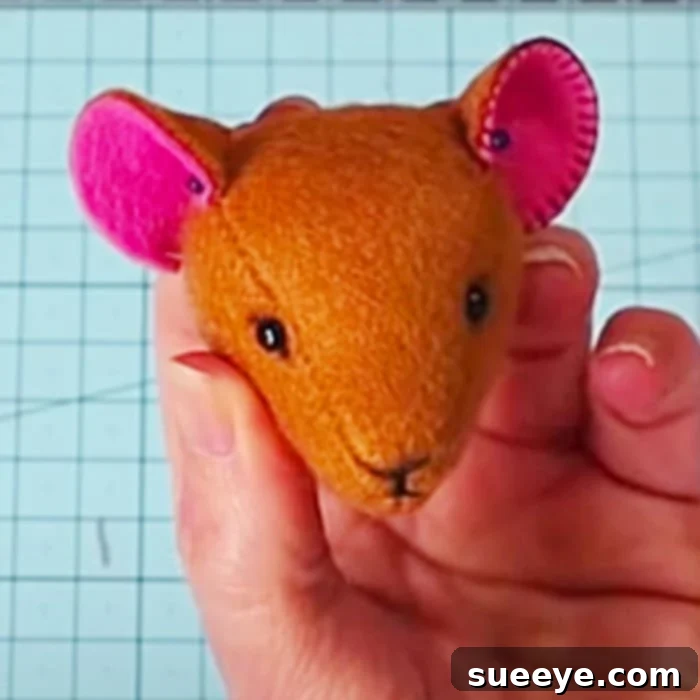
The head is often the most recognizable part of any stuffed animal, and this mouse is no exception. Start by sewing the individual patchwork pieces for the head together, right sides facing, using a consistent seam allowance as indicated on the pattern. Press your seams open or to one side for a neat finish. Once the patchwork fabric for the head is assembled, you will then sew the main head pieces together, leaving an opening for turning and stuffing. Carefully clip curves and trim seam allowances before turning the head right side out. Lightly stuff the head with fiberfill, shaping it as you go. Don’t overstuff to the point of distorting the seams, but ensure it’s firm enough to hold its shape. Set the head aside for now.
3. Crafting the Ears and Tail
The ears give the mouse its adorable character. Sew the ear pieces together, right sides facing, leaving a small opening at the base for turning. Trim seam allowances, especially at curved edges, and turn them right side out. You can gently stuff them or leave them flat for a different look. Set them aside. For the tail, you might sew a tube of fabric, turn it right side out, and stuff it lightly or use a piece of cord or braided floss, depending on the pattern’s design. The pattern will guide you on where and how to attach these features to the head or body later.
4. Assembling the Mouse Body and Dress
Next, focus on the body. Similar to the head, sew the patchwork pieces for the body together first, if applicable, then sew the main body pieces, right sides together, leaving an opening at the bottom or back for turning and stuffing. Carefully turn the body right side out and begin stuffing it, ensuring an even distribution of fiberfill. The dress, if it’s an integrated part of the body pattern, will be assembled alongside the body pieces. If it’s a separate garment, you will sew it according to its pattern pieces and prepare it to be put on the mouse later. This might involve sewing small sleeves, a bodice, and a skirt. Press all seams as you go for a polished look.
5. Bringing It All Together: Attaching Features and Finishing Touches
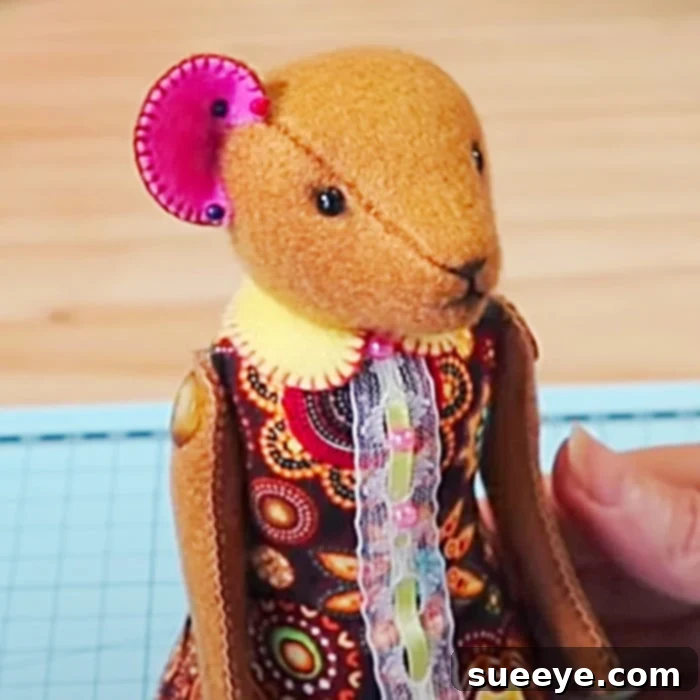
Now, it’s time to assemble your mouse. Using strong thread and a needle, hand-sew the head securely to the body, ensuring the stitching is neat and robust. Position and hand-sew the ears onto the head, and attach the tail to the body. This is also the stage where you’ll add the charming facial features. If using buttons for eyes, stitch them firmly in place. For embroidered eyes, use embroidery floss to create French knots or satin stitches for a soft, expressive look. Embroider a small nose and a gentle mouth to complete its sweet face. If you have a separate dress, carefully put it on the mouse and secure it as needed. For the final touch, the video tutorial shows a cute little fabric basket. This small accessory can be made by sewing miniature fabric pieces into a basket shape, then lightly stuffing it or leaving it hollow to hold tiny treasures.
Tips for a Perfect Patchwork Mouse
- Precision is Key: When working with patchwork, accurate cutting and consistent seam allowances are vital for your pieces to fit together perfectly.
- Pressing Matters: Ironing your seams after each sewing step will make a huge difference in the overall neatness and professional appearance of your finished mouse.
- Stuffing Smart: Stuff your mouse gradually and evenly, using a chopstick or blunt tool to push fiberfill into tight spots like the snout or ears. Avoid lumpy areas.
- Personalize: Don’t be afraid to experiment with different fabric combinations, embroidery patterns, or even small embellishments like bows or ribbons.
- Child Safety: If making this for a child, always opt for embroidered eyes and features instead of buttons, and ensure all seams are very securely sewn.
Why This Project is a Must-Try
This patchwork mouse is more than just a stuffed animal; it’s a testament to the beauty of handmade crafts and the joy of creative expression. It’s an incredibly satisfying project that allows you to transform humble fabric scraps into a creation filled with personality. The free pattern and detailed video tutorial make it accessible for anyone eager to try their hand at sewing a charming toy. Whether it becomes a beloved toy for a child, a unique piece of home decor, or a heartfelt gift for a friend, this patchwork mouse will surely bring a smile to anyone’s face. Dive into your fabric stash, unleash your creativity, and get ready to stitch up the cutest little mouse you’ve ever seen!