
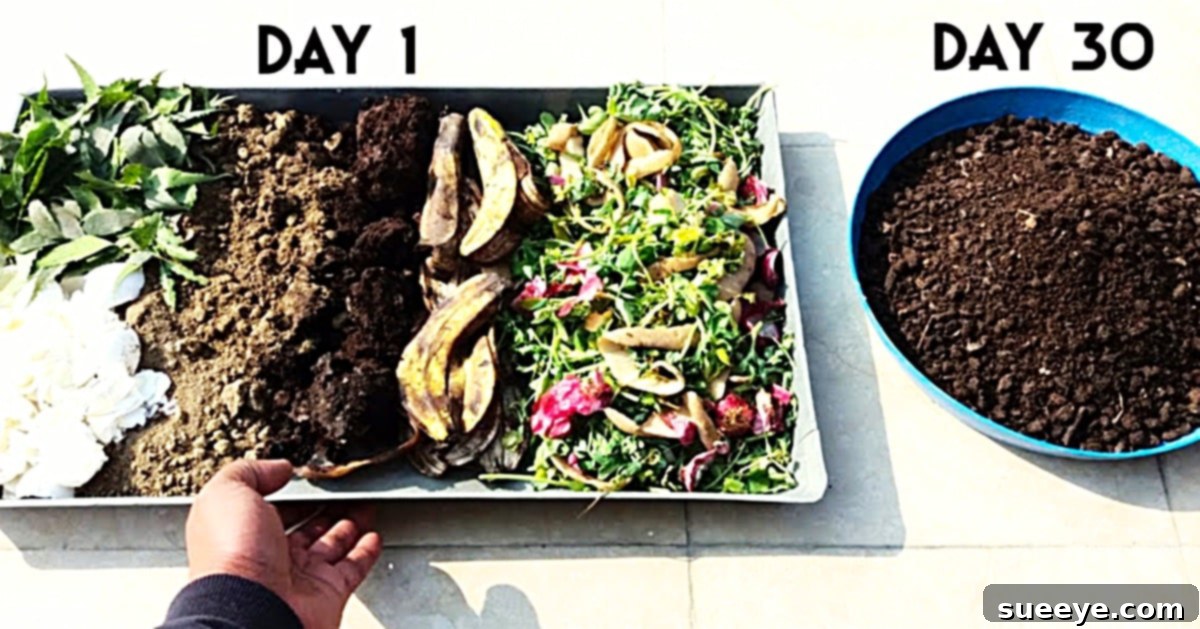
How to Make Easy Compost from Kitchen Scraps for Thriving Plants
Composting often gets a reputation for being complicated, messy, or even smelly. Many aspiring gardeners dream of turning their kitchen waste into nutrient-rich “black gold” for their plants, only to be deterred by complex instructions or fear of failure. However, the truth is that making your own compost, especially from everyday kitchen scraps, can be incredibly straightforward and rewarding. It’s an excellent way to nourish your garden, reduce household waste, and embrace sustainable living.
Inspired by practical, no-fuss methods like those shared by Urban Gardening on YouTube, we’ve broken down the composting process into simple, actionable steps. You’ll discover that creating a vibrant, odor-free compost pile right in your backyard or even on your patio is far easier than you might think. This guide will walk you through everything you need to know, from selecting the right materials to maintaining your compost, ensuring your plants receive the very best natural food they deserve.
Why Composting Your Kitchen Scraps is a Game-Changer for Your Garden
Before diving into the “how-to,” it’s worth understanding the profound benefits of integrating homemade compost into your gardening routine. Composting is more than just turning waste into soil; it’s about creating a powerful, natural elixir that can transform your garden’s health and vitality.
1. Superior Soil Enrichment
Compost is an unparalleled soil conditioner. It doesn’t just add nutrients; it fundamentally improves the soil’s structure. It enhances aeration, allowing plant roots to breathe and grow more effectively. Furthermore, compost significantly boosts water retention capabilities, meaning your plants will require less frequent watering, especially during dry spells. It acts like a sponge, holding moisture and gradually releasing it to the roots.
2. Nutrient-Rich Plant Food
Unlike synthetic fertilizers that often provide a concentrated dose of a few specific nutrients, compost offers a broad spectrum of macro and micronutrients in a slow-release form. This ensures your plants receive a steady, balanced diet, promoting robust growth, vibrant foliage, and bountiful blooms or harvests. The organic matter also supports a thriving ecosystem of beneficial microorganisms, which further aid in nutrient cycling and plant health.
3. Significant Waste Reduction
One of the most immediate impacts of composting is the dramatic reduction of household waste. A substantial portion of what we discard daily, such as fruit and vegetable peels, coffee grounds, and eggshells, can be diverted from landfills. This not only lessens your ecological footprint but also transforms waste into a valuable resource, closing the loop on your organic materials.
4. Natural Pest and Disease Resistance
Healthy plants are naturally more resilient to pests and diseases. Compost fosters strong, healthy root systems and overall plant vigor, making them less susceptible to common garden ailments. Ingredients like neem leaves, when incorporated, add an extra layer of natural pest-repellent properties, discouraging unwelcome visitors without the need for harsh chemicals.
5. Cost Savings and Environmental Benefits
By making your own compost, you eliminate the need to purchase expensive commercial fertilizers and soil amendments. This saves money while providing your plants with superior nourishment. Environmentally, composting reduces greenhouse gas emissions associated with landfill waste decomposition and the production and transportation of synthetic fertilizers. It’s a win-win for your wallet and the planet.
Essential Materials for Your Easy Kitchen Compost
The beauty of this composting method lies in its simplicity and the accessibility of its core ingredients. Most of what you need is likely already in your kitchen or garden. Here’s a detailed look at the materials and why they are crucial:
- A Compost Container: This is your composting vessel. A simple bucket, a repurposed dustbin, or any large garden pot with drainage holes will work perfectly. You can also invest in a dedicated compost bin or tumbler if you prefer, but the key is good aeration and a suitable volume for your kitchen waste.
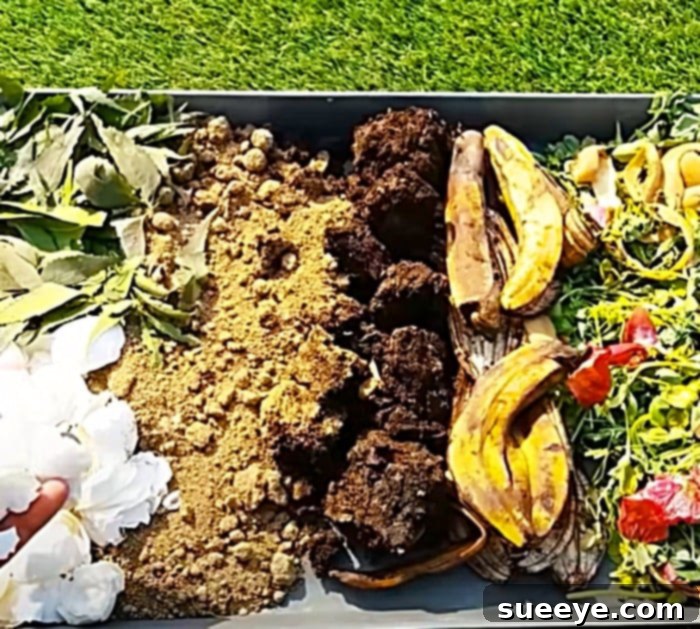
- Eggshells: These are a fantastic source of calcium carbonate, which is vital for building strong cellular structures in plants. Crushing them finely before adding them helps them break down faster, releasing their beneficial minerals.
- Neem Leaves: A secret weapon for organic gardeners! Neem leaves act as a natural pest deterrent and also possess antifungal and antibacterial properties, helping to keep your compost pile and subsequently your plants healthy and disease-resistant. If fresh neem leaves aren’t readily available, neem powder can also be used sparingly.
- Garden Soil: This humble ingredient is critical for two main reasons. Firstly, it acts as an excellent odor absorber, keeping your compost pile smelling earthy and pleasant rather than foul. Secondly, and perhaps more importantly, garden soil introduces a rich community of beneficial microorganisms and bacteria that are essential for kickstarting and accelerating the decomposition process.
- Banana Peels: A powerhouse of potassium and magnesium, banana peels are excellent for promoting strong root development, vigorous flowering, and overall plant health. Chopping them into smaller pieces will help them decompose more quickly.
- Green Kitchen Waste: This broad category includes a variety of nitrogen-rich materials like fruit and vegetable scraps (excluding citrus in large quantities, meat, and dairy), coffee grounds, and tea bags. These “greens” provide the necessary nitrogen to fuel the microbial activity that drives decomposition.
- Brown Materials (Optional but Recommended for Balance): To create a balanced compost pile, you’ll need carbon-rich “browns” alongside your nitrogen-rich “greens.” Examples include wood chips, shredded paper (non-glossy), dry leaves, straw, or hay. These provide structure for aeration and are crucial for preventing odors and maintaining the right carbon-to-nitrogen ratio.
- Water: Essential for maintaining the ideal moisture level in your compost pile, which is critical for microbial activity.
Step-by-Step Directions: Creating Your Odor-Free Kitchen Compost
Making compost from kitchen scraps is a process of layering, moistening, and aeration. Follow these easy steps to build a thriving compost pile:
Step 1: Prepare Your Container
Begin by selecting your chosen container—a bucket, dustbin, or garden pot. Ensure it has drainage holes at the bottom to prevent waterlogging, which can lead to anaerobic conditions and foul odors. If using a basic bucket, you might drill a few holes. For better aeration, you can also drill small holes around the sides, especially near the bottom.
Step 2: Lay a Foundation Layer
Start your compost pile with a base layer of “brown” materials, such as a few inches of wood chips, dry leaves, or shredded paper. This layer provides good drainage and helps to ensure adequate air circulation from the bottom, preventing compaction and stagnation. Follow this with a thin layer of garden soil – about an inch or two.
Step 3: Begin Layering Your Kitchen Scraps
Now, start adding your “green” kitchen waste. It’s beneficial to chop larger items like banana peels and tougher vegetable scraps into smaller pieces (1-2 inches). Smaller pieces have more surface area, which allows microorganisms to break them down much faster. Spread a layer of your green waste over the brown base.
Step 4: Incorporate Specific Boosters and Soil
After a layer of green waste, sprinkle some crushed eggshells and neem leaves (or neem powder) across the surface. These specialized additions will enhance your compost’s nutritional profile and protective qualities. Crucially, add another thin layer of garden soil (about half an inch to an inch) over the green waste and boosters. This soil layer is key for odor control and for introducing fresh microbes to work on the new organic matter.
Step 5: Maintain the Green-to-Brown Ratio
As you continue to add kitchen scraps daily or every few days, strive to maintain a good balance between “greens” (nitrogen-rich items like fresh food scraps) and “browns” (carbon-rich items like dry leaves, shredded cardboard, or wood chips). A general rule of thumb is to aim for roughly two parts brown material to one part green material by volume. This ratio is essential for efficient decomposition and preventing a smelly, sludgy pile. After adding fresh greens, always cover them with a layer of browns and then a sprinkle of soil.
Step 6: Moisten the Pile
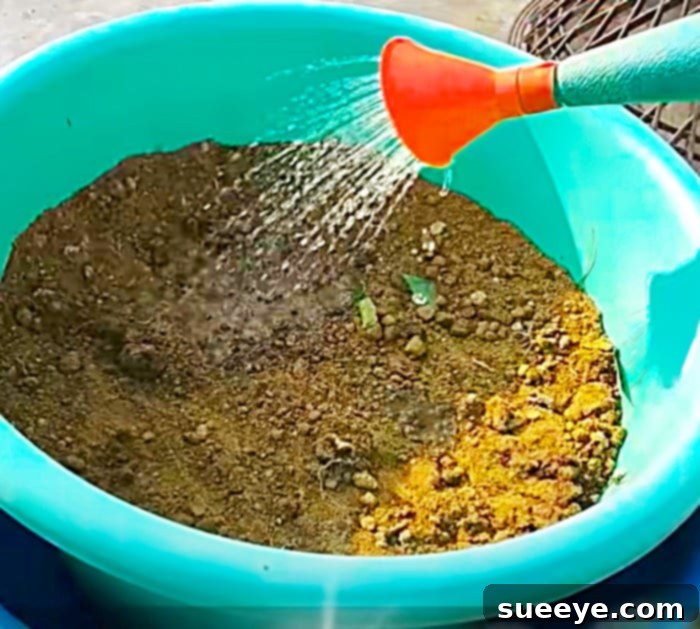
Compost needs moisture, but not too much. Each time you add a significant amount of new material, especially if the pile feels dry, lightly water it. The goal is for the compost to be consistently moist, like a wrung-out sponge – damp, but not dripping wet. If it’s too dry, decomposition slows down; if it’s too wet, it can become anaerobic and smelly.
Step 7: Turn and Aerate Regularly
This is a critical step for active composting. Regular turning introduces oxygen into the pile, which is vital for the aerobic bacteria that do most of the decomposition work. Turning also mixes the materials, ensures even breakdown, and helps regulate temperature. Aim to turn your compost pile every few days or at least once a week, using a spade, fork, or compost aerator. This simple action will drastically speed up the composting process and prevent odors.
Step 8: Monitor and Maintain
Periodically check your compost pile for moisture and temperature. An actively decomposing pile might feel warm to the touch. If it seems too dry, add a bit of water. If it looks too wet or starts to smell, add more brown materials and turn it thoroughly. Continue this process of adding materials, watering, and turning until your bin is full or the bottom layers have transformed.
Step 9: Harvesting Your Black Gold
Depending on the materials, temperature, and how frequently you turn it, your compost can be ready in a few weeks to a few months. You’ll know it’s ready when it has a dark, rich brown color, a crumbly texture, and smells like fresh earth – not like rotting food. The original scraps should no longer be recognizable. Once ready, you can simply scoop out the finished compost from the bottom of your bin (if it has an access door) or empty the entire bin to retrieve it. Apply this finished compost directly to your garden beds, mix it into potting soil, or use it as a top dressing for your plants.
Troubleshooting Common Composting Issues
Even with the easiest methods, you might encounter a few hiccups. Here’s how to address them:
1. Foul Odors
This is the most common complaint. Foul, rotten smells usually indicate too much “green” (nitrogen-rich) material, too much moisture, or insufficient aeration.
- Solution: Add more “brown” materials like shredded paper, dry leaves, or wood chips. Turn the pile vigorously to introduce oxygen. If it’s too wet, spread it out a bit to dry or add more browns to absorb excess moisture.
2. Compost Not Breaking Down
If your compost seems stagnant and isn’t decomposing, it’s likely lacking moisture, nitrogen (greens), or aeration.
- Solution: Check the moisture; it should be consistently damp. If dry, add water. Ensure you have enough green materials to provide nitrogen. If you’re only adding browns, decomposition will be very slow. Turn the pile frequently to aerate it and mix components.
3. Attracting Pests (Flies, Rodents)
Pests are usually drawn to certain materials or exposed food scraps.
- Solution: Avoid adding meat, dairy products, oily foods, or cooked leftovers, as these attract pests. Always bury fresh kitchen scraps under a layer of brown materials and soil. Ensure your compost bin has a lid to deter larger animals.
Tips for Maximum Composting Success
- Chop Smaller: The smaller your organic materials are, the faster they will decompose.
- Layer Wisely: Always aim for a mix of greens, browns, and soil to keep the pile balanced.
- Keep it Moist: Consistency is key. Think “wrung-out sponge.”
- Turn Regularly: Oxygen is the engine of aerobic decomposition. Don’t skip this step!
- Avoid Problematic Items: Steer clear of meat, dairy, bones, oily foods, diseased plants, and pet waste, as these can attract pests, create odors, and introduce pathogens.
- Choose the Right Location: Place your compost bin in a partially shaded spot to prevent it from drying out too quickly in direct sun.
- Be Patient: Composting is a natural process that takes time. Enjoy the journey!
This compost is truly healthy for plants and is remarkably simple to create, proving that you don’t need a complex system to make a real difference in your garden and for the environment.