
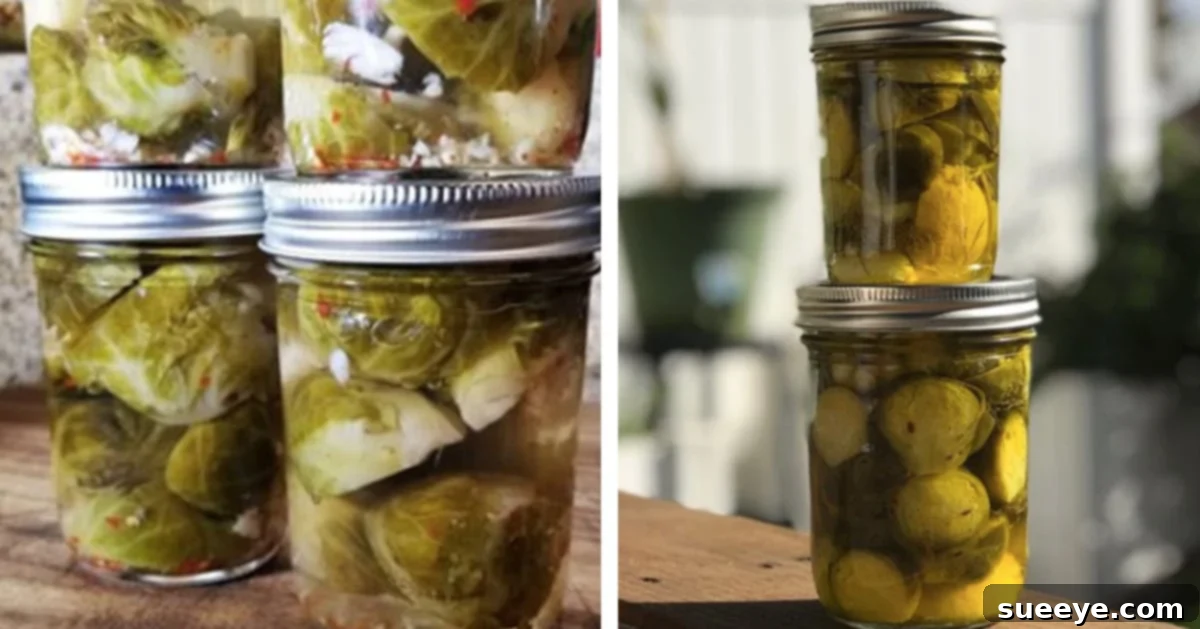
Tangy & Delicious: Master the Art of Homemade Pickled Brussels Sprouts
Are you one of those people who genuinely love brussels sprouts, or are you perpetually on the hunt for innovative and exciting ways to incorporate them into your diet? And for my fellow aficionados, can you ever truly get enough of all things pickled? For a long time, the idea of combining these two culinary loves—brussels sprouts and pickling—had never crossed my mind. In fact, when I first heard about pickled brussels sprouts, I admit I was more than a little skeptical. “Pickled brussels sprouts? Who knew that was even a thing?” I thought. But oh, how wrong I was! From the moment I took that first crisp, tangy bite, I was utterly captivated. They didn’t just meet my expectations; they soared past them, leaving me delighted and craving more. And the best part? Discovering just how incredibly simple they are to make sealed the deal. I knew right then and there that I had to whip up a batch of my own.
My culinary revelation occurred just last week during a delightful dinner party at a friend’s house. As I navigated my way through the inviting array of appetizers spread across her kitchen counter, a humble mason jar brimming with what appeared to be mini green cabbages immediately caught my eye. My friend, ever the gracious host, noticed my curiosity and insisted I try one. She casually mentioned that pickled brussels sprouts had been a staple in her home for years, praised for their incredible taste and fantastic shelf life. With a slight hesitation born of past brussels sprout misadventures, I plucked one from the jar and popped it into my mouth. The immediate burst of tangy, savory, and subtly spiced flavor was an absolute revelation. The sprouts were perfectly crisp, offering a delightful counterpoint to the vibrant brine. I was hooked! I found myself returning to that jar throughout the evening, utterly smitten with this newfound delicacy. The experience left such an impression that the very next weekend, I embarked on a mission to my local grocery store, determined to gather all the necessary ingredients to recreate that magic in my own kitchen.
Why You’ll Fall in Love with Pickled Brussels Sprouts
Beyond their unexpected deliciousness, pickled brussels sprouts offer a fantastic range of benefits that make them a must-try for any food enthusiast. Firstly, let’s talk about flavor. The pickling process transforms the often polarizing taste of brussels sprouts into something truly extraordinary. The sharp acidity of the vinegar cuts through any bitterness, while the added spices infuse each sprout with a delightful complexity. You get a perfect balance of tangy, savory, and a hint of warmth from the red pepper flakes, creating a snack that’s both refreshing and deeply satisfying. The texture is equally appealing; instead of being soft or mushy, they remain wonderfully crisp and firm, retaining that satisfying crunch with every bite.
Secondly, their versatility is astounding. These aren’t just a quirky snack; they can elevate a multitude of dishes. Serve them as a unique appetizer at your next gathering, adding a vibrant pop of color and flavor to a charcuterie board. Chop them up and toss them into salads for an extra layer of zest and crunch. They make an excellent tangy accompaniment to rich, roasted meats or grilled fish, cutting through the richness beautifully. Consider adding them to sandwiches or wraps, or even as a surprising addition to your next Bloody Mary. Their bright, zesty character makes them an instant palate cleanser and a refreshing side dish.
Finally, there’s the practical benefit of preservation. Pickling is an ancient method of food preservation that not only extends the shelf life of vegetables but also enhances their flavor. Having a jar of homemade pickled brussels sprouts in your pantry or refrigerator means you always have a healthy, flavorful snack or condiment readily available. They’re a fantastic way to enjoy the nutritional benefits of brussels sprouts—rich in vitamins K and C, fiber, and antioxidants—in a format that’s utterly irresistible.
Essential Ingredients for Your Pickled Brussels Sprouts Adventure
Embarking on your pickling journey requires just a handful of simple, readily available ingredients. The beauty of this recipe lies in its straightforward nature, allowing the natural flavors to shine. Here’s a detailed look at what you’ll need:
For the Brussels Sprouts and Flavor Enhancers:
- Fresh Brussels Sprouts: You’ll need enough to tightly fill your chosen mason jar(s). When selecting your sprouts, look for ones that are vibrant green, firm to the touch, and free from significant blemishes or yellowing. Smaller sprouts tend to pickle more uniformly and have a more tender texture, but larger ones can be halved if necessary.
- 1 Clove of Garlic: This is a foundational flavor agent, adding a pungent, savory depth to your pickles. While the recipe suggests one clove per jar, feel free to adjust this to your personal taste. For an extra garlicky kick, you could even add two cloves or thinly slice one for broader distribution of flavor. Always use fresh garlic for the best results.
- 1/4 Teaspoon of Crushed Red Pepper Flakes: These flakes introduce a subtle, warm heat that perfectly complements the tang of the vinegar. This amount provides a gentle spice, but like garlic, it’s easily adjustable. If you prefer a milder pickle, reduce the amount or omit it entirely. For those who love a fiery kick, don’t hesitate to increase it!
Crafting the Perfect Brine:
The brine is the heart of any pickle, responsible for both preservation and flavor. This simple recipe creates a perfectly balanced brine that will transform your brussels sprouts:
- 5 Cups of Distilled White Vinegar: Distilled white vinegar is the preferred choice for pickling due to its consistent 5% acidity, clear color, and neutral flavor profile. This ensures a safe and aesthetically pleasing pickle, as it won’t discolor your vegetables or cloud your brine.
- 5 Cups of Water: Using filtered water is recommended to avoid any off-flavors that might come from tap water, especially if your tap water is heavily chlorinated or has a high mineral content.
- 7 Tablespoons of Canning Salt: This is a critical ingredient. Canning salt (also known as pickling salt) is pure sodium chloride, free from anti-caking agents, iodine, and other additives that can make your brine cloudy or discolor your vegetables. Do NOT substitute with iodized table salt, which can ruin your pickles. Kosher salt can sometimes be used as a substitute, but ensure it is pure and iodine-free.
Essential Equipment You’ll Need:
Having the right tools on hand will make your pickling process smooth and efficient:
- Mason Jars: Pint or quart-sized jars are ideal. Ensure they are clean and sterilized before use. You’ll also need new lids and bands for proper sealing.
- Large Pot for Brine: A non-reactive pot (stainless steel or enamel-coated) is essential for preparing your pickling brine.
- Large Pot for Water Bath Canning: A stockpot deep enough to fully submerge your jars by at least an inch of water, and ideally equipped with a canning rack at the bottom, is needed for the processing step.
- Jar Lifter: This specialized tool makes it safe and easy to lift hot jars in and out of the canner.
- Canning Funnel: Helps prevent spills when pouring hot brine into jars.
- Headspace Tool (Optional but Recommended): A simple tool to accurately measure the recommended headspace in your jars.
- Cutting Board and Sharp Knife: For trimming and preparing your brussels sprouts.
- Clean Kitchen Towels: For cooling jars and wiping rims.
The Art of Pickling: Your Step-by-Step Guide to Perfection
Now that you have all your ingredients and equipment ready, let’s dive into the simple yet rewarding process of making your own pickled brussels sprouts. Remember, hygiene is key in canning, so ensure all your equipment is clean.
Step One: Preparing the Brussels Sprouts and Jars
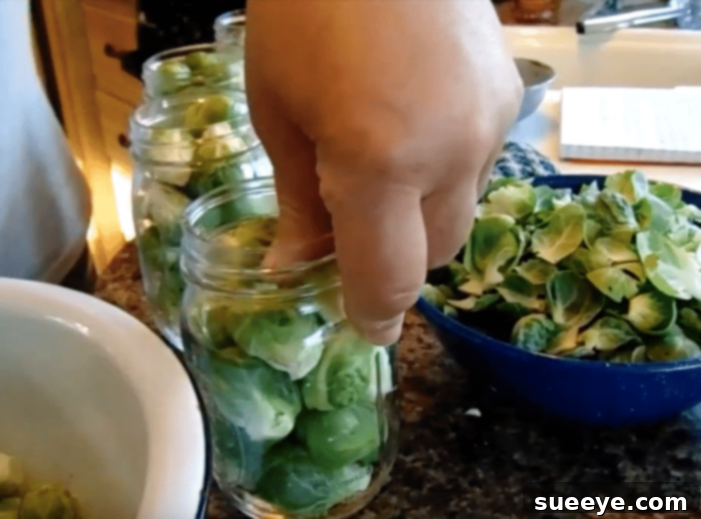
The first crucial step involves preparing your star ingredient and getting your jars ready for their transformation. Begin by thoroughly washing your brussels sprouts under cold running water. Next, carefully trim off the very ends of each sprout’s stem, then gently peel away any loose, discolored, or damaged outer leaves. You want to expose the fresh, vibrant green core of the sprout. For larger sprouts, you might consider halving them to ensure they pickle evenly and fit snugly into your jars. This also allows the brine to penetrate more effectively.
Once your brussels sprouts are prepped, it’s time to sterilize your mason jars. You can do this by washing them thoroughly in hot soapy water, rinsing well, and then either boiling them in water for at least 10 minutes (keeping them hot until ready to fill) or running them through a dishwasher cycle on a hot setting. This sterilization is crucial for food safety and ensuring a good seal. While your jars are still hot, begin filling them tightly with the prepared brussels sprouts. It’s important to pack them as snugly as possible, as brussels sprouts tend to shrink slightly during the pickling process. A well-packed jar means more delicious pickles and less wasted brine. You can gently press them down with your fingers or a clean utensil.
Step Two: Assembling the Jars with Flavor and Brine
With your brussels sprouts packed tightly into the sterilized jars, it’s time to infuse them with flavor and a preserving brine. For each jar, add one clove of garlic. You can leave it whole, or for a stronger garlic flavor, you might slice it or give it a gentle smash. If you decided to add any additional spices like mustard seeds, dill sprigs, or bay leaves, now is the time to tuck them into the jar alongside the brussels sprouts.
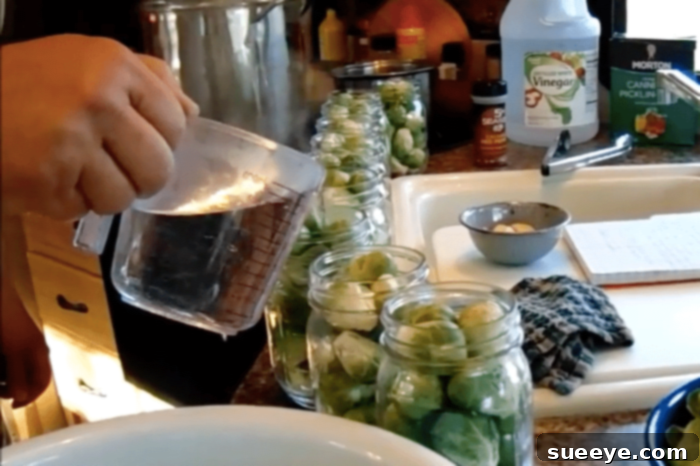
Next, prepare your pickling brine. In a large, non-reactive pot (stainless steel is ideal), combine the 5 cups of distilled white vinegar, 5 cups of water, and 7 tablespoons of canning salt. Bring this mixture to a rolling boil over medium-high heat, stirring occasionally to ensure the salt dissolves completely. Once the brine is boiling and the salt has fully dissolved, carefully ladle the hot brine over the brussels sprouts in each jar. Fill the jars, leaving precisely 1/2 inch of headspace from the top rim. This headspace is vital; it allows for the expansion of food during processing and helps to create a strong vacuum seal. After filling, use a non-metallic utensil (like a chopstick or plastic knife) to gently dislodge any trapped air bubbles by running it around the inside of the jar. Top off with more brine if needed to maintain the 1/2-inch headspace. Finally, wipe the rims of the jars clean with a damp cloth to ensure a perfect seal. Center a clean, hot lid on each jar, and screw on the band finger-tight – just until resistance is met, no overtightening.
Step Three: Water Bath Canning for Shelf Stability and Proper Storage
The final step ensures your pickled brussels sprouts are safely preserved and shelf-stable. Place your filled and sealed jars into a large canning pot fitted with a rack. Ensure the jars are not touching each other. Carefully fill the canner with hot water, making sure the water level covers the tops of the jars by at least one inch. Bring the water to a full, rolling boil over high heat. Once boiling vigorously, set a timer for 25 minutes. It’s crucial that the water remains at a full boil throughout the entire processing time. If you live at a high altitude, you may need to adjust your processing time; consult a reliable canning guide for specific adjustments.
Once the 25 minutes are up, turn off the heat and carefully remove the jars from the canner using a jar lifter. Place the hot jars on a clean, dry kitchen towel or a cooling rack, ensuring they are spaced apart and not touching. Allow them to cool undisturbed for 12 to 24 hours. During this cooling period, you should hear satisfying “pinging” sounds as the jars seal, creating a vacuum. After the jars have completely cooled, check the seals: the center of each lid should be concave (depressed) and should not flex when pressed. If any jar has not sealed properly, refrigerate it immediately and consume its contents within a few weeks.
For best flavor development, allow your pickled brussels sprouts to “cure” for at least two to four weeks before opening. This allows the flavors to meld and deepen. Store properly sealed jars in a cool, dark place, such as a pantry, for up to 1-2 years. Once opened, store in the refrigerator and consume within a few months for optimal taste and texture. If you opt not to water bath can, the jars must be stored in the refrigerator from the start and consumed within 2 months.
Creative Ways to Enjoy Your Homemade Pickled Brussels Sprouts
Now that you’ve successfully created your batch of tangy, crisp pickled brussels sprouts, the fun truly begins: enjoying them! Their versatility means they can be incorporated into a wide variety of meals and snacks, adding a unique twist and burst of flavor. Here are some of our favorite ways to savor these homemade delights:
- As a Standalone Snack: Sometimes, the simplest way is the best. Pop a few straight from the jar for a refreshing, low-calorie, and satisfyingly tangy snack. They’re a fantastic alternative to potato chips or other less healthy options.
- Elevate Your Appetizer Spread: Arrange them on a charcuterie board alongside artisanal cheeses, cured meats, crackers, and other pickled vegetables. Their vibrant color and zesty flavor will make them a standout addition.
- Perfect Plate Companion: Serve them as a vibrant side dish to roasted chicken, grilled fish, or pork chops. Their acidity cuts through rich flavors, balancing your meal beautifully.
- Salad Supercharge: Chop them finely or halve them and toss them into your favorite green salads or grain bowls. They add a delightful crunch and a welcome tang that can brighten any salad.
- Sandwich and Wrap Enhancer: Forget plain pickles! Add sliced pickled brussels sprouts to your burgers, sandwiches, or wraps for an unexpected burst of flavor and texture. They pair wonderfully with deli meats and cheeses.
- Chopped into Spreads: Finely dice them and mix them into tuna salad, chicken salad, or egg salad for an exciting flavor dimension that will surprise and delight.
- Garnish for Cocktails: For the adventurous, use a pickled brussels sprout as a unique and flavorful garnish for a Bloody Mary or other savory cocktails.
- Gift from the Heart: Package a beautifully labeled jar of your homemade pickled brussels sprouts as a thoughtful and delicious gift for friends and family. It’s a personal touch that shows you care!
Troubleshooting and Tips for Pickling Success
While making pickled brussels sprouts is generally straightforward, a few tips and tricks can ensure your success and help you avoid common pitfalls:
- Why are my sprouts soft? Overcooking during the processing stage or using old, less firm brussels sprouts can lead to a softer texture. Ensure your sprouts are fresh and crisp to begin with, and stick to the recommended processing time.
- Cloudy Brine? A slightly cloudy brine can sometimes occur due to minerals in your water, or if you used an iodized salt. This is usually harmless, but using filtered water and pure canning salt will help keep your brine clear. If the brine becomes excessively cloudy, or develops an off-odor, it could indicate spoilage, and the contents should be discarded.
- Jars Not Sealing? This is common. Make sure jar rims are perfectly clean before applying lids. Do not overtighten bands; finger-tight is sufficient. Sometimes a faulty lid is the culprit. If a jar doesn’t seal, simply store it in the refrigerator and consume within a few weeks.
- Experiment with Flavors: Don’t be afraid to customize! Add a sprig of fresh dill, a few mustard seeds, a bay leaf, or even a pinch of turmeric for different flavor profiles. Just ensure that any additions are food-safe for canning.
- Quality of Ingredients Matters: Starting with fresh, high-quality brussels sprouts will always yield the best results. The same goes for your vinegar and salt.
Your Next Pickling Adventure Awaits!
From a skeptical first bite to a full-fledged kitchen project, the journey of discovering homemade pickled brussels sprouts has been nothing short of delightful. This recipe proves that sometimes, the most surprising culinary experiences come from simple ingredients and a willingness to try something new. The satisfaction of lining up those gleaming jars, filled with crisp, tangy, and flavorful brussels sprouts, ready to be enjoyed, is immense. It’s a testament to the joy of homemade food and the rewarding process of preserving nature’s bounty.
So, whether you’re a seasoned pickler or taking your very first dip into the world of home canning, I wholeheartedly encourage you to give this recipe a try. You’ll not only unlock a fantastic new way to enjoy brussels sprouts, but you’ll also gain a versatile and healthy snack that’s perfect for any occasion. Prepare to be surprised, delighted, and utterly hooked on these tangy treasures. Share your creations and let us know how your pickled brussels sprouts turn out – happy pickling!