
Irresistible Orange Upside Down Cake: An Easy, Budget-Friendly Recipe
If you’ve ever yearned for a dessert that’s both stunningly beautiful and incredibly simple to make, look no further than this delightful Orange Upside Down Cake. While pineapple upside-down cakes are a classic, this recipe introduces a refreshing twist by featuring the vibrant, zesty flavor of oranges. The bright citrus notes elevate the cake’s tender and decadent texture, creating a truly unforgettable treat. What’s more, this recipe cleverly bypasses the need for a traditional caramelized glaze, simplifying the process and making it accessible even for novice bakers. It’s truly the perfect dessert for any occasion, equally enjoyable whether paired with a warm cup of coffee or a cool glass of iced tea.
This Orange Upside Down Cake stands out not only for its unique flavor profile but also for its remarkable ease and speed of preparation. You’ll find yourself reaching for this recipe again and again, whether for a spontaneous craving or a last-minute gathering. Worried about costs? Don’t be! Many of the ingredients you’ll need are likely staples in your pantry. And if not, rest assured that this entire recipe is incredibly budget-friendly, proving that deliciousness doesn’t have to come with a hefty price tag. We owe a huge thank you to Amo Receitas via YouTube for sharing this brilliant and mouthwatering creation that inspired our version.
Why an Orange Upside Down Cake is a Game-Changer
The concept of an “upside-down” cake dates back centuries, with early versions cooked in cast iron skillets over open fires. The appeal lies in the beautiful fruit arrangement that forms the top of the cake once inverted. Traditionally, pineapple has been the fruit of choice, offering a sweet and tangy profile. However, opting for oranges provides a distinct and equally captivating experience.
Oranges bring a unique brightness and aromatic quality that fresh pineapples sometimes lack. Their natural acidity perfectly balances the sweetness of the cake, resulting in a dessert that feels lighter and more refreshing. The beautiful circular slices, when baked, create a stunning visual pattern that is both inviting and elegant, making this cake a fantastic centerpiece for any table. Moreover, the lack of a separate caramel glaze simplifies the cooking process without compromising on flavor or moisture, as a clever syrup infusion takes its place, guaranteeing every slice is wonderfully tender and juicy.
The Secret to a Super Moist Cake: Simple Syrup Infusion
One of the hallmarks of an exceptional cake is its moisture, and this Orange Upside Down Cake delivers in spades, thanks to a simple yet ingenious technique: post-baking syrup infusion. While many upside-down cakes rely on a thick caramel layer for moisture and flavor, our recipe uses a light, zesty orange syrup. This syrup is poured over the warm cake after it comes out of the oven, allowing it to slowly seep into every crevice. The result is an incredibly moist crumb, bursting with additional orange flavor that amplifies the fruit on top. This method ensures your cake remains fresh and delightful for longer, providing a juicy texture that beautifully complements the tender cake and vibrant orange slices.
Ingredients You’ll Need:
Gathering your ingredients is the first step towards baking this heavenly Orange Upside Down Cake. We recommend using fresh, high-quality components to ensure the best possible flavor and texture. For the orange juice, freshly squeezed is always superior, offering a brighter, more authentic citrus punch that store-bought varieties can’t quite match. However, if fresh oranges aren’t readily available, a good quality, unsweetened store-bought orange juice can be a suitable alternative.
For the Cake Batter:
- 4 large Eggs: Crucial for structure and richness, ensure they are at room temperature for better emulsification.
- 1 cup (200g) Granulated Sugar: Provides sweetness and helps create a tender crumb.
- 1 cup (240ml) Cooking Oil: Vegetable, canola, or a light olive oil works best, contributing to a moist texture without imparting strong flavors.
- 1 ½ cups (360ml) Fresh Orange Juice: The star of the show, delivering that wonderful citrus aroma and taste.
- 3 ½ cups (420g) Cake Flour (sifted): Using cake flour results in a lighter, more tender cake. If you don’t have cake flour, you can make your own by removing 2 tablespoons of all-purpose flour from each cup and replacing it with 2 tablespoons of cornstarch, then sifting well.
- 1 tbsp (15g) Baking Powder: The leavening agent that helps the cake rise and achieve a fluffy texture.
- 2-3 medium Oranges, thinly sliced: These will form the beautiful “upside-down” layer and infuse the cake with flavor. Choose firm, blemish-free oranges.
For the Simple Syrup:
- 1 ½ cups (360ml) Fresh Orange Juice: For an extra layer of juicy, citrusy goodness.
- 4 tbsp (50g) Granulated Sugar: To sweeten the syrup and help it penetrate the cake effectively.
Essential Kitchen Equipment:
Having the right tools can make your baking experience smoother and more enjoyable. For this recipe, you’ll need standard kitchen items, nothing too specialized.
- Large mixing bowl: For combining your cake batter ingredients.
- Electric mixer or sturdy whisk: To achieve fluffy eggs and a well-combined batter.
- 9-inch (23cm) round baking pan: The ideal size for this recipe. Ensure it’s oven-safe.
- Parchment paper (optional): While not strictly necessary due to the butter and sugar, a round of parchment on the bottom can provide extra insurance against sticking.
- Pastry brush: For greasing the pan evenly.
- Small saucepan: For preparing the simple syrup.
- Griller stick or skewer: To create small holes in the cake for syrup absorption. A chopstick or even a fork can also work.
- Wire cooling rack: For cooling the cake after it’s baked and before serving.
Step-by-Step Directions: Baking Your Orange Upside Down Masterpiece
Step 1: Prepare Your Cake Batter and Pan
Begin by preheating your oven to 180°C (350°F). This ensures the oven is at the correct temperature when your cake is ready to bake, promoting even cooking. In a large mixing bowl, crack your four large eggs. Using an electric mixer on medium-high speed, whisk the eggs vigorously until they double in volume and transform into a light, frothy, and fluffy consistency. This aeration is key to a light and tender cake. Gradually add the granulated sugar, cooking oil, and orange juice to the whisked eggs, mixing until just combined. Next, gently fold in the sifted cake flour until no dry streaks remain. Be careful not to overmix the batter at this stage, as overmixing can develop the gluten in the flour, leading to a tough cake. Finally, sprinkle in the baking powder and mix gently for only a few seconds, just until it’s incorporated.
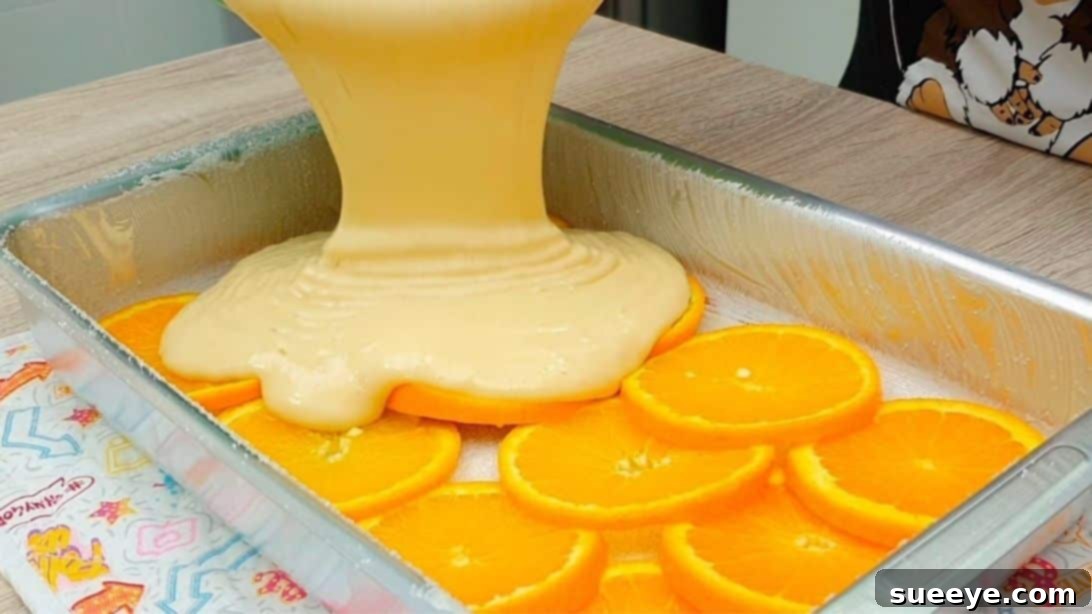
Now, prepare your baking pan. Generously brush the inside of a 9-inch round baking pan with softened butter, ensuring full coverage, especially along the bottom and sides. This butter layer will help prevent sticking and contribute to a golden crust. Sift a generous amount of granulated sugar evenly over the buttered bottom of the pan. This layer of sugar will slightly caramelize as the cake bakes, creating a subtly sweet, non-sticky base. Arrange your thinly sliced oranges neatly at the bottom of the sugared pan. You can create an appealing pattern, like concentric circles, for a beautiful presentation. Carefully pour the prepared cake batter over the orange slices, distributing it evenly across the pan.
Step 2: Bake to Golden Perfection
Carefully place the prepared baking pan into your preheated 180°C (350°F) oven. Bake for approximately 45 minutes. Baking times can vary depending on your oven, so keep an eye on your cake. To check for doneness, insert a wooden skewer or toothpick into the center of the cake. If it comes out clean or with only a few moist crumbs attached, your cake is ready. The top should be golden brown, and the edges should be pulling slightly away from the sides of the pan. Once baked, remove the cake from the oven and let it cool in the pan on a wire rack for about 10-15 minutes while you prepare the syrup. This initial cooling helps the cake set before being drenched in syrup.
Step 3: Craft the Zesty Orange Syrup
While your cake is cooling slightly, it’s time to make the magical simple syrup that will infuse your cake with incredible moisture and flavor. In a small saucepan, combine the 1 ½ cups of fresh orange juice and 4 tablespoons of granulated sugar. Place the saucepan over medium heat and stir continuously until the sugar completely dissolves. Bring the mixture to a gentle boil, then remove it from the heat immediately. The goal is to create a thin, sweet orange liquid, not a thick syrup. This light consistency will allow it to soak into the cake easily.
Step 4: Infuse and Unmold Your Cake
Once your syrup is ready and the cake has cooled for a few minutes in the pan, it’s time for the infusion process. Using a griller stick, skewer, or even a sturdy chopstick, carefully poke numerous small holes all over the surface of the warm cake. Be thorough but gentle; you want the syrup to penetrate deeply without damaging the cake’s structure. Immediately and slowly pour the warm orange syrup evenly over the entire surface of the poked cake. Take your time to ensure the syrup is absorbed, especially along the edges. Let the cake sit in the pan for at least 30 minutes, or even up to an hour, allowing it to fully absorb all that delicious syrup. This step is crucial for achieving an incredibly moist and flavorful cake.
After the syrup has been completely absorbed, it’s time for the exciting reveal! Place a large serving plate or a wire cooling rack on top of the baking pan. With a firm grip on both the pan and the plate/rack, carefully and confidently flip the entire assembly upside down. Gently lift the baking pan away from the cake. If any orange slices stick to the bottom of the pan, carefully peel them off and place them back onto the cake. Your beautiful Orange Upside Down Cake, with its vibrant citrus pattern, is now ready to be admired and enjoyed!
Expert Tips for the Perfect Orange Upside Down Cake:
- Use Room Temperature Ingredients: Eggs, in particular, should be at room temperature as they whip up to a greater volume, resulting in a lighter cake.
- Don’t Overmix the Batter: Once you add the flour, mix only until just combined. Overmixing develops gluten, which can lead to a dense, tough cake.
- Freshly Squeezed Orange Juice: While store-bought works, fresh orange juice makes a noticeable difference in the cake’s vibrant flavor. Consider adding a teaspoon of orange zest to the batter for an extra aromatic kick.
- Proper Pan Preparation is Key: Don’t skimp on buttering and sugaring the pan. This is crucial for the oranges to release cleanly and prevent the cake from sticking. You can also line the bottom with parchment paper for extra insurance.
- Patience with the Syrup: Allow the cake ample time to absorb the syrup after baking. This step is essential for maximum moisture and flavor penetration.
- Confident Flip: When it’s time to unmold, be confident and quick in your flip. Hesitation can sometimes cause the cake to break. Ensure your serving plate is larger than the cake.
Serving Suggestions to Elevate Your Dessert:
This Orange Upside Down Cake is delightful on its own, but a few simple additions can transform it into an even more indulgent experience:
- A Dollop of Cream: Serve warm with a scoop of vanilla ice cream, a generous dollop of freshly whipped cream, or a light crème fraîche.
- Beverage Pairings: It pairs wonderfully with a hot cup of black tea, coffee, or a glass of chilled Prosecco or sparkling wine. For a non-alcoholic option, try it with a refreshing glass of iced tea or lemonade.
- Garnish with Zest: A light sprinkle of fresh orange zest over the top just before serving adds an extra burst of aroma and color.
- Berry Medley: A side of fresh mixed berries, such as raspberries or blueberries, can add a complementary tartness and beautiful color contrast.
Storage Instructions: Keeping Your Cake Fresh
This moist cake stays fresh and delicious for several days. To store, cover the cake loosely with plastic wrap or place it in an airtight container at room temperature for up to 2-3 days. For longer storage, you can refrigerate it for up to 5 days. We generally don’t recommend freezing this cake, as the orange slices might become watery upon thawing, affecting the texture and appearance.
Creative Variations to Explore:
Once you’ve mastered the basic recipe, feel free to experiment with these delicious variations:
- Add Spices: A pinch of cinnamon, cardamom, or nutmeg in the batter can add warmth and depth to the citrus flavor.
- Lemon & Lime Twist: Substitute a portion of the orange juice with lemon or lime juice, and use thin slices of these fruits for a more intensely tart and fragrant cake.
- Almond Flavor: Add 1 teaspoon of almond extract to the cake batter for a subtle nutty aroma that pairs beautifully with citrus.
- Boozy Syrup: For an adult version, add a tablespoon of Grand Marnier or Cointreau to the simple syrup before pouring it over the cake.
- Dried Fruit Infusion: Incorporate a handful of dried cranberries or finely chopped apricots into the batter for added texture and sweetness.
Conclusion: A Taste of Sunshine in Every Slice
This Easy Orange Upside Down Cake is more than just a dessert; it’s a celebration of simple flavors and accessible baking. Its bright, zesty character and incredibly moist texture make it a standout recipe that defies its humble origins. Whether you’re a seasoned baker or just starting your culinary journey, this budget-friendly recipe promises a rewarding experience and a delicious outcome. It’s the perfect way to bring a ray of sunshine to your table, any time of the year. We encourage you to try this recipe and experience the sheer joy of creating something so wonderfully delicious with minimal fuss.
Special thanks to Amo Receitas via YouTube for inspiring this delightful recipe and for providing the mouthwatering images that guided our culinary journey. Be sure to check out their other incredible tutorials for more cooking inspiration!