
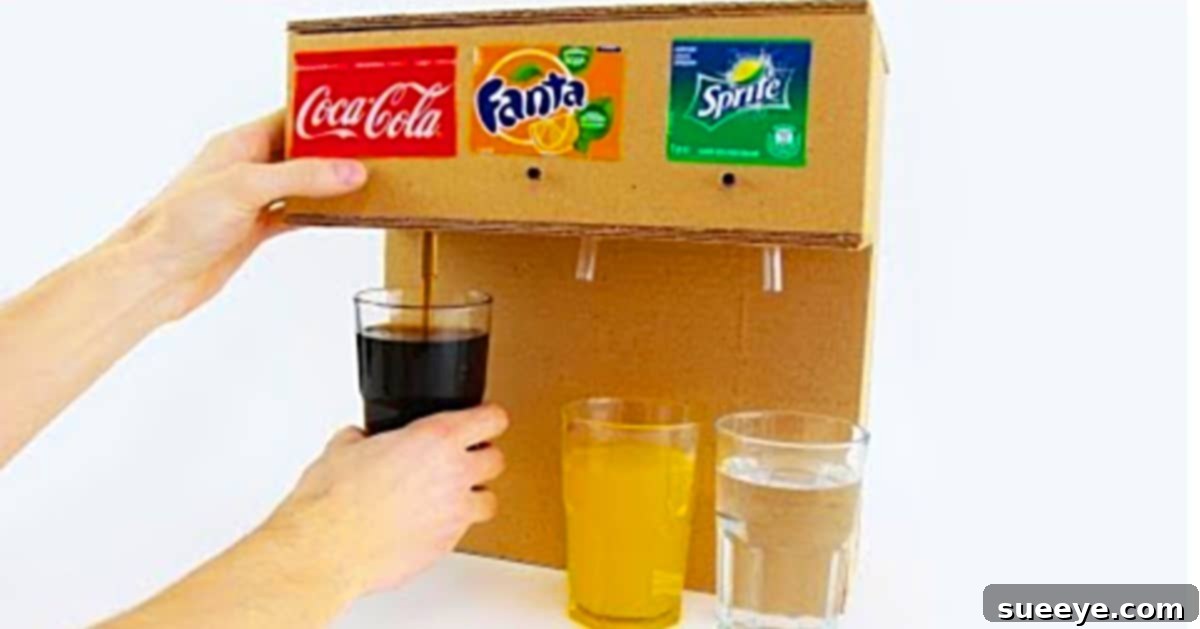
DIY Soda Fountain: Build Your Own Refreshment Station at Home
Imagine having a personal soda fountain right in your home, dispensing your favorite fizzy drinks with the simple push of a button. It sounds like something out of a classic diner, but with a little creativity and some readily available materials, you can bring this nostalgic charm to life! Inspired by a captivating YouTube tutorial, we embarked on an exciting journey to construct our very own DIY soda fountain, transforming ordinary items into an extraordinary source of refreshment and fun. This project isn’t just about crafting a unique gadget; it’s an incredible opportunity for hands-on learning, fostering creativity, and creating unforgettable memories with family.
Why Build a DIY Soda Fountain?
Beyond the sheer coolness factor, building a DIY soda fountain offers a plethora of benefits. It’s an excellent educational activity, introducing basic principles of electronics, fluid dynamics, and construction in a tangible, exciting way. For families, it serves as a fantastic bonding project, encouraging teamwork and problem-solving skills. Environmentally conscious crafters will appreciate the opportunity to repurpose materials, primarily cardboard and plastic bottles, giving them a second life. Furthermore, having a self-serve beverage station adds a unique touch to parties, gatherings, or even just daily enjoyment. It’s a conversation starter, a source of entertainment, and a testament to what you can achieve with a DIY spirit.
Materials: Your Toolkit for Refreshment
Gathering the right supplies is the first crucial step in any successful DIY project. The beauty of this soda fountain is that most items are affordable and easily sourced from local hardware stores like Home Depot or even salvaged from around your house. Here’s a comprehensive list of what you’ll need to assemble your very own beverage dispenser:
- Cardboard: Sufficient quantity to construct the housing for your fountain. Repurposed shipping boxes work perfectly.
- 3 Large Soda Bottles: Clean, empty 2-liter or similar sized plastic bottles will serve as your beverage reservoirs.
- 1 (9V Battery): To power the air pumps, providing a robust and consistent energy source.
- 1 (6V Battery): While the original instruction mentions 6V, a second 9V battery or a single well-chosen power source (like a 9V adapter) might be more consistent, depending on your pump specifications. For simplicity and as per original, we include it, but be mindful of your specific pump requirements.
- 3 Mini Air Pump Motors: These are the heart of your fountain, responsible for pressurizing the bottles and pushing the liquid out. Small aquarium air pumps or similar low-power motors are ideal.
- 3 Push Button Switches: Momentary switches that will activate each pump individually when pressed, giving you control over each drink dispenser.
- 2 Types of Tubing (Thin and Thick): You’ll need thin tubing to connect the air pumps to the bottle caps (for air input) and slightly thicker tubing for the beverage output lines. Ensure they are food-grade if possible.
- Electrical Wires: Various lengths of insulated wire to connect your batteries, switches, and pumps.
- Soldering Iron: Essential for creating secure and reliable electrical connections.
- Solder: The metal alloy used with the soldering iron to join wires and components.
- A Drill: With various drill bit sizes, specifically suitable for plastic bottle caps and cardboard.
- Safety Glasses: Always wear these when drilling or soldering.
- Hot Glue Gun and Glue Sticks (Optional but recommended): For securing components and sealing gaps in the cardboard housing.
- Utility Knife or Box Cutter: For cutting cardboard precisely.
- Ruler and Marker: For measuring and marking your cardboard cuts and drill points.
- Decorative Materials: Stickers, paint, markers, craft paper – anything to personalize your fountain.
Step-by-Step Construction Guide
Building your soda fountain is an exciting process that combines basic electronics with creative construction. Follow these detailed steps to bring your refreshment station to life:
Step 1: Preparing the Electrical System and Air Pumps
This is where your soda fountain gets its power and functionality. It’s critical to ensure all connections are secure and safe. Begin by laying out your mini air pumps, push-button switches, and batteries. The goal is to create three independent circuits, each controlling one air pump with one switch.
Carefully solder wires to the terminals of each mini air pump. Then, solder wires to each push-button switch. Finally, connect these components to your 9V battery (or batteries, depending on your setup). A typical circuit for each dispenser would involve connecting the positive terminal of the battery to one terminal of the push-button switch, the other terminal of the switch to one terminal of the air pump, and the remaining terminal of the air pump back to the negative terminal of the battery. Ensure all soldered joints are clean, strong, and insulated to prevent short circuits. If you’re new to soldering, watch a quick tutorial on safe soldering practices, and always work in a well-ventilated area with safety glasses on.
Step 2: Modifying the Soda Bottles for Dispensing
Your soda bottles will hold the beverages and facilitate their dispensing. For each of your three large soda bottles, you will need to drill two distinct holes in their caps. Use a drill with appropriate bit sizes – one smaller hole for the thin air input hose and one slightly larger hole for the thicker beverage output hose. Precision here is key to ensuring a good seal and preventing leaks.
Once the holes are drilled, carefully feed the thin hoses through the smaller holes in the caps, making sure they extend almost to the bottom of the bottle when the cap is secured. These hoses will be connected to your air pumps. Then, feed the thicker hoses through the larger holes. These will serve as your drink dispensing straws. Secure the hoses in place within the caps using hot glue or another sealant to create an airtight seal around each hose. This seal is crucial for the air pumps to effectively pressurize the bottle. Test each setup by attaching an air pump and pressing its corresponding switch. You should feel air being pushed through the thin hose, creating pressure within the bottle. If you fill it with water and test, you should see water come out the larger tube when the pump is activated.
Step 3: Constructing the Fountain Housing and Assembly
Now it’s time to give your soda fountain its structure and aesthetic appeal. Using cardboard, design and construct a housing that will comfortably hold your three modified soda bottles, hide the wiring, and allow access to the push-button switches and dispensing tubes. You can refer to your video tutorial for specific dimensions and design ideas, but don’t be afraid to customize. A basic design might involve a main chamber for the bottles with an upper panel for the dispensing nozzles and a front panel for the buttons.
Drill or cut precise holes in the cardboard housing for your push-button switches, ensuring they are easily accessible for users. Also, create openings where the beverage output hoses will emerge, typically at the front or top of the housing. Carefully feed all your wired components, hoses, and bottles into the cardboard structure. Secure the bottles upright, perhaps with cardboard dividers or hot glue, to prevent them from tipping. Mount the push-button switches firmly into their designated holes. Arrange the output piping so it extends neatly from the front of the fountain, ready to fill cups.
Step 4: Personalizing and Decorating Your Fountain
With the functional components assembled, the final step is to make your DIY soda fountain truly yours! This is where you can unleash your creativity. Decorate the exterior of your cardboard housing with stickers, paint, markers, or even craft paper. You could opt for a retro diner theme, a futuristic look, or something bright and whimsical. The beauty of DIY is that there’s no right or wrong way to make it look, as long as it brings you joy and works as intended.
Consider adding labels above each dispensing nozzle to indicate the flavor of the drink, or even create a custom logo for your “homemade soda brand.” This step is particularly enjoyable for kids, as it allows them to take ownership of the project and express their artistic flair. Let your imagination guide you – the more personal touches, the more unique and cherished your soda fountain will become.
Safety Considerations for Your DIY Project
Safety should always be a top priority when undertaking any DIY project, especially one involving electronics and tools. When soldering, ensure you have proper ventilation to avoid inhaling fumes, and always wear safety glasses to protect your eyes. Be careful when handling hot soldering irons. When using a drill, secure your materials firmly and wear safety glasses. Supervise children closely if they are involved in these steps. Handle batteries with care and ensure all electrical connections are properly insulated to prevent shocks or short circuits. While this project uses low voltage, it’s still good practice to be mindful of electrical safety. Always ensure liquids do not come into contact with exposed wiring or battery terminals.
Tips for Success and Customization
- Troubleshooting: If a dispenser isn’t working, check your electrical connections, ensure the battery has charge, and verify that the hoses are securely sealed in the bottle cap. A loose seal means the pump can’t build sufficient pressure.
- Beverage Choice: While called a “soda fountain,” this dispenser isn’t limited to soda. You can use it for juices, flavored water, or any other non-viscous beverage. Just ensure the bottles and tubing are thoroughly cleaned between uses, especially when switching between different types of drinks.
- Durability: For a more robust and long-lasting fountain, consider using stronger materials than cardboard, such as thin plywood or plastic sheets, for the housing.
- Educational Extension: Turn this into a science lesson! Discuss air pressure, circuits, and how pumps work. Experiment with different battery voltages (safely) to see how it affects dispensing speed.
- Party Fun: Fill your fountain with different flavored sparkling waters and let guests create their own custom drinks. Add some syrup pumps for an even more authentic experience.
My son and I embarked on this DIY soda fountain adventure, full of anticipation. While I was diligently watching the video tutorial and jotting down notes, engrossed in the instructions, I turned around to find my little engineer already putting on the finishing touches! It was amazing to see his intuition and problem-solving skills in action. We had an absolute blast with this project. The pride on his face as he tested each dispenser was priceless. He even took it a step further, using the leftover cardboard to build a charming little soda stand outside. He then proudly sold his self-serve drinks to the neighborhood kids, turning a fun craft into a delightful mini-enterprise. It was a wonderful reminder of the unexpected joy and learning that comes from hands-on projects.
In conclusion, building a DIY soda fountain is more than just a craft; it’s an experience. It’s about bringing a touch of whimsy into your home, fostering creativity, and perhaps most importantly, spending quality time creating something tangible and exciting. Whether you’re looking for a unique centerpiece for your next party, an educational project for the kids, or simply a fun way to enjoy your favorite beverages, this homemade soda fountain promises endless enjoyment. So, gather your materials, embrace your inner inventor, and get ready to dispense some serious fun!