
Mastering the Art of Rag Quilt Making: A Comprehensive Guide for Beginners
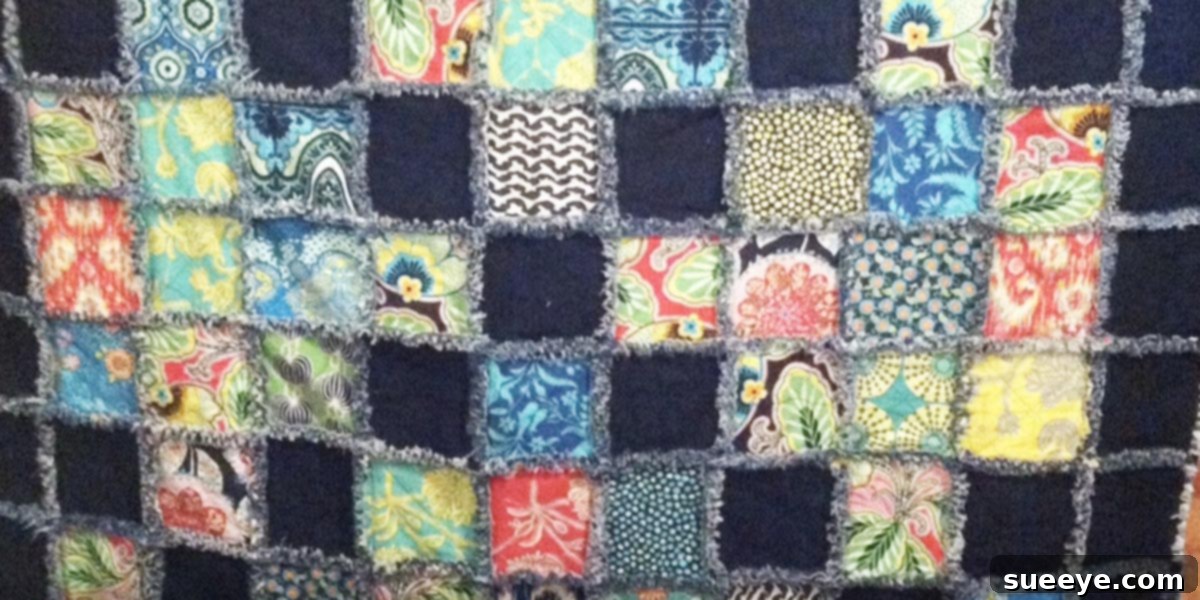
Embarking on your first quilting adventure can feel daunting, but learning how to make a rag quilt offers a wonderfully accessible and deeply rewarding experience. Rag quilts are celebrated for their unique charm, cozy texture, and simple construction, making them an ideal project for newcomers to the world of sewing and quilting. Unlike traditional quilts that often require intricate piecing and precise binding, rag quilts embrace a rustic, “ragged” aesthetic where exposed seams are intentionally frayed to create a soft, inviting texture.
Imagine snuggling under a quilt that feels like a warm hug, with soft, fluffy edges that are a delight to touch. That’s the magic of a rag quilt. They are incredibly versatile, perfect for baby blankets, lap quilts, throws, or even larger bed coverings. With just a few basic sewing skills – primarily sewing straight lines – you can create a beautiful, handmade item that will be cherished for years to come. This comprehensive guide will walk you through every step, ensuring your first rag quilt project is a resounding success.
Why Choose a Rag Quilt for Your Next Project?
Rag quilts stand out for several compelling reasons, particularly for those new to sewing or looking for a quick yet satisfying project:
- Simplicity: The construction method is straightforward, focusing on basic square or rectangular blocks and straight-line sewing. There’s no complex pattern matching or intricate quilting stitches required.
- Forgiving Nature: The beauty of a rag quilt lies in its frayed edges, which are wonderfully forgiving of minor imperfections. This allows beginners to relax and enjoy the process without the pressure of achieving absolute perfection.
- Warmth and Comfort: By layering fabrics like flannel, cotton, and even minky or cuddle fabric, rag quilts become incredibly warm, soft, and inviting, perfect for chilly evenings.
- Unique Aesthetic: The signature frayed seams give rag quilts a distinct, charmingly rustic, and lived-in look that is both timeless and trendy.
- Customization: With an endless array of fabric choices, you can easily customize a rag quilt to match any decor, season, or recipient’s preference, making them fantastic personalized gifts.
- Therapeutic Process: Many find the repetitive motion of cutting, sewing, and clipping seams to be a meditative and enjoyable crafting experience.
Gathering Your Essential Tools and Supplies
Before you dive into the cutting and sewing, gather all the necessary tools and materials. Having everything ready beforehand will streamline your process and make the experience much more enjoyable.
- Sewing Machine: A basic sewing machine capable of a straight stitch is all you need. Ensure it’s in good working order and you have fresh needles.
- Complimenting Fabrics: You will need three distinct layers for each quilt block: a top fabric, a middle layer (batting or another fabric), and a backing fabric. The selection of these fabrics is crucial for the final look and feel of your quilt.
- Matching Thread: Choose a strong, good-quality polyester or cotton thread that either matches or subtly contrasts with your fabrics. Since your seams will be clipped and visible, thread color can subtly influence the overall look.
- Sharp Scissors or Rotary Cutter and Mat: For precise and efficient cutting, a rotary cutter, self-healing mat, and a quilting ruler are highly recommended. If you don’t have these, a good pair of fabric scissors will work, though it will take more time.
- Sewing Pins or Fabric Clips: These are indispensable for holding your fabric layers together securely before and during sewing, ensuring everything stays aligned.
- Iron and Ironing Board: Essential for pressing your fabric squares flat after pre-washing and for pressing seams during assembly, which contributes to a neater final product.
- Ragging Scissors (Spring-Loaded): While regular scissors can be used, specialized spring-loaded ragging scissors or Fiskars Easy Action scissors are a game-changer for clipping the numerous seams. They significantly reduce hand fatigue and make the clipping process much faster and more enjoyable.
Choosing Your Fabrics: The Heart of Your Rag Quilt
The fabrics you select will define the aesthetic and tactile experience of your rag quilt. You’ll need three layers for each block: a top, a middle, and a back. All three layers will contribute to the frayed edges, so choose materials that fray well and complement each other.
The Top Layer: Your Design Canvas
For the visible top side of your quilt, cotton woven prints are a popular choice due to their vast array of colors and patterns. They offer structure and a classic quilted look. However, don’t limit yourself!
- 100% Cotton Wovens: Excellent for vibrant patterns and durability. They fray well and provide a classic quilting feel.
- Flannel: Adds extra softness and warmth, and frays beautifully, creating a very plush, cuddly rag.
- Minky or Cuddle Fabric: If you want an exceptionally luxurious and soft top, minky or cuddle fabric can be used. Be aware that these fabrics can be slippery to work with, so take extra care with pinning and sewing. They don’t fray as dramatically as cotton or flannel but add a lovely texture.
- Denim or Corduroy: For a more robust, rustic, and heavier quilt, denim or corduroy can be a fantastic choice for the top layer, offering unique texture and durability.
The Middle Layer: Adding Warmth and Loft
The middle layer, often referred to as batting in traditional quilting, primarily provides warmth and adds loft to your quilt. For rag quilts, you have several options:
- Flannel: This is a highly recommended choice for the middle layer. It’s soft, affordable, adds significant warmth, and contributes beautifully to the frayed edges. You can use a solid color flannel or even another print.
- Cotton Batting Scraps: If you have leftover cotton batting from other projects, these can be cut into squares and used. Cotton batting will give a softer, less fluffy fray compared to flannel.
- Old Blankets or Sheets: For an eco-friendly approach, consider repurposing old, clean flannel sheets or thin blankets as your middle layer, provided they are soft and can be cut into squares.
The Backing Layer: The Cuddle Factor
The backing layer will be the side that often touches your skin, so prioritize comfort and softness. It will also contribute to the frayed edges.
- Flannel: Again, flannel is an excellent choice for the back. It’s incredibly soft, cozy, and frays wonderfully, enhancing the overall “ragged” effect.
- Minky or Cuddle Fabric: For ultimate luxurious softness, use minky or cuddle fabric for the backing. It creates an irresistibly soft and warm quilt. Keep in mind its stretchiness when sewing.
- Soft Cotton: A soft cotton fabric can also be used, offering a smooth finish. It will fray, but perhaps not as plushly as flannel.
Calculating Your Fabric Yardage
To determine how much fabric you’ll need, first decide on your desired quilt size and the finished size of each quilt block. Remember that each quilt block will be 1 inch smaller when finished than its cut size, due to the 1/2-inch seam allowance on all four sides.
Example: If you want finished blocks to be 8 inches, you will need to cut your fabric squares to 9 inches (8″ finished + 1/2″ seam + 1/2″ seam). A common beginner block size for rag quilts is 8-inch finished squares, meaning you cut 9-inch squares.
- Determine Quilt Dimensions: Decide on the length and width of your final quilt (e.g., 60 inches x 72 inches).
- Calculate Number of Blocks per Row/Column: Divide your desired quilt width by your finished block size to get the number of blocks per row. Do the same for length. (e.g., 60″ / 8″ = 7.5 blocks, so you’d round up to 8 blocks per row to ensure coverage).
- Total Number of Blocks: Multiply the number of blocks per row by the number of rows. (e.g., 8 blocks/row x 9 rows = 72 blocks).
- Fabric Yardage: Multiply the total number of blocks by 3 (for the top, middle, and back layers). This gives you the total number of squares you need to cut. Then, based on your cut square size (e.g., 9×9 inches), calculate how many squares you can get from a yard of fabric (typically 44/45 inches wide). This will help you determine how many yards of each fabric type you need. It’s always wise to purchase a little extra, especially for your main top fabric, to account for errors or future repairs.
Preparation is Key: Pre-Washing and Pressing
This step is non-negotiable for a professional-looking and durable quilt. Pre-washing all your fabrics is crucial for several reasons:
- Shrinkage: Most 100% cotton and flannel fabrics will shrink when washed and dried, especially on high heat. Pre-washing ensures that all fabrics shrink beforehand, preventing distortion or puckering in your finished quilt after its first wash.
- Color Bleeding: Darker fabrics, particularly reds and blues, can bleed color onto lighter fabrics. Pre-washing, especially with color-catching sheets, helps remove excess dye and prevents unwanted color transfer.
- Softening: Washing and drying can soften new fabrics, making them more pliable and pleasant to work with.
Pre-Washing Process:
Wash all your fabrics according to their care instructions, typically on a warm or cool cycle. For fabrics of similar colors, you can wash them together. For darker, vibrant colors, consider washing them separately or using several color-catching sheets in the wash. Dry them completely on high heat, just as you would expect to dry the finished quilt.
Pressing for Perfection:
After your fabrics are dry, iron each piece thoroughly. Pressing removes wrinkles, makes the fabric easier to cut accurately, and ensures your blocks lay flat and square. This attention to detail in the preparation stage will save you frustration later on.
Cutting Your Quilt Blocks with Precision
Accuracy in cutting is vital for a well-aligned quilt. Take your time with this step.
- Layer and Square Up: Lay your pre-washed and pressed fabric flat on your cutting mat. If using a rotary cutter, you can often layer multiple pieces of fabric (up to 4-6, depending on thickness) to cut several squares at once. Ensure the edges are squared up with your ruler before making any cuts.
- Cut Each Layer: Cut all your top fabric squares, then all your middle layer squares, and finally all your backing fabric squares to your predetermined size (e.g., 9×9 inches). Aim for consistent, straight cuts.
- Organize: Once all your squares are cut, it’s helpful to organize them into sets of three (one top, one middle, one back) so they are ready for assembly.
Designing Your Quilt Layout: The Creative Stage
Before you start sewing, take the time to arrange your cut squares into your desired quilt pattern. This step allows you to visualize the finished quilt and make any necessary adjustments to color or pattern placement.
- Lay It Out: Find a large, clean surface—your floor, a bed, or a large table—and lay out all your top fabric squares in the correct number of rows and columns.
- Experiment: Play around with different arrangements until you achieve a design that you love. Consider alternating colors, creating specific patterns, or simply distributing prints evenly for a random look.
- Take a Photo: Once you’re happy with your layout, take a picture with your phone. This serves as a helpful reference as you assemble the blocks, preventing you from forgetting your intended design.
- Stack Your Blocks: Working row by row, carefully stack the blocks in order. For instance, start with the first block of the first row, place the second block on top, and so on. Repeat for all rows.
Assembling the Quilt Blocks: Layering and Stitching
Now, it’s time to bring your individual blocks to life. Each rag quilt block is a “sandwich” of three layers.
- Create Your Block Sandwich: For each individual block, place your backing fabric square right side down. Then, place your middle layer (flannel or batting) on top of the backing fabric. Finally, place your top fabric square right side up on top of the middle layer.
- Secure Layers: Carefully align all three layers, ensuring the edges are as even as possible. Use 2-4 sewing pins or fabric clips to secure the layers together, one at each corner or side. This prevents shifting while you sew.
- Sew an “X” on Each Block: Using your sewing machine, sew a large “X” across each three-layered block. Start from one corner and sew diagonally to the opposite corner. Lift your presser foot, pivot the fabric, and sew from the other two opposing corners to form a clear “X”. This quilting stitch keeps your layers securely together and prevents shifting. Trim your threads neatly.
- Repeat: Continue this process for all your individual quilt blocks, creating a stack of finished “X”-stitched block sandwiches.
Sewing Blocks into Rows: Building Your Quilt Structure
With all your individual blocks prepared, the next step is to sew them together to form rows, keeping your layout photo handy.
- Take the First Two Blocks of Your First Row: Place them right sides together, aligning the edges. This means the top fabric of one block will be facing the top fabric of the other block.
- Pin Along One Edge: Use several pins to secure the aligned edge.
- Sew with a 1/2-Inch Seam Allowance: Using a straight stitch on your sewing machine, sew along the pinned edge with a consistent 1/2-inch seam allowance. This larger seam allowance is crucial for creating the distinctive frayed edges.
- Add Remaining Blocks: Continue adding the next block in the row, placing it right sides together with the previous block, pinning, and sewing with a 1/2-inch seam allowance until your entire row is assembled.
- Repeat for All Rows: Follow the same procedure for every row of your quilt.
- Press Seams (Optional but Recommended): While not strictly necessary for rag quilts, pressing the seams to one side (usually towards the darker fabric) after each row is sewn can help the quilt lie flatter and make the next steps easier.
Joining Rows to Form the Quilt Top
Once all your individual rows are sewn, it’s time to connect them to complete the quilt top.
- Take the First Two Rows: Place the first row on top of the second row, right sides together. Align the raw edges that will be sewn.
- Nest Your Seams: This is a key step for a flatter quilt. Where the vertical seams of the blocks meet, gently push the seam allowances in opposite directions (e.g., one up, one down). This allows the seams to “nest” together, reducing bulk and creating flatter intersections.
- Pin Generously: Use plenty of pins, especially at the seam intersections, to keep everything aligned perfectly.
- Sew with a 1/2-Inch Seam Allowance: Stitch along the pinned edge, maintaining your consistent 1/2-inch seam.
- Continue Adding Rows: Add the third row to the second, then the fourth to the third, and so on, until all your rows are sewn together.
- Check for Squareness: After connecting all rows, lay your quilt flat to check for any distortions. Minor issues are fine for a rag quilt!
The Ragging Process: Creating the Iconic Frayed Edges
This is arguably the most satisfying part of making a rag quilt! The “ragging” or clipping of the seams is what gives the quilt its characteristic look and feel. Take your time and be careful not to cut into your stitching.
- Locate All Seams: Lay your assembled quilt flat. You will be clipping all the exposed seam allowances on the top of the quilt – both the horizontal seams between blocks and the vertical seams between rows.
- Clip the Seams: Using your sharp scissors or, ideally, your ragging scissors, make small cuts into the seam allowances. These clips should be approximately 1/4 to 1/2 inch apart.
- Crucial Tip: Do NOT Cut the Stitch Line! This is the most important rule. Clip only into the seam allowance, stopping just before you reach the actual stitch line that holds the blocks together. Cutting the stitch line will cause your quilt to fall apart.
- Focus on Evenness: Try to keep your clips relatively evenly spaced. This helps ensure uniform fraying.
- All Sides: Make sure to clip all four edges of the entire quilt as well, creating a consistent fringe around the perimeter.
- Patience is a Virtue: This step takes time, especially for a larger quilt. Put on some music or a podcast and enjoy the meditative process. Your ragging scissors will make a huge difference in hand comfort.
The First Wash: Unleashing the Fluff and Fray
The magic truly happens in the wash! The first wash and dry cycle will encourage the clipped seams to fray and bloom, giving your rag quilt its signature soft, fuzzy texture.
- Prepare for Lint: Be warned, this first wash will produce a significant amount of lint! Clean out your washing machine’s lint trap (if it has one) before you start, and plan to clean your dryer’s lint trap multiple times during the drying cycle.
- Wash Cycle: Place your clipped quilt into the washing machine. Use a gentle cycle with warm water. The agitation of the wash cycle is what encourages the fraying. You can add a small amount of mild detergent.
- The Dryer is Your Friend: Transfer the wet quilt to your dryer. Dry on a medium to high heat setting. The tumbling action and heat will continue to fray the seams. You might need to dry it for an extended period, emptying the lint trap every 15-20 minutes until the quilt is completely dry and fluffy.
- Shake It Out: Once dry, give your quilt a good shake outside to remove any loose threads or lint.
Care and Maintenance of Your Rag Quilt
Rag quilts are designed for comfort and durability, and with proper care, they will last for many years.
- Regular Washing: Wash your rag quilt as needed in a washing machine on a gentle cycle with warm or cool water.
- Drying: Tumble dry on medium heat. Continue to check and clean your dryer’s lint trap regularly, as rag quilts will continue to produce some lint with each wash, especially initially.
- Spot Cleaning: For small spills, spot clean with a damp cloth and mild soap.
- Embrace the Fray: Over time, the frayed edges may become even softer and more distinct, adding to the quilt’s charm. This is part of its appeal!
Conclusion: Your Handmade Masterpiece Awaits!
Congratulations! You’ve navigated the journey of creating a beautiful, cozy, and unique rag quilt. From selecting your fabrics and meticulously cutting your blocks to the satisfying process of clipping seams and witnessing the magic of the first wash, you’ve developed new skills and crafted something truly special. Rag quilts are a testament to the joy of handmade items – they’re not just blankets, but tangible expressions of warmth, comfort, and creativity. Whether you keep it for yourself, gift it to a loved one, or simply enjoy the pride of accomplishment, your rag quilt is a charming reminder of what you can create with your own two hands. Embrace the snuggle, and perhaps, get ready to make another!