
Master the Grill: How to Cook the Perfect Steak Every Time
While pan-searing offers a convenient indoor option for preparing steak, nothing quite compares to the distinct smoky flavor and outdoor experience of grilling. Many believe grilling a perfect steak is a daunting task, but with a few simple techniques, you can achieve restaurant-quality results every single time. Forget the smoke-filled kitchen; embrace the sizzle and aroma of an outdoor grill!
Join us as we explore the art of grilling steak, from selecting the right cut to perfecting that crucial resting period. Let Ryan Maya Cooks guide you through the process, ensuring your next grilled steak is a memorable culinary triumph.
Why Grill Your Steak? Unlocking Superior Flavor and Experience
Grilling isn’t just a cooking method; it’s an experience. The high heat of a grill creates an incredible crust and distinctive char marks, while the smoke infuses the meat with a complexity of flavor that pan-frying simply cannot replicate. Furthermore, grilling often requires less oil than pan-searing, making it a potentially healthier option for those mindful of their fat intake. The outdoor setting transforms cooking into a social event, creating a relaxed atmosphere perfect for entertaining friends and family. It’s a fantastic way to enjoy the warmer months and bring people together over delicious food.
Whether you’re a seasoned grill master or a novice looking to impress, mastering grilled steak is a rewarding journey. It’s about precision, understanding your equipment, and respecting the quality of your ingredients.
Choosing the Perfect Steak for Grilling
The foundation of a great grilled steak begins with selecting the right cut. While our recipe focuses on a New York Strip, many other cuts shine on the grill. Look for steaks that are at least 1 to 1.5 inches thick; thinner steaks cook too quickly and are harder to manage for even doneness. Marbling – the small flecks of fat distributed throughout the muscle – is key to flavor and tenderness. Here are some popular grilling options:
- New York Strip: A classic choice, known for its balanced flavor, good marbling, and tender texture. It holds its shape well on the grill.
- Ribeye: Highly prized for its rich, buttery flavor and abundant marbling. It can be boneless or bone-in (Tomahawk).
- Sirloin: A leaner, more economical option, still full of robust beefy flavor. It benefits from a good marinade or a strong seasoning rub.
- Filet Mignon (Tenderloin): Extremely tender and lean, with a mild flavor. Often cut thicker and grilled quickly to maintain its delicate texture.
- T-Bone/Porterhouse: These cuts include both the New York Strip and the Filet Mignon, offering a delightful contrast in textures and flavors.
Always aim for high-quality, fresh steak from a reputable butcher or grocery store. Freshness greatly impacts the final taste and texture.
Essential Tools and Ingredients for Grilling Success
Before you fire up the grill, ensure you have all your tools and ingredients ready. Preparation is key to a smooth and successful grilling experience.
What You Need for the Perfect Grilled Steak:
- Steak: Regular new york strip (1 to 1.5 inches thick is ideal).
- Kosher Salt: Its coarser texture is excellent for seasoning and forming a crust.
- Garlic Powder: Adds a savory depth of flavor without the risk of burning fresh garlic.
- Freshly Cracked Black Pepper: Provides a pungent, aromatic kick.
- Grill: Gas or charcoal, ensure it’s clean and in good working order.
- Tongs: Long-handled tongs are essential for safely flipping and moving the steak.
- Instant-Read Meat Thermometer: Your best friend for ensuring perfect doneness.
- Paper Towels: Crucial for patting the steak dry.
- Cutting Board: For seasoning and later for resting and slicing.
Beyond these basics, consider a grill brush for cleaning, and perhaps a good grilling glove for safety.
Preparing Your Steak for the Grill: The First Steps to Perfection
The journey to a perfect grilled steak begins long before it touches the grates. Proper preparation ensures maximum flavor, tenderness, and an irresistible crust.
Step 1: Bring to Room Temperature and Pat Dry
Remove your steak from the refrigerator about 30-60 minutes before grilling. Allowing it to come closer to room temperature helps it cook more evenly from edge to center. This minimizes the temperature gradient and prevents the outside from overcooking while the inside remains cold. Once out, the most crucial first step is to pat the meat dry with a paper towel. This is non-negotiable! Moisture on the surface of the steak creates steam when it hits the hot grill, preventing a beautiful, hard sear. A dry surface is vital for achieving that desirable Maillard reaction, which gives steak its rich brown crust and complex flavor.
Step 2: Season Generously and Evenly
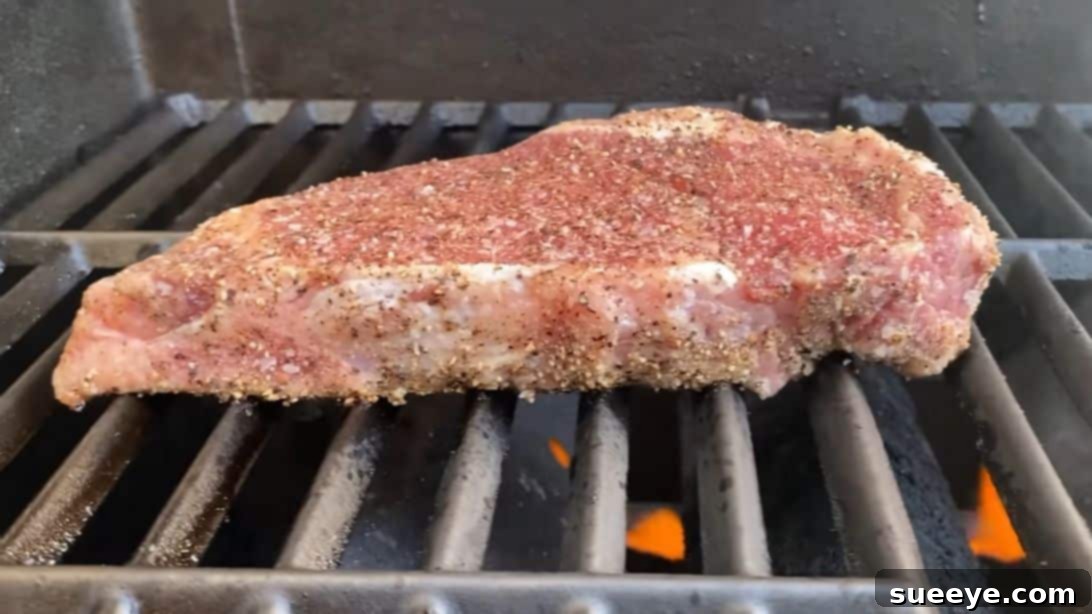
Seasoning is where much of the flavor is built. Cover the entire surface of the steak generously with kosher salt, garlic powder, and freshly cracked black pepper. Don’t be shy with the salt; a good amount helps draw out moisture and contribute to the crust. Gently pat the seasonings into the meat to ensure they adhere well. Flip the steak and repeat the process on the bottom side. Don’t forget the edges! Use any leftover seasonings on your chopping board to coat the sides of the steak as well. This creates a flavor bomb from every angle. Allow the seasoned steak to sit for a few minutes (while you preheat the grill) for the seasonings to begin penetrating the surface.
The Grilling Process: Achieving the Perfect Sear and Doneness
Now, it’s time to bring on the heat! Grilling is about high temperature and precise timing.
Step 3: Preheat Your Grill to Maximum Heat for the Ultimate Sear
Turn your gas grill to its highest setting. You want the grates to be as hot as possible. For charcoal grills, aim for a two-zone fire with one side extremely hot. High heat is essential for creating that immediate, satisfying sizzle and a robust sear. Allow the grill to preheat for at least 10-15 minutes with the lid closed. This ensures the grates are scorching hot. Carefully feel for the hottest spot on your grill (often directly above the burners or over the densest charcoal) and place the steak there. You should hear an immediate, aggressive sizzling sound. If you don’t hear that sound, your grill is not hot enough, and you won’t achieve a proper sear. Press the steak down gently with your tongs to ensure maximum contact with the grates, then close the grill lid immediately. Cook for 2 minutes and 30 seconds.
Step 4: Rotate for Crosshatch Marks and Enhanced Crust
After the initial 2 minutes and 30 seconds, carefully open the grill. Check your steak for beautiful, distinct grill marks. If they are well-defined, you’re on the right track. Using your tongs, rotate the steak slightly (about 45 degrees) within the same hot spot. This rotation creates the classic crosshatch grill pattern and ensures a more even crust development across the surface. Close the grill immediately after rotating. Cook for another 2 minutes and 30 seconds on this side. Resist the urge to constantly lift the lid; consistent heat is crucial for effective grilling.
Step 5: Flip, Cook to Desired Doneness, and Rest
Now it’s time for the final flip. Open the grill, flip your steak to the uncooked side, and press it down gently to ensure good contact with the hot grates. Close the grill and cook for 2 minutes. After this, you will cook until your steak reaches your desired internal temperature. For a perfect medium-rare, aim for an internal temperature of 115°F-120°F (46°C-49°C) while still on the grill. Remember, the steak will continue to cook for a few degrees after it’s removed from the heat (this is called carry-over cooking).
Crucially, use an instant-read meat thermometer inserted into the thickest part of the steak, away from any bone, to accurately check its temperature. Guessing can lead to over or undercooked steak.
Once your steak reaches the target temperature, remove it immediately from the grill and transfer it to a clean cutting board. This next step is just as important as the grilling itself:
Resting: Let the steak rest for at least 10 minutes (15 minutes for thicker cuts) before slicing. Tent it loosely with foil to keep it warm. This resting period allows the juices, which have been driven to the center of the steak during cooking, to redistribute throughout the meat. Slicing too early will cause all those delicious juices to run out onto your board, resulting in a dry, less flavorful steak. Patience here is truly a virtue!
Understanding Steak Doneness Levels
Achieving your preferred doneness is key to a satisfying steak experience. Here’s a quick guide to internal temperatures (taken *before* resting, remember carry-over cooking):
- Rare: 120-125°F (49-52°C) – Cool red center.
- Medium-Rare: 130-135°F (54-57°C) – Warm red center. (Our target!)
- Medium: 135-140°F (57-60°C) – Warm pink center.
- Medium-Well: 140-145°F (60-63°C) – Slightly pink center.
- Well-Done: 150°F+ (66°C+) – Little to no pink. (Not recommended for most cuts, as it can lead to dryness).
Always remove the steak from the grill 5-10 degrees below your target final temperature to account for carry-over cooking during the rest.
Tips for Grilling Steak Like a Pro
- Clean Your Grates: Always start with clean grill grates to prevent sticking and ensure clear grill marks.
- Don’t Overcrowd: Grill steaks in batches if necessary. Overcrowding drops the grill temperature and prevents proper searing.
- Resist Poking and Prodding: Don’t pierce the steak with forks or constantly flip it. Each puncture allows precious juices to escape, and excessive flipping prevents a good crust from forming.
- Hot Spots: Learn where the hot spots are on your grill and use them strategically.
- Keep the Lid Closed: For gas grills, closing the lid helps maintain consistent internal temperature and cooks the steak more evenly.
- Slice Against the Grain: Once rested, slice the steak against the grain (perpendicular to the muscle fibers) for maximum tenderness.
Common Grilling Mistakes to Avoid
Even seasoned grillers can make mistakes. Avoiding these common pitfalls will elevate your steak game:
- Not Preheating Enough: This is the number one mistake. Cold grates mean no sear, no crust, and a less flavorful steak.
- Flipping Too Often: As mentioned, flip only when necessary (usually once or twice). Let the grill do its work.
- Cutting Steak Immediately: The resting period is non-negotiable for juicy steak.
- Under-Seasoning: Steak can handle a lot of seasoning. Don’t be shy with salt and pepper.
- Eyeballing Doneness: Unless you’re a seasoned chef, always use a meat thermometer. It’s the most reliable way to achieve perfect doneness.
Serving Your Perfectly Grilled Steak
Once your steak has rested and been sliced, it’s ready to be savored! A perfectly grilled steak needs little adornment. A sprinkle of flaky sea salt, a dollop of compound butter, or a fresh herb garnish can enhance its natural flavors. Serve it with classic sides like roasted asparagus, a crisp garden salad, creamy mashed potatoes, or grilled vegetables to complete a magnificent meal.
RELATED: How to Make Delicious Country Fried Steak (for when you crave a different kind of steak experience!)
If you’re looking to master pan-searing as well, check out this guide: How to Cook the Perfect Steak Every Time
Enjoy the Fruits of Your Labor!
Grilling the perfect steak is a simple pleasure that yields incredible results. With practice, attention to detail, and this comprehensive guide, you’ll be confidently grilling succulent steaks every time. The satisfaction of pulling a perfectly seared, juicy steak off the grill is unmatched. So fire up your grill, gather your ingredients, and get ready to enjoy one of life’s greatest culinary delights. Happy grilling!