
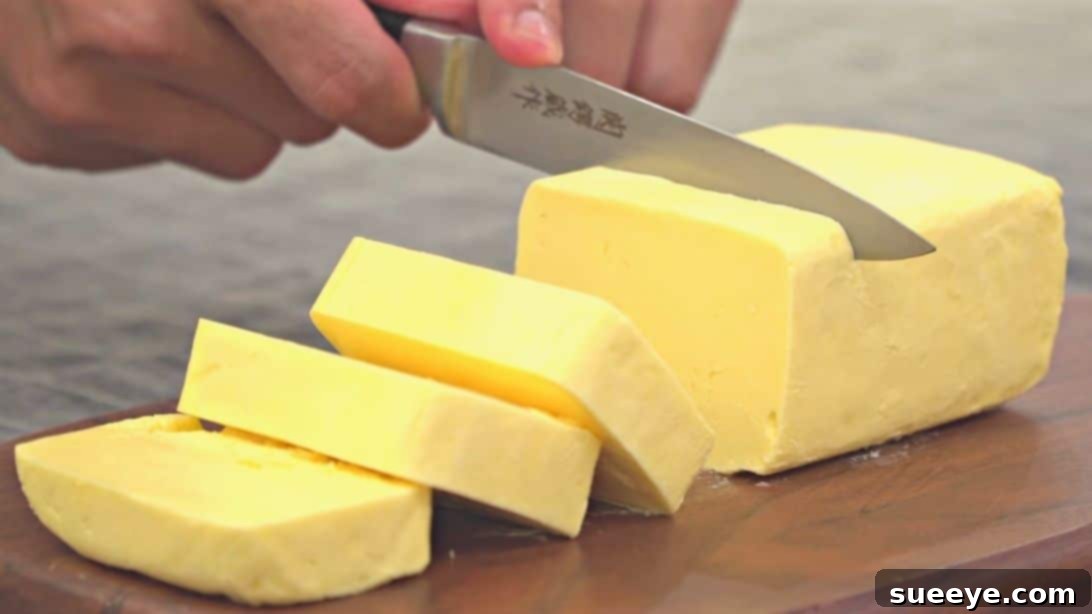
Discover the Joy of Homemade Butter: Simple, Fresh, and Ready in Minutes!
Imagine spreading rich, creamy, and undeniably fresh butter on your morning toast, knowing you made it yourself with just one simple ingredient. Say goodbye to store-bought shortages and hello to the incredible satisfaction of crafting your own butter at home. Thanks to this fantastic tutorial inspired by Nino’s Home on YouTube, you’re about to unlock a culinary secret that’s not only surprisingly easy but also incredibly rewarding.
This comprehensive guide will walk you through the satisfying process of making delicious homemade butter from scratch. Forget complex recipes and expensive ingredients; all you need is a single, readily available item, and you could be enjoying your own fresh batch in as little as 10 minutes. Whether you’re a seasoned home cook or a complete beginner, preparing your own butter is a delightful experience that promises superior flavor, control over what goes into your food, and a genuine sense of accomplishment. Let’s dive into the simple steps and discover just how effortless homemade butter can be!
Why Make Your Own Butter? The Unbeatable Benefits
You might be wondering why bother making butter when it’s so readily available in stores. The answer lies in an unparalleled difference in taste, freshness, and the pure joy of a DIY project. Homemade butter offers a distinct, rich flavor profile that often surpasses its mass-produced counterparts. It has a creamier texture and a delicate aroma that elevates any dish it touches.
Control Over Ingredients
One of the biggest advantages is complete control over what goes into your butter. Store-bought butter can sometimes contain additives or colorings. When you make it at home, you know exactly what you’re getting: pure cream, and optionally, a pinch of salt. This transparency is especially appealing for those with dietary concerns or who simply prefer wholesome, natural ingredients.
Cost-Effective and Convenient
While premium butter can be expensive, buying heavy cream in bulk can often be more cost-effective, especially if you catch sales. Plus, imagine never running out of butter again! A quick trip to the dairy aisle for cream, and you can whip up a fresh batch whenever you need it, avoiding last-minute grocery store runs.
A Fun and Rewarding Experience
The process itself is quite mesmerizing. Watching cream transform into butter is a simple marvel that can be a fun activity for families, teaching children about food origins. The sense of achievement you get from creating something so fundamental from scratch is incredibly satisfying.
Versatility and Customization
Homemade butter also opens up a world of customization. You can easily infuse it with herbs, garlic, honey, or spices to create gourmet flavored butters that perfectly complement your culinary creations. This level of versatility is hard to achieve with pre-made options.
Understanding the Simple Science Behind Butter Making
At its core, making butter is a fascinating process of separating fat from liquid. Heavy cream is an emulsion of fat globules suspended in water. When you churn or beat the cream vigorously, you break the membranes surrounding these fat globules, allowing them to clump together. As these fat particles coalesce, they form a solid mass – butter – while the remaining liquid separates into buttermilk.
This transformation from liquid cream to solid butter is surprisingly quick and visually dramatic. Understanding this basic principle helps you appreciate why certain steps, like washing the butter, are crucial for a perfect, long-lasting final product.
Essential Ingredients and Equipment
The beauty of homemade butter lies in its simplicity. You truly only need one main ingredient, plus a couple of common kitchen items.
Key Ingredient:
- 2 cups or 500 grams of Heavy Cream or Whipping Cream: This is the star of the show. For best results, use a high-quality heavy cream with a fat content of at least 36%. Organic or local cream can yield an even richer flavor. Ensure the cream is very cold, straight from the refrigerator, as this helps the fat globules separate more efficiently.
Supporting Ingredients:
- Ice-Cold Water: Absolutely essential for washing the butter and preventing it from becoming oily or spoiling quickly.
- Optional: Salt: Fine-grain sea salt or kosher salt can be added to taste if you prefer salted butter.
Equipment You’ll Need:
- Large Mixing Bowl: Choose a bowl with high sides to prevent splattering during the churning process.
- Hand Mixer, Stand Mixer, or Food Processor: While possible to make butter by hand, a mechanical mixer speeds up the process dramatically. A stand mixer with a whisk attachment or a food processor with a blade attachment are highly efficient.
- Strainer or Sieve: For separating the solid butter from the liquid buttermilk.
- Spatula or Spoon: For scraping down the sides of the bowl and kneading.
- Optional: Cheesecloth: Can be used for a more thorough straining or squeezing of buttermilk.
- Parchment Paper: For shaping and storing your finished butter.
Ensure all your equipment is thoroughly clean and, ideally, chilled. A cold environment aids in the successful separation of butterfat.
Step-by-Step Directions: Crafting Your Own Butter
Let’s get started on this exciting culinary adventure! Follow these detailed steps to transform simple cream into golden butter.
Step 1: The Churning Process – From Cream to Solids
Begin by pouring about 2 cups (500 grams) of very cold heavy cream or whipping cream into a large mixing bowl. If you’re using a hand mixer, start beating the cream on medium-high speed. If you have a stand mixer, use the whisk attachment. For a food processor, use the standard blade.
- Stage 1: Whipped Cream: Initially, the cream will thicken into soft peaks, then stiff peaks, just like whipped cream. This is a crucial stage, but don’t stop here!
- Stage 2: Grainy Texture: Continue beating. The whipped cream will start to look a bit grainy and lose its smooth texture. It might even look like curdled cream.
- Stage 3: Separation: Keep going! After about 4 to 6 minutes (this can vary based on your mixer and cream), you will notice a dramatic change. Yellowish solid bits will begin to separate from a milky liquid. This liquid is buttermilk! You might hear a splattering sound as the butterfat clumps together. Continue beating until the butter solids are clearly distinct from the liquid buttermilk.
Once the butter solids have formed and separated from the buttermilk, carefully pour the mixture through a strainer into another bowl. This will separate the solid butter from the liquid buttermilk. Make sure to save the fresh buttermilk; it’s fantastic for baking or making pancakes!
Step 2: Washing and Kneading the Butter
This is arguably the most critical step for delicious, long-lasting homemade butter. Washing the butter removes any residual buttermilk, which can cause the butter to spoil quickly and give it an off-flavor.
- Prepare the Ice Bath: In a large, clean mixing bowl, pour in plenty of ice-cold water and add a few ice cubes. This cold environment helps to firm up the butter and makes it easier to work with.
- Submerge the Butter: Gently transfer the separated butter solids into the ice-cold water bath.
- Knead and Wash: Using your hands (ensure they are clean and cold) or a spatula, start gently kneading and pressing the butter under the water. You will notice the water becoming cloudy with milky residue as you press the buttermilk out. The goal is to extract as much buttermilk as possible.
- Change the Water: Drain the cloudy water and replace it with fresh ice-cold water. Continue kneading and pressing. Repeat this process 3-4 times, or until the water remains completely clear after kneading. This indicates that most of the buttermilk has been removed. This step typically takes about 3 to 5 minutes of active kneading.
- Drain and Squeeze: Once the water runs clear, drain all the water completely. You can use a clean cloth or paper towels to gently squeeze out any remaining moisture. The butter should now be firm, smooth, and cohesive.
Step 3: Seasoning, Shaping, and Storing Your Fresh Butter
Now that your butter is clean and firm, it’s time to add flavor and prepare it for storage.
- Seasoning (Optional): If you prefer salted butter, transfer the clean butter to a dry bowl. Add a pinch (about ¼ to ½ teaspoon per 2 cups of cream) of fine-grain salt to the butter. Knead it gently to evenly distribute the salt. Taste and adjust as needed. For unsalted butter, simply skip this step.
- Shaping: Place the butter onto a piece of parchment paper. Using your hands or a spatula, shape it into your desired form – a traditional rectangular block is common, or you can roll it into a log. The parchment paper helps to prevent sticking and makes it easy to handle.
- Wrapping: Cover the butter completely with the parchment paper, sealing it tightly. This protects it from absorbing odors from the refrigerator and preserves its freshness.
- Refrigerate: Place the wrapped butter in the refrigerator for at least an hour to allow it to firm up completely before serving or using.
Tips for Homemade Butter Success
Achieving perfect homemade butter every time is easy with a few simple tricks:
- Start with Cold Cream: This cannot be emphasized enough. Cold cream separates more efficiently and yields better results.
- Don’t Overfill the Bowl: Leave plenty of room for the cream to expand and for splattering, especially during the separation stage.
- Be Patient (But Not Too Patient!): The process can take anywhere from 5 to 15 minutes depending on your equipment and cream. Don’t stop too early, but once the butter solids are clearly separated, move on.
- Thorough Washing is Key: Don’t skip or rush the washing process. Removing all the buttermilk is vital for extending the shelf life and ensuring a pure butter flavor.
- Save the Buttermilk: The byproduct of butter making is fresh buttermilk, which is fantastic for baking, marinating chicken, or making light and fluffy pancakes.
- Experiment with Flavor: Once you master the basic recipe, try adding herbs, garlic, honey, or cinnamon to create custom flavored butters.
Creative Variations for Your Homemade Butter
Once you’ve mastered the basic technique, feel free to get creative and personalize your butter:
- Herbed Butter: Mix in finely chopped fresh herbs like chives, parsley, dill, or rosemary. A touch of minced garlic can also be added for a savory spread perfect for bread or steak.
- Sweet Butter: Incorporate honey, maple syrup, or a dash of cinnamon and brown sugar for a delightful spread on pancakes, waffles, or muffins.
- Cultured Butter: For a tangier, more complex flavor reminiscent of European-style butter, add a tablespoon of cultured buttermilk or plain yogurt to your heavy cream 12-24 hours before churning. Let it sit at room temperature to thicken and develop flavor, then chill thoroughly before churning.
- Spicy Butter: A pinch of red pepper flakes or a finely diced jalapeño can give your butter a zesty kick, great for corn on the cob or tacos.
Frequently Asked Questions About Homemade Butter
What kind of cream is best for making butter?
Heavy cream or heavy whipping cream with a fat content of 36% or higher is ideal. The higher the fat content, the better the yield and the quicker the butter will form. Avoid ultra-pasteurized cream if possible, as it sometimes doesn’t separate as effectively.
Can I use a blender to make butter?
Yes, a high-powered blender can also be used. Place the cold cream in the blender, secure the lid, and blend on high speed. Watch it closely, as it can go from cream to butter very quickly. Be careful not to over-blend.
What if my butter doesn’t separate?
If your butter isn’t separating, ensure your cream is very cold. Sometimes, cream that isn’t cold enough or has a lower fat content can take longer. Continue beating; sometimes it just needs more time. Also, make sure you’re using fresh cream that hasn’t expired.
How long does homemade butter last?
Properly washed and stored homemade butter will last about 1-2 weeks in the refrigerator, similar to store-bought butter. If you’ve salted it, it may last a little longer. For extended storage, you can freeze homemade butter for several months. Just ensure it’s tightly wrapped in parchment paper and then an airtight container or freezer bag.
What can I do with the leftover buttermilk?
Don’t discard it! This is fresh buttermilk, a valuable ingredient. It’s excellent for baking moist cakes, biscuits, pancakes, or waffles. It can also be used to marinate chicken, adding tenderness and flavor.
Conclusion: The Ultimate Homemade Butter Experience
Making your own butter is more than just a kitchen task; it’s an incredibly rewarding experience that connects you more deeply with your food. The simplicity of transforming a single ingredient into a culinary staple, often in under 10 minutes, is truly satisfying. From its superior taste and texture to the control it gives you over your ingredients, homemade butter is a game-changer for any home cook.
So, the next time you find yourself reaching for store-bought butter, consider this simple, fun, and cost-effective alternative. Give this tutorial a try, inspired by the wonderful insights from Nino’s Home on YouTube, and unlock the secret to fresher, more flavorful butter right in your own kitchen. Enjoy the delicious results!