
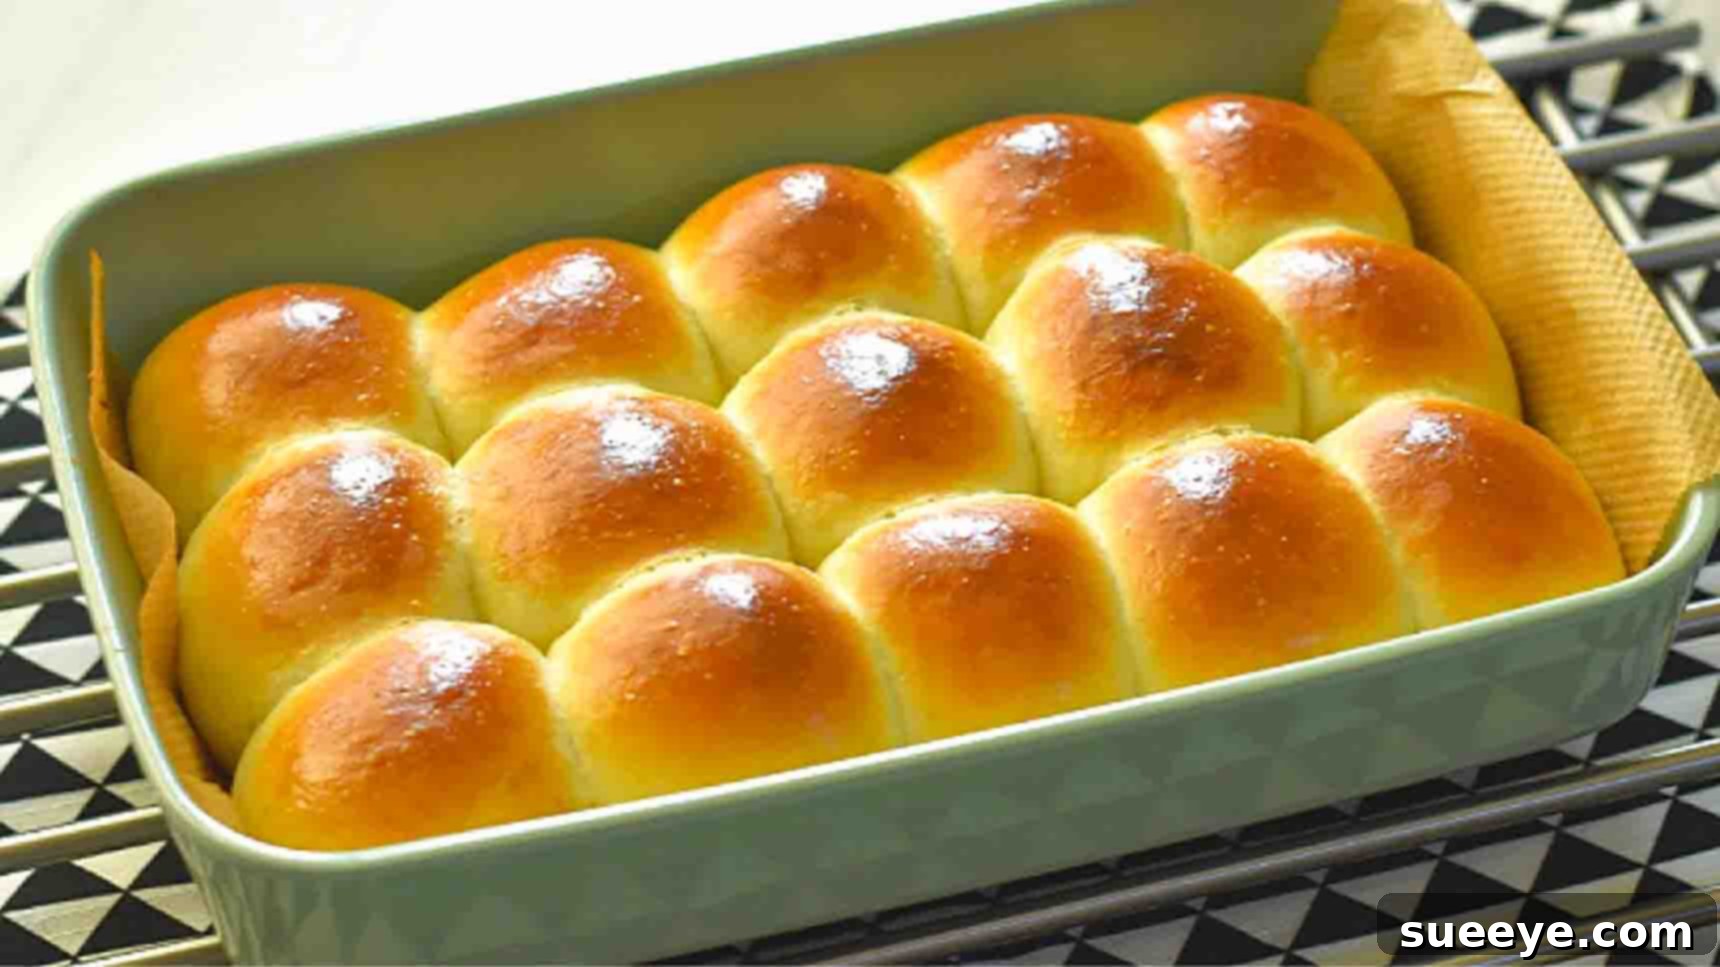
The Ultimate Guide to Incredibly Soft & Fluffy Homemade Dinner Rolls (No Double Proofing!)
There’s an undeniable charm and comfort in the aroma of freshly baked bread, and homemade dinner rolls bring that warmth right into your kitchen. Imagine pulling soft, fluffy, melt-in-your-mouth rolls, still warm from the oven, ready to grace your table and perfectly complement any meal. If the thought of baking bread has ever seemed daunting, perhaps due to complicated steps or extensive proofing times, prepare to have your perception completely transformed. This extraordinary dinner roll recipe, generously shared by the talented Bincy Chris on YouTube, is a true game-changer for anyone seeking a simple yet profoundly delicious bread-making experience.
What makes this particular recipe stand out as potentially the best dinner roll recipe you’ll ever try? It masterfully balances simplicity with spectacular results. You’ll achieve impossibly soft and remarkably fluffy rolls with minimal fuss, primarily thanks to a streamlined process that brilliantly eliminates the need for a second proofing stage. This key innovation alone saves you a significant amount of time, making homemade bread a convenient and realistic option even on your busiest days. Furthermore, this recipe calls for just seven essential ingredients—common staples you likely already have readily available in your pantry. No special trips to the store are required! Get ready to delight your family and friends with these divine homemade dinner rolls. We recommend watching Bincy Chris’s video for a helpful visual guide, then follow our comprehensive instructions below to bake your very own batch of perfect quick dinner rolls today.
Why These Homemade Dinner Rolls Are a Game-Changer
For many home bakers, yeast breads often carry a reputation for being intricate and demanding, typically requiring multiple proofing stages and precise timing. However, this particular recipe triumphantly defies those expectations, positioning itself as an ideal choice for both aspiring bakers taking their first steps into bread making and seasoned enthusiasts looking for a quick yet exquisite result.
- Unbeatable Softness & Fluffiness: The meticulously balanced combination of ingredients, coupled with Bincy Chris’s simplified methodology, consistently yields rolls that boast an incredibly tender, airy interior, encased within a beautifully golden and delicate crust. These are the softest dinner rolls you can imagine.
- No Double Proofing Required: This feature is arguably the most significant time-saver. By cleverly skipping the traditional second proofing stage, you dramatically reduce the overall preparation time without any compromise on the rolls’ texture, rise, or irresistible flavor. This means you can enjoy fresh, warm, easy homemade dinner rolls in a fraction of the time typically associated with yeast breads.
- Only 7 Pantry Staples: Say goodbye to lengthy shopping lists! This streamlined recipe relies solely on everyday, common ingredients: all-purpose flour, milk, a single egg, unsalted butter, yeast, sugar, and salt. The likelihood of having everything you need already on hand makes spontaneous baking sessions a joy.
- Effortless Preparation: From the initial mixing of the dough to the final shaping of each roll, every step in this recipe is designed to be straightforward, intuitive, and easy to follow. Even if you consider yourself a novice in the world of baking, you are virtually guaranteed success and the satisfaction of producing your own delicious, fluffy dinner rolls.
Essential Ingredients for Perfect Dinner Rolls
The true beauty of this easy dinner roll recipe lies in its elegant simplicity. With just a handful of common, readily available ingredients, you are well on your way to baking a batch of the best homemade dinner rolls you’ve ever tasted. To ensure optimal results, always use fresh ingredients and measure them with precision.
- 2 & 1/2 cups All-Purpose Flour: This forms the structural foundation of our rolls, providing the necessary gluten development for that desirable chew and softness.
- 1/2 cup + 2 tbsp Slightly Warm Milk: Absolutely crucial for gently activating the yeast. The milk should feel warm to the touch, similar to bathwater (ideally between 105-115°F or 40-46°C). Avoid milk that is too hot, as it can kill the yeast, or too cold, which will inhibit its activity.
- 1 Egg: Contributes significantly to the richness, golden color, and overall tenderness of the rolls. It also acts as a binder, helping to create a cohesive dough.
- 3 & 1/2 tbsp Unsalted Butter: When incorporated into the dough, the butter imparts a luscious, rich flavor and is instrumental in achieving that wonderfully soft and tender crumb texture. Ensure it’s very soft or melted and slightly cooled.
- 1 tsp Yeast (Instant or Dried): This is the magical leavening agent responsible for making your dinner rolls light, airy, and fluffy. If you’re using active dry yeast, you might opt to proof it in the warm milk and sugar for a few minutes before adding other ingredients, although instant yeast can typically be added directly with the dry ingredients.
- 2 & 1/2 tbsp Sugar: Serves a dual purpose: it acts as a food source for the yeast, stimulating its activity and promoting a robust rise, and it also adds a subtle touch of sweetness to enhance the rolls’ flavor profile.
- 1 & 1/4 tsp Salt: A vital ingredient that balances the overall flavors of the rolls, preventing them from tasting bland. It also plays an important role in strengthening the gluten structure within the dough, contributing to its elasticity and texture.
- Eggwash (for brushing): 1 egg + 1 tbsp milk: This simple mixture is brushed onto the rolls just before baking to create that coveted beautiful golden-brown, glossy, and slightly crispy finish on the crust.
Step-by-Step Guide to Fluffy Dinner Rolls
Embark on the journey to incredible homemade dinner rolls by following these detailed steps carefully. Each instruction is designed to be straightforward and easy to understand, ensuring a successful baking experience even for those who are new to bread making. Prepare to pull warm, irresistible dinner rolls from your oven in record time!
Step 1: Preparing Your Perfect Dough for Easy Dinner Rolls
The foundation for your ultimate dinner rolls begins with meticulously preparing the dough. In a spacious mixing bowl (or the bowl of a stand mixer), combine the liquid and wet ingredients first. Start by adding 1/2 cup + 2 tbsp of slightly warm milk. The temperature is key here: aim for bathwater warmth, approximately 105-115°F (40-46°C), as this is ideal for activating the yeast without killing it. Next, add 2 & 1/2 tbsp of sugar, which will serve as nourishment for the yeast, and then sprinkle in 1 tsp of yeast. Give this mixture a gentle stir and let it sit for a few minutes until it becomes slightly foamy – this confirms your yeast is active. After activation, incorporate 1 egg, 3 & 1/2 tbsp of unsalted butter (which should be melted and cooled slightly, or very soft at room temperature), and 1 & 1/4 tsp of salt. Mix these wet ingredients thoroughly until they are completely well combined and homogenous.
Once your wet mixture is perfectly prepared, gradually introduce 2 & 1/2 cups of all-purpose flour. Begin mixing everything together, using either a sturdy spoon, a Danish dough whisk, or a stand mixer fitted with a dough hook. Continue mixing until the flour is fully incorporated and a shaggy dough begins to form. Persist with the mixing until the dough comes together into a cohesive ball that pulls away from the sides of the bowl.
After the dough has successfully formed, transfer it to a lightly floured, clean work surface. Now comes the kneading process! Knead the dough for approximately 3 to 4 minutes. This critical step is where gluten is developed, which is essential for giving your dinner rolls their characteristic chewiness, elasticity, and structure. You’ll know the dough is properly kneaded when it transforms into a soft, smooth, and elastic consistency. It should also exhibit a slow spring-back when gently poked with a finger. If, at any point, your dough feels a bit stiff or overly dry, you can incrementally add 1 tablespoon of water at a time, kneading it in until the desired softness and pliability are achieved. Be cautious not to add too much flour during the kneading process, as this can inadvertently lead to dense and heavy rolls.
Step 2: Dividing and Shaping Your Fluffy Rolls
With your beautifully kneaded dough now perfectly prepared, it’s time to skillfully bring your individual dinner rolls to life through the art of shaping. First, gently roll the entire dough into a uniform log shape on your lightly floured work surface. This cylindrical form makes the subsequent division into equal pieces significantly easier and more consistent. Utilizing a bench scraper or a sharp knife, carefully divide the dough log into approximately 15 equal pieces. While aiming for uniformity is good for even baking, don’t strive for absolute mathematical perfection; a close approximation is perfectly fine.
As you meticulously work on shaping each individual piece of dough, it is paramount to keep the remaining dough covered. Use a damp cloth or a piece of plastic wrap to prevent the dough from drying out, which can lead to a less tender crust. Now, take one piece of dough at a time. Gently flatten it into a small, relatively flat disc. Then, begin the technique of tucking the edges of the dough meticulously toward the center of the disc, effectively creating tension on the top surface. This process helps create a smooth exterior. Once all the edges are tucked in, flip the dough ball over so that the seam is facing downwards on your work surface. Gently cup your hand around the dough ball and roll it in a circular motion against the surface. Continue until it forms a smooth, taut, and perfectly round ball. This specific shaping technique is crucial as it creates a seamless top and a tight surface, both of which contribute to the rolls rising beautifully, maintaining their structure, and achieving that desirable even shape during both proofing and baking.
As each roll is expertly shaped, carefully place it onto a prepared baking tray that has been lined with parchment paper. Remember to leave adequate space between each roll, as they will undoubtedly expand and grow in size during the upcoming proofing stage and, even more so, during the baking process.
Step 3: The Crucial Proofing Process for Perfect Rise
After meticulously shaping your homemade dinner rolls, the next and equally vital step is the proofing process. This is the stage where the yeast truly begins its transformative work, actively fermenting the sugars within the dough and producing carbon dioxide gas. This gas becomes trapped within the gluten network, creating those delightful air pockets that are responsible for the dough’s characteristic rise and ultimately, the rolls’ light and airy texture. To facilitate this, gently cover the baking tray containing your shaped rolls loosely with cling wrap or a clean, damp kitchen towel. Ensure the covering isn’t too tight, allowing sufficient room for the rolls to expand without obstruction.
Allow the shaped rolls to sit and rise undisturbed at room temperature for approximately 1 hour. The ideal room temperature for proofing is generally around 70-75°F (21-24°C). During this period, you should observe a visible increase in the rolls’ size; they should become noticeably puffier and feel considerably lighter. A reliable method to determine if they are adequately proofed is the “poke test”: gently poke a roll with a lightly floured finger. If the indentation slowly springs back partially, the rolls are perfectly proofed and ready for the oven. If the indentation springs back immediately, they require a little more time to rise. Conversely, if the indentation collapses and doesn’t spring back at all, the rolls may be slightly over-proofed, though they will usually still bake up wonderfully.
While your easy dinner rolls are gracefully proofing, it’s the opportune moment to preheat your oven to 375 degrees F (190°C). A properly preheated oven is absolutely crucial for ensuring even baking and achieving that beautiful golden crust. Once the rolls have fully proofed and your oven is ready, prepare your egg wash. Whisk together 1 egg with 1 tablespoon of milk until thoroughly combined. With a light touch, gently brush the top of each dough ball with this egg wash. This step serves more than just an aesthetic purpose; the egg wash significantly contributes to the beautiful, rich golden-brown color and imparts a slightly shiny, soft finish to the crust of your baked rolls. Remember to be very gentle during this process to avoid inadvertently deflating your perfectly proofed and delicate rolls.
Step 4: Baking to Golden Perfection for the Best Dinner Rolls
The final and undoubtedly most rewarding step in crafting your homemade dinner rolls is the baking process itself. With precision and care, transfer the baking tray, now adorned with your egg-washed and perfectly proofed rolls, into the preheated oven at 375 degrees F (190°C).
Allow your delicious dinner rolls to bake for approximately 18 to 20 minutes. It’s important to note that baking times can vary slightly depending on the individual calibration and efficiency of your oven. Therefore, it’s advisable to keep a watchful eye on them, particularly as you approach the end of the suggested baking time. You’ll know your homemade dinner rolls are perfectly baked when they acquire a beautiful, enticing golden-brown color across their tops and feel wonderfully light when gently lifted. For an additional verification of doneness, you can carefully tap the bottom of one of the rolls; a hollow sound indicates they are thoroughly cooked through. Ideally, the internal temperature of a baked roll should register around 200-210°F (93-99°C).
Once your dinner rolls have achieved that glorious golden hue and are thoroughly baked, carefully remove the tray from the hot oven. For an extra touch of indulgence and to ensure the softest possible crust, you might choose to brush the hot rolls with a small amount of melted butter immediately after they emerge from the oven. This optional step is highly recommended for an unparalleled buttery flavor and tender finish. Allow them to cool on the baking tray for just a few minutes before carefully transferring them to a wire rack to cool slightly more. These rolls are truly at their peak when enjoyed warm, straight from the oven, offering an unparalleled taste and texture experience that is hard to resist.
Mastering the Art of Dinner Rolls: Pro Tips for Success
While Bincy Chris’s easy dinner roll recipe is incredibly forgiving and designed for success, incorporating a few expert tips can further elevate your baking prowess. These professional insights will help you consistently achieve perfect, fluffy dinner rolls every single time, ensuring your homemade bread is always a triumph.
- Accurate Measurements Are Key: In baking, precision is paramount—it’s often compared to chemistry. Whenever possible, utilize a kitchen scale for measuring flour to achieve the most accurate results. If a scale isn’t available, employ the “spoon and level” method for dry ingredients: lightly spoon flour into your measuring cup until it overflows, then level it off with a straight edge. This technique prevents over-measuring, which can lead to excessively dense rolls.
- Yeast Freshness is Crucial: The vitality of your yeast directly impacts the rise of your rolls. Always ensure your yeast is fresh and active. If you have any doubts about its potency, you can perform a quick proofing test: mix the yeast with the warm milk and a pinch of sugar from the recipe. If, after 5-10 minutes, the mixture becomes visibly foamy and bubbly, your yeast is active and ready to use.
- Milk Temperature Matters Immensely: The instruction for “slightly warm” milk is absolutely critical. Milk that is too cold will significantly inhibit the yeast’s activity, preventing a proper rise. Conversely, milk that is too hot will kill the yeast entirely, rendering it ineffective. Aim for a temperature that feels like warm bathwater, specifically between 105-115°F (40-46°C). A kitchen thermometer can be invaluable here.
- Resist Over-Flouring: While a light dusting of flour on your work surface is necessary for kneading, try to resist the impulse to add excessive flour if your dough feels sticky. A slightly sticky dough is often a positive indicator of good hydration levels, which directly contributes to achieving beautifully soft and tender dinner rolls.
- Embrace Proper Kneading: Kneading is the process that develops the gluten network within the dough, providing its structure and elasticity. Do not rush this step. A well-kneaded dough will transform into a smooth, pliable, and elastic texture. A good indicator of sufficient kneading is the “windowpane test”: carefully stretch a small piece of dough; if you can stretch it thin enough to see light through it without it tearing, your gluten is perfectly developed.
- Strive for Consistent Shaping: When dividing and shaping your dough, aim to make each roll roughly the same size and shape. This uniformity is important because it ensures that all your quick dinner rolls bake evenly, preventing some from being undercooked while others are overbaked.
- Create an Ideal Proofing Environment: Yeast thrives in a warm, draft-free environment. If your kitchen is particularly cool, you can create a makeshift proofing box. A common trick is to place the covered rolls in a slightly warm (but turned OFF) oven or microwave. The residual warmth provides a cozy spot for the dough to rise.
- Avoid Overbaking: Overbaking is a common pitfall that can dry out your dinner rolls, resulting in a tough and less appealing texture. Keep a close watch on your rolls, especially during the final minutes of baking, and remove them from the oven as soon as they achieve that inviting golden-brown color.
Creative Variations and Serving Suggestions for Your Homemade Dinner Rolls
While these classic, fluffy dinner rolls are undeniably perfect in their original form, don’t hesitate to unleash your culinary creativity! Experimenting with additions and toppings can transform them into an even more personalized and delightful treat.
Delicious Variations:
- Garlic Herb Rolls: For an aromatic twist, finely mince 1-2 cloves of fresh garlic and chop 1-2 tablespoons of your favorite fresh herbs (such as parsley, rosemary, thyme, or chives). Mix these flavorful additions into the dough just after the flour has been mostly incorporated. Alternatively, for a simpler approach, brush the warm, baked rolls generously with melted garlic butter for an instant flavor boost.
- Cheesy Rolls: Elevate your dinner rolls with a cheesy goodness! Fold in about 1/2 cup of shredded cheddar, Parmesan, mozzarella, or your preferred cheese during the last minute of kneading the dough. The melting cheese will create pockets of savory delight within the soft bread.
- Sweet Rolls: Transform these savory rolls into a delightful sweet treat. Before shaping, flatten each dough piece and sprinkle it with a mixture of cinnamon and sugar, then roll them up. After baking, for an extra special touch, brush the warm rolls with a simple glaze made from powdered sugar and a touch of milk or vanilla extract.
- Honey Wheat Rolls: For a nuttier flavor and added whole grains, consider substituting a portion of the all-purpose flour with whole wheat flour (start with about 1/2 cup whole wheat flour for a subtle change, adjusting as desired). You can also replace some of the granulated sugar with an equal amount of honey for a natural sweetness and distinct flavor. You may need to slightly adjust the liquid content to achieve the desired dough consistency.
Perfect Serving Suggestions:
- Classic with Butter: There’s arguably nothing more comforting and satisfying than a warm, fluffy roll generously slathered with a pat of softened butter, or paired with your favorite fruit jam or marmalade.
- Accompaniment to Hearty Meals: These versatile rolls are the ultimate sidekick for a wide array of hearty dishes. They perfectly complement robust soups, comforting stews, spicy chili, succulent roasts, or any grand holiday feast, such as Thanksgiving or Christmas dinners. Their ability to soak up delicious sauces is unparalleled.
- Mini Sandwiches or Sliders: For a delightful appetizer or light lunch, slice the rolls horizontally and fill them with your favorite deli meats, slices of cheese, or even leftover roast chicken or turkey. These make excellent sliders for parties or packed lunches.
- Brunch Staple: Incorporate these homemade dinner rolls into your brunch spread. Serve them alongside scrambled eggs, crispy bacon, fresh fruit, and a steaming cup of coffee for a truly comforting and satisfying start to your day.
Storing Your Fluffy Dinner Rolls
While freshly baked dinner rolls are always an unparalleled culinary experience, it’s not uncommon to have a few leftovers (though with this recipe, they might be a rare occurrence!). Here’s how to properly store them to maintain their delightful texture and flavor for as long as possible:
- Room Temperature Storage: Once your dinner rolls have completely cooled down to room temperature, transfer them into an airtight container or a sealed plastic bag. Stored this way, they will remain wonderfully fresh and soft for approximately 2-3 days. Avoid refrigerating, as this can actually make bread go stale faster.
- Freezing Baked Rolls: For extended storage, freezing is an excellent option. Ensure the rolls are entirely cooled before placing them in a freezer-safe bag or an airtight container. They can be safely frozen for up to 2-3 months without a significant loss in quality. When you’re ready to enjoy them, simply thaw the frozen rolls at room temperature, then gently warm them in an oven or microwave before serving for that “just baked” taste.
- Reheating Instructions: To bring your stored rolls back to their warm, soft glory, simply pop them into a preheated oven at 300°F (150°C) for about 5-10 minutes. Alternatively, for a quicker reheat, a microwave will do the trick in approximately 15-30 seconds per roll, depending on your microwave’s power. Be careful not to overheat in the microwave, as they can become tough.
Frequently Asked Questions (FAQs) About Homemade Dinner Rolls
Baking can sometimes raise a few questions, especially when striving for perfection. Here are answers to some common inquiries that might arise while you’re creating these amazing and easy homemade dinner rolls:
- Q: Can I use cold milk for this recipe?
A: No, using slightly warm milk is absolutely essential for this recipe. Cold milk will significantly slow down or completely inhibit the activity of the yeast, which is crucial for the rolls to rise properly. The ideal temperature range for activating yeast is typically between 105-115°F (40-46°C). - Q: What should I do if my dough doesn’t rise during proofing?
A: A lack of rise usually indicates inactive yeast. This could be due to several reasons: the yeast might be old or expired, or the milk used was either too hot (which can kill the yeast) or too cold (which won’t activate it). Always ensure your yeast is fresh, and verify your milk temperature before combining it with the yeast. - Q: Can I prepare the dough for these quick dinner rolls ahead of time?
A: While this recipe is cleverly designed for relatively quick, single-day baking, you can certainly prepare the dough in advance. Mix and knead the dough up to the shaping stage, then cover it tightly with plastic wrap and refrigerate overnight (for 8-12 hours). The cold temperature will significantly slow down the proofing process. The next day, allow the dough to come to room temperature for about 30-60 minutes before proceeding with shaping and the subsequent 1-hour proofing step. - Q: Do I need a stand mixer to make these dinner rolls?
A: Not at all! While a stand mixer can certainly make the kneading process easier and faster, this dough can be mixed by hand with a sturdy spoon or Danish dough whisk and then kneaded manually on a clean, lightly floured surface. It will require a bit more physical effort and arm work, but the results will be just as delicious. - Q: How can I tell when the dinner rolls are perfectly done baking?
A: Your homemade dinner rolls are perfectly baked when their tops are a beautiful, uniform golden brown color. Another reliable indicator is to gently tap the bottom of a baked roll; it should produce a hollow sound. For ultimate precision, an instant-read thermometer inserted into the center of a roll should register an internal temperature between 200-210°F (93-99°C).
Conclusion: Your New Favorite Dinner Roll Recipe Awaits!
It’s time to cast aside complicated bread recipes and bid farewell to endless proofing times. This truly easy homemade dinner roll recipe, courtesy of the ingenious Bincy Chris, is nothing short of a culinary revelation. It consistently delivers incredibly soft, wonderfully fluffy, and utterly delicious dinner rolls, all achieved with just seven simple ingredients and a wonderfully straightforward, no-fuss method. Whether you’re planning to bake for a special celebratory occasion, preparing a comforting family dinner, or simply craving the irresistible comfort of fresh, warm bread, these quick dinner rolls are guaranteed to swiftly become a cherished staple in your kitchen. So, gather your ingredients, meticulously follow these expertly detailed steps, and prepare to delight everyone at your table with what will undoubtedly be the best dinner rolls they’ve ever had the pleasure of tasting. Happy baking, and enjoy every soft, buttery bite!