
Master the Sweet Simplicity: Easy Candy Churn Dash Quilt Block Tutorial for Beginners
Embarking on a quilting journey can seem daunting at first, with intricate patterns and complex techniques often appearing beyond reach for newcomers. Many aspiring quilters, myself included, have been hesitant to dive into this beautiful craft. However, the world of quilting is also rich with simplified, detailed, and incredibly easy-to-understand tutorials that demystify the process and make it accessible to everyone. My personal quilting path was transformed when I discovered content creators who break down projects into manageable steps, making even seemingly elaborate designs achievable.
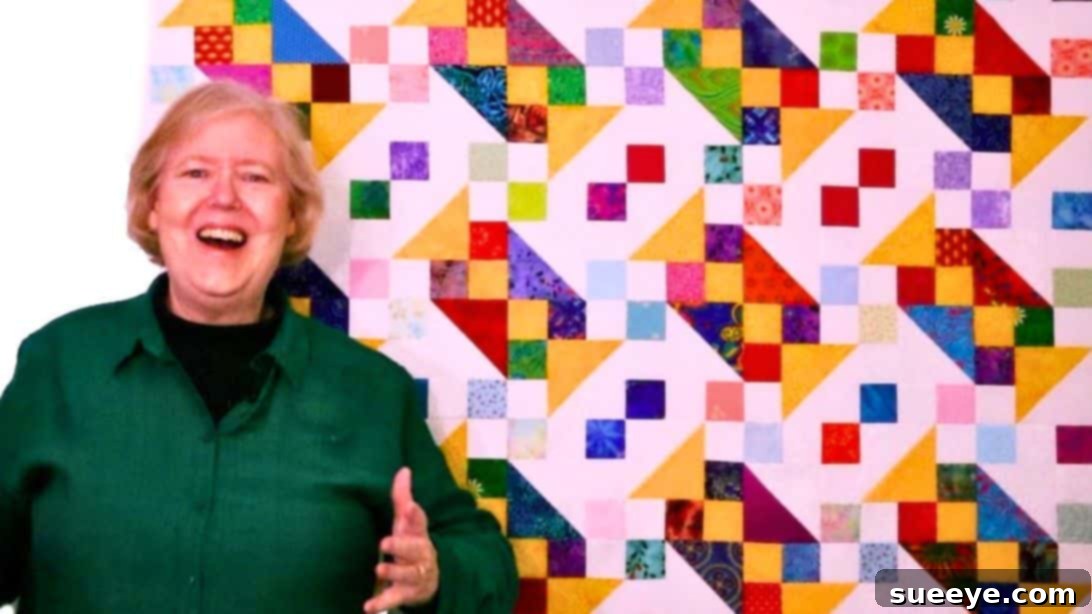
One such delightful discovery, and a recent favorite, is the enchanting Candy Churn Dash Quilt Block. This block is not only visually appealing but also remarkably straightforward to construct, making it an ideal choice for beginners eager to develop their skills and create something beautiful. Its classic appeal, combined with a playful twist, makes it a versatile element for a myriad of quilting projects.
RELATED: How to Make a Mini Churn Dash Quilt Block
The Candy Churn Dash pattern offers endless possibilities for fabric combinations, allowing you to personalize your creations and make each block truly pop. Whether you lean towards vibrant, cheerful prints or subtle, harmonious hues, this block adapts beautifully. Once mastered, you can integrate this charming block into various projects, from elegant table runners and decorative table toppers to cozy placemats, eye-catching throw pillows, or even as a foundational element in a larger, stunning quilt. Learn how to craft this captivating quilt block with the invaluable guidance of Brita Nelson, The Questioning Quilter, through her comprehensive video tutorial on YouTube.
What is the Churn Dash Quilt Block?
The Churn Dash quilt block is a beloved traditional pattern in the quilting community, recognized for its distinctive design that dates back centuries. Its name is believed to come from its resemblance to an old-fashioned butter churn and its accompanying dasher. Typically, the block consists of a central square surrounded by four triangles and four rectangles, forming a nine-patch grid. This arrangement creates a striking visual impact, often highlighting the contrast between fabrics. The enduring popularity of the Churn Dash lies in its strong geometric shape, its historical significance, and its incredible adaptability, making it a cornerstone for both traditional and modern quilting projects.
Why the Candy Churn Dash is Perfect for Beginners
While the traditional Churn Dash is a staple, the “Candy” variation brings an extra layer of charm and often a simplified approach, making it exceptionally beginner-friendly. Brita Nelson’s method for the Candy Churn Dash streamlines the process, focusing on foundational techniques like cutting precise squares, creating half-square triangles (HSTs), and accurate piecing – all crucial skills for any quilter. The ‘candy’ aspect often comes from the delightful fabric choices or a slight alteration in the block’s construction that adds a playful visual twist, such as manipulating the central unit. This project builds confidence by allowing you to successfully complete a beautiful block without getting bogged down by overly complex steps, paving the way for more intricate designs in the future.
Essential Materials for Your Candy Churn Dash Quilt Block:
Gathering the right tools and materials is the first step towards a successful quilting project. For your Candy Churn Dash Quilt Block, here’s what you’ll need:
- Dark Print Fabric: Choose a vibrant or dark-toned fabric that will stand out and define the pattern. Opt for 100% quilting cotton for ease of use and consistent results.
- Background Fabric: Select a lighter or contrasting fabric that will make your dark print pop. A solid or subtle tone-on-tone print works beautifully. Ensure both fabrics are pre-washed and pressed if you intend to pre-wash all your fabrics for future projects.
- Quilting Ruler: A clear acrylic quilting ruler (at least 6×12 inches or a square ruler) is indispensable for accurate cutting. Look for rulers with clear measurement markings.
- Marking Pen, Pencil, or Chalk: Essential for drawing your stitching lines. Choose a tool that is easily erasable or disappears, such as a water-soluble marker, heat-erasable pen, or tailor’s chalk.
- Fabric Scissors or Rotary Cutter and a Cutting Mat: A rotary cutter provides speed and precision, especially when paired with a self-healing cutting mat. If using scissors, ensure they are sharp and dedicated to fabric only.
- Needle and Thread: A good quality 50wt cotton thread is standard for piecing quilt blocks. Use a sharp needle appropriate for your fabric type and thread weight.
- Iron and Ironing Board (for pressing): A hot iron is critical for setting seams, flattening fabric, and ensuring your blocks lie perfectly flat. Consistent pressing is key to accurate piecing.
- Sewing Machine: Any basic sewing machine capable of a straight stitch will work. A quarter-inch presser foot is highly recommended for maintaining accurate seam allowances.
How to Make the Candy Churn Dash Quilt Block: Step-by-Step
Follow these detailed instructions to construct your beautiful Candy Churn Dash Quilt Block. Remember, precision in cutting and a consistent seam allowance are your best friends here.
Step 1: Crafting the Half-Square Triangles (HSTs)
To begin, you will create the foundational half-square triangles that form the corners of your Churn Dash block. Start by cutting both your dark print and background fabrics into 5-inch squares. For a single Candy Churn Dash block, you will need a total of four half-square triangles for the corners, which typically requires two pairs of 5-inch squares.
- Take one 5-inch dark print square and one 5-inch background square. Place them right sides together, aligning all edges perfectly.
- Using your ruler and marking tool, draw a diagonal line from one corner to the opposite corner on the wrong side of the lighter fabric. This line will serve as your guide.
- Stitch a seam ¼ inch away from this drawn diagonal line on both sides. Maintain an accurate ¼-inch seam allowance throughout.
- Carefully cut along the drawn diagonal line, separating the two stitched pieces. You now have two unpressed half-square triangle units.
- Open each unit and press the seams. For flatter blocks and easier piecing, typically press the seam allowance towards the darker fabric. Alternatively, you can press the seams open if that is your preferred method. Pressing is crucial here for crisp, flat blocks.
- Using your quilting ruler, trim each HST unit down to 4.5 inches square. This step is vital for ensuring all your units are the same size, which contributes significantly to the accuracy of your finished block. Repeat this process with a second pair of 5-inch squares to create two more HSTs, bringing your total to four perfectly trimmed 4.5-inch HSTs.
Step 2: Creating the Side Units with Horizontal Stitching
Next, you’ll create the side rectangular units that will surround the central square of your Churn Dash. This step uses a similar technique to the HSTs but with a horizontal guide line to create different shaped units.
- Take another 5-inch dark print square and a 5-inch background square. Place them right sides together, ensuring all edges are aligned.
- Instead of a diagonal line, draw a horizontal line across the wrong side of the lighter fabric, 2.5 inches from the bottom edge (which is essentially half of the 5-inch block).
- Stitch a seam ¼ inch away from this drawn horizontal line on both sides, just as you did with the HSTs.
- Cut along the drawn horizontal line to separate the two stitched units.
- Open the fabric and press the seams, again, typically towards the darker fabric to minimize bulk. You should now have two block units that measure approximately 4.5 inches tall and 5 inches wide. These units are distinct from the square HSTs and will form the rectangular arms of your Churn Dash. You will need four of these rectangular units in total for a full Churn Dash block, so repeat this process with a second pair of 5-inch squares to create two more units.
Step 3: Assembling the Candy Churn Dash Block
Now that you have all your component units – four 4.5-inch half-square triangles and four 4.5×5-inch rectangular units – it’s time to bring them together to form the delightful Candy Churn Dash Quilt Block. The Churn Dash block is typically a nine-patch layout, meaning it’s composed of three rows with three units in each row. The “Candy” variation often introduces a playful twist in the center or the overall arrangement.
- Arrange Your Units: Lay out your four 4.5-inch HSTs and four 4.5×5-inch rectangular units on your cutting mat or design wall according to the classic Churn Dash pattern, incorporating the “candy” design as demonstrated by Brita Nelson in the video. The HSTs usually form the four corners of the block, while the rectangular units are placed in the middle of each side. For the central element, if the video technique involves “cutting each block into 4 pieces, then swapping the pieces and rearranging,” this suggests a specific method for creating a unique patterned center from a larger initial piece. Carefully follow the visual layout provided in the tutorial to achieve the distinct “Candy” look.
- Stitch the Rows: Once you are satisfied with the arrangement, stitch the units together into three horizontal rows. Sew the first unit to the second, and then the second to the third in each row. Press your seams as you go, alternating the direction of pressing for adjacent seams (e.g., press seams in row 1 to the right, row 2 to the left, row 3 to the right). This technique, known as “nesting seams,” helps reduce bulk and makes your points match up more easily when joining the rows.
- Join the Rows: With your three rows assembled and pressed, it’s time to join them. Align Row 1 with Row 2, matching the seam intersections carefully. Pin if necessary, especially at the seam junctions. Stitch the rows together with your consistent ¼-inch seam allowance. Repeat this process to join Row 2 and Row 3.
- Final Pressing and Trimming: Give your finished Candy Churn Dash block a final, thorough press to ensure all seams are flat and the block is crisp. If needed, you can gently square up your block to its intended final size (e.g., 12.5 inches unfinished, or a size determined by the tutorial), making sure to keep the points and shapes intact.
Tips for Successful Fabric Selection
Choosing your fabrics is one of the most exciting parts of any quilting project. For the Candy Churn Dash, thoughtful selection can truly make your block shine:
- Contrast is Key: The Churn Dash pattern relies heavily on the contrast between light and dark fabrics to define its distinct shape. Ensure there’s a clear difference in value between your dark print and background fabric.
- Play with Prints: Don’t be afraid to mix prints! Small-scale prints can read almost as solids from a distance, while larger, bolder prints can add a focal point. For a “candy” theme, think bright, cheerful colors, whimsical patterns, or even novelty fabrics with sweets or treats.
- Embrace Scraps: This block is an excellent opportunity to use up smaller fabric scraps. The 5-inch squares are perfect for leftover bits from previous projects, allowing you to create a truly unique and scrappy “candy” effect.
- Fabric Quality Matters: High-quality 100% quilting cotton will be easier to work with, cut more precisely, and hold up better over time.
- Consider the End Project: If you’re making a baby quilt, soft flannels might be lovely. For a table runner, durable cotton is ideal. Let your project guide your fabric choices.
Creative Project Ideas for Your Candy Churn Dash Blocks
Once you’ve mastered making the Candy Churn Dash block, the possibilities for what you can create are endless. Here are a few ideas to spark your creativity:
- Table Runner: A series of Candy Churn Dash blocks stitched together, perhaps with sashing in between and a border, makes for a vibrant and inviting table runner.
- Table Topper: Arrange four or nine blocks to create a charming square table topper perfect for a coffee table or dining nook.
- Pillow Covers: One or two blocks can be the centerpiece of a beautiful throw pillow, adding a handmade touch to your home decor.
- Placemats: A single Candy Churn Dash block, framed with borders and backed, makes a delightful and personalized placemat.
- Wall Hanging: Showcase your beautiful block as a small wall hanging, perhaps with simple quilting and binding, to add a pop of color to any room.
- Tote Bags: Incorporate a quilted Candy Churn Dash panel into the front of a handmade tote bag for a unique accessory.
- Baby Quilts: Repeat this easy block several times, alternating with solid squares or other simple blocks, to create a sweet and memorable baby quilt.
- Full-Sized Quilt: For a grander project, continue making blocks and assemble them into a larger quilt, adding sashing and borders to create a truly impressive piece.
Final Thoughts on Your Quilting Journey
Creating the Candy Churn Dash Quilt Block is more than just following steps; it’s about embracing the joy of learning, the satisfaction of making something with your own hands, and the artistic expression that quilting offers. As you progress, remember that every stitch is a part of your unique creative journey. Don’t be afraid to experiment with different fabrics, colors, and even slight modifications to make the design truly your own. The beauty of quilting lies in its imperfections and the stories woven into each piece.
We extend our sincere thanks to Brita Nelson, The Questioning Quilter, for her clear and inspiring tutorial. Her approach makes complex quilting concepts accessible to all, empowering beginners to tackle new projects with confidence. We highly recommend visiting her YouTube channel and subscribing for more fantastic quilting ideas and detailed instructions. Happy quilting!
*All images are credited to Brita Nelson the Questioning Quilter via YouTube. Give her channel a visit and subscribe for more!