
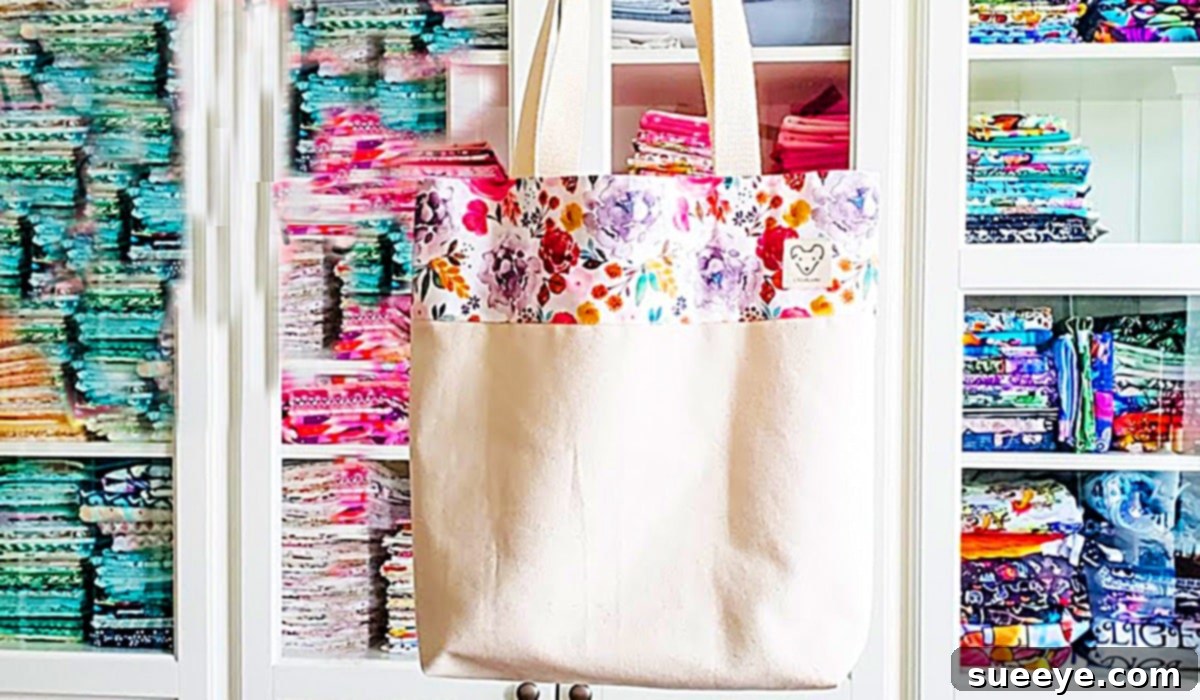
Are you looking for a practical, stylish, and eco-friendly way to carry your groceries, books, or everyday essentials? Learning how to sew an easy grocery tote bag can be a truly rewarding experience. Not only does it allow you to express your personal style, but it also contributes to reducing plastic waste, making it a sustainable choice for conscious consumers. When I first discovered this brilliant video tutorial by Jess OklaRoots on YouTube, I immediately recognized it as a DIY treasure. What sets this particular project apart is its incredible simplicity, making it accessible even for novice sewers. It requires minimal sewing, and for those who prefer an even quicker method, many steps can be completed using strong fabric glue such as a hot glue gun, Fabri-Tac, or Liquid Stitch. Of course, if you’re comfortable with your sewing machine, you have the option to sew the entire bag, ensuring maximum durability and a professional finish. I decided to embark on this project primarily to create a sturdy and reliable reusable shopping bag, but its versatility quickly became apparent. This denim tote, for instance, perfectly complements a casual outfit, yet it’s robust enough to handle both light and heavy shopping trips. The instructions provided in Jess OklaRoots’ video tutorial are exceptionally clear and easy to follow, guiding you through each stage with expert precision. This isn’t just a bag; it’s a statement of practicality, creativity, and environmental responsibility, all rolled into one delightful sewing project. Let’s delve deeper into what makes this easy grocery tote a must-make for anyone seeking a blend of style and function.
Making your own tote bag is more than just a craft; it’s an investment in sustainable living and personal expression. Imagine walking into a grocery store with a custom-designed bag that perfectly matches your aesthetic, all while knowing you’ve contributed to a greener planet. These homemade reusable shopping bags are incredibly durable, often outlasting their store-bought counterparts, and they’re fully washable, ensuring hygiene and longevity. Beyond groceries, this versatile tote can serve myriad purposes: a beach bag, a library bag, a craft project carrier, or simply a chic everyday handbag. The satisfaction of creating something functional with your own hands is unparalleled, and with Jess OklaRoots’ guidance, you’ll be amazed at how quickly you can bring this project to life.
Essential Materials for Your Easy Grocery Tote Bag Project:
Gathering the right materials is the first exciting step in any DIY project. For this easy grocery tote, you’ll find that most items are readily available at your local craft or fabric store. The beauty of this project lies in its flexibility, allowing you to choose fabrics and straps that truly reflect your personal taste and intended use. Here’s a detailed look at what you’ll need to get started:
- Main Fabric (a couple of yards): The choice of fabric is crucial for both aesthetics and durability. Canvas is an excellent option for the main body of the bag due to its robust nature, making it ideal for carrying heavy items like groceries. It’s also easy to work with and holds its shape well. Consider a fun pattern or a solid color that complements your style. For an added touch of elegance or a surprise element, you might opt for a contrasting floral liner, as suggested in the original inspiration. Other great choices include denim (known for its incredible strength and casual appeal), duck cloth, or even upholstery fabric scraps for an upcycled look. The amount needed, “a couple of yards,” is a good estimate, allowing for the main body and potentially an interior lining, depending on the bag’s desired size. Always consider pre-washing your fabric to prevent shrinking after your bag is complete.
- Lining Fabric (optional, but recommended for durability and finish): While not strictly listed as a separate item, the mention of a “floral liner” suggests the use of a second fabric. This adds an extra layer of durability, gives the bag a more finished look, and can introduce a delightful pop of color or pattern when you reach inside. Lighter cotton fabrics, quilting cottons, or even a different type of canvas work well for lining.
- Canvas Strapping (by the yard): The straps are critical for carrying comfort and the bag’s overall strength. Canvas strapping, often found by the yard at fabric stores like Jo-Ann Fabrics, is perfect for this. It’s thick, durable, and comes in various widths and colors. You’ll want to ensure the width is comfortable to hold and strong enough to support the bag’s contents. Alternatively, you can create your own fabric straps from your main fabric or a coordinating material, which allows for even more customization and a seamless look. Webbing made from cotton or polyester are also excellent choices for sturdy straps.
- A Sewing Machine: While the tutorial highlights minimal sewing and gluing options, a sewing machine will make the process faster, more precise, and result in a more durable bag. Any basic sewing machine capable of sewing straight stitches through heavier fabrics like canvas will suffice. Make sure you have a heavy-duty needle (like a denim or upholstery needle) if you’re working with thick materials.
- A Pair of Sharp Scissors: Essential for precise fabric cutting. A good pair of fabric shears makes a significant difference in the accuracy of your cuts, which in turn affects the final look of your tote bag. Avoid using these scissors on paper or other materials to keep them sharp for fabric.
- Pins or Fabric Clips: These are indispensable for holding fabric layers together before sewing or gluing. Pins are traditional, but fabric clips (often called wonder clips) are fantastic, especially when working with thicker fabrics that might be challenging to pin, or when you want to avoid pinholes.
- Matching Thread: If you’re sewing, you’ll need a spool of good quality polyester thread that matches or complements your main fabric. Polyester thread is strong and durable, perfect for a utility bag.
- Fabric Glue (for no-sew option): For those opting for a no-sew or minimal-sew approach, a strong fabric adhesive is crucial. Options include a hot glue gun (for quick bonds), Fabri-Tac (a powerful, flexible fabric glue), or Liquid Stitch (another excellent choice for permanent fabric bonding). Ensure the glue you choose is suitable for the fabric type you are using and will withstand washing.
- Iron and Ironing Board (optional but recommended): Pressing seams as you go results in a much neater and more professional-looking finished product. It helps to set stitches and flatten edges.
- Ruler or Measuring Tape: Accuracy in cutting is key. A long ruler, quilting ruler, or flexible measuring tape will be necessary for precise measurements of your fabric pieces and strap lengths.
- Fabric Marker or Chalk: For marking cut lines, seam allowances, and strap placement on your fabric.
Step-by-Step Guide to Crafting Your Easy Grocery Tote Bag:
The beauty of this project, as demonstrated in the easy grocery tote bag video tutorial by Jess OklaRoots on YouTube, lies in its straightforward approach. Even though the video provides excellent visual guidance, we’ll break down the process into detailed steps, making it easier to follow along and ensuring you understand each phase of construction. Remember, you have the flexibility to sew or glue many of these steps, depending on your preference and skill level.
Step 1: Fabric Preparation and Cutting Your Pieces
The foundation of any successful sewing project begins with precise cutting. You will start by preparing all your fabric pieces according to the dimensions provided by Jess OklaRoots in her tutorial. This typically involves cutting two large rectangles for the main exterior body of the bag, two similar rectangles for the interior lining (if you’re adding one), and two shorter strips for the handles or straps. Lay your fabric flat and smooth out any wrinkles before measuring. Use your ruler and fabric marker to draw clear lines for your cuts, then carefully use your sharp fabric scissors to cut out each piece. Accuracy here will lead to a much neater finished bag.
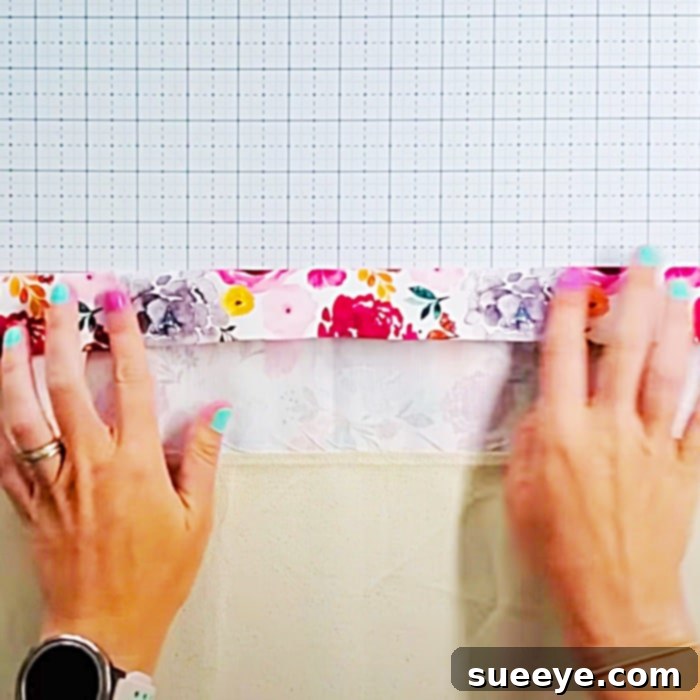
Step 2: Constructing the Main Exterior Bag
Take your two main exterior fabric rectangles. Place them right sides together, aligning the edges perfectly. You will then sew (or glue) along the two side seams and the bottom seam, leaving the top edge open. Use a consistent seam allowance, typically 1/2 inch or 5/8 inch, as recommended in the tutorial. If sewing, backstitch at the beginning and end of each seam to reinforce it. If gluing, apply a continuous bead of fabric glue along the seam line, press the fabrics together firmly, and allow adequate drying time before proceeding. Once these seams are secure, you can optionally create boxed corners, which give the bag a flat bottom and more capacity. To do this, simply align the bottom seam with a side seam at each corner, forming a triangle. Measure and mark a line perpendicular to the seam, usually 2-3 inches from the corner point, and sew/glue across this line. Trim the excess fabric triangle for a neat finish.
Step 3: Creating the Interior Lining (if applicable)
If you’ve opted for a lining, repeat Step 2 with your two lining fabric rectangles. Place them right sides together and sew/glue the two side seams and the bottom seam. Crucially, when working on the lining’s bottom seam, remember to leave a 4-6 inch opening unsewn in the middle. This opening will be vital later for turning the entire bag right side out. Just like the exterior, you can also create boxed corners for the lining to match the exterior bag’s shape and capacity. Press seams open for a neat finish.
Step 4: Preparing and Attaching the Straps
Take your canvas strapping. If you’re making your own fabric straps, you’ll typically fold and press the raw edges inwards, then fold the strip in half lengthwise and topstitch along both long edges to create strong, finished straps. For pre-made canvas strapping, simply determine your desired length for comfortable carrying, cut them, and if necessary, finish the raw ends by folding them under or melting them if they are synthetic to prevent fraying. Position the straps on the top raw edge of your main exterior bag. Place each end of a strap about 4-6 inches in from the side seams, ensuring they are evenly spaced. Pin or clip them securely in place, attaching them to the exterior fabric. You will stitch or glue them in place within the seam allowance, securing them firmly to the top edge of the bag. This temporary attachment prevents them from shifting during the next steps.
Step 5: Assembling the Bag and Liner
Now, it’s time to bring the exterior and lining together. Keep the exterior bag wrong side out. Insert the lining bag (right side out) into the exterior bag, so that the right sides of both fabrics are facing each other. Align the top raw edges of the exterior bag, the straps, and the lining perfectly. Match the side seams if possible for a clean finish. Pin or clip all around the top circumference of the bag. You will then sew (or glue) all the way around this top edge, securing the exterior, straps, and lining together. Ensure you catch all layers in your stitch/glue line.
Step 6: Turning the Bag Right Side Out and Finishing Details
After securing the top edge, you’ll use that opening you left in the lining’s bottom seam. Carefully reach through this opening and pull the entire bag—exterior and lining—right side out. This will reveal the finished outer bag and push the lining into its correct position inside the bag. Once the bag is right side out, gently push out all corners, ensuring they are crisp. Then, you’ll need to close the opening in the lining. You can hand-stitch this opening closed using a ladder stitch for an invisible finish, or machine stitch it very close to the edge. Once the lining opening is closed, tuck the lining completely inside the main bag. Press the top edge of the bag nicely to create a crisp seam. For a professional and durable finish, you can topstitch around the entire top edge of the bag, approximately 1/8 to 1/4 inch from the folded edge. This secures the lining in place and adds a polished look to your straps and the bag’s opening.
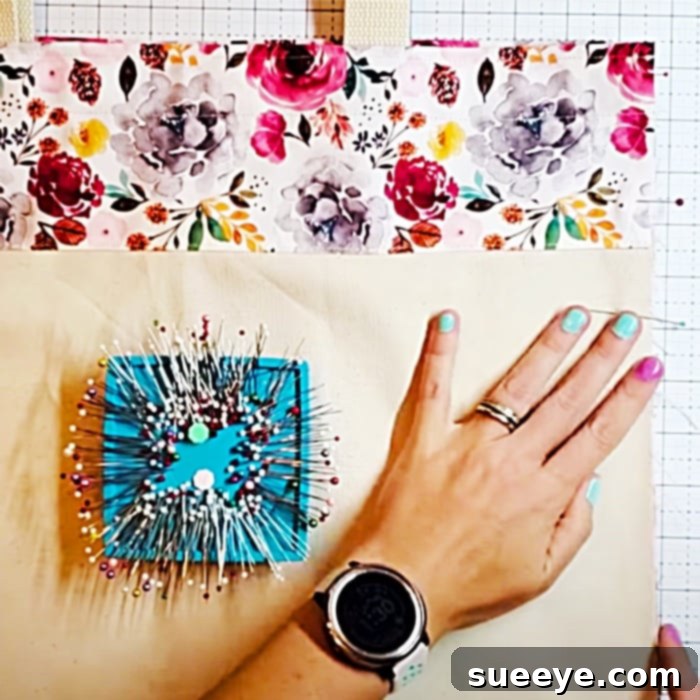
This comprehensive approach ensures that whether you choose to sew, glue, or a combination of both, your easy grocery tote bag will be a sturdy, stylish, and functional companion for all your adventures. The joy of creating something so practical and personalized is immense. I just love this pattern and the endless possibilities it offers!
Embracing the No-Sew Option: Crafting with Fabric Adhesives
For those who are new to sewing, lack a machine, or simply prefer a quicker crafting method, the “no-sew” approach with fabric glue is a fantastic alternative. Jess OklaRoots thoughtfully mentions this option, making the project accessible to an even wider audience. Here’s how you can adapt the steps above using fabric adhesives:
- Seaming with Glue: Instead of running a stitch line, apply a continuous, thin bead of strong fabric glue (like Fabri-Tac, Liquid Stitch, or even a heavy-duty fabric hot glue) along your designated seam lines. Press the two fabric pieces firmly together, using pins or clips to hold them in place while the glue dries. For boxed corners, apply glue along the marked line and press. Allow ample drying time, often several hours or overnight, for a permanent bond before stressing the seams.
- Securing Straps: For straps, you’ll want an extra-strong bond. Fold under the raw ends of your straps by about an inch and glue them down. Then, position the strap ends on the main exterior bag’s top edge, applying a generous amount of glue to the folded-under strap ends and pressing them firmly onto the bag fabric within the seam allowance. You might even want to add an extra layer of fabric over the strap ends on the inside for additional reinforcement if solely relying on glue.
- Top Edge Assembly: When combining the exterior and lining, apply glue along the raw top edge of the exterior bag (where the straps are already attached), then carefully place the lining (right side out) over it, aligning the raw edges. Press firmly and use clips to hold it until dry. The final topstitching can be mimicked by a neat line of glue along the top edge, though it won’t provide the same structural integrity as stitching.
- Closing the Lining Opening: For the lining opening, simply apply a thin line of glue along the folded edges and press them together until a secure bond is formed.
While fabric glue offers convenience, remember to use a high-quality product designed for fabrics and allow sufficient curing time. This method results in a surprisingly durable bag, perfect for lighter loads or as a stylish accessory.
Customizing Your Tote: Make It Uniquely Yours
One of the greatest joys of DIY projects is the freedom to customize. This easy grocery tote pattern is a blank canvas for your creativity:
- Fabric Choices: Experiment with different fabric combinations. A rustic burlap exterior with a vibrant cotton lining, or a sophisticated faux leather with a classic striped interior. The possibilities are endless. Consider denim for a rugged look, canvas for durability, or even upcycle old curtains or jeans for a truly unique and sustainable bag.
- Adding Pockets: Easily incorporate interior or exterior pockets for your phone, keys, or a small wallet. This adds functionality and organization. Simply construct the pocket (hem the top edge, fold and press side/bottom edges) and attach it to your main fabric or lining piece before assembling the bag.
- Strap Variations: Play with strap length and material. Longer straps can be worn over the shoulder or cross-body, while shorter ones offer a classic hand-carry style. Use contrasting fabric for straps, or even add embellishments like rivets or decorative stitching.
- Embellishments: Personalize your tote with embroidery, fabric paint, patches, appliqués, or even iron-on vinyl designs. Make it truly reflect your personality!
- Size Adjustments: The beauty of this pattern is its adaptability. Want a smaller lunch tote? Or a giant beach bag? Simply adjust the dimensions of your initial fabric cuts, maintaining the general proportions, and follow the same construction steps.
The Lasting Appeal of a Handmade Tote
In a world increasingly focused on sustainability and personal expression, a handmade easy grocery tote bag checks all the boxes. It’s a testament to your ability to create something beautiful and useful, reduces your reliance on single-use plastics, and adds a unique touch to your daily routine. The simple steps outlined by Jess OklaRoots make this project achievable for anyone, regardless of their crafting experience. Whether you choose to sew every seam or lean on the power of fabric glue, the result will be a charming, durable, and highly functional bag that you’ll be proud to carry. So, grab your materials, head over to Jess OklaRoots’ YouTube channel for the visual guide, and embark on this delightful journey of crafting your very own custom grocery tote. You’ll not only gain a fantastic new accessory but also the immense satisfaction that comes from a successful DIY endeavor.