
Transform Old Jars: A Charming DIY Bird Swing Mason Jar Craft
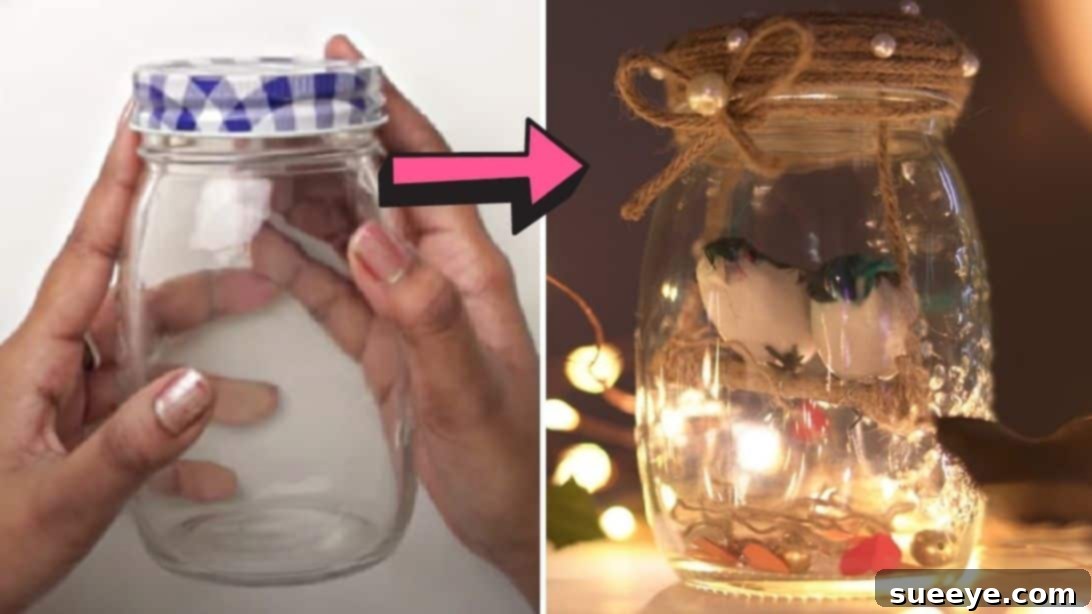
Discover an inspiring and eco-friendly way to breathe new life into an old jar by transforming it into a delightful decorative piece. Mason jars, often relegated to the back of the cupboard, possess incredible potential for creative repurposing. Far beyond serving as simple storage for ingredients or cookies, or perhaps a unique glass for a frappe, they can become the foundation for adorable crafts that add a touch of whimsy and personality to any space. This particular project, brilliantly showcased by VENTUNO ART on YouTube, guides you through creating a captivating decorative mason jar featuring a charming bird swing. It’s a craft that requires only a handful of readily available materials, primarily focusing on the rustic elegance of braided ropes, with the optional addition of fairy lights to truly make it sparkle.
The Allure of Mason Jar Crafts: Creativity Meets Sustainability
Mason jars are true heroes of the DIY world, offering an unparalleled blend of versatility, affordability, and charm. Their sturdy glass construction makes them ideal for a multitude of projects, ranging from practical organizational solutions to purely aesthetic decorative items. Opting to repurpose old jars isn’t just a creative endeavor; it’s a step towards sustainable living. By giving these items a second life, we reduce waste and contribute to a more environmentally conscious lifestyle. Moreover, homemade crafts like this mason jar project infuse your home with unique character that mass-produced decorations simply can’t replicate. Each handmade piece tells a story, reflecting your personal style and effort.
Why Choose This Bird Swing Jar Project?
Among the countless ways to decorate a mason jar, the bird swing concept stands out for its unique appeal. It evokes a sense of natural beauty and tranquility, bringing a miniature outdoor scene indoors. The combination of rustic rope, delicate paper hearts, and a charming bird figure creates a focal point that is both endearing and aesthetically pleasing. This project is perfect for those who appreciate handmade decor with a natural, farmhouse, or whimsical touch. It’s also an excellent craft for beginners, requiring basic crafting skills and providing immense satisfaction upon completion. Imagine this delightful jar adorning a shelf, a desk, or even serving as a unique centerpiece, radiating warmth and handmade charm.
Essential Materials for Your Avian Haven
Gathering your materials is the first exciting step in bringing your vision to life. Most of these items are easily found at craft stores or even around your home, making this an accessible project for everyone. Here’s what you’ll need:
- Beads: Choose various sizes and colors to add decorative accents. Wooden or pearl beads can offer a classic look, while colorful plastic beads can add a playful touch.
- Rope: A crucial element for wrapping the lid, creating the swing, and filling the jar. Natural jute, sisal, or cotton ropes work wonderfully for a rustic aesthetic. Ensure you have enough length for all components.
- Stick (for the branch): A small, clean twig or a piece of craft wood, roughly the width of your jar, will serve as the perch for your bird. Look for one with a natural bend or interesting texture.
- Birds: Small craft birds, often found in sets at hobby stores, will be the stars of your jar. Look for lightweight options with wire feet for easy attachment.
- Colored Paper (different colors): For crafting tiny hearts that will float gracefully within your jar. Choose colors that complement your overall design scheme.
- Scissors: For cutting rope, paper, and any other materials that need trimming.
- Mason Jar: The foundation of your project. Any size can work, but a standard wide-mouth pint or quart jar is often ideal for visibility and ease of assembly.
- Glue Gun and Glue Sticks: Essential for securely attaching rope, beads, and other elements. Hot glue provides a strong, quick-drying bond.
- Tape: Useful for temporary holding or securing elements like the bird swing to the lid before permanent attachment. Masking tape or strong double-sided tape can work.
Step-by-Step Guide: Crafting Your Mason Jar Masterpiece
Let’s embark on the creative journey of transforming your simple mason jar into a captivating decorative piece. Follow these detailed steps to ensure a beautiful and sturdy finished product.
Step 1: Preparing Your Jar and Crafting Elements
The foundation of any great craft begins with proper preparation. Start by ensuring your mason jar is clean and ready for its artistic transformation.
- Jar Preparation: Begin by thoroughly cleaning your mason jar. Remove all existing labels, adhesive residue, and any smudges. A clean, clear surface is vital for the best aesthetic outcome. Allow it to dry completely before proceeding.
- Lid Transformation: Take the bottle cap (or lid) of your mason jar. Start wrapping a piece of rope around it, beginning from the center in a gentle swirl motion. Apply small dots of hot glue at strategic points as you wrap, securing each loop to the previous one and to the cap itself. This ensures the rope stays firmly in place and creates a neat, spiral pattern. Continue wrapping until the entire cap surface is covered. Once the rope is secure, you can further decorate the lid by carefully gluing small beads onto the rope, adding a touch of sparkle and texture.
- Crafting Hearts: Select various colors of paper. Using your scissors, carefully cut out small heart shapes. These will add a whimsical and romantic touch when placed inside the jar. You can make them uniform or vary their sizes for added visual interest.
- Preparing the Filler Ropes: Take a medium-length piece of rope – roughly the height of your jar, plus a bit extra. Gently unbraid or untwist it to create soft, wispy strands. This will give your jar a cloud-like, ethereal filling. Prepare one or more such pieces, depending on how full you want your jar to appear. These unbraided ropes will form the nest-like base for your bird and other decorative elements.
Step 2: Assembling the Bird Swing and Filling the Jar
Now it’s time to bring all the individual components together and construct the charming scene within your mason jar.
- Attaching Birds to the Branch: Take your chosen stick or branch. Carefully attach the feet of your craft bird(s) onto the branch using a small amount of hot glue or by twisting any integrated wires securely. Ensure the bird is stable and positioned naturally on its perch. As a critical note, double-check that the length of your branch, with the bird(s) attached, is slightly less than the interior width of your mason jar, allowing it to fit comfortably without touching the sides.
- Creating the Swing: Cut a long piece of rope. Secure one end of this rope to one side of your branch using hot glue. Loop the rope over the branch, creating a gentle U-shape or a small swing. Then, bring the rope back to the other side of the branch and secure it there with more hot glue, ensuring the swing is taut and symmetrical. This loop will eventually be attached to the jar lid.
- Filling the Jar: Gently place the unbraided ropes you prepared in Step 1 into the bottom of your clean mason jar. These wispy strands will form a soft, cloud-like bed. Next, carefully add the small paper hearts and any remaining beads into the jar, letting them settle among the ropes. This creates a delicate and captivating interior landscape.
- Securing the Bird’s Swing: Take the branch with the attached bird and the rope swing. Carefully position the ends of the swing rope onto the underside of the jar’s lid. Use strong tape to temporarily secure the swing ropes to the lid. Once you are satisfied with the positioning and balance, apply hot glue to permanently attach the rope ends to the lid, ensuring the bird and its swing hang beautifully in the center of the jar when the lid is closed.
- Final Decorative Touch for the Jar Neck: To complete the rustic charm, take another piece of rope and wrap it around the neck of the mason jar. Tie the rope into an attractive bow or knot. For an extra touch of elegance, glue a bead onto the very center of the bow, creating a focal point. This adds a polished finish to your handcrafted jar.
Creative Embellishments and Customization Ideas
While the basic design is enchanting on its own, there are countless ways to personalize your bird swing mason jar and make it truly unique. Consider these ideas to add your personal flair:
- Fairy Lights: For a magical glow, carefully string a set of battery-operated fairy lights inside the jar before adding the unbraided ropes and other elements. The tiny lights will create a warm, inviting ambiance, especially enchanting in the evenings. Ensure the battery pack is easily accessible for turning the lights on and off.
- Different Bird Types: Experiment with various types of craft birds – perhaps a pair of lovebirds, a vibrant cardinal, or a classic robin. The choice of bird can significantly alter the mood of your miniature scene.
- Varying Rope Colors and Textures: Instead of traditional jute, try colored cotton ropes, thin satin cords, or even twisted fabric strips for a different look. A pastel rope could create a softer aesthetic, while a brighter color could add a pop of fun.
- Natural Elements: Incorporate other small natural elements. Tiny dried flowers, miniature pinecones, small polished pebbles, or even a few sprigs of preserved moss can enhance the natural feel of the craft. Ensure they are clean and dry before adding them to the jar.
- Painted Jars: For a different background, consider spray painting the exterior of your mason jar with a translucent or frosted paint. This can create a softer, diffused look. Alternatively, paint the interior with acrylics for an opaque background, but remember it might obscure the internal elements slightly.
- Seasonal Themes: Adapt your jar for different seasons. For autumn, use orange and brown hearts, mini craft pumpkins, and a bird in warm tones. For winter, incorporate faux snow, tiny silver bells, and a robin or cardinal.
- Personalized Tags: Attach a small, handwritten tag to the neck of the jar with a special message, date, or recipient’s name if you plan to gift it.
Tips for a Flawless Finish
Achieving a professional-looking finish for your DIY project often comes down to paying attention to the details. Here are some tips to help you create a truly stunning bird swing mason jar:
- Hot Glue Control: Use hot glue sparingly but effectively. Too much can be messy and visible, while too little won’t provide a secure bond. Practice on scrap material first if you’re new to using a glue gun. Ensure the glue is hot enough to flow smoothly for best adhesion.
- Even Rope Wrapping: When wrapping the lid, try to keep the rope taut and the coils as close together as possible to avoid gaps. This creates a neat and professional appearance.
- Secure Knots and Attachments: Double-check that all components, especially the bird and its swing, are securely attached. Give them a gentle tug to ensure they won’t come loose over time.
- Symmetry Matters: When creating the swing and attaching it to the lid, strive for symmetry. A balanced swing will look more aesthetically pleasing and ensure the bird hangs centrally within the jar.
- Cleanliness is Key: Handle the glass jar and other components with clean hands to avoid fingerprints and smudges. If necessary, give the exterior of the jar a final wipe with a glass cleaner before displaying.
- Patience and Precision: Rushing through steps can lead to errors. Take your time, especially with the delicate parts like cutting hearts and attaching small beads. Precision makes a big difference in the final outcome.
Caring for Your Mason Jar Creation
Once your beautiful bird swing mason jar is complete, a little care will ensure it remains a charming decoration for years to come. Place your jar in a location where it won’t be easily knocked over, away from direct sunlight which can fade paper elements over time, and away from excessive heat or moisture. For dusting, a soft, dry brush or a can of compressed air can carefully remove dust from inside and outside the jar without disturbing the delicate elements. Avoid using wet cloths directly on the rope or paper components. This handmade creation is a delicate piece of art, and gentle handling will preserve its beauty.
The Joy of DIY: More Than Just a Craft
Creating this DIY bird swing mason jar is more than just following a set of instructions; it’s an experience that offers numerous rewards. From the satisfaction of turning an old item into something new and beautiful, to the joy of personalizing your living space with handmade decor, the benefits are immense. This project serves as a wonderful reminder of the potential for creativity in everyday objects and encourages a mindful approach to consumption. Whether you’re making it for yourself, as a thoughtful gift for a loved one, or simply enjoying the crafting process, this charming mason jar will undoubtedly bring a smile to your face and a touch of warmth to your home.
All images and the original tutorial are credited to VENTUNO ART via YouTube. We highly recommend visiting her channel and subscribing for more inspiring DIY ideas!