
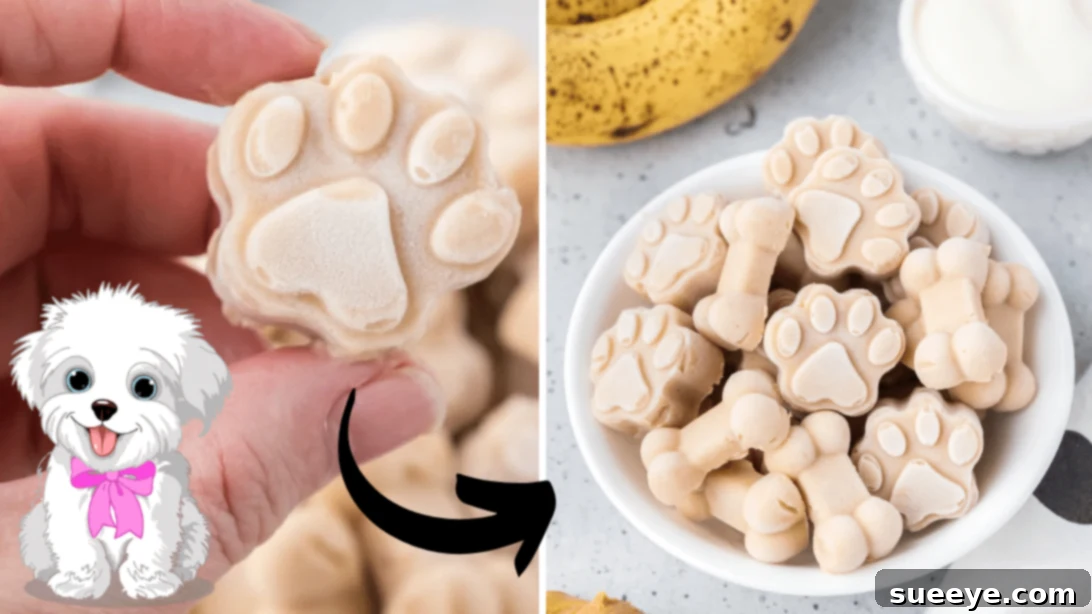
Every pet owner knows that irresistible gaze – the one your dog gives you when you’re enjoying a delicious treat, especially something as enticing as ice cream. It’s almost impossible to resist those puppy eyes, filled with longing and curiosity. While it’s natural to want to share every joy with your beloved companion, handing over your human ice cream is rarely a good idea. Our frozen desserts often contain ingredients like high sugar content, lactose (which many dogs struggle to digest), artificial sweeteners, and sometimes even chocolate, all of which can be harmful or even toxic to dogs.
But what if there was a way to let them indulge in a cool, creamy treat without any of the risks? The good news is, there is! You can easily make homemade ice cream specifically designed for dogs. Not only is it safe, but it’s also incredibly simple to prepare, often requiring just a few common ingredients you likely already have in your kitchen. Forget expensive store-bought dog ice creams; creating your own allows you complete control over what goes into your furry friend’s bowl, ensuring a healthy and delicious snack every time.
This article will guide you through crafting a delightful and safe frozen treat that will have your dog’s tail wagging with pure joy. We’ll cover the essential ingredients, crucial safety tips (especially concerning peanut butter), and easy step-by-step instructions. Get ready to become your dog’s favorite chef!
Why Homemade Dog Ice Cream Is The Best Treat for Your Canine Companion
Opting for homemade dog ice cream offers a multitude of benefits over store-bought alternatives or, worse, sharing your own desserts. Understanding these advantages can motivate you to whip up a batch for your four-legged friend more often:
- Control Over Ingredients: This is arguably the biggest advantage. When you make treats at home, you know exactly what’s going into them. You can avoid artificial colors, preservatives, excessive sugars, and other additives that might be present in commercial products. This is particularly important for dogs with sensitivities or allergies.
- Healthier Choices: By selecting fresh, natural ingredients, you can create a treat that’s not just tasty but also nutritious. Ingredients like bananas offer vitamins and minerals, while plain yogurt provides probiotics beneficial for digestion.
- Cost-Effective: Buying specialized dog treats can quickly add up. Homemade options, especially those using common kitchen staples, are significantly more budget-friendly. You get more bang for your buck, allowing you to treat your dog more often without breaking the bank.
- Avoidance of Harmful Substances: As mentioned, many human foods are dangerous for dogs. This recipe specifically addresses and avoids these risks, particularly the silent killer often found in peanut butter: xylitol. Making it yourself ensures you steer clear of such toxic components.
- Customization for Picky Eaters or Dietary Needs: Does your dog dislike bananas? Or maybe they have a sensitive stomach? You can easily adapt homemade recipes by substituting safe fruits or adding veterinarian-approved supplements.
- Bonding Experience: There’s something uniquely satisfying about preparing food for someone you love, and pets are no exception. The act of making and serving a special treat strengthens the bond between you and your dog, showing them just how much you care.
By choosing the homemade route, you’re not just offering a treat; you’re providing a thoughtful, healthy, and safe expression of your love for your furry family member.
RELATED: 12 Human Foods That Are Actually Good For Dogs
Essential Ingredients for Your Dog’s Delightful Ice Cream
Crafting this simple yet satisfying dog ice cream requires just three primary ingredients, all of which are generally safe and beneficial for most dogs. However, careful selection, especially concerning peanut butter, is paramount for your pet’s safety.
1. Banana: The Natural Sweetener and Nutrient Boost
- Quantity: 1 medium-sized banana
- Why it’s great for dogs: Bananas are a fantastic source of potassium, vitamins C and B6, and fiber. They provide natural sweetness, eliminating the need for added sugars, and contribute to the creamy texture of the ice cream. Make sure your banana is ripe, as this will enhance the flavor and make it easier to blend.
2. Peanut Butter: The Flavorful Protein Powerhouse (Read This Carefully!)
- Quantity: 4 tablespoons of peanut butter
- Why it’s great for dogs: Peanut butter is a beloved treat for many dogs, offering a good source of protein, healthy fats, and vitamins B and E. It adds a rich, irresistible flavor that dogs go wild for.
- CRUCIAL SAFETY WARNING: This is the most critical ingredient to select carefully. You absolutely must use plain, unsweetened peanut butter that contains NO xylitol. Xylitol is a sugar alcohol commonly used as a sugar substitute in many “sugar-free” or “reduced sugar” human products, including some peanut butters. Even small amounts of xylitol can be extremely toxic to dogs, causing a rapid drop in blood sugar (hypoglycemia), seizures, liver failure, and even death. Always, always check the ingredient label before using any peanut butter for your dog. Look for brands that list only peanuts (and maybe salt) as ingredients.
3. Plain or Vanilla Yogurt: The Creamy Probiotic Base
- Quantity: 12 ounces of plain or vanilla yogurt
- Why it’s great for dogs: Yogurt provides probiotics, which can aid in digestion, and is a good source of calcium and protein. The creamy texture is essential for dog ice cream.
- Important Note: Use plain, unsweetened yogurt to avoid added sugars and artificial sweeteners. If using vanilla yogurt, ensure it is also unsweetened and contains no xylitol or other artificial sweeteners. Greek yogurt is an excellent option as it’s often thicker and has more protein. Avoid flavored yogurts that might contain fruits or ingredients harmful to dogs.
How to Make Homemade Ice Cream for Dogs: Step-by-Step Guide
Making this delightful dog ice cream is incredibly straightforward. With just a few simple steps, you’ll have a batch of frozen treats ready to cool down your canine companion.
Step 1: Blend All Ingredients Until Smooth
Begin by combining your chosen ingredients in a powerful blender. Peel and break the banana into a few pieces before adding it. Scoop in the four tablespoons of xylitol-free peanut butter. Finally, add the 12 ounces of plain or unsweetened vanilla yogurt. Secure the lid and blend the mixture on high speed until it reaches a completely smooth and uniform consistency. There should be no lumps of banana or streaks of peanut butter; aim for a thick, creamy liquid.
Pro Tip: If your banana isn’t perfectly ripe, or if your blender struggles, you can add a tiny splash of water or dog-safe broth to help it along, but avoid making the mixture too watery.
Step 2: Pour into Molds and Prepare for Freezing
Once your mixture is perfectly smooth, it’s time to transfer it to molds for freezing. Silicone molds are ideal for this purpose as they make it incredibly easy to pop out the frozen treats. Ice cube trays or small paper cups (for single servings) also work wonderfully. Carefully pour the creamy mixture into your chosen molds, filling each cavity nicely but leaving a little room at the top to prevent overflow as it expands slightly during freezing.
Creative Option: For an extra touch, you can insert a small, dog-safe chew stick or a piece of a healthy dog biscuit into the center of each mold before freezing, creating a “popsicle” effect that your dog will love!
Step 3: Freeze Thoroughly and Serve
Carefully place the filled silicone molds or ice cube trays into the freezer. Allow them to freeze for a minimum of 2 hours, or until they are completely solid. The freezing time may vary depending on the size of your molds and the temperature of your freezer. Once fully frozen, you can easily pop them out of the silicone molds.
Serve one or two frozen treats to your eager dogs and watch them enjoy! These treats are best served outdoors or in an area where your dog can make a bit of a mess, as they will melt.
Storage Tips and Serving Suggestions
Now that you’ve mastered the art of making homemade dog ice cream, it’s essential to know how to store these delectable delights and serve them appropriately to your furry friend.
Proper Storage for Freshness
Once your dog ice cream treats are frozen solid, you can store any leftovers for future enjoyment. The best way to do this is to transfer the individual frozen treats from the molds into an airtight container or a heavy-duty freezer-safe Ziploc bag. This prevents freezer burn and helps maintain their fresh taste and texture.
- Shelf Life: Stored properly in the freezer, these homemade dog ice creams can last for up to three weeks. After this period, they might start to lose some flavor or develop freezer burn, though they might still be safe to eat.
- Preventing Sticking: If storing multiple treats in one bag or container, you might want to separate them with small pieces of parchment paper to prevent them from sticking together.
Serving Suggestions for Maximum Enjoyment
Serving these treats is just as fun as making them! Here are a few tips to ensure your dog gets the most out of their special snack:
- Portion Control: While these treats are healthy, moderation is key. The appropriate portion size depends on your dog’s size, age, and overall diet. A small dog might enjoy one small mold, while a larger dog could have two. Consult your vet if you’re unsure about appropriate portion sizes for your specific dog.
- Supervision is Key: Always supervise your dog when they are enjoying a frozen treat, especially if they tend to gobble things down quickly.
- Mess Management: As these are frozen, they will melt! Consider serving them outdoors, on a washable mat, or in their crate to contain any potential mess.
- Special Occasions: These treats are perfect for cooling down on a hot day, as a reward for good behavior, or simply to show your dog some extra love. They can also be a fantastic “birthday cake” alternative for your dog’s special day!
- For Teething Puppies: The cold, hard texture can be soothing for teething puppies’ sore gums.
Customization Ideas and Healthy Add-ins
This basic recipe is a fantastic starting point, but you can easily customize it to suit your dog’s preferences or introduce additional healthy ingredients. Always ensure any additions are safe for canine consumption.
- Berries: Add a handful of fresh or frozen blueberries, raspberries, or strawberries to the blender. These are packed with antioxidants and vitamins.
- Pumpkin Puree: A tablespoon or two of plain, unsweetened pumpkin puree (not pumpkin pie filling) can add fiber, aid digestion, and boost flavor.
- Sweet Potato: Cooked and mashed sweet potato is another nutrient-dense and dog-safe addition that adds a lovely color and flavor.
- Unsweetened Applesauce: For a different fruity twist, replace some of the banana with unsweetened applesauce.
- Cinnamon: A tiny pinch of ground cinnamon can add a warm, comforting flavor and has anti-inflammatory properties. Ensure it’s pure cinnamon, not a cinnamon sugar blend.
- Carrots: Finely grated carrots can be blended in for an extra crunch and a boost of Vitamin A.
- Bone Broth: For an extra savory treat, you could swap out a small portion of the yogurt for unseasoned, low-sodium bone broth.
Always introduce new ingredients slowly and in small quantities to ensure your dog tolerates them well. If your dog has any underlying health conditions, consult your veterinarian before introducing new foods into their diet.
Important Safety Reminders for Dog Treats
While making homemade treats is a wonderful way to show your love, safety should always be your top priority. Reiterate these crucial points to ensure your dog remains healthy and happy.
- Xylitol is Lethal: We cannot stress this enough. Re-check every label for xylitol, especially in peanut butter. It is present in an increasing number of sugar-free products.
- Avoid Other Toxic Foods: Never include chocolate, grapes, raisins, onions, garlic, avocado, or macadamia nuts in your dog’s treats. These are highly toxic.
- Watch for Allergies: Just like humans, dogs can have food allergies. If your dog shows any signs of discomfort (vomiting, diarrhea, itching, swelling) after trying a new ingredient, discontinue use and contact your vet.
- Consult Your Veterinarian: If your dog has specific dietary restrictions, health conditions (like diabetes or kidney issues), or is on medication, always speak with your veterinarian before introducing new foods or making significant changes to their diet.
- Treats in Moderation: Even healthy treats should only make up a small portion of your dog’s daily caloric intake. They are meant to supplement a balanced diet, not replace it.
More Than Just a Treat: The Joy of Sharing with Your Dog
Beyond the nutritional benefits and the simplicity of preparation, there’s an intangible joy that comes from making and sharing these homemade frozen treats with your dog. It’s a small gesture that speaks volumes about your care and affection. Watching your dog eagerly lick away at their custom-made ice cream, their eyes sparkling with delight, is a reward in itself.
This experience deepens your bond, provides mental stimulation as they figure out how to enjoy the cold treat, and offers a safe alternative to satisfying their curiosity about human foods. So next time those adorable puppy eyes look up at your dessert, you’ll have a guilt-free, healthy, and incredibly tasty alternative ready for them. Give this recipe a try, and prepare for endless tail wags and happy doggie licks!
*All image credit belongs to Kitchen Fun With My 3 Sons via YouTube. Follow and subscribe to her channel for more delicious and fun ideas!