
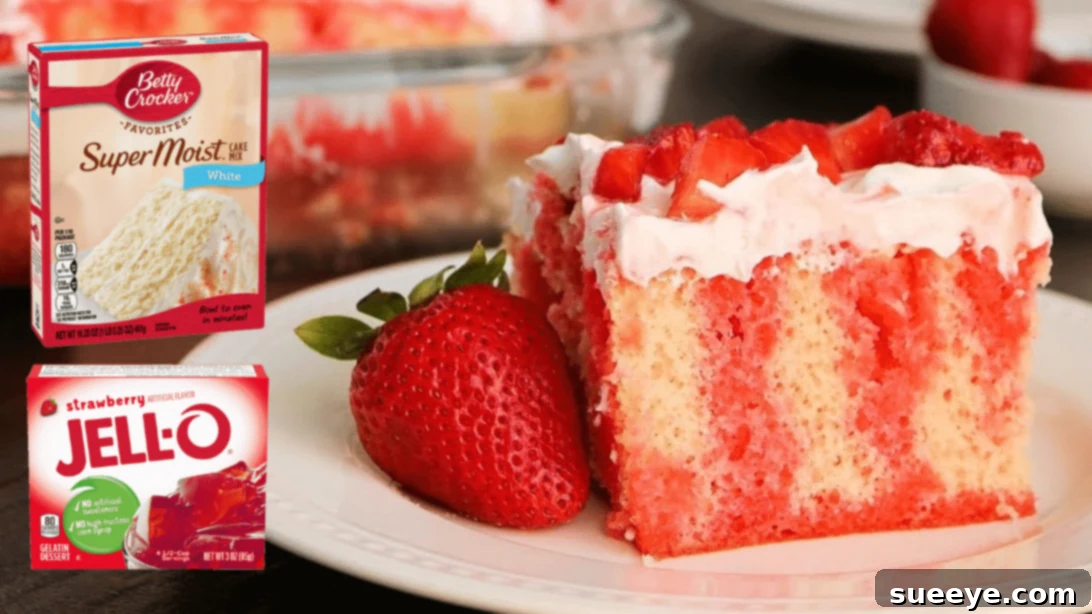
Embark on a delightful culinary journey with the classic Strawberry Jello Poke Cake – a dessert that promises to be a vibrant, refreshingly sweet addition to any occasion. This beloved treat has earned its place as a go-to favorite for its ease of preparation, stunning visual appeal, and irresistible flavor. Imagine a moist, tender cake infused with the bright, fruity essence of strawberry jello, topped with a cloud of creamy whipped topping and garnished with fresh, juicy strawberries. It’s a symphony of textures and tastes that appeals to all ages, making it perfect for family gatherings, potlucks, summer BBQs, or simply a sweet afternoon indulgence.
The genius behind the “poke cake” lies in its clever design: holes are gently poked across the baked cake, allowing a liquid (in this case, strawberry jello) to seep in and infuse every bite with an explosion of flavor and moisture. This technique transforms a simple cake into an extraordinarily tender and flavorful dessert, creating beautiful streaks of color throughout the cake’s interior. Strawberry Jello Poke Cake, in particular, stands out for its vibrant red hue and the refreshing tang of strawberries, making it an especially popular choice during warmer months or as a festive treat. It’s a nostalgic dessert for many, evoking memories of childhood birthdays and celebratory feasts, yet it remains timeless in its appeal.
This recipe is not just about baking; it’s about crafting a memorable experience. It’s a kid-friendly dessert that almost guarantees smiles and requests for seconds. With clear, simple steps, even novice bakers can achieve a perfectly moist, flavor-packed cake that looks as incredible as it tastes. Ready to dive into creating this delightful dessert? Learn how to bring this classic to life with the help of this easy-to-follow recipe, inspired by the wonderful guidance from Cara’s Recipe on YouTube. Get ready to bake a masterpiece that will leave everyone craving another slice!
RELATED: Easy Frozen Jello Candy Grapes Recipe
The Enduring Charm of Poke Cakes: A Sweet History
Poke cakes emerged as a popular dessert in American households during the 1970s, largely due to the rise of convenient boxed cake mixes and the widespread availability of gelatin products like Jell-O. The concept was revolutionary in its simplicity: take a baked cake, poke holes in it, and pour a flavorful liquid over the top. This not only added incredible moisture but also infused the cake with a secondary flavor, transforming an ordinary dessert into something extraordinary. The strawberry jello variation quickly became a beloved classic, cherished for its bright color, fruity taste, and refreshing quality.
What makes a poke cake truly special is its ability to adapt and evolve. While the original concept often involved fruit-flavored gelatin, the technique has since been applied to various infusions, including puddings, condensed milk, and even chocolate sauces. However, the Strawberry Jello Poke Cake remains an iconic representation of this dessert category. It perfectly balances the sweetness of the cake with the refreshing tartness of strawberries and the creamy richness of whipped topping. It’s a dessert that tells a story of home baking, shared joy, and the simple pleasure of a beautifully crafted treat. Beyond its deliciousness, the visual appeal of the jello seeping into the cake creates an inviting marbled effect, making it a feast for the eyes as well as the palate.
Ingredients for the Ultimate Strawberry Jello Poke Cake:
Crafting the perfect Strawberry Jello Poke Cake begins with a careful selection of ingredients, each playing a crucial role in achieving that delightful balance of flavor and texture. Here’s what you’ll need:
- 1 (15.25 oz) box of white cake mix, plus ingredients listed on the box: A standard white cake mix forms the perfect tender base, offering a neutral canvas that readily absorbs the jello’s vibrant flavor. Be sure to have the eggs, oil, and water specified on your particular cake mix box.
- 2 (3 oz) boxes of strawberry jello: This is the heart of our poke cake! Two boxes ensure a robust strawberry flavor and ample liquid to infuse the entire cake.
- 1½ cups of boiling water: Essential for completely dissolving the gelatin crystals, ensuring a smooth and evenly flavored jello mixture.
- 1 cup of cold water: Added after the boiling water, this helps to cool down the jello mixture quickly, preparing it for absorption into the cake without making the cake too hot.
- 8 oz of whipped cream: A decadent, airy topping that provides a wonderful creamy contrast to the sweet and fruity cake. You can use store-bought whipped topping or freshly whipped heavy cream for an extra touch of gourmet.
- 1½ cups of fresh strawberries, diced or sliced: The perfect garnish! Fresh strawberries add a burst of natural sweetness, a slight tartness, and a beautiful pop of color, making the cake look as good as it tastes.
- 1-2 tsp of granulated sugar, optional: A sprinkle of sugar over the fresh strawberries enhances their natural sweetness, especially if your berries are a little tart. This step is entirely customizable to your preference.
How to Make Strawberry Jello Poke Cake: A Step-by-Step Guide
Creating this delightful Strawberry Jello Poke Cake is a straightforward and rewarding process. Follow these detailed steps to ensure a perfect, moist, and flavorful dessert every time.
Step 1: Bake the Perfect Cake Base
Begin by preheating your oven to 350°F (175°C). This ensures your oven reaches the optimal temperature for even baking before you place the cake inside. Next, prepare a 9×13-inch baking dish by greasing it thoroughly with nonstick cooking spray or butter and flour. This crucial step prevents the cake from sticking, allowing for easy removal and serving later. Set the prepared dish aside. Now, follow the instructions on your white cake mix box to prepare the batter. Most mixes typically require eggs, oil, and water. Mix until just combined, being careful not to overmix, as this can lead to a tough cake. Pour the batter evenly into your prepared baking dish. Bake the cake according to the package directions, which usually takes around 28-33 minutes, or until a wooden skewer inserted into the center comes out clean. Once baked, remove the cake from the oven and let it cool in the pan on a wire rack for about 1 hour. Cooling is absolutely essential before the next step; pouring warm jello onto a warm cake can result in a soggy, less appealing texture. After an hour of cooling, gently poke holes evenly across the entire surface of the cake. The handle of a wooden spoon is ideal for creating consistent, deep holes, about ¾ to 1 inch apart. These holes are the magic conduits that will allow the jello to seep in and infuse the cake with flavor and moisture.
Step 2: Prepare and Infuse with Strawberry Jello
While your cake is cooling and the holes are poked, it’s time to prepare the star of the show: the strawberry jello. In a medium-sized bowl, combine the two packets of strawberry jello mix with 1½ cups of boiling water. Stir vigorously for at least 2 minutes, or until the gelatin crystals are completely dissolved. It’s important that no granules remain, as this ensures a smooth and evenly flavored jello. Once dissolved, add 1 cup of cold water to the mixture. Continue stirring for about 1 more minute. The cold water helps to bring the jello mixture to a more suitable temperature for pouring onto the cake. Carefully and evenly pour the prepared jello mixture over the cooled, poked cake. Make sure to distribute the jello so it seeps into all the holes. The cake will begin to absorb the vibrant red liquid, preparing it for its transformation. Once the jello has been poured, cover the baking dish tightly with plastic wrap and place it in the refrigerator to chill for approximately 2 to 4 hours. This chilling time is vital for the jello to set properly within the cake and to achieve that signature moist, infused texture. Meanwhile, prepare your fresh strawberries. Wash and hull them, then slice or dice them according to your preference. If your strawberries aren’t super sweet or you prefer an extra touch of sweetness, toss them gently with 1-2 teaspoons of granulated sugar. Store the sweetened strawberries in an airtight container and place them in the refrigerator to chill alongside the cake.
Step 3: Assemble, Chill, and Serve Your Masterpiece
After the cake has thoroughly chilled for 2 to 4 hours, and the jello has completely set within its layers, it’s time for the final assembly. Remove the cooled cake from the refrigerator. Now, generously spread the 8 ounces of whipped cream evenly over the top of the jello-infused cake. Ensure a smooth, consistent layer that covers the entire surface. The creamy whipped topping provides a beautiful contrast to the sweet and tangy cake below. Once topped with whipped cream, cover the cake again with plastic wrap to protect it and return it to the refrigerator. Allow it to chill for at least another 30 minutes to an hour. This additional chilling time helps the whipped cream set slightly and ensures the entire cake is perfectly cold and refreshing when served. Just before serving, remove the cake from the refrigerator and lavishly top it with your chilled, sweetened fresh strawberries. Arrange them artfully for an appealing presentation. Slice, serve, and watch as your guests delight in this wonderfully moist, flavorful, and visually stunning Strawberry Jello Poke Cake! Each bite offers a delightful burst of strawberry goodness, creamy indulgence, and tender cake.
Tips for the Perfect Strawberry Jello Poke Cake
To ensure your Strawberry Jello Poke Cake turns out perfectly every time, keep these expert tips in mind:
- Don’t Overmix the Batter: When preparing the cake mix, mix only until the ingredients are just combined. Overmixing develops the gluten in the flour, which can lead to a dense, tough cake rather than a light and fluffy one.
- Cool the Cake Completely: This is a non-negotiable step! Pouring warm jello onto a warm cake can result in the jello melting into the cake rather than setting in distinct layers and infusing moisture. A fully cooled cake will absorb the jello beautifully.
- Poke Evenly and Deeply: The holes are your pathways for flavor. Ensure they are spaced evenly (about ¾ to 1 inch apart) and go deep enough (almost to the bottom of the cake) to allow maximum jello penetration. A wooden spoon handle or a large chopstick works wonderfully.
- Ensure Jello is Fully Dissolved: Stir the jello and boiling water mixture until there are absolutely no granules left. Undissolved jello will result in an uneven texture and less intense flavor.
- Chill Thoroughly: The refrigeration steps are crucial for the jello to set firmly within the cake and for the whipped cream to stabilize. Don’t rush this process; patience will be rewarded with a superior texture and taste.
- Garnish Just Before Serving: While the cake can be made ahead, it’s best to add the fresh strawberries shortly before serving. This keeps them looking vibrant and fresh, preventing them from becoming soggy or losing their appeal.
- Experiment with Jello Flavors: While strawberry is classic, feel free to try other jello flavors like raspberry, cherry, or even a mix for a colorful, multi-flavored poke cake.
Variations and Customizations: Unleash Your Creativity
The beauty of the Strawberry Jello Poke Cake lies in its versatility. While the classic version is undeniably delicious, don’t hesitate to unleash your creativity and try some exciting variations:
- Different Cake Flavors: Swap out the white cake mix for vanilla, lemon, or even a subtle almond-flavored cake to complement the strawberry jello.
- Alternative Jello Flavors: Explore a spectrum of colors and tastes! Raspberry, cherry, lime, or even a blue raspberry jello can create stunning visual and flavor contrasts. Consider a rainbow poke cake using multiple jello colors for a truly show-stopping dessert.
- Cream Cheese Frosting: For a richer topping, replace the whipped cream with a light cream cheese frosting. A lemon or vanilla cream cheese frosting would pair beautifully with the strawberry jello.
- Fruit Medley: Instead of just strawberries, top your cake with a mix of fresh berries like blueberries, raspberries, and blackberries for an antioxidant-rich and visually stunning finish.
- Tropical Twist: Use a pineapple or orange jello and top with corresponding tropical fruits like diced pineapple, mandarin oranges, and a sprinkle of shredded coconut.
- Chocolate Drizzle: A light drizzle of melted white or dark chocolate over the whipped cream and strawberries can add an extra layer of decadence.
- Adult Version (21+): For a grown-up twist, you can add a touch of strawberry liqueur or vodka to the jello mixture before pouring it over the cake (ensure the cake is cool and the alcohol is added after the jello has been fully dissolved in water, reducing the water slightly if adding significant liquid).
Serving and Storage Suggestions
Strawberry Jello Poke Cake is best served chilled, making it an incredibly refreshing dessert, especially during warm weather. It’s ideal for:
- Summer barbecues and picnics
- Potlucks and family gatherings
- Birthday parties (especially for kids!)
- A simple, delightful treat after dinner
For an extra indulgent experience, serve a slice with a scoop of vanilla bean ice cream or an additional dollop of freshly whipped cream.
Storage: Store leftover cake tightly covered with plastic wrap in the refrigerator for up to 3-4 days. The jello helps keep the cake moist, but the fresh strawberries are best consumed within 1-2 days for optimal freshness. We do not recommend freezing this cake, as the jello and whipped cream textures can change upon thawing.
Frequently Asked Questions About Strawberry Jello Poke Cake
Here are some common questions about making Strawberry Jello Poke Cake:
Q: Can I use a different size baking pan?
A: While a 9×13-inch pan is standard, you could use an 8×8-inch pan for a thicker cake, but you might need to adjust baking time and potentially the amount of jello/topping. For larger pans, you might need 1.5-2x the recipe. Always ensure the cake is cooled before poking and pouring.
Q: How far in advance can I make this cake?
A: You can prepare the cake, poke it, and pour the jello up to 24 hours in advance. Apply the whipped cream and fresh strawberries closer to serving time (within a few hours) to ensure they remain fresh and visually appealing.
Q: My jello didn’t set properly inside the cake, what went wrong?
A: This can happen if the cake wasn’t fully cooled when the jello was poured, or if the jello mixture wasn’t sufficiently chilled. Ensure the jello fully dissolves in boiling water, then cools with cold water, and the cake is thoroughly chilled for at least 2-4 hours after pouring.
Q: Can I use homemade whipped cream instead of store-bought?
A: Absolutely! Homemade whipped cream (heavy cream whipped with a little sugar and vanilla extract) will elevate the flavor even further. Just make sure it’s stiffly whipped before spreading.
Q: Why is my cake soggy?
A: A soggy cake usually means it was either too warm when the jello was added, causing the cake to break down, or too much jello was used for the size of the cake. Ensure proper cooling and stick to the recommended jello amount.
*All image credit belongs to Cara’s Recipes via YouTube. Follow and subscribe to her channel for more delightful culinary creations!
Easy Strawberry Jello Poke Cake Recipe: A Conclusion to Sweetness
The Strawberry Jello Poke Cake isn’t just a dessert; it’s a testament to simple pleasures and timeless appeal. With its vivid colors, refreshing taste, and delightfully moist texture, it consistently brings joy to any table. From its humble origins as a clever way to infuse flavor into a cake to its status as a cherished classic, this recipe proves that sometimes, the easiest recipes yield the most unforgettable results. Whether you’re a seasoned baker or just starting your culinary adventures, this guide provides everything you need to create a perfect Strawberry Jello Poke Cake that will impress and delight everyone who takes a bite. So, gather your ingredients, follow the steps, and prepare to indulge in a slice of pure, strawberry-infused bliss. Enjoy the process, and most importantly, savor every delicious moment!