
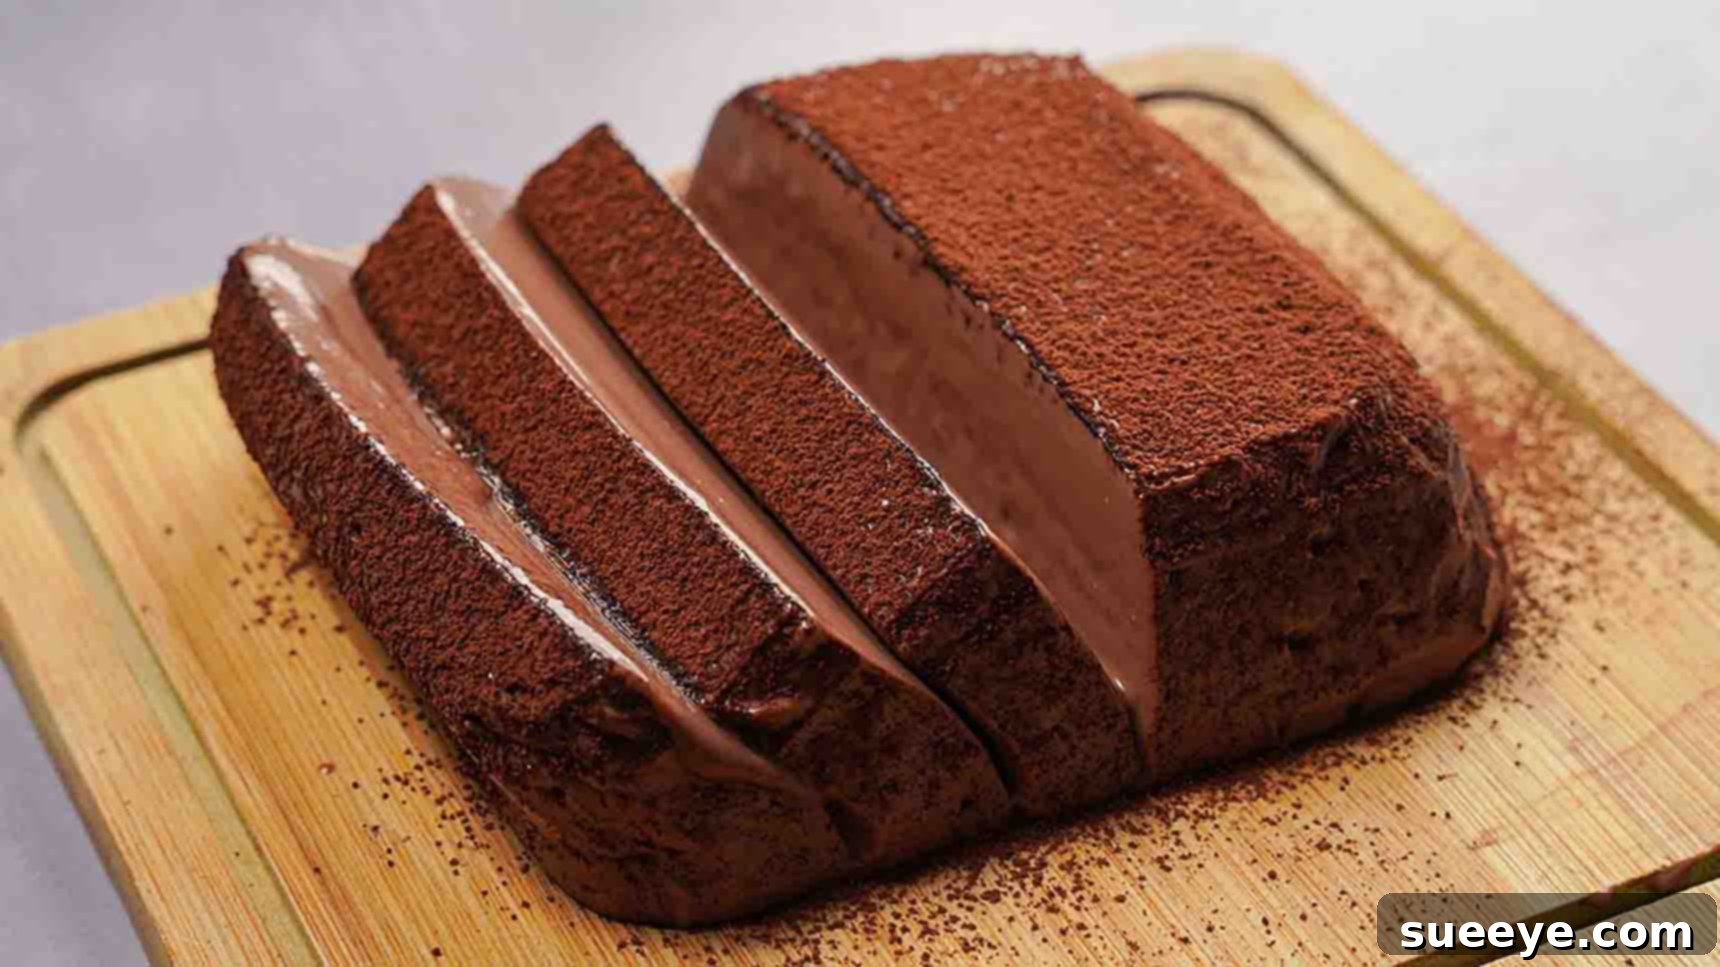
Indulge in Simplicity: The Easiest 2-Ingredient Yogurt Mousse Recipe
Are you searching for an effortlessly elegant dessert that requires minimal ingredients but delivers maximum flavor? Look no further! This delightful 2-ingredient yogurt mousse recipe, inspired by the culinary experts at Yummy on YouTube, is a game-changer. It’s a dream come true for dessert enthusiasts who appreciate simplicity without compromising on taste or texture. Prepare to amaze your family and friends with this unbelievably creamy, rich, and surprisingly light treat that comes together with just plain yogurt and dark chocolate.
Forget complicated baking techniques and lengthy ingredient lists. This no-fuss, no-bake dessert is perfect for last-minute gatherings, a sweet finish to a weeknight meal, or even a healthier indulgence when those chocolate cravings strike. The magic lies in the transformation of two humble ingredients into a luxurious mousse that tastes like it came straight from a gourmet patisserie. Get ready to embark on a simple culinary adventure that will undoubtedly earn you rave reviews and requests for the recipe!
Why This 2-Ingredient Yogurt Mousse Is a Must-Try
In a world full of complex recipes, this easy dessert recipe stands out for its straightforward approach and spectacular results. Here’s why you absolutely need to add this chocolate yogurt mousse to your dessert repertoire:
- Unbeatable Simplicity: As the name suggests, you only need two ingredients. This cuts down on shopping time and expense, making it an accessible treat for everyone.
- Effortlessly Elegant: Despite its ease, the resulting mousse has a sophisticated texture and rich flavor that feels incredibly gourmet. It’s an impressive dessert without the fuss.
- Healthier Indulgence: By utilizing plain yogurt as its base, this mousse offers a lighter alternative to traditional versions, often packed with heavy cream and butter. It’s a wonderful way to enjoy a sweet treat with less guilt.
- No-Bake Convenience: Forget turning on the oven! This recipe is entirely no-bake, making it perfect for hot summer days or when you simply want to avoid the complexities of baking.
- Versatile & Customizable: While delicious on its own, this mousse serves as a fantastic base for various toppings and flavor enhancements, allowing you to personalize it to your taste.
- Crowd-Pleaser: Its universally appealing combination of creamy yogurt and rich chocolate makes it a guaranteed hit at any gathering, from casual family dinners to more formal celebrations.
Ready to create this culinary masterpiece? Let’s dive into the ingredients and steps!
Ingredients You’ll Need
The beauty of this simple homemade dessert lies in its minimalist ingredient list. High-quality ingredients will elevate the final taste, so choose wisely!
- 1 & 1/2 cups + 2 tbsp (400g) Plain Yogurt: Opt for full-fat plain yogurt for the creamiest texture and richest flavor. Greek yogurt can also work, often requiring less straining due to its already thicker consistency. Ensure it’s unsweetened to control the overall sweetness of your mousse.
- 14 oz (400g) Dark Chocolate: The quality of your chocolate makes a significant difference. Choose a good quality dark chocolate with at least 60-70% cocoa solids for a deep, rich flavor that balances the tanginess of the yogurt. Chocolate chips, a bar, or even baking chocolate can be used.
That’s it! Just two core components stand between you and a wonderfully decadent dessert.
Step-by-Step Directions: Crafting Your Easy Chocolate Yogurt Mousse
Follow these straightforward steps to create your perfect 2-ingredient yogurt mousse. Precision and patience are key, especially during the chilling phase, to achieve the ideal mousse consistency.
Step 1: Preparing the Yogurt and Melting the Chocolate
The first crucial step in achieving that luscious mousse texture is to prepare your yogurt. Begin by placing a cheesecloth (or a clean kitchen towel) over a fine-mesh strainer, which should then be placed over a bowl. This setup will allow the whey, or excess liquid, to drain from the yogurt, resulting in a much thicker, creamier, and more concentrated yogurt base. Carefully spoon 1 & 1/2 cups + 2 tbsp (400g) of plain yogurt into the cheesecloth. Gently wrap the yogurt with the ends of the cheesecloth, creating a neat bundle. To expedite the straining process, place a weight (such as a can of food or a small plate with something heavy on top) directly over the wrapped yogurt. Transfer this entire setup to the fridge and let it chill for approximately 30 to 40 minutes. This period is essential for removing enough liquid to create a firm, mousse-like consistency.
Once 40 minutes have passed, retrieve the yogurt from the fridge, remove the weight, and unwrap the cheesecloth. You’ll notice a significant reduction in volume and a much thicker, almost cream cheese-like texture. Transfer this strained yogurt to a clean mixing bowl. Using a whisk, vigorously whisk the yogurt until it becomes perfectly smooth and lump-free. Set this aside while you prepare your chocolate. For the chocolate component, grate 14 oz (400g) of dark chocolate into a heatproof bowl. Grating helps the chocolate melt more evenly and quickly. Then, create a double boiler by placing the bowl of grated chocolate over a pot of simmering (not vigorously boiling) water, ensuring the bottom of the chocolate bowl does not touch the water. Stir the chocolate continuously with a spatula until it is completely melted and smooth. Remove the bowl from the heat as soon as it’s fully melted to prevent it from seizing or burning.
Step 2: Combining, Chilling, and Serving Your Decadent Mousse
Now comes the exciting part: bringing your two key ingredients together! Gently pour the warm, melted dark chocolate into the bowl with your smooth, strained yogurt. Using a spatula or whisk, mix them thoroughly until they are fully combined and the mixture boasts a uniform chocolate color without any streaks of white yogurt. Be mindful not to overmix, but ensure every bit of yogurt is coated with chocolate. The mixture will start to thicken slightly as the warm chocolate cools with the cold yogurt.
Once combined, prepare your serving vessel. For a classic presentation, lightly grease a 5-inch pan (a springform pan works wonderfully for easy release) and line it with parchment paper, making sure the paper extends up the sides. This ensures a clean removal of your finished mousse. Carefully pour the combined yogurt mousse mixture into the prepared pan, spreading it evenly with your spatula. Once poured, gently tap the pan a few times on the counter to release any trapped air bubbles and ensure a smooth top. Place the pan in the fridge and chill for a minimum of three to four hours. For the best firm and sliceable texture, chilling it overnight is often ideal.
After the chilling period, your homemade chocolate mousse is ready to be unveiled! Remove it from the fridge. If using a springform pan, simply release the sides. If using a regular pan, you can carefully invert it onto a plate or lift it out by the parchment paper. Transfer the mousse to your desired serving plate. For an optional touch of elegance and an enhanced chocolate flavor, lightly sprinkle some cocoa powder over the top just before serving. To achieve perfectly clean slices, use a hot knife – simply dip your knife in hot water, wipe it clean, and then make your cuts. This prevents the chocolate from dragging and creates beautiful, sharp edges. Serve immediately and watch it disappear!
Tips for a Perfect 2-Ingredient Yogurt Mousse Every Time
While this recipe is incredibly simple, a few expert tips can ensure your quick dessert turns out perfectly:
- Don’t Skip Straining: This is the most critical step for achieving a thick, firm mousse. If you don’t strain the yogurt enough, your mousse will be too runny.
- Quality Ingredients Matter: Since there are only two ingredients, their quality significantly impacts the final taste. Invest in good dark chocolate and a full-fat, plain yogurt.
- Melt Chocolate Carefully: Use a double boiler or microwave in short bursts (15-30 seconds), stirring well between each, to prevent the chocolate from seizing or burning.
- Temperature Balance: Ensure your melted chocolate isn’t scalding hot when adding to the yogurt. It should be warm enough to be liquid but not so hot that it “cooks” the yogurt. The cold yogurt helps cool the chocolate, which is essential for setting.
- Gentle Mixing: Fold the chocolate into the yogurt rather than vigorously stirring to maintain the nascent airy texture and prevent overworking the mixture.
- Patience with Chilling: While 3-4 hours is a minimum, chilling overnight yields the best results, allowing the mousse to fully set and develop its firm yet creamy consistency.
- Hot Knife for Serving: This trick is a game-changer for clean, professional-looking slices.
Variations and Customizations: Elevate Your Simple Mousse Recipe
This 2-ingredient yogurt mousse is fantastic as is, but it also serves as an excellent canvas for creativity. Here are a few ideas to customize your dessert:
- Flavor Extracts: Add a few drops of vanilla extract, almond extract, or even peppermint extract to the melted chocolate before combining for an extra layer of flavor.
- Citrus Zest: Grate some orange or lemon zest into the yogurt mixture for a bright, refreshing counterpoint to the rich chocolate.
- Coffee Boost: Stir a teaspoon of instant espresso powder (dissolved in a tiny bit of hot water) into the melted chocolate for a mocha-inspired mousse.
- Spice It Up: A pinch of cayenne pepper or chili powder can add an unexpected and delightful warmth to the dark chocolate.
- Nutty Crunch: Fold in finely chopped toasted nuts (like almonds or hazelnuts) or sprinkle them on top for added texture.
- Fruit Pairings: Serve slices of your mousse with fresh berries (strawberries, raspberries, blueberries) or a raspberry coulis for a burst of freshness.
- Different Chocolate: While dark chocolate is recommended for balance, you could experiment with milk chocolate for a sweeter mousse, or even white chocolate for a creamier, milder flavor (though white chocolate melts differently, so be mindful).
- Sweetener (Optional): If your plain yogurt is very tart and you prefer a sweeter dessert, you can add a tablespoon or two of powdered sugar or a liquid sweetener like maple syrup to the strained yogurt before mixing with chocolate. Taste and adjust to your preference.
Storage and Make-Ahead Tips
One of the many advantages of this no-bake chocolate mousse is its excellent make-ahead potential and storage capabilities, making it ideal for entertaining or meal prepping your desserts.
- Make-Ahead: This mousse needs significant chilling time, so it’s the perfect dessert to prepare a day or even two days in advance. Simply cover the pan tightly with plastic wrap once the mousse is set and store it in the refrigerator until ready to serve.
- Storage: Leftover mousse should be stored in an airtight container in the refrigerator. It will maintain its best texture and flavor for up to 3-4 days. While the texture might slightly change, it will still be delicious.
- Freezing: You can freeze individual slices of the mousse for longer storage. Wrap them tightly in plastic wrap and then aluminum foil. They can be stored in the freezer for up to 2-3 weeks. Thaw them in the refrigerator for a few hours before serving.
Frequently Asked Questions (FAQs) About Yogurt Mousse
Here are some common questions about making this delightful yogurt mousse dessert:
- Can I use Greek yogurt instead of plain yogurt?
- Yes, absolutely! Greek yogurt is already strained, making it thicker than regular plain yogurt. You might find you need to strain it for a shorter period, or sometimes not at all, depending on how thick you want your mousse. Just make sure it’s plain and unsweetened.
- What if I don’t have cheesecloth?
- No problem! You can use a clean, thin kitchen towel (like a flour sack towel), a few layers of coffee filters, or even heavy-duty paper towels placed in a strainer. The goal is to allow the whey to drain while keeping the yogurt solids.
- My chocolate seized. What went wrong?
- Chocolate typically seizes when it comes into contact with even a tiny amount of water or steam, or when it’s overheated. Ensure your bowl for melting chocolate is completely dry, and when using a double boiler, make sure the water doesn’t boil too vigorously or touch the bottom of the chocolate bowl. Stirring constantly helps.
- Can I use milk chocolate or white chocolate?
- While dark chocolate provides the best flavor balance and sets well, you can experiment with milk or white chocolate. Keep in mind that milk and white chocolates have different fat and sugar contents and may result in a sweeter or less firm mousse. Adjust your expectations accordingly. You might need to reduce any additional sweeteners if using milk chocolate.
- Is this dessert truly healthy?
- Compared to traditional cream-and-egg-based mousses, this yogurt mousse is a healthier option due to the protein and probiotics in yogurt and the antioxidants in dark chocolate. However, it still contains sugar from the chocolate, so moderation is key. You can opt for very dark chocolate (70%+) to reduce sugar content further.
- My mousse didn’t set. What can I do?
- The most common reasons for not setting are insufficient yogurt straining (too much liquid) or not chilling long enough. If it’s still too soft, you can try chilling it for several more hours or even overnight. Ensure your dark chocolate had enough cocoa butter to help it set properly.